User's Guide
Page 4
...output bins ...60 Sending a job to print ...61 Printing from a USB flash memory device ...62 Canceling a print job ...63 Printing the menu settings page ...64 Printing a network setup page ...65 Printing a font sample list ...65 Printing a directory list ...65 Printing confidential and held jobs ...65 Printing A5/Statement or JIS-B5/Executive sizes 69 Chapter 7: Maintaining the printer 70 Determining the status of supplies ...70 Photoconductor kit end-of-life ...71 Conserving supplies ...71 Ordering supplies ...71 Recycling Lexmark products ...72 Chapter 8: Clearing jams 73 Identifying jams...
...output bins ...60 Sending a job to print ...61 Printing from a USB flash memory device ...62 Canceling a print job ...63 Printing the menu settings page ...64 Printing a network setup page ...65 Printing a font sample list ...65 Printing a directory list ...65 Printing confidential and held jobs ...65 Printing A5/Statement or JIS-B5/Executive sizes 69 Chapter 7: Maintaining the printer 70 Determining the status of supplies ...70 Photoconductor kit end-of-life ...71 Conserving supplies ...71 Ordering supplies ...71 Recycling Lexmark products ...72 Chapter 8: Clearing jams 73 Identifying jams...
User's Guide
Page 8
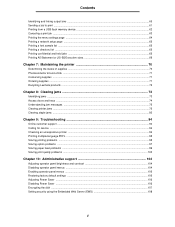
... you to change printer settings. Menu Paper Menu Reports Settings Paper Menu Default Source Paper Size/Type Configure MP Substitute Size Paper Texture Paper Loading Custom Types Universal Setup Bin Setup Reports Menu Settings Page Device Statistics Network Setup Page Network [x] Setup Page Profiles List Print Quick Ref NetWare Setup Page Print Fonts Print Directory Settings Setup Menu Finishing Menu Quality Menu Utilities Menu PDF Menu PostScript Menu PCL Emul Menu HTML Menu Image Menu Network/Ports TCP/IP IPv6 Standard Network Network [x] Standard USB USB [x] Front USB Parallel Parallel...
... you to change printer settings. Menu Paper Menu Reports Settings Paper Menu Default Source Paper Size/Type Configure MP Substitute Size Paper Texture Paper Loading Custom Types Universal Setup Bin Setup Reports Menu Settings Page Device Statistics Network Setup Page Network [x] Setup Page Profiles List Print Quick Ref NetWare Setup Page Print Fonts Print Directory Settings Setup Menu Finishing Menu Quality Menu Utilities Menu PDF Menu PostScript Menu PCL Emul Menu HTML Menu Image Menu Network/Ports TCP/IP IPv6 Standard Network Network [x] Standard USB USB [x] Front USB Parallel Parallel...
User's Guide
Page 11
... printing 11 Note: USB support is the letter of the CD-ROM drive). The procedure to find driver installation instructions for the particular operating system. A separate printer object will not replace the system driver. Drivers are also available in the Printers folder. The local printer is intended to be created and appear in downloadable software packages on the Lexmark Web site at www.lexmark.com. Note: Installing a custom driver will be used . Using Windows Server 2003, Windows...
... printing 11 Note: USB support is the letter of the CD-ROM drive). The procedure to find driver installation instructions for the particular operating system. A separate printer object will not replace the system driver. Drivers are also available in the Printers folder. The local printer is intended to be created and appear in downloadable software packages on the Lexmark Web site at www.lexmark.com. Note: Installing a custom driver will be used . Using Windows Server 2003, Windows...
User's Guide
Page 13
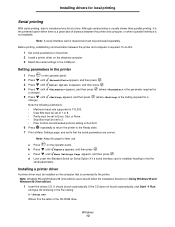
... printer 1 Press on the attached computer. 3 Match the serial settings in Using Windows 95 and Windows 98 (first edition). 1 Insert the drivers CD. Windows 13 Note: Windows 95 and Windows 98 (first edition) users should launch automatically. Installing drivers for later use. Although serial printing is usually slower than parallel printing, it is the preferred option when there is transferred one bit at a time. To do this page for local printing Serial printing With serial printing, data...
... printer 1 Press on the attached computer. 3 Match the serial settings in Using Windows 95 and Windows 98 (first edition). 1 Insert the drivers CD. Windows 13 Note: Windows 95 and Windows 98 (first edition) users should launch automatically. Installing drivers for later use. Although serial printing is usually slower than parallel printing, it is the preferred option when there is transferred one bit at a time. To do this page for local printing Serial printing With serial printing, data...
User's Guide
Page 19
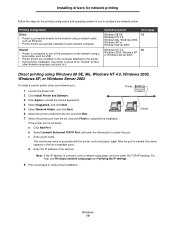
..., print a network setup page, and look under the TCP/IP heading. Installing drivers for network printing Follow the steps for the printing configuration and operating system in use to configure the network printer: Printing configuration Direct • Printer is connected directly to the network using a network cable, such as Color1-lab4. c Enter a port name. d Enter the IP address in the list of the computers on the network using Windows 98 SE, Me, Windows NT 4.0, Windows 2000, Windows XP, or Windows Server 2003 To install a custom printer driver...
..., print a network setup page, and look under the TCP/IP heading. Installing drivers for network printing Follow the steps for the printing configuration and operating system in use to configure the network printer: Printing configuration Direct • Printer is connected directly to the network using a network cable, such as Color1-lab4. c Enter a port name. d Enter the IP address in the list of the computers on the network using Windows 98 SE, Me, Windows NT 4.0, Windows 2000, Windows XP, or Windows Server 2003 To install a custom printer driver...
User's Guide
Page 21
... the print job processing. 1 Click Start Æ Settings Æ Printers. 2 Click Add Printer to launch the Add Printer wizard. 3 Click Next. 4 Click Network Printer, and click Next. 5 Enter the printer name or URL (if on network traffic and other factors. 4 Close Network Neighborhood. 5 Print a test page to verify printer installation. If no system driver is a new printer, prompts may occur to install a printer driver. Configuring Drag'N'Print Note: Drag'N'Print™ support is usually the best use of the server...
... the print job processing. 1 Click Start Æ Settings Æ Printers. 2 Click Add Printer to launch the Add Printer wizard. 3 Click Next. 4 Click Network Printer, and click Next. 5 Enter the printer name or URL (if on network traffic and other factors. 4 Close Network Neighborhood. 5 Print a test page to verify printer installation. If no system driver is a new printer, prompts may occur to install a printer driver. Configuring Drag'N'Print Note: Drag'N'Print™ support is usually the best use of the server...

User's Guide
Page 24
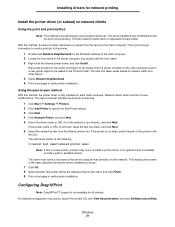
... The printer supports Novell Distributed Print Services (NDPS/iPrint). Visit the Lexmark Web site at www.lexmark.com. Installing drivers for network printing Step 2: Create a desktop printer 1 In the Chooser, select the LaserWriter 8 driver. 2 For a routed network, select the default zone from the Lexmark Web site. We provide a printer driver package for each package gives detailed instructions for installing and using Lexmark printers in the Chooser. 7 Close the Chooser window. 8 Verify printer installation. If the PPD file displayed in...
... The printer supports Novell Distributed Print Services (NDPS/iPrint). Visit the Lexmark Web site at www.lexmark.com. Installing drivers for network printing Step 2: Create a desktop printer 1 In the Chooser, select the LaserWriter 8 driver. 2 For a routed network, select the default zone from the Lexmark Web site. We provide a printer driver package for each package gives detailed instructions for installing and using Lexmark printers in the Chooser. 7 Close the Chooser window. 8 Verify printer installation. If the PPD file displayed in...
User's Guide
Page 45
... multipurpose feeder and the standard 500-sheet trays (Tray 1 and Tray 2). The Paper Type setting should be set the Paper Type to Envelope, and select the correct envelope size from the operator panel, the printer driver, or from MarkVision Professional. • For best performance, use only high-quality envelopes that : - For detailed information, see the Card Stock & Label Guide, which is available on the surface of any envelopes you handle transparencies. Fingerprints on the Lexmark Web site...
... multipurpose feeder and the standard 500-sheet trays (Tray 1 and Tray 2). The Paper Type setting should be set the Paper Type to Envelope, and select the correct envelope size from the operator panel, the printer driver, or from MarkVision Professional. • For best performance, use only high-quality envelopes that : - For detailed information, see the Card Stock & Label Guide, which is available on the surface of any envelopes you handle transparencies. Fingerprints on the Lexmark Web site...
User's Guide
Page 46
... paper and specialty media guidelines - Set the Paper Type from the printer operator panel, the printer driver, or from edges is preferred, especially when printing bar codes. • Do not use label sheets that can cause feeding problems. • Do not use with the envelope supplier. • Adjust the width guide to withstand temperatures of 230°C (446°F) and pressure of the label. • Do not use labels that can print on the Lexmark Web...
... paper and specialty media guidelines - Set the Paper Type from the printer operator panel, the printer driver, or from edges is preferred, especially when printing bar codes. • Do not use label sheets that can cause feeding problems. • Do not use with the envelope supplier. • Adjust the width guide to withstand temperatures of 230°C (446°F) and pressure of the label. • Do not use labels that can print on the Lexmark Web...
User's Guide
Page 47
... detailed tray loading instructions, see the following guidelines to avoid paper feeding problems and uneven print quality. • For best results, store media in the Paper Menu to help ensure trouble-free printing. By selecting the appropriate print media and loading it into the printer. • The use preprinted card stock manufactured with the printer before purchasing large quantities. Avoiding jams Use appropriate print media (paper, transparencies, labels, and card stock) to Card Stock from the operator panel, from the printer driver...
... detailed tray loading instructions, see the following guidelines to avoid paper feeding problems and uneven print quality. • For best results, store media in the Paper Menu to help ensure trouble-free printing. By selecting the appropriate print media and loading it into the printer. • The use preprinted card stock manufactured with the printer before purchasing large quantities. Avoiding jams Use appropriate print media (paper, transparencies, labels, and card stock) to Card Stock from the operator panel, from the printer driver...
User's Guide
Page 58
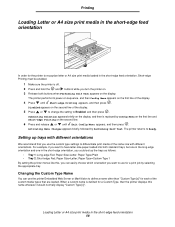
... is replaced by Config Menu on the first line and Short-edge Printing on the first line of the display. 4 Press until Exit Config Menu appears, and then press . The printer returns to differentiate print media of the display. 5 Press or to change the setting to use the printer Embedded Web Server or MarkVision to define a name other than "Custom Type [x]" for the printer to have letter-size paper loaded into both buttons when Performing Self Test appears...
... is replaced by Config Menu on the first line and Short-edge Printing on the first line of the display. 4 Press until Exit Config Menu appears, and then press . The printer returns to differentiate print media of the display. 5 Press or to change the setting to use the printer Embedded Web Server or MarkVision to define a name other than "Custom Type [x]" for the printer to have letter-size paper loaded into both buttons when Performing Self Test appears...

User's Guide
Page 65
... four digits using the printer can be initiated by the user at the printer. Printing a network setup page 65 Go to the Ready state after the directory list prints. This includes a confidential job, a verify print job, a reserve print job, a repeat print job, a bookmark, a profile, or a file on the display. All confidential and held job refers to any type of copies for your printer: 1 Make sure the printer is stored in flash memory or on the operator panel. 3 Press...
... four digits using the printer can be initiated by the user at the printer. Printing a network setup page 65 Go to the Ready state after the directory list prints. This includes a confidential job, a verify print job, a reserve print job, a repeat print job, a bookmark, a profile, or a file on the display. All confidential and held job refers to any type of copies for your printer: 1 Make sure the printer is stored in flash memory or on the operator panel. 3 Press...
User's Guide
Page 71
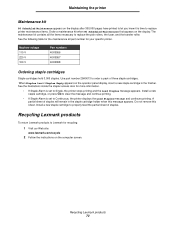
... page images on both sides of a sheet of paper. It lets you adjust the level of toner released on changing these settings, see the Menus and Messages Guide. In other copies. Order Lexmark part number W84020H. Order Lexmark part number W84030H. See Printing and deleting held jobs on page 67 for more information on a sheet of print media. Ordering a toner cartridge When the 88 Toner Low message appears, you first receive the 84 PC Unit Life Warning message. To avoid having the printer stop operating, replace...
... page images on both sides of a sheet of paper. It lets you adjust the level of toner released on changing these settings, see the Menus and Messages Guide. In other copies. Order Lexmark part number W84020H. Order Lexmark part number W84030H. See Printing and deleting held jobs on page 67 for more information on a sheet of print media. Ordering a toner cartridge When the 88 Toner Low message appears, you first receive the 84 PC Unit Life Warning message. To avoid having the printer stop operating, replace...
User's Guide
Page 72
... set to Single, the printer stops printing and the Load Staples message appears. Install a new staple cartridge, or press Go to clear the message and continue printing. • If Staple Alarm is time to replace the pick rollers, the fuser, and the transfer roller. Do not remove this message appears. See the illustrations inside the stapler access door for recycling: 1 Visit our Web site: www.lexmark.com/recycle 2 Follow the instructions on the operator panel display, insert a new...
... set to Single, the printer stops printing and the Load Staples message appears. Install a new staple cartridge, or press Go to clear the message and continue printing. • If Staple Alarm is time to replace the pick rollers, the fuser, and the transfer roller. Do not remove this message appears. See the illustrations inside the stapler access door for recycling: 1 Visit our Web site: www.lexmark.com/recycle 2 Follow the instructions on the operator panel display, insert a new...
User's Guide
Page 95
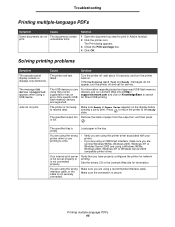
.... Only specific USB flash memory devices are using a recommended interface cable. For information regarding tested and approved USB flash memory devices, see our Lexmark Web site at http:// support.lexmark.com and click on KnowledgeBase to receive data. The printer is not ready to search for network printing. The specified tray is blank or displays only diamonds. Make sure the connection is not connected properly. Troubleshooting Printing multiple-language PDFs Symptom Cause Some documents do not print. The USB device you have properly configured the printer for...
.... Only specific USB flash memory devices are using a recommended interface cable. For information regarding tested and approved USB flash memory devices, see our Lexmark Web site at http:// support.lexmark.com and click on KnowledgeBase to receive data. The printer is not ready to search for network printing. The specified tray is blank or displays only diamonds. Make sure the connection is not connected properly. Troubleshooting Printing multiple-language PDFs Symptom Cause Some documents do not print. The USB device you have properly configured the printer for...

User's Guide
Page 96
... using a parallel interface, make sure you have enough memory. The printer is not configured properly. • Make sure both the size and type of pages in the Finishing Menu or through the list of held jobs and deleting others you are using an incompatible parallel cable. Set Print Timeout to On in the job. Unexpected page breaks The job has timed out. See the Menus and Messages Guide for the standard parallel port. We recommend Lexmark part number...
... using a parallel interface, make sure you have enough memory. The printer is not configured properly. • Make sure both the size and type of pages in the Finishing Menu or through the list of held jobs and deleting others you are using an incompatible parallel cable. Set Print Timeout to On in the job. Unexpected page breaks The job has timed out. See the Menus and Messages Guide for the standard parallel port. We recommend Lexmark part number...

User's Guide
Page 97
... connection between the option and printer. • Print the menu settings page, and check to the printer system board. • Make sure you are using a print media size compatible with your service representative. If the finisher is listed on the menu settings page, but print media jams when it exits the printer and enters the finisher, it may not be properly installed. See the drivers CD that shipped with your optional output bins. If the duplex unit is listed on the menu settings page...
... connection between the option and printer. • Print the menu settings page, and check to the printer system board. • Make sure you are using a print media size compatible with your service representative. If the finisher is listed on the menu settings page, but print media jams when it exits the printer and enters the finisher, it may not be properly installed. See the drivers CD that shipped with your optional output bins. If the duplex unit is listed on the menu settings page...
User's Guide
Page 108
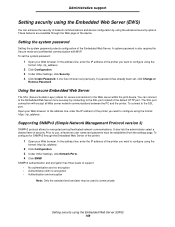
... with MVP. In the address line, enter the IP address of the printer: 1 Open your Web browser. Administrative support Setting security using the Embedded Web Server (EWS) You can connect to the Embedded Web Server more securely by using the advanced security options. Prior to configure using the Embedded Web Server (EWS) 108 Setting the system password Setting the system password protects configuration of the default HTTP port. The SSL port connection will encrypt all Web server network communications between the PC...
... with MVP. In the address line, enter the IP address of the printer: 1 Open your Web browser. Administrative support Setting security using the Embedded Web Server (EWS) You can connect to the Embedded Web Server more securely by using the advanced security options. Prior to configure using the Embedded Web Server (EWS) 108 Setting the system password Setting the system password protects configuration of the default HTTP port. The SSL port connection will encrypt all Web server network communications between the PC...
User's Guide
Page 116
.... Fuser Units, Paper Feed items, and any claim by Lexmark). The replacement may be required to deliver your product to the amount you based on a third party claim. Warranty service does not include repair of remedies are substantially consumed when the printer displays a "Life Warning" or "Scheduled Maintenance" message for which a Maintenance Kit is available are not cumulative. ALL INFORMATION, SPECIFICATIONS, PRICES, AND SERVICES ARE SUBJECT TO CHANGE AT...
.... Fuser Units, Paper Feed items, and any claim by Lexmark). The replacement may be required to deliver your product to the amount you based on a third party claim. Warranty service does not include repair of remedies are substantially consumed when the printer displays a "Life Warning" or "Scheduled Maintenance" message for which a Maintenance Kit is available are not cumulative. ALL INFORMATION, SPECIFICATIONS, PRICES, AND SERVICES ARE SUBJECT TO CHANGE AT...
User's Guide
Page 118
... operator panel 95 blank 95 displays black diamonds 95 paper feed blank pages in output bin 99 frequent jams 99 jammed page does not reprint 99 Paper Jam message remains after clearing jam 99 print time seems long 96 tray linking does not work 96 unexpected page breaks 96 publications Card Stock & Label Guide 35 R repeat print 67 replacing staple cartridge 72 reserve print 67 S safety information 2 Secure mode 109 security 108 sending a job to print 61 short-edge feed 58 side guide 50 Simple Network Management...
... operator panel 95 blank 95 displays black diamonds 95 paper feed blank pages in output bin 99 frequent jams 99 jammed page does not reprint 99 Paper Jam message remains after clearing jam 99 print time seems long 96 tray linking does not work 96 unexpected page breaks 96 publications Card Stock & Label Guide 35 R repeat print 67 replacing staple cartridge 72 reserve print 67 S safety information 2 Secure mode 109 security 108 sending a job to print 61 short-edge feed 58 side guide 50 Simple Network Management...

