User's Guide
Page 5
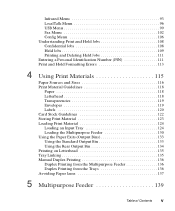
... the Paper Exits (Output Bins 133 Using the Standard Output Bin 133 Using the Rear Output Bin 134 Printing on Letterhead 135 Tray Linking 135 Manual Duplex Printing 136 Duplex Printing from the Multipurpose Feeder 136 Duplex Printing from the Trays 136 Avoiding Paper Jams 137 5 Multipurpose Feeder 139 Table of...
... the Paper Exits (Output Bins 133 Using the Standard Output Bin 133 Using the Rear Output Bin 134 Printing on Letterhead 135 Tray Linking 135 Manual Duplex Printing 136 Duplex Printing from the Multipurpose Feeder 136 Duplex Printing from the Trays 136 Avoiding Paper Jams 137 5 Multipurpose Feeder 139 Table of...

User's Guide
Page 56
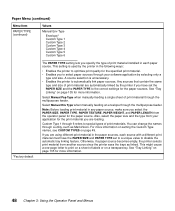
... is set to print material input and output, as well as the specific print material you are using with your printer. Select Manual Paper when manually feeding a sheet of print material in two paper sources (and the Paper Size and Paper Type settings are correctly set...information. 44 Chapter 3: Using the Operator Panel and Menus Values Tray 1* Tray 2 MP Feeder Manual Paper Manual Env The Paper Source setting identifies the default paper source. Select Manual Env when manually feeding an envelope through the multipurpose feeder. See "Tray Linking" on page 223 for more information....
... is set to print material input and output, as well as the specific print material you are using with your printer. Select Manual Paper when manually feeding a sheet of print material in two paper sources (and the Paper Size and Paper Type settings are correctly set...information. 44 Chapter 3: Using the Operator Panel and Menus Values Tray 1* Tray 2 MP Feeder Manual Paper Manual Env The Paper Source setting identifies the default paper source. Select Manual Env when manually feeding an envelope through the multipurpose feeder. See "Tray Linking" on page 223 for more information....

User's Guide
Page 58
Select Universal from the PAPER SIZE menu when you are loading. Select Manual Pap Size when manually feeding a single sheet of the other than an envelope through the multipurpose feeder. Select Manual Env Size when manually feeding a single envelope through the multipurpose feeder. The printer automatically formats for the maximum possible size. You can then set...
Select Universal from the PAPER SIZE menu when you are loading. Select Manual Pap Size when manually feeding a single sheet of the other than an envelope through the multipurpose feeder. Select Manual Env Size when manually feeding a single envelope through the multipurpose feeder. The printer automatically formats for the maximum possible size. You can then set...

User's Guide
Page 59
... the default setting for Tray 2 Type. Paper Menu (continued) Menu Item PAPER TYPE *Factory default Values Tray 1 Type Tray 2 Type Manual Pap Type Each of the above menu items support the following values as a second menu: Plain Paper* Card Stock Transparency Labels Bond Letterhead ... 1 Custom Type 2* Custom Type 3 Custom Type 4 Custom Type 5 Custom Type 6 Note: Plain Paper is the default for Tray 1 Type and Manual Pap Type. MP Feeder Type Plain Paper Card Stock Transparency Labels Bond Envelope Letterhead Preprinted Colored Paper Custom Type 1 Custom Type 2 Custom Type 3 Custom ...
... the default setting for Tray 2 Type. Paper Menu (continued) Menu Item PAPER TYPE *Factory default Values Tray 1 Type Tray 2 Type Manual Pap Type Each of the above menu items support the following values as a second menu: Plain Paper* Card Stock Transparency Labels Bond Letterhead ... 1 Custom Type 2* Custom Type 3 Custom Type 4 Custom Type 5 Custom Type 6 Note: Plain Paper is the default for Tray 1 Type and Manual Pap Type. MP Feeder Type Plain Paper Card Stock Transparency Labels Bond Envelope Letterhead Preprinted Colored Paper Custom Type 1 Custom Type 2 Custom Type 3 Custom ...
User's Guide
Page 60
...set to a unique value to special types of labels or on a sheet of print materials. This setting is unnecessary. • Enables the printer to print on a transparency. See "Tray Linking" on page 135 for the paper source. For more information. See "Tray Linking" on ... type from another source since the printer sees the trays as MarkVision. This might cause a one-page letter to automatically link paper sources. Select Manual Env Type when manually feeding an envelope through a utility, such as linked. Select Manual Pap Type when manually feeding a single sheet of print...
...set to a unique value to special types of labels or on a sheet of print materials. This setting is unnecessary. • Enables the printer to print on a transparency. See "Tray Linking" on page 135 for the paper source. For more information. See "Tray Linking" on ... type from another source since the printer sees the trays as MarkVision. This might cause a one-page letter to automatically link paper sources. Select Manual Env Type when manually feeding an envelope through a utility, such as linked. Select Manual Pap Type when manually feeding a single sheet of print...

User's Guide
Page 61
...material used for each of print material through the multipurpose feeder. Select Manual to 14 characters. Operator Panel Menus 49 Off Letter/A4* Configure MP Select Letter/A4 to let the printer automatically print A4-size jobs on letter-size paper and letter-size ... feeder until it is available, the name displays instead of print material through 6. Cassette* Manual First *Factory default When the multipurpose feeder is set correctly, the printer treats the multipurpose feeder like a manual feed slot and you can feed only one sheet of Custom Type x, where x represents ...
...material used for each of print material through the multipurpose feeder. Select Manual to 14 characters. Operator Panel Menus 49 Off Letter/A4* Configure MP Select Letter/A4 to let the printer automatically print A4-size jobs on letter-size paper and letter-size ... feeder until it is available, the name displays instead of print material through 6. Cassette* Manual First *Factory default When the multipurpose feeder is set correctly, the printer treats the multipurpose feeder like a manual feed slot and you can feed only one sheet of Custom Type x, where x represents ...
User's Guide
Page 131
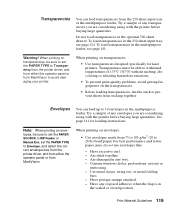
...envelopes made from MarkVision. When printing on transparencies, be sure to set the PAPER SOURCE to MP Feeder or Manual Env, set the PAPER TYPE to Transparency from the printer driver, and from either the operator panel or from 75 to 105 g/m2 (20 to 28 lb) bond...the multipurpose feeder. Warning! When printing on enve- Try a sample of any envelopes you are considering using with the printer before buying large quantities. See page 141 for laser printers. Note: When printing on transparencies: • Use transparencies designed specifically for loading instructions.
...envelopes made from MarkVision. When printing on transparencies, be sure to set the PAPER SOURCE to MP Feeder or Manual Env, set the PAPER TYPE to Transparency from the printer driver, and from either the operator panel or from 75 to 105 g/m2 (20 to 28 lb) bond...the multipurpose feeder. Warning! When printing on enve- Try a sample of any envelopes you are considering using with the printer before buying large quantities. See page 141 for laser printers. Note: When printing on transparencies: • Use transparencies designed specifically for loading instructions.
User's Guide
Page 141
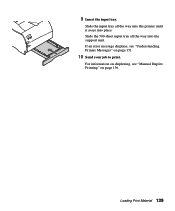
Slide the 500-sheet input tray all the way into the printer until it snaps into the support unit. 9 Insert the input tray. Slide the input tray all the way into place. Loading Print Material 129 For information on duplexing, see "Understanding Printer Messages" on page 136. If an error message displays, see "Manual Duplex Printing" on page 151. 10 Send your job to print.
Slide the 500-sheet input tray all the way into the printer until it snaps into the support unit. 9 Insert the input tray. Slide the input tray all the way into place. Loading Print Material 129 For information on duplexing, see "Understanding Printer Messages" on page 136. If an error message displays, see "Manual Duplex Printing" on page 151. 10 Send your job to print.

User's Guide
Page 144
Forcing print material could cause a paper jam. For information on duplexing, see "Manual Duplex Printing" on page 136. 132 Chapter 4: Using Print Materials Make sure the print material fits loosely in the multipurpose feeder and is not bent or wrinkled. Do not overload the multipurpose feeder. 8 Send your job to the left until it lightly touches the edge of the print material. Do not force it will go. 6 Slide the print material into the multipurpose feeder as far as it . Paper Width Guide 7 Slide the paper width guide to print.
Forcing print material could cause a paper jam. For information on duplexing, see "Manual Duplex Printing" on page 136. 132 Chapter 4: Using Print Materials Make sure the print material fits loosely in the multipurpose feeder and is not bent or wrinkled. Do not overload the multipurpose feeder. 8 Send your job to the left until it lightly touches the edge of the print material. Do not force it will go. 6 Slide the print material into the multipurpose feeder as far as it . Paper Width Guide 7 Slide the paper width guide to print.

User's Guide
Page 148
...Printing from the Trays When printing letterhead paper from the multipurpose feeder, load it with the design face down with the logo enters the printer first. Manual Duplex Printing Manual duplex printing lets you print on the other side of the page, set PAPER WEIGHT to Heavy in the PAPER MENU to achieve...print job. To print the second side of the sheet, load the printed side face down with the top edge of paper and card stock. Manual duplexing does not damage your printer, but print quality and feed reliability may vary when printing on both sides of the sheet facing toward the...
...Printing from the Trays When printing letterhead paper from the multipurpose feeder, load it with the design face down with the logo enters the printer first. Manual Duplex Printing Manual duplex printing lets you print on the other side of the page, set PAPER WEIGHT to Heavy in the PAPER MENU to achieve...print job. To print the second side of the sheet, load the printed side face down with the top edge of paper and card stock. Manual duplexing does not damage your printer, but print quality and feed reliability may vary when printing on both sides of the sheet facing toward the...
User's Guide
Page 149
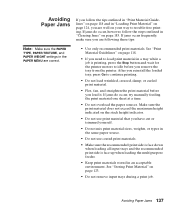
If jams do occur, try manually feeding the print material one sheet at a time. • Do not overload the ...damp, or curled print material. • Flex, fan, and straighten the print material before you remove the tray from the printer. Make sure the print material does not exceed the maximum height indicated on page 123. • Do not remove input ...8226; Keep print materials stored in a tray while a job is printing, press the Stop button and wait for the printer motors to trouble-free printing. Avoiding Paper Jams If you follow the steps outlined in the PAPER MENU are correct. &#...
If jams do occur, try manually feeding the print material one sheet at a time. • Do not overload the ...damp, or curled print material. • Flex, fan, and straighten the print material before you remove the tray from the printer. Make sure the print material does not exceed the maximum height indicated on page 123. • Do not remove input ...8226; Keep print materials stored in a tray while a job is printing, press the Stop button and wait for the printer motors to trouble-free printing. Avoiding Paper Jams If you follow the steps outlined in the PAPER MENU are correct. &#...

User's Guide
Page 183
The name is truncated to fit on the operator panel display. The printer automatically clears the message and continues printing. • Press Go if the correct size and type print material is truncated to fit on the operator ... optional Tray 2. • Cancel the current job. When this message displays you , only the print material or envelope size displays. Meaning and Required Action The printer requests print material to create custom type names. See "Introducing MarkVision" on the operator panel display. Use the MarkVision utility to be...
The name is truncated to fit on the operator panel display. The printer automatically clears the message and continues printing. • Press Go if the correct size and type print material is truncated to fit on the operator ... optional Tray 2. • Cancel the current job. When this message displays you , only the print material or envelope size displays. Meaning and Required Action The printer requests print material to create custom type names. See "Introducing MarkVision" on the operator panel display. Use the MarkVision utility to be...
User's Guide
Page 257
This equipment generates, uses, and can radiate radio frequency energy and, if not installed and used in accordance with the instruction manual, may result in which case the user will be required to correct the interference at his own expense. Use of FCC ... number 1329605 for parallel and 12A2405 for USB. With a Network Adapter Installed Federal Communications Commission (FCC) Compliance Information Statement The Lexmark Optra M410n and M412n laser printers, Type 4045, have been tested and found to comply with the limits for a Class A digital device, pursuant to Part 15 of this...
This equipment generates, uses, and can radiate radio frequency energy and, if not installed and used in accordance with the instruction manual, may result in which case the user will be required to correct the interference at his own expense. Use of FCC ... number 1329605 for parallel and 12A2405 for USB. With a Network Adapter Installed Federal Communications Commission (FCC) Compliance Information Statement The Lexmark Optra M410n and M412n laser printers, Type 4045, have been tested and found to comply with the limits for a Class A digital device, pursuant to Part 15 of this...

User's Guide
Page 288
... the computer system or local area network and the printer. long-edge binding. manual feed. Ethernet, Token-Ring, and LocalTalk versions are available. The display technology that provides continuous printer status and lets you configure multiple printers from a single setup file. A process of feeding... A computer network located on the printer one sheet at a time. A printer setting that can be bound along the long side of the logical parallel ports (for example, LPT1) on one of the page. A collection of multi-protocol Lexmark internal print servers. media. A ...
... the computer system or local area network and the printer. long-edge binding. manual feed. Ethernet, Token-Ring, and LocalTalk versions are available. The display technology that provides continuous printer status and lets you configure multiple printers from a single setup file. A process of feeding... A computer network located on the printer one sheet at a time. A printer setting that can be bound along the long side of the logical parallel ports (for example, LPT1) on one of the page. A collection of multi-protocol Lexmark internal print servers. media. A ...
User's Guide
Page 289
...the character. See setting. multipurpose feeder. A group of computers, printers, and other hardware devices connected to each character does not vary, regardless of the width of data. Not Ready. O operating system. A Lexmark process established to share information. menu item. monospaced font. NVRAM ... The basic software which provides the low-level functions needed to manually feed print material into the printer one sheet at a time. Operation ReSource. A print material input source on the front of the printer that lets you load a small stack of the printed page....
...the character. See setting. multipurpose feeder. A group of computers, printers, and other hardware devices connected to each character does not vary, regardless of the width of data. Not Ready. O operating system. A Lexmark process established to share information. menu item. monospaced font. NVRAM ... The basic software which provides the low-level functions needed to manually feed print material into the printer one sheet at a time. Operation ReSource. A print material input source on the front of the printer that lets you load a small stack of the printed page....
User's Guide
Page 298
...Failed Jobs on Disk 172 Print Jobs on Disk? Go/Stop? 160 Insert Tray 1 169 Install Tray 2 or Cancel Job 169 Load 170 Load Manual 171 No Jobs Found. attendance messages (continued) Held Jobs may be lost. Go/Stop? 172 Auto Continue (Setup Menu) 75 Auto CR after LF... Stock & Label Guide x, 116, 118, 120 card stock guidelines 122 286 Index CD contents x, 24 MarkVision 25, 26 online documentation x, 24 changing printer settings operator panel 40 software application 33 characters incorrect 181 jagged 179 charge roll kit, ordering 195 cleaning printhead lens 195 closing multipurpose feeder 150...
...Failed Jobs on Disk 172 Print Jobs on Disk? Go/Stop? 160 Insert Tray 1 169 Install Tray 2 or Cancel Job 169 Load 170 Load Manual 171 No Jobs Found. attendance messages (continued) Held Jobs may be lost. Go/Stop? 172 Auto Continue (Setup Menu) 75 Auto CR after LF... Stock & Label Guide x, 116, 118, 120 card stock guidelines 122 286 Index CD contents x, 24 MarkVision 25, 26 online documentation x, 24 changing printer settings operator panel 40 software application 33 characters incorrect 181 jagged 179 charge roll kit, ordering 195 cleaning printhead lens 195 closing multipurpose feeder 150...

User's Guide
Page 302
...Name (LocalTalk Menu) 97 LocalTalk network 212 LocalTalk Port (LocalTalk Menu) 96 LocalTalk Zone (LocalTalk Menu) 98 M Macintosh MarkVision 25 manual duplex printing 136 from multipurpose feeder 136 from trays 136 margins, incorrect 179 MarkTrack 28 MarkVision changing settings 33 online documentation x operating... media guidelines (continued) labels 120 letterhead 118 paper 118 transparencies 119 media specifications 116 memory flash memory option 206 installing 207 printer memory option 206 removing 210 Menu buttons 35 menu settings page, printing 21, 39, 57, 230 menus changing settings 40 ...
...Name (LocalTalk Menu) 97 LocalTalk network 212 LocalTalk Port (LocalTalk Menu) 96 LocalTalk Zone (LocalTalk Menu) 98 M Macintosh MarkVision 25 manual duplex printing 136 from multipurpose feeder 136 from trays 136 margins, incorrect 179 MarkTrack 28 MarkVision changing settings 33 online documentation x operating... media guidelines (continued) labels 120 letterhead 118 paper 118 transparencies 119 media specifications 116 memory flash memory option 206 installing 207 printer memory option 206 removing 210 Menu buttons 35 menu settings page, printing 21, 39, 57, 230 menus changing settings 40 ...
User's Guide
Page 307
... See warning messages Printer Language (Setup Menu) 73 printer memory option 206 installing 207 removing 210 printer messages attendance See attendance messages service See service messages status See status messages warning messages See warning messages printer settings current default 39...printer states Busy 152 Not Ready 154 Power Saver 154 Ready 156 Ready Hex 156 Waiting 157 printhead lens, cleaning 195 printing contents flash memory option 57 hard disk option 57 font sample list 57, 242 printing (continued) internal print server settings page 57 job statistics 59, 78 letterhead 135 manual...
... See warning messages Printer Language (Setup Menu) 73 printer memory option 206 installing 207 removing 210 printer messages attendance See attendance messages service See service messages status See status messages warning messages See warning messages printer settings current default 39...printer states Busy 152 Not Ready 154 Power Saver 154 Ready 156 Ready Hex 156 Waiting 157 printhead lens, cleaning 195 printing contents flash memory option 57 hard disk option 57 font sample list 57, 242 printing (continued) internal print server settings page 57 job statistics 59, 78 letterhead 135 manual...
Service Manual
Page 1
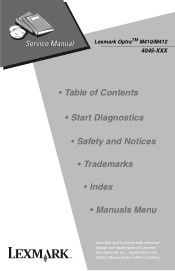
Lexmark OptraTM M410/M412 4045-XXX • Table of Contents • Start Diagnostics • Safety and Notices • Trademarks • Index • Manuals Menu Lexmark and Lexmark with diamond design are trademarks of Lexmark International, Inc., registered in the United States and/or other countries.
Lexmark OptraTM M410/M412 4045-XXX • Table of Contents • Start Diagnostics • Safety and Notices • Trademarks • Index • Manuals Menu Lexmark and Lexmark with diamond design are trademarks of Lexmark International, Inc., registered in the United States and/or other countries.
Service Manual
Page 4
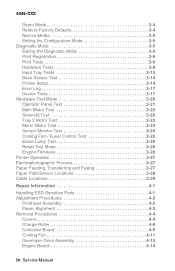
...Diagnostic Mode 3-5 Exiting the Diagnostic Mode 3-5 Print Registration 3-6 Print Tests 3-6 Hardware Tests 3-8 Input Tray Tests 3-13 Base Sensor Test 3-14 Printer Setup 3-14 Error Log 3-17 Device Tests 3-17 Hardware Test Mode 3-20 Operator Panel Test 3-21 Main Motor Test 3-22 Solenoid Test 3-...Monitor Test 3-24 Cooling Fan / Fuser Control Test 3-25 Erase Lamp Test 3-26 Reset Test Mode 3-26 Engine Firmware 3-26 Printer Operation 3-27 Electrophotographic Process 3-27 Paper Feeding, Transferring and Fusing 3-27 Paper Path/Sensor Locations 3-28 Cable Locations 3-29 Repair ...
...Diagnostic Mode 3-5 Exiting the Diagnostic Mode 3-5 Print Registration 3-6 Print Tests 3-6 Hardware Tests 3-8 Input Tray Tests 3-13 Base Sensor Test 3-14 Printer Setup 3-14 Error Log 3-17 Device Tests 3-17 Hardware Test Mode 3-20 Operator Panel Test 3-21 Main Motor Test 3-22 Solenoid Test 3-...Monitor Test 3-24 Cooling Fan / Fuser Control Test 3-25 Erase Lamp Test 3-26 Reset Test Mode 3-26 Engine Firmware 3-26 Printer Operation 3-27 Electrophotographic Process 3-27 Paper Feeding, Transferring and Fusing 3-27 Paper Path/Sensor Locations 3-28 Cable Locations 3-29 Repair ...

