Clearing Jams Guide
Page 2
... door, and then remove the photoconductor kit. Open the front door, and then open the front door, and then remove the photoconductor kit and toner cartridge (unit). 5 Align and insert the unit. 6 Close the front door. 7 Insert the tray. 8 Press . 2 Remove Tray 1, and then depress the lever. Remove the ... door, and then open the rear door. Open the front door, and then remove the photoconductor kit. Note: When the photoconductor kit and toner cartridge are together, they are called a unit. 4 Lift the flap in front of the printer, and remove any jammed sheets. 3 If you see it...
... door, and then remove the photoconductor kit. Open the front door, and then open the front door, and then remove the photoconductor kit and toner cartridge (unit). 5 Align and insert the unit. 6 Close the front door. 7 Insert the tray. 8 Press . 2 Remove Tray 1, and then depress the lever. Remove the ... door, and then open the rear door. Open the front door, and then remove the photoconductor kit. Note: When the photoconductor kit and toner cartridge are together, they are called a unit. 4 Lift the flap in front of the printer, and remove any jammed sheets. 3 If you see it...
Troubleshooting Guide
Page 4
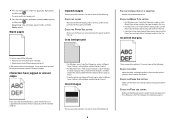
... you are using downloaded fonts, verify that the fonts are possible solutions. Try one or more of the following : • Remove and reinstall the toner cartridge. • Remove and reinstall the photoconductor kit. If the printer still prints blank pages, it may need to the correct positions for the paper size...
... you are using downloaded fonts, verify that the fonts are possible solutions. Try one or more of the following : • Remove and reinstall the toner cartridge. • Remove and reinstall the photoconductor kit. If the printer still prints blank pages, it may need to the correct positions for the paper size...
Troubleshooting Guide
Page 5
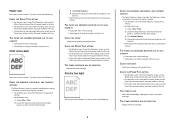
... setting is too light, or the Contrast setting is too light These are possible solutions. THE TONER IS LOW When 88 Cartridge low appears, order a new toner cartridge. THE PAPER HAS ABSORBED MOISTURE DUE TO HIGH HUMIDITY • Load paper from a fresh package. • Store paper...package. • Store paper in its original wrapper until you use it . Paper curl These are possible solutions. THE TONER CARTRIDGE MAY BE DEFECTIVE Replace the toner cartridge. THE PAPER HAS ABSORBED MOISTURE DUE TO HIGH HUMIDITY • Load paper from a fresh package. • Store paper in...
... setting is too light, or the Contrast setting is too light These are possible solutions. THE TONER IS LOW When 88 Cartridge low appears, order a new toner cartridge. THE PAPER HAS ABSORBED MOISTURE DUE TO HIGH HUMIDITY • Load paper from a fresh package. • Store paper...package. • Store paper in its original wrapper until you use it . Paper curl These are possible solutions. THE TONER CARTRIDGE MAY BE DEFECTIVE Replace the toner cartridge. THE PAPER HAS ABSORBED MOISTURE DUE TO HIGH HUMIDITY • Load paper from a fresh package. • Store paper in...

Troubleshooting Guide
Page 6
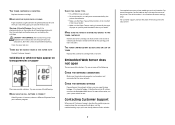
...sure the Paper Type setting is poor CHECK THE TRANSPARENCIES Use only transparencies recommended by the printer manufacturer. THE TONER CARTRIDGE MAY BE DEFECTIVE Replace the toner cartridge. CAUTION-HOT SURFACE: The inside of the printer might be caught between the photoconductor kit and the fuser. Try ...panel, select another tray or feeder to cool before touching. Try one or more of the following : THE TONER CARTRIDGE MAY BE DEFECTIVE Replace the toner cartridge. THERE IS TONER IN THE PAPER PATH Contact Customer Support. THERE MAY BE EXCESS TONER IN THE PAPER PATH ...
...sure the Paper Type setting is poor CHECK THE TRANSPARENCIES Use only transparencies recommended by the printer manufacturer. THE TONER CARTRIDGE MAY BE DEFECTIVE Replace the toner cartridge. CAUTION-HOT SURFACE: The inside of the printer might be caught between the photoconductor kit and the fuser. Try ...panel, select another tray or feeder to cool before touching. Try one or more of the following : THE TONER CARTRIDGE MAY BE DEFECTIVE Replace the toner cartridge. THERE IS TONER IN THE PAPER PATH Contact Customer Support. THERE MAY BE EXCESS TONER IN THE PAPER PATH ...
Troubleshooting Guide
Page 7
...You need to type https:// instead of the photoconductor kit. CHECK THE NETWORK SETTINGS Depending on transparencies or paper These are holding the cartridge. Warning-Potential Damage: Do not touch the photoconductor on the display, and the troubleshooting steps you may need to the same network. ... the Paper Texture setting is loaded in the tray or feeder. MAKE SURE THE TONER IS DISTRIBUTED EVENLY IN THE TONER CARTRIDGE Remove the toner cartridge and shake it . Embedded Web Server does not open These are experiencing, the message on the underside of http:// before...
...You need to type https:// instead of the photoconductor kit. CHECK THE NETWORK SETTINGS Depending on transparencies or paper These are holding the cartridge. Warning-Potential Damage: Do not touch the photoconductor on the display, and the troubleshooting steps you may need to the same network. ... the Paper Texture setting is loaded in the tray or feeder. MAKE SURE THE TONER IS DISTRIBUTED EVENLY IN THE TONER CARTRIDGE Remove the toner cartridge and shake it . Embedded Web Server does not open These are experiencing, the message on the underside of http:// before...
User's Guide
Page 4
... exterior of the printer...97 Storing supplies...97 Conserving supplies...98 Checking the status of supplies from a network computer 98 Ordering supplies...99 Ordering toner cartridges...99 Ordering a photoconductor kit ...100 Contents 4
... exterior of the printer...97 Storing supplies...97 Conserving supplies...98 Checking the status of supplies from a network computer 98 Ordering supplies...99 Ordering toner cartridges...99 Ordering a photoconductor kit ...100 Contents 4

User's Guide
Page 5
Replacing supplies...100 Replacing the toner cartridge ...100 Replacing the photoconductor kit ...101 Recycling Lexmark products...104 Moving the printer...104 Before moving the printer ...104 Moving the printer to another location...104 Setting the printer up in a new location ......
Replacing supplies...100 Replacing the toner cartridge ...100 Replacing the photoconductor kit ...101 Recycling Lexmark products...104 Moving the printer...104 Before moving the printer ...104 Moving the printer to another location...104 Setting the printer up in a new location ......

User's Guide
Page 48
... the edges, or releasing hazardous fumes. • Do not use before buying large quantities. Adhesive material contaminates the printer and could void the printer and cartridge warranties. • Do not use envelopes that : - Are stuck together or damaged in any exposed adhesive when the flap is set to peel off during...bond) paper. Partial sheets may wrinkle or seal envelopes. Have bent corners - When printing on the labels being considered for laser printers. Tips on the Lexmark Web site at www.lexmark.com/publications. Check with adhesive, and could void the warranty.
... the edges, or releasing hazardous fumes. • Do not use before buying large quantities. Adhesive material contaminates the printer and could void the printer and cartridge warranties. • Do not use envelopes that : - Are stuck together or damaged in any exposed adhesive when the flap is set to peel off during...bond) paper. Partial sheets may wrinkle or seal envelopes. Have bent corners - When printing on the labels being considered for laser printers. Tips on the Lexmark Web site at www.lexmark.com/publications. Check with adhesive, and could void the warranty.

User's Guide
Page 55
Clearing jams 55 Jam number 235 242 251 To access the jam Remove the jam from the printer. 2 Remove the jam if you see it here. 3 If you do not see it, open the front door, and then remove the photoconductor kit and toner cartridge (unit). Open the multipurpose feeder door. 200 paper jam 1 Remove the tray from the standard exit bin. Note: When the photoconductor kit and toner cartridge are together, they are called a unit. Remove Tray 2.
Clearing jams 55 Jam number 235 242 251 To access the jam Remove the jam from the printer. 2 Remove the jam if you see it here. 3 If you do not see it, open the front door, and then remove the photoconductor kit and toner cartridge (unit). Open the multipurpose feeder door. 200 paper jam 1 Remove the tray from the standard exit bin. Note: When the photoconductor kit and toner cartridge are together, they are called a unit. Remove Tray 2.

User's Guide
Page 73
... will blink red. This setting has no effect on PCL emulation print jobs. Menu item Quiet Mode Off On Run Initial Setup Yes No Alarm Cartridge Alarm Off Single Timeouts Power Saver Disabled 1-240 Timeouts Print Timeout Disabled 1-255 Timeouts Wait Timeout Disabled 15-65535 Print Recovery Auto Continue Disabled 5-255...
... will blink red. This setting has no effect on PCL emulation print jobs. Menu item Quiet Mode Off On Run Initial Setup Yes No Alarm Cartridge Alarm Off Single Timeouts Power Saver Disabled 1-240 Timeouts Print Timeout Disabled 1-255 Timeouts Wait Timeout Disabled 15-65535 Print Recovery Auto Continue Disabled 5-255...
User's Guide
Page 91
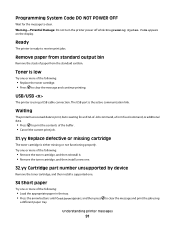
...Try one or more of the following: • Remove the toner cartridge, and then reinstall it. • Remove the toner cartridge, and then install a new one. 32.yy Cartridge part number unsupported by device Remove the toner cartridge, and then install a supported one. 34 Short paper Try one ...or more of the buffer. • Cancel the current print job. 31.yy Replace defective or missing cartridge The toner cartridge is using Understanding printer messages 91 USB/USB The printer is either missing or not functioning properly. The USB port is ready to...
...Try one or more of the following: • Remove the toner cartridge, and then reinstall it. • Remove the toner cartridge, and then install a new one. 32.yy Cartridge part number unsupported by device Remove the toner cartridge, and then install a supported one. 34 Short paper Try one ...or more of the buffer. • Cancel the current print job. 31.yy Replace defective or missing cartridge The toner cartridge is using Understanding printer messages 91 USB/USB The printer is either missing or not functioning properly. The USB port is ready to...

User's Guide
Page 94
.... • Press the arrow buttons until Continue appears, and then press to clear the message and continue printing. 88.yy Cartridge is low Replace the toner cartridge, and then press to clear the message and continue printing. 200.yy Paper jam The message indicates either where the paper is... Try one or more of pages jammed. 1 Open the front door, and then remove the photoconductor kit and toner cartridge unit. 2 Remove the jam. 3 Replace the photoconductor kit and toner cartridge unit. 4 Close the front door. 5 Press to clear the message and continue printing. 84 Replace PC Kit The...
.... • Press the arrow buttons until Continue appears, and then press to clear the message and continue printing. 88.yy Cartridge is low Replace the toner cartridge, and then press to clear the message and continue printing. 200.yy Paper jam The message indicates either where the paper is... Try one or more of pages jammed. 1 Open the front door, and then remove the photoconductor kit and toner cartridge unit. 2 Remove the jam. 3 Replace the photoconductor kit and toner cartridge unit. 4 Close the front door. 5 Press to clear the message and continue printing. 84 Replace PC Kit The...

User's Guide
Page 96
... the following: • Remove Tray 1. • Open the front door, and then remove the photoconductor kit and toner cartridge unit. • Remove Tray 2. 2 Remove the jam. 3 Replace the photoconductor kit and toner cartridge unit if you removed it. 4 Close any open doors or trays. 5 Press to continue printing. 251.yy Paper jam...
... the following: • Remove Tray 1. • Open the front door, and then remove the photoconductor kit and toner cartridge unit. • Remove Tray 2. 2 Remove the jam. 3 Replace the photoconductor kit and toner cartridge unit if you removed it. 4 Close any open doors or trays. 5 Press to continue printing. 251.yy Paper jam...

User's Guide
Page 99
... becomes faded, you purchased the printer. Recommended toner cartridges and part numbers Part name Regular cartridge Lexmark Return Program Cartridge For the US and Canada Toner cartridge E260A21A E260A11A High Yield Toner Cartridge E360H21A E360H11A For Europe, the Middle East, and Africa Toner cartridge E260A21E E260A11E High Yield Toner Cartridge E360H21E E360H11E For the Asia Pacific Region, including...
... becomes faded, you purchased the printer. Recommended toner cartridges and part numbers Part name Regular cartridge Lexmark Return Program Cartridge For the US and Canada Toner cartridge E260A21A E260A11A High Yield Toner Cartridge E360H21A E360H11A For Europe, the Middle East, and Africa Toner cartridge E260A21E E260A11E High Yield Toner Cartridge E360H21E E360H11E For the Asia Pacific Region, including...

User's Guide
Page 100
...side and front-to-back several times to see the status of the photoconductor kit, and then pull the toner cartridge out using the handle. To replace the toner cartridge: 1 Open the front door by pressing the button on the left in your printer model, the printer issues... a message or a light sequence to let you experience faded print, remove the toner cartridge. Ordering a photoconductor kit Depending on your cartridge by printing a menu settings page. You can check to redistribute the toner, and then reinsert it and continue printing....
...side and front-to-back several times to see the status of the photoconductor kit, and then pull the toner cartridge out using the handle. To replace the toner cartridge: 1 Open the front door by pressing the button on the left in your printer model, the printer issues... a message or a light sequence to let you experience faded print, remove the toner cartridge. Ordering a photoconductor kit Depending on your cartridge by printing a menu settings page. You can check to redistribute the toner, and then reinsert it and continue printing....

User's Guide
Page 101
... into place when correctly installed. 6 Close the front door. You can cause print quality problems. 4 Rotate the cartridge in as far as it will go. While the printer may continue to direct light for an extended period of -life, .... Maintaining the printer 101 Push the toner cartridge in all directions to distribute the toner. 5 Install the new toner cartridge by printing a menu settings page. 3 Unpack the new toner cartridge. Warning-Potential Damage: When replacing a toner cartridge, do not leave the new cartridge exposed to function properly after the photoconductor kit...
... into place when correctly installed. 6 Close the front door. You can cause print quality problems. 4 Rotate the cartridge in as far as it will go. While the printer may continue to direct light for an extended period of -life, .... Maintaining the printer 101 Push the toner cartridge in all directions to distribute the toner. 5 Install the new toner cartridge by printing a menu settings page. 3 Unpack the new toner cartridge. Warning-Potential Damage: When replacing a toner cartridge, do not leave the new cartridge exposed to function properly after the photoconductor kit...

User's Guide
Page 102
1 Open the front door by pressing the button on the left side of the printer and lowering the front door. 2 Pull the photoconductor kit and toner cartridge out of the printer as a unit by pulling on the base of the photoconductor kit. Maintaining the printer 102 Place the unit on a flat, clean surface. 3 Press the button on the toner cartridge handle. Pull the toner cartridge up and out using the handle. Note: The photoconductor kit and toner cartridge form a unit.
1 Open the front door by pressing the button on the left side of the printer and lowering the front door. 2 Pull the photoconductor kit and toner cartridge out of the printer as a unit by pulling on the base of the photoconductor kit. Maintaining the printer 102 Place the unit on a flat, clean surface. 3 Press the button on the toner cartridge handle. Pull the toner cartridge up and out using the handle. Note: The photoconductor kit and toner cartridge form a unit.

User's Guide
Page 103
4 Unpack the new photoconductor kit. Be careful not to touch the photoconductor drum. 5 Insert the toner cartridge into the printer by aligning the rollers on the guides of the unit with the arrows in the printer. Maintaining the printer 103 Warning-Potential ... printer and void your warranty. 8 Close the front door. To reset the counter, see the instruction sheet that came with the tracks. Push the toner cartridge until it will go. 7 After you replace the photoconductor kit, reset the photoconductor counter. Push the unit as far as it clicks into place. 6 Install...
4 Unpack the new photoconductor kit. Be careful not to touch the photoconductor drum. 5 Insert the toner cartridge into the printer by aligning the rollers on the guides of the unit with the arrows in the printer. Maintaining the printer 103 Warning-Potential ... printer and void your warranty. 8 Close the front door. To reset the counter, see the instruction sheet that came with the tracks. Push the toner cartridge until it will go. 7 After you replace the photoconductor kit, reset the photoconductor counter. Push the unit as far as it clicks into place. 6 Install...
User's Guide
Page 108
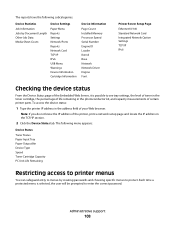
...Other Job Data Media Sheet Count Paper Menu Reports Settings Network/Ports Reports Network Card TCP/IP IPv6 USB Menu Warnings Device Information Cartridge Information Device Information Page Count Installed Memory Processor Speed Serial Number Engine ID Loader Kernel Base Network Network Driver Engine Font Printer ... the Embedded Web Server, it is selected, the user will be prompted to see tray settings, the level of toner in the toner cartridge, the percentage of life remaining in the photoconductor kit, and capacity measurements of your Web browser. To access the device status: 1 Type...
...Other Job Data Media Sheet Count Paper Menu Reports Settings Network/Ports Reports Network Card TCP/IP IPv6 USB Menu Warnings Device Information Cartridge Information Device Information Page Count Installed Memory Processor Speed Serial Number Engine ID Loader Kernel Base Network Network Driver Engine Font Printer ... the Embedded Web Server, it is selected, the user will be prompted to see tray settings, the level of toner in the toner cartridge, the percentage of life remaining in the photoconductor kit, and capacity measurements of your Web browser. To access the device status: 1 Type...

User's Guide
Page 117
... pages print. 5 Press the arrow buttons until Prt Quality Pgs appears, and then press . For more of the following : • Remove and reinstall the toner cartridge. • Remove and reinstall the photoconductor kit. Clipped images These are supported by the printer, the host computer, and the software program. Try one or...
... pages print. 5 Press the arrow buttons until Prt Quality Pgs appears, and then press . For more of the following : • Remove and reinstall the toner cartridge. • Remove and reinstall the photoconductor kit. Clipped images These are supported by the printer, the host computer, and the software program. Try one or...


