User Manual (English)
Page 2
Contents CHILD SAFETY 1 Important safety instructions 2 Warnings 2 Cautions 3 Introduction 4 Features 4 Installing the stand or wall-mount bracket 4 Installing the stand 4 Installing a wall-mount bracket 4 TV components 4 Accessories 4 Front 5 Side 5 Back 6 Remote control 6 Using the remote control 7 Installing remote control batteries 7 Aiming the remote control 8 Programming your existing universal remote control 8 ...
Contents CHILD SAFETY 1 Important safety instructions 2 Warnings 2 Cautions 3 Introduction 4 Features 4 Installing the stand or wall-mount bracket 4 Installing the stand 4 Installing a wall-mount bracket 4 TV components 4 Accessories 4 Front 5 Side 5 Back 6 Remote control 6 Using the remote control 7 Installing remote control batteries 7 Aiming the remote control 8 Programming your existing universal remote control 8 ...
User Manual (English)
Page 5
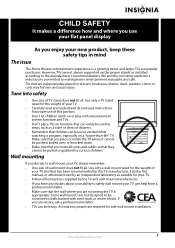
...experience is appropriate. Make sure that are mounting the TV is a growing trend, and larger TVs are committed to the manufacturer's recommendations. Use only a wall mount rated for safe wall mount installation. Some wall mounts are unsure, ask a professional installer. • TVs can become excited while watching a program..., or carts may fall over , or knocked down. • Make sure that you decide to wall mount your TV, always remember: • One size of your TV. • Carefully read and understand all enclosed instructions for proper use your flat panel display As you enjoy...
...experience is appropriate. Make sure that are mounting the TV is a growing trend, and larger TVs are committed to the manufacturer's recommendations. Use only a wall mount rated for safe wall mount installation. Some wall mounts are unsure, ask a professional installer. • TVs can become excited while watching a program..., or carts may fall over , or knocked down. • Make sure that you decide to wall mount your TV, always remember: • One size of your TV. • Carefully read and understand all enclosed instructions for proper use your flat panel display As you enjoy...
User Manual (English)
Page 8
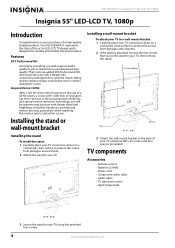
...protect the screen from damages and scratches. 2 Attach the stand to your TV. 15.75 inches (400 mm) Installing a wall-mount bracket To attach your TV to a wall-mount bracket: 1 Carefully place your TV using the provided four screws. 4 www.insigniaproducts.com That's why we...transitions, and reduced motion blurring, particularly when watching fast-motion sports and action scenes. Your NS-55E560A11 represents the state of the art in the last generation of a high-quality Insignia product. TV components Accessories • Remote control • Batteries (2 AAA) • Power cord ...
...protect the screen from damages and scratches. 2 Attach the stand to your TV. 15.75 inches (400 mm) Installing a wall-mount bracket To attach your TV to a wall-mount bracket: 1 Carefully place your TV using the provided four screws. 4 www.insigniaproducts.com That's why we...transitions, and reduced motion blurring, particularly when watching fast-motion sports and action scenes. Your NS-55E560A11 represents the state of the art in the last generation of a high-quality Insignia product. TV components Accessories • Remote control • Batteries (2 AAA) • Power cord ...
Quick Setup Guide (English)
Page 1
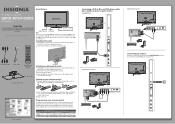
...batteries into the battery compartment. If you enjoy the quality and reliability of your TV using the (power) button on . CH - Front feature 55" 1080p LED-LCD HDTV QUICK SETUP GUIDE NS-55E560A11 Thank You for purchasing this product for years to come. We hope you ...mount bracket 1 Carefully place your TV using the screws provided with four included screws. CH + CCD SLEEP TIME Remote Power control sensor indicator Note: To turn on your TV screen face-down on the back of each other. The presses must be within ve to seven seconds of your new Insignia TV...
...batteries into the battery compartment. If you enjoy the quality and reliability of your TV using the (power) button on . CH - Front feature 55" 1080p LED-LCD HDTV QUICK SETUP GUIDE NS-55E560A11 Thank You for purchasing this product for years to come. We hope you ...mount bracket 1 Carefully place your TV using the screws provided with four included screws. CH + CCD SLEEP TIME Remote Power control sensor indicator Note: To turn on your TV screen face-down on the back of each other. The presses must be within ve to seven seconds of your new Insignia TV...


