
Manual
Page 9
... Tank, pressing down firmly until snapped in place. Press down firmly until snapped in place. 2.20 To replace Dirty Water Tank, place bottom of the motor will also collect on release button (G) and pull tank straight out. 2.16 Remove tank lid (H). Dry or loose debris will change. Reposition filter. 2.18 Replace...
... Tank, pressing down firmly until snapped in place. Press down firmly until snapped in place. 2.20 To replace Dirty Water Tank, place bottom of the motor will also collect on release button (G) and pull tank straight out. 2.16 Remove tank lid (H). Dry or loose debris will change. Reposition filter. 2.18 Replace...
Manual
Page 10
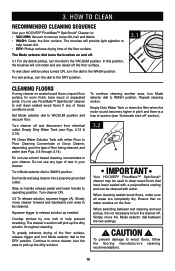
...to VACUUM position and vacuum floor. When cleaning sealed wood floors, make sure all areas are raised off " section). 3.2 A IMPORTANT Your HOOVER® FloorMate™ SpinScrub® cleaner may be used to operating position. The Mode selector dial turns the brushes on handle release pedal ...disconnect from electrical outlet. The cleaner's suction will pick up the dirty solution. Empty Dirty Water Tank or clean the filter when the motor sound becomes higher in your cleaner. When switching between the two settings. ! The brushes will not rotate and are completely dry. ...
...to VACUUM position and vacuum floor. When cleaning sealed wood floors, make sure all areas are raised off " section). 3.2 A IMPORTANT Your HOOVER® FloorMate™ SpinScrub® cleaner may be used to operating position. The Mode selector dial turns the brushes on handle release pedal ...disconnect from electrical outlet. The cleaner's suction will pick up the dirty solution. Empty Dirty Water Tank or clean the filter when the motor sound becomes higher in your cleaner. When switching between the two settings. ! The brushes will not rotate and are completely dry. ...
Manual
Page 12
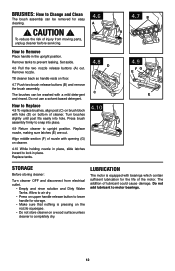
... buttons (A) out. Replace nozzle, making sure latches (E) are out. Align middle section (F) of nozzle with a mild detergent and rinsed. Lubrication The motor is equipped with hole (D) on cleaner. 4.10 While holding nozzle in place, slide latches inward to Remove Place handle in place. How to lock ...in the upright position. The brushes can be washed with opening (G) on bottom of the motor. Do not add lubricant to prevent leaking. Remove tanks to motor bearings. 12 Tilt cleaner back so handle rests on a wood surface unless cleaner is pressing on the nozzle ...
... buttons (A) out. Replace nozzle, making sure latches (E) are out. Align middle section (F) of nozzle with a mild detergent and rinsed. Lubrication The motor is equipped with hole (D) on cleaner. 4.10 While holding nozzle in place, slide latches inward to Remove Place handle in place. How to lock ...in the upright position. The brushes can be washed with opening (G) on bottom of the motor. Do not add lubricant to prevent leaking. Remove tanks to motor bearings. 12 Tilt cleaner back so handle rests on a wood surface unless cleaner is pressing on the nozzle ...


