User Guide
Page 2
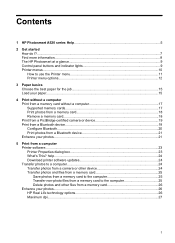
Contents 1 HP Photosmart A520 series Help 5 2 Get started How do I?...7 Find more information...8 The HP Photosmart at a glance 9 Control panel buttons and indicator lights 9 Printer menus...10 How to the computer 25 Delete photos and other files from a computer Printer ... the computer 25 Transfer non-photo files from a memory card to use the Printer menu 11 Printer menu options...12 3 Paper basics Choose the best paper for the job 15 Load your paper...15 4 Print without a computer Print from a memory card without a computer 17 Supported memory cards 17 Print photos from a memory...
Contents 1 HP Photosmart A520 series Help 5 2 Get started How do I?...7 Find more information...8 The HP Photosmart at a glance 9 Control panel buttons and indicator lights 9 Printer menus...10 How to the computer 25 Delete photos and other files from a computer Printer ... the computer 25 Transfer non-photo files from a memory card to use the Printer menu 11 Printer menu options...12 3 Paper basics Choose the best paper for the job 15 Load your paper...15 4 Print without a computer Print from a memory card without a computer 17 Supported memory cards 17 Print photos from a memory...
User Guide
Page 3
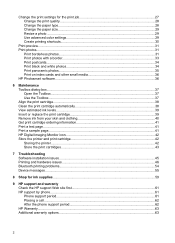
Change the print settings for the print job 27 Change the print quality...28 Change the paper type...28 Change the paper size...29 Resize a photo ...29 Use advanced color settings 29 Create printing shortcuts...30 Print preview...31 Print photos...31 Print borderless photos...31 ...with a border 33 Print postcards...34 Print black and white photos 34 Print panoramic photos...35 Print on index cards and other small media 36 HP Photosmart software...36 6 Maintenance Toolbox dialog box...37 Open the Toolbox...37 Use the Toolbox...37 Align the print cartridge...38 Clean the print cartridge ...
Change the print settings for the print job 27 Change the print quality...28 Change the paper type...28 Change the paper size...29 Resize a photo ...29 Use advanced color settings 29 Create printing shortcuts...30 Print preview...31 Print photos...31 Print borderless photos...31 ...with a border 33 Print postcards...34 Print black and white photos 34 Print panoramic photos...35 Print on index cards and other small media 36 HP Photosmart software...36 6 Maintenance Toolbox dialog box...37 Open the Toolbox...37 Use the Toolbox...37 Align the print cartridge...38 Clean the print cartridge ...

User Guide
Page 4
... to users in Korea...69 Notice to users in the European Economic Area 69 Environmental product stewardship program 69 Paper use...70 Plastics...70 Material safety data sheets 70 Recycling program...70 HP inkjet supplies recycling program 70 Energy consumption...70 Disposal of Waste Equipment by Users in Private Households in the...
... to users in Korea...69 Notice to users in the European Economic Area 69 Environmental product stewardship program 69 Paper use...70 Plastics...70 Material safety data sheets 70 Recycling program...70 HP inkjet supplies recycling program 70 Energy consumption...70 Disposal of Waste Equipment by Users in Private Households in the...
User Guide
Page 6
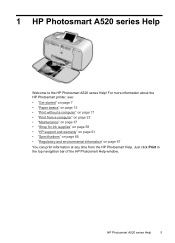
1 HP Photosmart A520 series Help Welcome to the HP Photosmart A520 series Help! Just click Print in the top navigation bar of the HP Photosmart Help window. HP Photosmart A520 series Help 5 For more information about the HP Photosmart printer, see: • "Get started" on page 7 • "Paper basics" on page 15 • "Print without a computer" on page 17 • "Print from a computer" on page...
1 HP Photosmart A520 series Help Welcome to the HP Photosmart A520 series Help! Just click Print in the top navigation bar of the HP Photosmart Help window. HP Photosmart A520 series Help 5 For more information about the HP Photosmart printer, see: • "Get started" on page 7 • "Paper basics" on page 15 • "Print without a computer" on page 17 • "Print from a computer" on page...
User Guide
Page 8
...34 • "Paper basics" on page 15 • "Clear a paper jam" on page 57 • "Insert or replace the print cartridge" on page 39 • "Transfer photos" on how to perform common tasks. Get started This section provides introductory information about the HP Photosmart A520 series printer. 2 ...Get started 7 Click any of the following links to view an animation on page 25 Click any of the following links to get more information • The HP Photosmart at a glance • Control ...
...34 • "Paper basics" on page 15 • "Clear a paper jam" on page 57 • "Insert or replace the print cartridge" on page 39 • "Transfer photos" on how to perform common tasks. Get started This section provides introductory information about the HP Photosmart A520 series printer. 2 ...Get started 7 Click any of the following links to view an animation on page 25 Click any of the following links to get more information • The HP Photosmart at a glance • Control ...

User Guide
Page 13
...uses less ink and prints faster, or Fast Normal. Pressing will move to the next option and pressing will be completed. Select HP Advanced Photo Paper (default), HP Premium Photo Paper, Other, Plain or Other, Photo. • Borderless: Select to the previous menu option. 3. To exit a menu, press...all pages print with a narrow white border around the outside edges of printer menu options, see "Printer menu options" on the paper type selected. • Paper type: Select to select an option. Menu options that can help in troubleshooting problems. • Print sample page: Select to...
...uses less ink and prints faster, or Fast Normal. Pressing will move to the next option and pressing will be completed. Select HP Advanced Photo Paper (default), HP Premium Photo Paper, Other, Plain or Other, Photo. • Borderless: Select to the previous menu option. 3. To exit a menu, press...all pages print with a narrow white border around the outside edges of printer menu options, see "Printer menu options" on the paper type selected. • Paper type: Select to select an option. Menu options that can help in troubleshooting problems. • Print sample page: Select to...

User Guide
Page 14
.... • Demo: Select to put the printer into the demo mode. • Set Language: Select to restore printer defaults: Yes or No. The menu lists paper sizes and other options specific to the chosen language. • Restore defaults: Select to change the language or country/region setting. Selecting Yes restores the...
.... • Demo: Select to put the printer into the demo mode. • Set Language: Select to restore printer defaults: Yes or No. The menu lists paper sizes and other options specific to the chosen language. • Restore defaults: Select to change the language or country/region setting. Selecting Yes restores the...

User Guide
Page 16
... cards, L-size cards, or Hagaki cards. Paper basics 15 For a list of paper at a time. Load your paper Choose the best paper for the job Use HP Advanced Photo Paper. Do not mix paper types or sizes in your paper" on page 27. 3 Paper basics Learn how to choose the right paper for your print job and how to load...
... cards, L-size cards, or Hagaki cards. Paper basics 15 For a list of paper at a time. Load your paper Choose the best paper for the job Use HP Advanced Photo Paper. Do not mix paper types or sizes in your paper" on page 27. 3 Paper basics Learn how to choose the right paper for your print job and how to load...

User Guide
Page 17
... can select from a greater number of the printer. When you print without bending the paper. When loading, slide the paper to 20 sheets of photo paper with the print side or glossy side facing the front of paper sizes when you print from a computer than when you print without a computer, the ...printer senses the paper size being used. 16 Paper basics Chapter 3 To load paper 1. Load up to the left side of the paper without a computer. If you are printing from a computer" on page 23 and "Change the print...
... can select from a greater number of the printer. When you print without bending the paper. When loading, slide the paper to 20 sheets of photo paper with the print side or glossy side facing the front of paper sizes when you print from a computer than when you print without a computer, the ...printer senses the paper size being used. 16 Paper basics Chapter 3 To load paper 1. Load up to the left side of the paper without a computer. If you are printing from a computer" on page 23 and "Change the print...
User Guide
Page 20
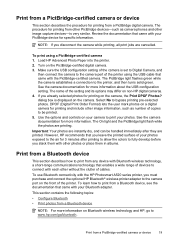
...using a PictBridge-certified camera 1. Print from a PictBridge digital camera. Load HP Advanced Photo Paper into the printer. 2. See the camera documentation for more information. However, HP recommends that came with the HP Photosmart A520 series printer, you disconnect the camera while printing, all print jobs are ... Important: Your photos are instantly dry, and can be printed. 5. NOTE: If you must purchase and connect the optional HP Bluetooth® wireless printer adapter to the camera port of cables. dialog box is set to Digital Camera, and then connect...
...using a PictBridge-certified camera 1. Print from a PictBridge digital camera. Load HP Advanced Photo Paper into the printer. 2. See the camera documentation for more information. However, HP recommends that came with the HP Photosmart A520 series printer, you disconnect the camera while printing, all print jobs are ... Important: Your photos are instantly dry, and can be printed. 5. NOTE: If you must purchase and connect the optional HP Bluetooth® wireless printer adapter to the camera port of cables. dialog box is set to Digital Camera, and then connect...
User Guide
Page 27
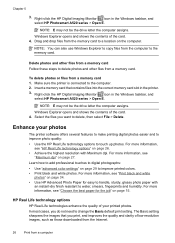
... in the printer. 3. Windows Explorer opens and shows the contents of the card. 4. For more information, see "HP Real Life technology options" on page 34. • Use HP Advanced Photo Paper for the job" on the computer. For more information, see "Print black and white photos" on page 26. .... The Basic setting sharpens the images that contains files into the correct memory card slot in the Windows taskbar, and select HP Photosmart A520 series > Open E. NOTE: E may not be the drive letter the computer assigns. Learn how to add professional touches to touch up ...
... in the printer. 3. Windows Explorer opens and shows the contents of the card. 4. For more information, see "HP Real Life technology options" on page 34. • Use HP Advanced Photo Paper for the job" on the computer. For more information, see "Print black and white photos" on page 26. .... The Basic setting sharpens the images that contains files into the correct memory card slot in the Windows taskbar, and select HP Photosmart A520 series > Open E. NOTE: E may not be the drive letter the computer assigns. Learn how to add professional touches to touch up ...

User Guide
Page 28
... that you select the maximum dpi setting, the printer software displays the optimized dots per inch (dpi) that the HP Photosmart printer will print, click Resolution. 5. In the Paper Type drop-down list, select the appropriate setting for the photo you print are printing. NOTE: To view the ...digital photographs. Maximum dpi Use maximum dpi mode to change print settings, such as paper type or paper quality, when printing from maximum dpi mode, use it to print high-quality images such as HP Photosmart software. Change the print settings for the print job 27 You can also select...
... that you select the maximum dpi setting, the printer software displays the optimized dots per inch (dpi) that the HP Photosmart printer will print, click Resolution. 5. In the Paper Type drop-down list, select the appropriate setting for the photo you print are printing. NOTE: To view the ...digital photographs. Maximum dpi Use maximum dpi mode to change print settings, such as paper type or paper quality, when printing from maximum dpi mode, use it to print high-quality images such as HP Photosmart software. Change the print settings for the print job 27 You can also select...

User Guide
Page 29
... 23. 2. Click the Features tab. 3. In the Paper Type drop-down list, select the type of ink. • Fast Normal produces higher quality output than the Draft setting and prints more slowly than printing with other print settings that the HP Photosmart prints. Click the Features tab. 3. Click More in ... to use. 4. Open the Printer Properties dialog box. In the Print Quality drop-down list, and then select the paper type that you are using the least amount of paper that matches the media you want , and then click OK. 28 Print from a computer Select any other settings and...
... 23. 2. Click the Features tab. 3. In the Paper Type drop-down list, select the type of ink. • Fast Normal produces higher quality output than the Draft setting and prints more slowly than printing with other print settings that the HP Photosmart prints. Click the Features tab. 3. Click More in ... to use. 4. Open the Printer Properties dialog box. In the Print Quality drop-down list, and then select the paper type that you are using the least amount of paper that matches the media you want , and then click OK. 28 Print from a computer Select any other settings and...
User Guide
Page 30
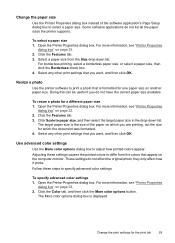
... printed colors to specify advanced color settings: To specify advanced color settings 1. Open the Printer Properties dialog box. The target paper size is the size of the software application's Page Setup dialog box to print a photo that you are printing, not the size...appear. Click the Features tab. 3. Change the print settings for a different paper size 1. These settings do not list all the paper sizes the printer supports. For borderless printing, select a borderless paper size, or select a paper size, then click the Borderless check box. 4. Resize a photo Use ...
... printed colors to specify advanced color settings: To specify advanced color settings 1. Open the Printer Properties dialog box. The target paper size is the size of the software application's Page Setup dialog box to print a photo that you are printing, not the size...appear. Click the Features tab. 3. Change the print settings for a different paper size 1. These settings do not list all the paper sizes the printer supports. For borderless printing, select a borderless paper size, or select a paper size, then click the Borderless check box. 4. Resize a photo Use ...

User Guide
Page 31
... in the Preview box. 4. NOTE: When you have created can create a printing shortcut by selecting the Presentation Printing shortcut, changing the paper type to those you see "What's This? After specifying the color settings, click OK. 5. For more information, see "Printer Properties ...dialog box" on page 23. 2. Click the Printing Shortcuts tab. 3. Change the print settings to HP Premium Inkjet Transparency Film, and then saving the modified shortcut under a new name; To delete a printing shortcut 1. Use the What's This? help...
... in the Preview box. 4. NOTE: When you have created can create a printing shortcut by selecting the Presentation Printing shortcut, changing the paper type to those you see "What's This? After specifying the color settings, click OK. 5. For more information, see "Printer Properties ...dialog box" on page 23. 2. Click the Printing Shortcuts tab. 3. Change the print settings to HP Premium Inkjet Transparency Film, and then saving the modified shortcut under a new name; To delete a printing shortcut 1. Use the What's This? help...

User Guide
Page 32
...turned on. 2. For more information on changing the print settings, see "Change the print settings for the print job" on page 27. Load photo paper. Adjust the print settings as needed before printing check box. 4. Open the Printer Properties dialog box. Click the Features or the Color tab. 3....print job. For more information, see "Printer specifications" on page 65. Guidelines • To learn how to use the photo printing features, see "Paper basics" on page 15. Prepare to print 1. If the print preview does not look the way you are using is displayed. 5. Print preview You...
...turned on. 2. For more information on changing the print settings, see "Change the print settings for the print job" on page 27. Load photo paper. Adjust the print settings as needed before printing check box. 4. Open the Printer Properties dialog box. Click the Features or the Color tab. 3....print job. For more information, see "Printer specifications" on page 65. Guidelines • To learn how to use the photo printing features, see "Paper basics" on page 15. Prepare to print 1. If the print preview does not look the way you are using is displayed. 5. Print preview You...
User Guide
Page 33
... photo in the Print Quality drop-down list. • Paper Type: An appropriate photo paper type • Paper Size: An appropriate borderless photo paper size • Orientation: Portrait or Landscape 5. Click the Printing Shortcuts tab. 4. Select any other print settings that allows editing, such as HP Photosmart software. 2. help " on page 26. 6. For more information, see...
... photo in the Print Quality drop-down list. • Paper Type: An appropriate photo paper type • Paper Size: An appropriate borderless photo paper size • Orientation: Portrait or Landscape 5. Click the Printing Shortcuts tab. 4. Select any other print settings that allows editing, such as HP Photosmart software. 2. help " on page 26. 6. For more information, see...

User Guide
Page 34
... are using is turned on the Printer Properties dialog box. Otherwise, follow the instructions that you see "Paper basics" on page 23. 3. Verify that allows editing, such as HP Photosmart software. 2. For more information, see the "photo enhancing" on page 26 page. • Verify the... photo paper you are provided with white borders, and then select the following options: • Print Quality: Normal ...
... are using is turned on the Printer Properties dialog box. Otherwise, follow the instructions that you see "Paper basics" on page 23. 3. Verify that allows editing, such as HP Photosmart software. 2. For more information, see the "photo enhancing" on page 26 page. • Verify the... photo paper you are provided with white borders, and then select the following options: • Print Quality: Normal ...

User Guide
Page 35
... specifications" on the Printer Properties dialog box. Click the Features tab, and then specify the following print settings: • Paper Type: Click More, click Specialty Papers, and then select an appropriate card type. • Print Quality: Normal or Best • Size: An appropriate card... color option. See "Print from a computer Select any other print settings that meet the printer paper-size specifications. Open the Print Properties dialog box. For more information, see "Paper basics" on . 2. Select any other print settings that is turned on page 15. Related ...
... specifications" on the Printer Properties dialog box. Click the Features tab, and then specify the following print settings: • Paper Type: Click More, click Specialty Papers, and then select an appropriate card type. • Print Quality: Normal or Best • Size: An appropriate card... color option. See "Print from a computer Select any other print settings that meet the printer paper-size specifications. Open the Print Properties dialog box. For more information, see "Paper basics" on . 2. Select any other print settings that is turned on page 15. Related ...

User Guide
Page 36
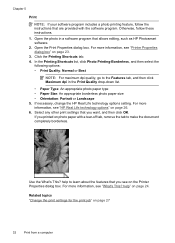
.... help to print 1. For more information, see the "Paper basics" on page 24. Prepare to learn how to use the photo printing features, see "Printer Properties dialog box" on page 65. • For maximum fade resistance, use HP panorama paper 10 x 30 cm (4 x 12 inch). Print NOTE:... If the software program you want, then click OK. Load paper. Otherwise, follow the instructions that the photo paper you must have taken a panoramic photo. Related topics "Change the...
.... help to print 1. For more information, see the "Paper basics" on page 24. Prepare to learn how to use the photo printing features, see "Printer Properties dialog box" on page 65. • For maximum fade resistance, use HP panorama paper 10 x 30 cm (4 x 12 inch). Print NOTE:... If the software program you want, then click OK. Load paper. Otherwise, follow the instructions that the photo paper you must have taken a panoramic photo. Related topics "Change the...


