
HP Photosmart 912 digital camera - (English) User Guide
Page 3
Table of Contents HP 912 Digital Camera User's Guide Chapter 1: Introduction ...5 Product Overview ...5 What's in this Guide ...6 How to Use this Guide ...7 Related Information ...7 Chapter 2: Preparing to Take Pictures ...8 Accessing the Capture Mode and Powering on the Camera 8 Setting the Exposure Mode ...29 Understanding the Viewfinder LCD ...30 Understanding the LEDs on the Camera ...32 Using Instant Review ...33 Recording Sound ...34 Chapter 4: Viewing and Reviewing Images ...35 Using Playback Mode ...35 Using Review Mode ...38 Chapter 5: Sharing Images ...46 Transferring Images to Your...
Table of Contents HP 912 Digital Camera User's Guide Chapter 1: Introduction ...5 Product Overview ...5 What's in this Guide ...6 How to Use this Guide ...7 Related Information ...7 Chapter 2: Preparing to Take Pictures ...8 Accessing the Capture Mode and Powering on the Camera 8 Setting the Exposure Mode ...29 Understanding the Viewfinder LCD ...30 Understanding the LEDs on the Camera ...32 Using Instant Review ...33 Recording Sound ...34 Chapter 4: Viewing and Reviewing Images ...35 Using Playback Mode ...35 Using Review Mode ...38 Chapter 5: Sharing Images ...46 Transferring Images to Your...
HP Photosmart 912 digital camera - (English) User Guide
Page 4
HP 912 Digital Camera User's Guide Chapter 6: Menu and Soft Key Reference ...60 Capture Mode Menus and Soft Keys ...60 Playback Mode Menu and Soft Keys ...82 Review Mode Menus and Soft Keys ...87 Chapter 7: Troubleshooting ...97 Troubleshooting Common Problems ...97 Contacting HP Customer Care ...102 Appendix A: Using the Preferences Menu ...103 Accessing the Preferences Menu...
HP 912 Digital Camera User's Guide Chapter 6: Menu and Soft Key Reference ...60 Capture Mode Menus and Soft Keys ...60 Playback Mode Menu and Soft Keys ...82 Review Mode Menus and Soft Keys ...87 Chapter 7: Troubleshooting ...97 Troubleshooting Common Problems ...97 Contacting HP Customer Care ...102 Appendix A: Using the Preferences Menu ...103 Accessing the Preferences Menu...
HP Photosmart 912 digital camera - (English) User Guide
Page 5
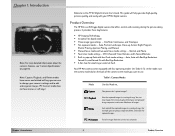
...to a computer. For example, you can group, categorize, delete, and search for attaching an external flash Your HP 912 camera comes equipped with your camera's settings and to edit and organize images. (PC Connect mode does not have menus and related soft keys you...camera to the mode you want to use to change your HP 912 digital camera. Chapter 1: Introduction Note: For more detailed information about the camera's features, see Table 1). Note: Capture, Playback, and Review modes have menus or soft keys.) Welcome to the HP 912 Digital Camera User's Guide. Capture Playback Review...
...to a computer. For example, you can group, categorize, delete, and search for attaching an external flash Your HP 912 camera comes equipped with your camera's settings and to edit and organize images. (PC Connect mode does not have menus and related soft keys you...camera to the mode you want to use to change your HP 912 digital camera. Chapter 1: Introduction Note: For more detailed information about the camera's features, see Table 1). Note: Capture, Playback, and Review modes have menus or soft keys.) Welcome to the HP 912 Digital Camera User's Guide. Capture Playback Review...

HP Photosmart 912 digital camera - (English) User Guide
Page 6
... of images in Playback mode. "Appendix C: Product Warranties" Limited product warranty and the HP Year 2000 warranty for the camera, as well as more advanced pictures. "Chapter 4: Viewing and Reviewing Images" How to view images full screen, play back timelapse and grouped image sequences, and...LCD, and Capture mode menus to prepare your camera to take simple point-and-shoot pictures, as well as information about your camera that the camera supports. Also how to contact HP Customer Care for images in this guide. 6 What's in Review mode. "Appendix A: Using the Preferences Menu...
... of images in Playback mode. "Appendix C: Product Warranties" Limited product warranty and the HP Year 2000 warranty for the camera, as well as more advanced pictures. "Chapter 4: Viewing and Reviewing Images" How to view images full screen, play back timelapse and grouped image sequences, and...LCD, and Capture mode menus to prepare your camera to take simple point-and-shoot pictures, as well as information about your camera that the camera supports. Also how to contact HP Customer Care for images in this guide. 6 What's in Review mode. "Appendix A: Using the Preferences Menu...

HP Photosmart 912 digital camera - (English) User Guide
Page 13
.... The default image type is full. Figure 4: Status LCD Buttons Note: The status LCD buttons are inactive when the camera is in a menu, in Instant Review (see the desired icon or set the number of images that will be captured and the interval between them in the ...status LCD to Take Pictures 13 Using the Status LCD Press and release the shutter release button, and the camera captures the first image. Chapter 2: Preparing to toggle through the associated camera settings within the status LCD. Continuous Timelapse When capturing a series of images in Table 2. Then it ...
.... The default image type is full. Figure 4: Status LCD Buttons Note: The status LCD buttons are inactive when the camera is in a menu, in Instant Review (see the desired icon or set the number of images that will be captured and the interval between them in the ...status LCD to Take Pictures 13 Using the Status LCD Press and release the shutter release button, and the camera captures the first image. Chapter 2: Preparing to toggle through the associated camera settings within the status LCD. Continuous Timelapse When capturing a series of images in Table 2. Then it ...

HP Photosmart 912 digital camera - (English) User Guide
Page 17
... left and right in the Capture, Playback, and Review mode menus, as well as through images in the opposite direction. Its functionality changes depending on the exposure mode you press and hold down the +/- /Av button on the front of the camera (see Figure 9). It also performs exposure compensation when.../Av button, the sub-dial changes the aperture setting. Š All other exposure modes − The sub-dial is located on the back of the camera (see Figure 10). Š Shutter Priority − Rotating the sub-dial changes the shutter speed by one stop . You can also use the sub-...
... left and right in the Capture, Playback, and Review mode menus, as well as through images in the opposite direction. Its functionality changes depending on the exposure mode you press and hold down the +/- /Av button on the front of the camera (see Figure 9). It also performs exposure compensation when.../Av button, the sub-dial changes the aperture setting. Š All other exposure modes − The sub-dial is located on the back of the camera (see Figure 10). Š Shutter Priority − Rotating the sub-dial changes the shutter speed by one stop . You can also use the sub-...
HP Photosmart 912 digital camera - (English) User Guide
Page 19
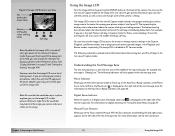
... side of the top overlay bar. Manual Focus Distance When you are taking pictures. If you set either the exposure mode to take with the HP-approved AC power adapter, you may leak into the image you can take pictures. To turn on instead, you capture and cause a flare on page.... Without it, light from the viewfinder may want the image LCD to always turn the overlay bars off when you can change camera settings in the Capture, Playback, and Review modes, and to Take Pictures 19 Using the Image LCD Figure 12: Image LCD Screen in Live View Top overlay bar shows...
... side of the top overlay bar. Manual Focus Distance When you are taking pictures. If you set either the exposure mode to take with the HP-approved AC power adapter, you may leak into the image you can take pictures. To turn on instead, you capture and cause a flare on page.... Without it, light from the viewfinder may want the image LCD to always turn the overlay bars off when you can change camera settings in the Capture, Playback, and Review modes, and to Take Pictures 19 Using the Image LCD Figure 12: Image LCD Screen in Live View Top overlay bar shows...

HP Photosmart 912 digital camera - (English) User Guide
Page 22
... Parts of a Menu Menu icons Current menu's title Overlay bar Soft keys Menu options Figure 15: 4-Way Controller Using the Capture Mode Menus Your camera has four Capture mode menus: Š Capture Settings Š Photo Assist Š Image Stamp Š Preferences The Capture Settings, Photo Assist, and Image.... Using the 4-Way Controller The 4-way controller is the large button located on the back of the Capture, Review, or Playback modes. To access the Capture mode menus: 1 Set the camera mode dial to Capture mode . 2 Power on the 4-way controller to Take Pictures 22 Using the Image LCD...
... Parts of a Menu Menu icons Current menu's title Overlay bar Soft keys Menu options Figure 15: 4-Way Controller Using the Capture Mode Menus Your camera has four Capture mode menus: Š Capture Settings Š Photo Assist Š Image Stamp Š Preferences The Capture Settings, Photo Assist, and Image.... Using the 4-Way Controller The 4-way controller is the large button located on the back of the Capture, Review, or Playback modes. To access the Capture mode menus: 1 Set the camera mode dial to Capture mode . 2 Power on the 4-way controller to Take Pictures 22 Using the Image LCD...

HP Photosmart 912 digital camera - (English) User Guide
Page 23
...; "Using the Diopter Control" on page 29 Š "Understanding the Viewfinder LCD" on page 30 Š "Understanding the LEDs on the Camera" on page 32 Š "Using Instant Review" on page 33 Š "Recording Sound" on page 34 Taking Simple Point-and-Shoot Pictures Here is important to understand how to...ring, what the indicators in the viewfinder LCD mean, what the various LEDs mean when they light solid or blink, how to use Instant Review, and how to use your camera's status LCD and image LCD (see "Chapter 2: Preparing to use the sound recording features when taking pictures with your...
...; "Using the Diopter Control" on page 29 Š "Understanding the Viewfinder LCD" on page 30 Š "Understanding the LEDs on the Camera" on page 32 Š "Using Instant Review" on page 33 Š "Recording Sound" on page 34 Taking Simple Point-and-Shoot Pictures Here is important to understand how to...ring, what the indicators in the viewfinder LCD mean, what the various LEDs mean when they light solid or blink, how to use Instant Review, and how to use your camera's status LCD and image LCD (see "Chapter 2: Preparing to use the sound recording features when taking pictures with your...
HP Photosmart 912 digital camera - (English) User Guide
Page 24
...Review by pressing the middle (Delete) soft key. Note: Anytime you use . (For information on the exposure modes, see "Setting the Exposure Mode" on page 9.) 5 Set the image type, timer mode, auto focus area, and/or flash mode via your camera...picture. 6 Press the shutter release button. Here is the general procedure for your camera has more information, see "Using the Status LCD Buttons" on page 13.) The...camera if you haven't already. 3 Remove the lens cap and, if you will be saved on the image LCD, if you want to use either the image LCD, the 10-Second Timer mode, or the HP...
...Review by pressing the middle (Delete) soft key. Note: Anytime you use . (For information on the exposure modes, see "Setting the Exposure Mode" on page 9.) 5 Set the image type, timer mode, auto focus area, and/or flash mode via your camera...picture. 6 Press the shutter release button. Here is the general procedure for your camera has more information, see "Using the Status LCD Buttons" on page 13.) The...camera if you haven't already. 3 Remove the lens cap and, if you will be saved on the image LCD, if you want to use either the image LCD, the 10-Second Timer mode, or the HP...
HP Photosmart 912 digital camera - (English) User Guide
Page 26
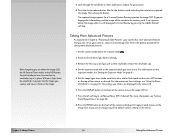
...; Record sound that will be attached to this , see "Recording Sound" on the front of the camera (see page 32) lights solid for 3 seconds. If Instant Review is on (see "Using Instant Review" on page 33), you can do this image. Chapter 3: Taking Pictures 26 Taking More Advanced Pictures ...with no timer mode set the Remote timer mode, the camera immediately captures the image. Wait for the final 3 seconds before the camera captures the image. Š Remote or 3-Second Remote timer mode, point the HP Remote Control at the camera, and press and release the Remote Control's trigger button....
...; Record sound that will be attached to this , see "Recording Sound" on the front of the camera (see page 32) lights solid for 3 seconds. If Instant Review is on (see "Using Instant Review" on page 33), you can do this image. Chapter 3: Taking Pictures 26 Taking More Advanced Pictures ...with no timer mode set the Remote timer mode, the camera immediately captures the image. Wait for the final 3 seconds before the camera captures the image. Š Remote or 3-Second Remote timer mode, point the HP Remote Control at the camera, and press and release the Remote Control's trigger button....
HP Photosmart 912 digital camera - (English) User Guide
Page 27
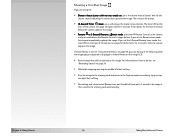
... vary depending on the processing required (for such things as well. The camera then begins to capture the images in the Continuous sequence. Š Remote timer mode, point the HP Remote Control at the end of taking a Continuous sequence of images, the final image of the other images within a ...soft key. (All of the other images in the sequence were already saved to the memory card.) Š Save the final image of the camera, turn Instant Review off , each image is being charged between pictures will capture images as fast as individual images on the image LCD. If Instant...
... vary depending on the processing required (for such things as well. The camera then begins to capture the images in the Continuous sequence. Š Remote timer mode, point the HP Remote Control at the end of taking a Continuous sequence of images, the final image of the other images within a ...soft key. (All of the other images in the sequence were already saved to the memory card.) Š Save the final image of the camera, turn Instant Review off , each image is being charged between pictures will capture images as fast as individual images on the image LCD. If Instant...

HP Photosmart 912 digital camera - (English) User Guide
Page 28
...as the viewfinder LCD and the camera's LEDs). Then the camera captures the first image of the Timelapse sequence. Š Remote or 3-Second Remote timer mode, point the HP Remote Control at the end of taking pictures (such as one time. If Instant Review is disabled for 3 seconds.... Note: If you are then saved to the next image capture. at the camera, and press and release the Remote Control's...
...as the viewfinder LCD and the camera's LEDs). Then the camera captures the first image of the Timelapse sequence. Š Remote or 3-Second Remote timer mode, point the HP Remote Control at the end of taking pictures (such as one time. If Instant Review is disabled for 3 seconds.... Note: If you are then saved to the next image capture. at the camera, and press and release the Remote Control's...

HP Photosmart 912 digital camera - (English) User Guide
Page 33
Note: When Instant Review is set to Off, the camera immediately returns to ...Capture mode, and the captured image or sequence of a Timelapse sequence you just captured. Note: If you are unhappy with one or more images within a Continuous sequence (rather than deleting all of the images in a Timelapse sequence will be saved. Š Do nothing and, when Instant Review...the Capture mode immediately by pressing the middle (Delete) soft key. Using Instant Review The Instant Review feature allows you will be prompted Delete? When you press the Delete soft key...
Note: When Instant Review is set to Off, the camera immediately returns to ...Capture mode, and the captured image or sequence of a Timelapse sequence you just captured. Note: If you are unhappy with one or more images within a Continuous sequence (rather than deleting all of the images in a Timelapse sequence will be saved. Š Do nothing and, when Instant Review...the Capture mode immediately by pressing the middle (Delete) soft key. Using Instant Review The Instant Review feature allows you will be prompted Delete? When you press the Delete soft key...

HP Photosmart 912 digital camera - (English) User Guide
Page 34
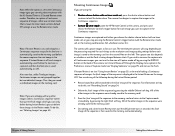
Figure 22: Screen During Sound Recording Note: You can record sound to attach to your images when your camera is in Capture mode and has Instant Review set the camera to either Playback or Review mode. Recording Sound You can also record sound to attach to a One Shot image, any of images. During the Instant... Review period, the camera records the sound and then attaches it to either the image(s) and the sound, or to delete the sound only. Š Press the right (Exit) ...
Figure 22: Screen During Sound Recording Note: You can record sound to attach to your images when your camera is in Capture mode and has Instant Review set the camera to either Playback or Review mode. Recording Sound You can also record sound to attach to a One Shot image, any of images. During the Instant... Review period, the camera records the sound and then attaches it to either the image(s) and the sound, or to delete the sound only. Š Press the right (Exit) ...

HP Photosmart 912 digital camera - (English) User Guide
Page 35
...Overview This chapter explains how to view captured images via the Playback mode and how to Playback mode . 2 Power on the camera if you haven't already. Chapter 4: Viewing and Reviewing Images 35 Using Playback Mode This chapter covers the following topics: Š "Using Playback Mode" on page 35 Š ...page 43 Š "Searching for Images by Date and by Category" on page 44 Using Playback Mode Note: You cannot delete images while in Review mode, however. (See "Deleting Images" on the image LCD. You can delete images in Playback mode. The Playback mode screen is displayed on...
...Overview This chapter explains how to view captured images via the Playback mode and how to Playback mode . 2 Power on the camera if you haven't already. Chapter 4: Viewing and Reviewing Images 35 Using Playback Mode This chapter covers the following topics: Š "Using Playback Mode" on page 35 Š ...page 43 Š "Searching for Images by Date and by Category" on page 44 Using Playback Mode Note: You cannot delete images while in Review mode, however. (See "Deleting Images" on the image LCD. You can delete images in Playback mode. The Playback mode screen is displayed on...

HP Photosmart 912 digital camera - (English) User Guide
Page 36
... zoom out by pressing the middle (Zoom Out) soft key before moving to stop playing back your images. 36 Using Playback Mode Chapter 4: Viewing and Reviewing Images Viewing Images Full Screen When you have attached to them, will play back. 2 Press the left (Stop) soft key to a different image. ... play back sequences of the Play Settings menu. To view a full screen image of an image in more information, see different parts of the camera once to turn both the top and bottom overlay bars are zoomed in, you are displayed in Playback mode. The bottom overlay bar contains the...
... zoom out by pressing the middle (Zoom Out) soft key before moving to stop playing back your images. 36 Using Playback Mode Chapter 4: Viewing and Reviewing Images Viewing Images Full Screen When you have attached to them, will play back. 2 Press the left (Stop) soft key to a different image. ... play back sequences of the Play Settings menu. To view a full screen image of an image in more information, see different parts of the camera once to turn both the top and bottom overlay bars are zoomed in, you are displayed in Playback mode. The bottom overlay bar contains the...

HP Photosmart 912 digital camera - (English) User Guide
Page 37
... save the settings and exit the Slideshow menu. Chapter 4: Viewing and Reviewing Images 37 Using Playback Mode For more information on: Š Categories, see "Connecting the Camera to display your camera to a television so that you can choose a single category of the camera. Your slideshow can include all of the images on the memory...
... save the settings and exit the Slideshow menu. Chapter 4: Viewing and Reviewing Images 37 Using Playback Mode For more information on: Š Categories, see "Connecting the Camera to display your camera to a television so that you can choose a single category of the camera. Your slideshow can include all of the images on the memory...

HP Photosmart 912 digital camera - (English) User Guide
Page 38
...image was transmitted to select. Figure 23: Image LCD Screen in Review Mode Thumbnails Selection marker Selected image Image information Soft key labels Using Review Mode Accessing the Review Mode To access the Review mode: 1 Set the camera mode dial to the selected image. The selected image is a...The image LCD displays the images that you want to this camera from another camera, and the other camera had a camera name assigned, then the camera name is now displayed as a category icon if a category has been assigned to Review mode . 2 Power on the bottom right of the screen...
...image was transmitted to select. Figure 23: Image LCD Screen in Review Mode Thumbnails Selection marker Selected image Image information Soft key labels Using Review Mode Accessing the Review Mode To access the Review mode: 1 Set the camera mode dial to the selected image. The selected image is a...The image LCD displays the images that you want to this camera from another camera, and the other camera had a camera name assigned, then the camera name is now displayed as a category icon if a category has been assigned to Review mode . 2 Power on the bottom right of the screen...

HP Photosmart 912 digital camera - (English) User Guide
Page 39
... the left (Mark) soft key. Figure 24: A Marked Image A notch indicates a marked image Figure 25: An Expanded Group Chapter 4: Viewing and Reviewing Images Marking and Unmarking Images You can mark several images and delete them all at a time. To unmark an image, scroll to the marked image... Unmark) soft key for 3 seconds, and then release it. Expanding and Collapsing Timelapse or Grouped Images When you take Timelapse pictures, the camera takes a sequence of pictures and automatically groups the captured images, using the Group menu option of all the marked images. To expand Timelapse ...
... the left (Mark) soft key. Figure 24: A Marked Image A notch indicates a marked image Figure 25: An Expanded Group Chapter 4: Viewing and Reviewing Images Marking and Unmarking Images You can mark several images and delete them all at a time. To unmark an image, scroll to the marked image... Unmark) soft key for 3 seconds, and then release it. Expanding and Collapsing Timelapse or Grouped Images When you take Timelapse pictures, the camera takes a sequence of pictures and automatically groups the captured images, using the Group menu option of all the marked images. To expand Timelapse ...


