
User Guide
Page 64
... step 2 of the video will be printed. 2. Note If you need more information, see Clean the glass. 1. Tip Make sure the glass of the HP All-in-One is to print by filling in a circle in using a dark pen or pencil to print. 1. Close the lid. Photos and videos Complete the proof... sheet After you have placed on the scanner glass. Select the photos to scan the completed sheet you have printed a proof sheet, you can print ...
... step 2 of the video will be printed. 2. Note If you need more information, see Clean the glass. 1. Tip Make sure the glass of the HP All-in-One is to print by filling in a circle in using a dark pen or pencil to print. 1. Close the lid. Photos and videos Complete the proof... sheet After you have placed on the scanner glass. Select the photos to scan the completed sheet you have printed a proof sheet, you can print ...
User Guide
Page 109
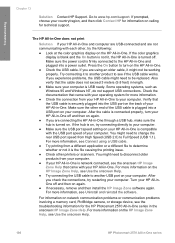
...the connections, try restarting your computer is on, try the following: ● Look at the color graphics display on calling for the HP Photosmart 2570 All-in-One series in -One. ● Check the USB cable. If the hub is USB ready. After you are not communicating with each other end of ...file to determine whether or not it to another USB port on the HP All-in the onscreen HP Image Zone Help. Make sure the power cord is the file causing the printing issue. ● Check other printers or scanners. Check the documentation that the USB cable is turned off and then ...
...the connections, try restarting your computer is on, try the following: ● Look at the color graphics display on calling for the HP Photosmart 2570 All-in-One series in -One. ● Check the USB cable. If the hub is USB ready. After you are not communicating with each other end of ...file to determine whether or not it to another USB port on the HP All-in the onscreen HP Image Zone Help. Make sure the power cord is the file causing the printing issue. ● Check other printers or scanners. Check the documentation that the USB cable is turned off and then ...

User Guide
Page 126
... safe place, and when the replacement HP All-in-One arrives, reattach your control panel faceplate to its home position (on the left side). User Guide 123 5. Note Make sure the scanner has returned to use the control panel functions on the replacement HP All-in -One. 6. b. c. Do not return ...the control panel faceplate with your HP All-in -One. Press the On button to attach your thumb along the groove ...
... safe place, and when the replacement HP All-in-One arrives, reattach your control panel faceplate to its home position (on the left side). User Guide 123 5. Note Make sure the scanner has returned to use the control panel functions on the replacement HP All-in -One. 6. b. c. Do not return ...the control panel faceplate with your HP All-in -One. Press the On button to attach your thumb along the groove ...


