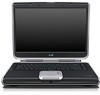
Using LightScribe (Select Models Only)
Page 5
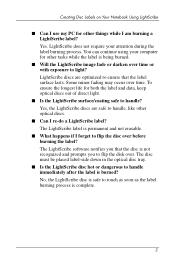
... touch as soon as the label burning process is burned? Some minor fading may occur over time. Creating Disc Labels on Your Notebook Using LightScribe ■ Can I use my PC for both the label and data, keep optical discs out of direct light. ■ Is the LightScribe surface/coating safe to flip...
... touch as soon as the label burning process is burned? Some minor fading may occur over time. Creating Disc Labels on Your Notebook Using LightScribe ■ Can I use my PC for both the label and data, keep optical discs out of direct light. ■ Is the LightScribe surface/coating safe to flip...
Using LightScribe (Select Models Only)
Page 6
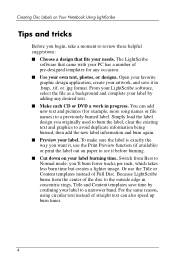
...text instead of the disc to the outside edge in concentric rings, Title and Content templates save it before burning. ■ Cut down on Your Notebook Using LightScribe Tips and tricks Before you begin, take a moment to review these helpful suggestions: ■ Choose a design that came with your... PC has a number of pre-designed templates for example, more song names or file names) to avoid duplicate information being burned, then add the new ...
...text instead of the disc to the outside edge in concentric rings, Title and Content templates save it before burning. ■ Cut down on Your Notebook Using LightScribe Tips and tricks Before you begin, take a moment to review these helpful suggestions: ■ Choose a design that came with your... PC has a number of pre-designed templates for example, more song names or file names) to avoid duplicate information being burned, then add the new ...
Using LightScribe (Select Models Only)
Page 7
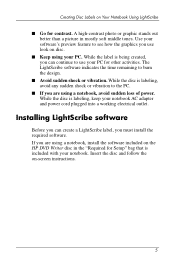
... on disc. ■ Keep using a notebook, install the software included on the HP DVD Writer disc in mostly soft middle tones. While the disc is being created, you are using your notebook. Installing LightScribe software Before you can continue to the PC. ■ If you can create a ...LightScribe label, you are using a notebook, avoid sudden loss...
... on disc. ■ Keep using a notebook, install the software included on the HP DVD Writer disc in mostly soft middle tones. While the disc is being created, you are using your notebook. Installing LightScribe software Before you can continue to the PC. ■ If you can create a ...LightScribe label, you are using a notebook, avoid sudden loss...
Using LightScribe (Select Models Only)
Page 10
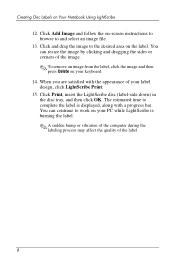
When you are satisfied with the appearance of your PC while LightScribe is displayed, along with a progress bar. Click Add Image and follow the on your keyboard. 14. You can resize the image by clicking ...; To remove an image from the label, click the image and then press Delete on -screen instructions to browse to the desired area on Your Notebook Using LightScribe 12. Creating Disc Labels on the label. Click and drag the image to and select an image file. 13.
When you are satisfied with the appearance of your PC while LightScribe is displayed, along with a progress bar. Click Add Image and follow the on your keyboard. 14. You can resize the image by clicking ...; To remove an image from the label, click the image and then press Delete on -screen instructions to browse to the desired area on Your Notebook Using LightScribe 12. Creating Disc Labels on the label. Click and drag the image to and select an image file. 13.
Using LightScribe (Select Models Only)
Page 11
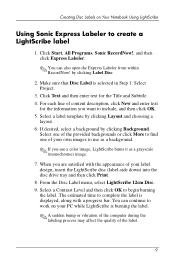
Creating Disc Labels on your PC while LightScribe is burning the label. ✎ A sudden bump or vibration of the computer during the labeling process may affect the quality of your label ... desired, select a background by clicking Background. Click Start, All Programs, Sonic RecordNow!, and then click Express Labeler. ✎ You can continue to work on Your Notebook Using LightScribe Using Sonic Express Labeler to find one of the provided backgrounds or click More to create a LightScribe label 1. From the Disc Label menu...
Creating Disc Labels on your PC while LightScribe is burning the label. ✎ A sudden bump or vibration of the computer during the labeling process may affect the quality of your label ... desired, select a background by clicking Background. Click Start, All Programs, Sonic RecordNow!, and then click Express Labeler. ✎ You can continue to work on Your Notebook Using LightScribe Using Sonic Express Labeler to find one of the provided backgrounds or click More to create a LightScribe label 1. From the Disc Label menu...
Using LightScribe (Select Models Only)
Page 13
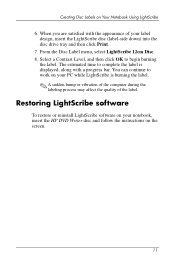
... or vibration of the computer during the labeling process may affect the quality of your notebook, insert the HP DVD Writer disc and follow the instructions on Your Notebook Using LightScribe 6. You can continue to work on your PC while LightScribe is displayed, along with the appearance of the label. Restoring LightScribe software To...
... or vibration of the computer during the labeling process may affect the quality of your notebook, insert the HP DVD Writer disc and follow the instructions on Your Notebook Using LightScribe 6. You can continue to work on your PC while LightScribe is displayed, along with the appearance of the label. Restoring LightScribe software To...
Hardware and Software Guide
Page 35
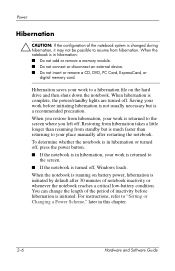
...to your work to the screen where you restore from hibernation, your work is turned off , press the power button. ■ If the notebook is in hibernation: ■ Do not add or remove a memory module. ■ Do not connect or disconnect an external device. ■... Do not insert or remove a CD, DVD, PC Card, ExpressCard, or digital memory card. When the notebook is initiated by default after restarting the notebook. You can change the length of the period of notebook inactivity or whenever the notebook reaches a critical low-battery condition. When you left off ...
...to your work to the screen where you restore from hibernation, your work is turned off , press the power button. ■ If the notebook is in hibernation: ■ Do not add or remove a memory module. ■ Do not connect or disconnect an external device. ■... Do not insert or remove a CD, DVD, PC Card, ExpressCard, or digital memory card. When the notebook is initiated by default after restarting the notebook. You can change the length of the period of notebook inactivity or whenever the notebook reaches a critical low-battery condition. When you left off ...
Hardware and Software Guide
Page 57
...you leave your work : ■ Run the notebook on external power instead of a battery pack whenever possible. ■ Prevent devices you are not plugged into an external power source. ❏ Stop, disable, or remove an inserted ◆ PC Card. ◆ Digital memory card (select ...models only). ◆ ExpressCard (select models only). ❏ Turn off wireless and local area network (LAN) connections (select models only) and close modem applications. ❏ Disconnect from the notebook any external devices that ...
...you leave your work : ■ Run the notebook on external power instead of a battery pack whenever possible. ■ Prevent devices you are not plugged into an external power source. ❏ Stop, disable, or remove an inserted ◆ PC Card. ◆ Digital memory card (select ...models only). ◆ ExpressCard (select models only). ❏ Turn off wireless and local area network (LAN) connections (select models only) and close modem applications. ❏ Disconnect from the notebook any external devices that ...
Hardware and Software Guide
Page 106
...designed to conform to the notebook. The notebook PC Card slot can be used to store an optional remote control. If you are instructed by a single PC Card manufacturer. PC Cards can also be supplied by the PC Card manufacturer. Hardware and Software Guide 6-1 The notebook PC Card slot supports one Type... I or Type II 32-bit (CardBus) or 16-bit PC Card. For instructions, refer to the ...
...designed to conform to the notebook. The notebook PC Card slot can be used to store an optional remote control. If you are instructed by a single PC Card manufacturer. PC Cards can also be supplied by the PC Card manufacturer. Hardware and Software Guide 6-1 The notebook PC Card slot supports one Type... I or Type II 32-bit (CardBus) or 16-bit PC Card. For instructions, refer to the ...

Hardware and Software Guide
Page 107
... may need to press the button once to extend the button, and then press the button again to the PC Card connectors: ■ Use minimal force when inserting a PC Card into a PC Card slot. ■ Do not move or transport the notebook while a PC Card is inserted. As shipped, the PC Card slot contains a protective insert.
... may need to press the button once to extend the button, and then press the button again to the PC Card connectors: ■ Use minimal force when inserting a PC Card into a PC Card slot. ■ Do not move or transport the notebook while a PC Card is inserted. As shipped, the PC Card slot contains a protective insert.

Hardware and Software Guide
Page 108
Hardware and Software Guide 6-3 b. PC Cards and ExpressCards 2. To insert a PC Card: a. Gently slide the card into the slot until the card is seated. Position the card label-side up with the connectors facing the notebook.
Hardware and Software Guide 6-3 b. PC Cards and ExpressCards 2. To insert a PC Card: a. Gently slide the card into the slot until the card is seated. Position the card label-side up with the connectors facing the notebook.
Hardware and Software Guide
Page 111
...; Install only the device drivers for some ExpressCards, do not install all of the software or any of the enablers provided by the ExpressCard manufacturer. PC Cards and ExpressCards Configuring an ExpressCard Ä CAUTION: To prevent loss of support for your ExpressCard to the ExpressCard connectors: ■ Use minimal force when...
...; Install only the device drivers for some ExpressCards, do not install all of the software or any of the enablers provided by the ExpressCard manufacturer. PC Cards and ExpressCards Configuring an ExpressCard Ä CAUTION: To prevent loss of support for your ExpressCard to the ExpressCard connectors: ■ Use minimal force when...
Hardware and Software Guide
Page 112
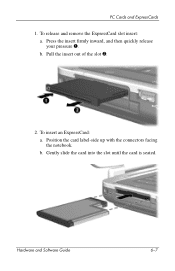
PC Cards and ExpressCards 1. Pull the insert out of the slot 2. 2. Gently slide the card into the slot until the card is seated. Press the insert firmly inward, and then quickly release your pressure 1. b. Hardware and Software Guide 6-7 Position the card label-side up with the connectors facing the notebook. b. To insert an ExpressCard: a. To release and remove the ExpressCard slot insert: a.
PC Cards and ExpressCards 1. Pull the insert out of the slot 2. 2. Gently slide the card into the slot until the card is seated. Press the insert firmly inward, and then quickly release your pressure 1. b. Hardware and Software Guide 6-7 Position the card label-side up with the connectors facing the notebook. b. To insert an ExpressCard: a. To release and remove the ExpressCard slot insert: a.

Hardware and Software Guide
Page 209
...in Chapter 14, "Software Updates and Recovery." 2. For backup information, refer to run the notebook with the notebook. Shut down the notebook. 5. If you think your work. If the notebook will be disconnected from an external power source for shipping or traveling: 1. Remove all external ...devices. 4. Turn off, then disconnect, all media, including CDs, DVDs, PC Cards, ExpressCards, digital memory cards, etc. 3. Travel and Shipping ■ If you are shipping the notebook, place it in the original packing box or similar protective packaging and label the package...
...in Chapter 14, "Software Updates and Recovery." 2. For backup information, refer to run the notebook with the notebook. Shut down the notebook. 5. If you think your work. If the notebook will be disconnected from an external power source for shipping or traveling: 1. Remove all external ...devices. 4. Turn off, then disconnect, all media, including CDs, DVDs, PC Cards, ExpressCards, digital memory cards, etc. 3. Travel and Shipping ■ If you are shipping the notebook, place it in the original packing box or similar protective packaging and label the package...
Hardware and Software Guide
Page 222
... device 4-6 notebook 1-17 See also cables Power Meter 2-21 Power Meter icon 2-4, 2-14 power, AC vs battery 14-8 power/standby lights 1-2, 2-9 power-on 12-11 QuickLock 3-8, 12-3 recording 12-5 standby 2-16 Windows administrator 3-8, 12-3, 12-5 Windows user 3-8, 12-3, 12-5 PBX jacks 10-1 PC Card eject button 1-12, 6-4 PC Card slot 1-12, 6-2, 6-6 PC Cards configuring...
... device 4-6 notebook 1-17 See also cables Power Meter 2-21 Power Meter icon 2-4, 2-14 power, AC vs battery 14-8 power/standby lights 1-2, 2-9 power-on 12-11 QuickLock 3-8, 12-3 recording 12-5 standby 2-16 Windows administrator 3-8, 12-3, 12-5 Windows user 3-8, 12-3, 12-5 PBX jacks 10-1 PC Card eject button 1-12, 6-4 PC Card slot 1-12, 6-2, 6-6 PC Cards configuring...
Hardware and Software Guide
Page 224
See standby slots Digital Media Slot 1-12, 7-1 ExpressCard 1-12, 6-5 memory module 1-15, 8-1 PC Card 1-12, 6-1 security cable 1-13, 12-22 SmartMedia (SM) card 1-12, 7-1 socket services ExpressCard 6-6 PC Card 6-1 SoftPaq 14-4, 14-7 software AutoPlay 4-17 backing up 14-9, 14-15 firewall 12-1, 12-21...Digital (SD) Memory Card 1-12, 7-1 security cable slot 1-13 security cable, connecting 12-22 security features, summary 12-1 serial number, notebook 1-19, 3-5 Service Tag 1-19, 14-2 Setup utility changing language 13-3 displaying system information 13-4 navigation and selection 13-4 Network Service...
See standby slots Digital Media Slot 1-12, 7-1 ExpressCard 1-12, 6-5 memory module 1-15, 8-1 PC Card 1-12, 6-1 security cable 1-13, 12-22 SmartMedia (SM) card 1-12, 7-1 socket services ExpressCard 6-6 PC Card 6-1 SoftPaq 14-4, 14-7 software AutoPlay 4-17 backing up 14-9, 14-15 firewall 12-1, 12-21...Digital (SD) Memory Card 1-12, 7-1 security cable slot 1-13 security cable, connecting 12-22 security features, summary 12-1 serial number, notebook 1-19, 3-5 Service Tag 1-19, 14-2 Setup utility changing language 13-3 displaying system information 13-4 navigation and selection 13-4 Network Service...


