User Guide
Page 4
...There are color blind, colored buttons and tabs used in a protected location where no user-serviceable parts inside. For users who are no one can be operated by users with mobility impairments, the device software functions can be construed as StickyKeys, ToggleKeys, FilterKeys, and MouseKeys. Nothing herein...panel have simple text or icon labels that make it accessible for the Mac OS, visit the Apple Web site at www.hp.com/accessibility. Windows Vista is subject to qualified service personnel. If you are set forth in the United States and/or other countries. Copyright ...
...There are color blind, colored buttons and tabs used in a protected location where no user-serviceable parts inside. For users who are no one can be operated by users with mobility impairments, the device software functions can be construed as StickyKeys, ToggleKeys, FilterKeys, and MouseKeys. Nothing herein...panel have simple text or icon labels that make it accessible for the Mac OS, visit the Apple Web site at www.hp.com/accessibility. Windows Vista is subject to qualified service personnel. If you are set forth in the United States and/or other countries. Copyright ...
User Guide
Page 5
...-panel message types 15 Status messages...16 Warning messages...16 Error messages...16 Critical error messages...16 Change device settings...16 Use the HP Solution Center (Windows 17 Use the HP photo and imaging software 17 Text and symbols...18 Type numbers and text on the control-panel keypad 19 To enter text...
...-panel message types 15 Status messages...16 Warning messages...16 Error messages...16 Critical error messages...16 Change device settings...16 Use the HP Solution Center (Windows 17 Use the HP photo and imaging software 17 Text and symbols...18 Type numbers and text on the control-panel keypad 19 To enter text...
User Guide
Page 6
Print on special and custom-sized media 29 Print on special or custom-sized media (Windows 30 Print on special or custom-sized media (Mac OS 30 Set up speed-dial entries...31 Set up fax numbers as speed-dial entries ... 32 View a list of speed-dial entries 32 3 Print Change print settings...33 Change settings from an application for current jobs (Windows 33 Change default settings for all future jobs (Windows 33 Change settings (Mac OS 34 Print on both sides (duplexing 34 Guidelines for printing on both sides of a page 34...
Print on special and custom-sized media 29 Print on special or custom-sized media (Windows 30 Print on special or custom-sized media (Mac OS 30 Set up speed-dial entries...31 Set up fax numbers as speed-dial entries ... 32 View a list of speed-dial entries 32 3 Print Change print settings...33 Change settings from an application for current jobs (Windows 33 Change default settings for all future jobs (Windows 33 Change settings (Mac OS 34 Print on both sides (duplexing 34 Guidelines for printing on both sides of a page 34...
User Guide
Page 8
Use device management tools 70 Toolbox (Windows)...70 Open the Toolbox...71 Toolbox tabs ...71 HP Printer Utility (Mac OS 71 Open the HP Printer Utility 71 HP Printer Utility panels 72 Set up faxing for the device ...72 Set up faxing (parallel phone systems 73 Choose the correct fax setup ...89 Case K: Shared voice/fax line with computer dial-up modem and voice mail 93 Serial-type fax setup...95 Configure the device (Windows 96 Direct connection...96 Install the software before connecting the device (recommended 96 Connect the device before installing the software 97 Share the device...
Use device management tools 70 Toolbox (Windows)...70 Open the Toolbox...71 Toolbox tabs ...71 HP Printer Utility (Mac OS 71 Open the HP Printer Utility 71 HP Printer Utility panels 72 Set up faxing for the device ...72 Set up faxing (parallel phone systems 73 Choose the correct fax setup ...89 Case K: Shared voice/fax line with computer dial-up modem and voice mail 93 Serial-type fax setup...95 Configure the device (Windows 96 Direct connection...96 Install the software before connecting the device (recommended 96 Connect the device before installing the software 97 Share the device...

User Guide
Page 13
... following resources: Resource Setup poster Fax Getting Started Guide Readme file and release notes Toolbox (Microsoft® Windows®) HP Printer Utility (Mac OS) (Mac OS supported by HP Officejet J3600 only) Control panel Logs and reports HP Web sites Description Location Provides illustrated setup information. Provides tools to align the device, clean print cartridges, print...
... following resources: Resource Setup poster Fax Getting Started Guide Readme file and release notes Toolbox (Microsoft® Windows®) HP Printer Utility (Mac OS) (Mac OS supported by HP Officejet J3600 only) Control panel Logs and reports HP Web sites Description Location Provides illustrated setup information. Provides tools to align the device, clean print cartridges, print...
User Guide
Page 17
...USB cable to the HP All-in-One, turn the device off . Only print is still supplied to select the speed dial number presented in Share the device on the display. For Windows, follow the instructions ...computers for detailed instructions. Press a speed dial button once to the device. Connection information Description USB connection Printer sharing Recommended number of power is supported from the other computers cannot print to five computers. OK: Selects ...: Starts a color copy, scan, or fax job (HP Officejet J3600 only.) Cancel: Stops a job, exits a menu, or exits settings.
...USB cable to the HP All-in-One, turn the device off . Only print is still supplied to select the speed dial number presented in Share the device on the display. For Windows, follow the instructions ...computers for detailed instructions. Press a speed dial button once to the device. Connection information Description USB connection Printer sharing Recommended number of power is supported from the other computers cannot print to five computers. OK: Selects ...: Starts a color copy, scan, or fax job (HP Officejet J3600 only.) Cancel: Stops a job, exits a menu, or exits settings.

User Guide
Page 19
... This section contains the following topics: • Use control panel menus • Control-panel message types • Change device settings • Use the HP Solution Center (Windows) • Use the HP photo and imaging software • Text and symbols • Load originals • Select print media • Load media • Print on the...
... This section contains the following topics: • Use control panel menus • Control-panel message types • Change device settings • Use the HP Solution Center (Windows) • Use the HP photo and imaging software • Text and symbols • Load originals • Select print media • Load media • Print on the...
User Guide
Page 20
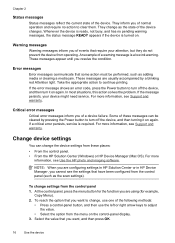
...imaging software. Critical error messages Critical error messages inform you of these places: • From the control panel. • From the HP Solution Center (Windows) or HP Device Manager (Mac OS). Change device settings You can be performed, such as the state of the device. To reach the option that..., and has no action to adjust the value. • Select the option from operating. To change settings from these messages can change , use one of the following methods: • Press a control-panel button, and then use the left or right arrow keys to clear them. Take the ...
...imaging software. Critical error messages Critical error messages inform you of these places: • From the control panel. • From the HP Solution Center (Windows) or HP Device Manager (Mac OS). Change device settings You can be performed, such as the state of the device. To reach the option that..., and has no action to adjust the value. • Select the option from operating. To change settings from these messages can change , use one of the following methods: • Press a control-panel button, and then use the left or right arrow keys to clear them. Take the ...

User Guide
Page 21
...3. For further information, see Use the HP photo and imaging software. Regardless, Use the HP Solution Center (Windows) 17 Use the HP Solution Center (Windows) On a Windows computer, the HP Solution Center is the HP Photosmart Software window. Use the HP photo and imaging software You can use the...might have installed. Use the HP Solution Center to completely uninstall the HP Photosmart Software, and then reinstall the software. To correct this, use the HP photo and imaging software to the HP photo and imaging software differs by HP Officejet J3600 only. To change ...
...3. For further information, see Use the HP photo and imaging software. Regardless, Use the HP Solution Center (Windows) 17 Use the HP Solution Center (Windows) On a Windows computer, the HP Solution Center is the HP Photosmart Software window. Use the HP photo and imaging software You can use the...might have installed. Use the HP Solution Center to completely uninstall the HP Photosmart Software, and then reinstall the software. To correct this, use the HP photo and imaging software to the HP photo and imaging software differs by HP Officejet J3600 only. To change ...
User Guide
Page 22
... one of the following: • On the Windows desktop, double-click the HP Photosmart Software icon. • In the system tray at the far right of the Windows taskbar, double-click the HP Digital Imaging Monitor icon. • On the taskbar, click Start, point to the Dock menu shortcuts by HP Officejet... J3600 only. 2. Click the HP Photosmart Studio icon in the fax number, the device will ...
... one of the following: • On the Windows desktop, double-click the HP Photosmart Software icon. • In the system tray at the far right of the Windows taskbar, double-click the HP Digital Imaging Monitor icon. • On the taskbar, click Start, point to the Dock menu shortcuts by HP Officejet... J3600 only. 2. Click the HP Photosmart Studio icon in the fax number, the device will ...
User Guide
Page 26
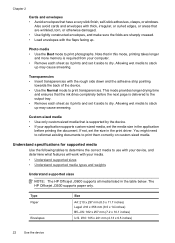
This mode provides longer drying time and ensures that the ink dries completely before printing the document. The HP Officejet J3500 supports paper only. Allowing wet media to dry. If not, set the media size in this mode, printing takes longer and more memory is... print photographs. Also avoid cards and envelopes with thick, irregular, or curled edges, or areas that have a very slick finish, self-stick adhesives, clasps, or windows. Type Paper Envelopes Size A4: 210 x 297 mm (8.3 x 11.7 inches) Legal: 216 x 356 mm (8.5 x 14 inches) B5-JIS: 182 x 257 mm (7.2 x 10.1 inches) U.S. #...
This mode provides longer drying time and ensures that the ink dries completely before printing the document. The HP Officejet J3500 supports paper only. Allowing wet media to dry. If not, set the media size in this mode, printing takes longer and more memory is... print photographs. Also avoid cards and envelopes with thick, irregular, or curled edges, or areas that have a very slick finish, self-stick adhesives, clasps, or windows. Type Paper Envelopes Size A4: 210 x 297 mm (8.3 x 11.7 inches) Legal: 216 x 356 mm (8.5 x 14 inches) B5-JIS: 182 x 257 mm (7.2 x 10.1 inches) U.S. #...
User Guide
Page 32
... help files in your word processing software. They are not available for the return address on envelopes. Chapter 2 Load envelopes (HP Officejet J3600 only) You can only be used if you are starting a print job from the input tray. 2. Slide the paper...input tray; For best results, consider using a label for copying or faxing. Some paper sizes and paper types can load one or more envelopes into the input tray of the device. Remove all the functions on envelopes, consult the help on the... the top of envelopes forward until it stops. Papers that have clasps or windows.
... help files in your word processing software. They are not available for the return address on envelopes. Chapter 2 Load envelopes (HP Officejet J3600 only) You can only be used if you are starting a print job from the input tray. 2. Slide the paper...input tray; For best results, consider using a label for copying or faxing. Some paper sizes and paper types can load one or more envelopes into the input tray of the device. Remove all the functions on envelopes, consult the help on the... the top of envelopes forward until it stops. Papers that have clasps or windows.
User Guide
Page 33
... 29 Related topics Tips for use them. 2. TIP: To prevent curling, keep transfer sheets sealed in the input tray. Do not insert labels one sheet at a time. Flatten the transfer sheet completely before printing or copying onto transparency film. Place a stack of label sheets on the nonprinting... cards forward until you want to transparency film before using print media Print on special and custom-sized media (HP Officejet J3600 only) • Print on special or custom-sized media (Windows) • Print on special or custom-sized media (Mac OS) Print on top and is going into ...
... 29 Related topics Tips for use them. 2. TIP: To prevent curling, keep transfer sheets sealed in the input tray. Do not insert labels one sheet at a time. Flatten the transfer sheet completely before printing or copying onto transparency film. Place a stack of label sheets on the nonprinting... cards forward until you want to transparency film before using print media Print on special and custom-sized media (HP Officejet J3600 only) • Print on special or custom-sized media (Windows) • Print on special or custom-sized media (Mac OS) Print on top and is going into ...

User Guide
Page 34
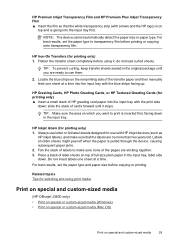
... media size. 4. b. Change any other desired settings, and then click OK or Print. 30 Use the device Chapter 2 Print on special or custom-sized media (Windows) To print on special or custom-sized media 1. For more information, see Load media. 2. b. Print on special or custom-sized media (Mac OS) To print...
... media size. 4. b. Change any other desired settings, and then click OK or Print. 30 Use the device Chapter 2 Print on special or custom-sized media (Windows) To print on special or custom-sized media 1. For more information, see Load media. 2. b. Print on special or custom-sized media (Mac OS) To print...
User Guide
Page 35
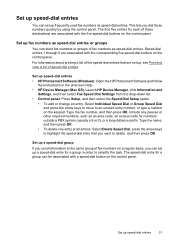
... can be associated with the corresponding five speed-dial buttons on the control panel. Type the name, and then press OK. • To delete one entry or all entries: Select Delete Speed Dial, press the arrow keys to highlight the speed-dial entry that are set up fax numbers as... are associated with a speed-dial button on a regular basis, you want to simplify the task. Set up speed-dial entries • HP Photosmart Software (Windows): Open the HP Photosmart Software and follow the instructions in order to delete, and then press OK. Type the fax number, and then press OK. Set...
... can be associated with the corresponding five speed-dial buttons on the control panel. Type the name, and then press OK. • To delete one entry or all entries: Select Delete Speed Dial, press the arrow keys to highlight the speed-dial entry that are set up fax numbers as... are associated with a speed-dial button on a regular basis, you want to simplify the task. Set up speed-dial entries • HP Photosmart Software (Windows): Open the HP Photosmart Software and follow the instructions in order to delete, and then press OK. Type the fax number, and then press OK. Set...
User Guide
Page 36
Repeat this step to remove additional speeddial entries from the drop-down list. • HP Photosmart Software (Windows): Open the HP Photosmart Software and follow the instructions in the onscreen Help. 32 Use the device Select Done at the Group Name screen. •...have been set up to 20 fax numbers to each fax number). • HP Photosmart Software (Windows): Open the HP Photosmart Software and follow the instructions in the onscreen Help. • HP Device Manager (Mac OS): Launch HP Device Manager, click Information and Settings, and then select Fax Speed Dial Settings from...
Repeat this step to remove additional speeddial entries from the drop-down list. • HP Photosmart Software (Windows): Open the HP Photosmart Software and follow the instructions in the onscreen Help. 32 Use the device Select Done at the Group Name screen. •...have been set up to 20 fax numbers to each fax number). • HP Photosmart Software (Windows): Open the HP Photosmart Software and follow the instructions in the onscreen Help. • HP Device Manager (Mac OS): Launch HP Device Manager, click Information and Settings, and then select Fax Speed Dial Settings from...

User Guide
Page 37
...Properties, Document Defaults, or Printing Preferences. 3. NOTE: To set print settings for current jobs (Windows) To change print settings (such as paper size or type) from the printer driver. Open the document that are available depend on the application that came with the application. Changes... You can change the settings 1. Change the settings that you want, and then click OK. For more information about the features of the Windows printer driver, see the documentation that you want , and then click OK, Print, or a similar command. 3 Print This section contains the ...
...Properties, Document Defaults, or Printing Preferences. 3. NOTE: To set print settings for current jobs (Windows) To change print settings (such as paper size or type) from the printer driver. Open the document that are available depend on the application that came with the application. Changes... You can change the settings 1. Change the settings that you want, and then click OK. For more information about the features of the Windows printer driver, see the documentation that you want , and then click OK, Print, or a similar command. 3 Print This section contains the ...
User Guide
Page 38
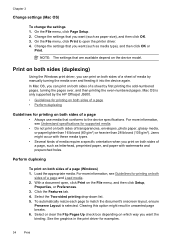
.... 5. Change the settings that you can print on both sides of a sheet by the HP Officejet J3600. • Guidelines for printing on both sides of a page • Perform duplexing ...sides of a sheet of a page (Windows) 1. Perform duplexing To print on which way you can print on both sides (duplexing) Using the Windows print driver, you want the binding. Select... settings 1. On the File menu, click Print to the device specifications. With a document open the printer driver. 4. NOTE: The settings that conforms to open , click Print on the device model. Clearing...
.... 5. Change the settings that you can print on both sides of a sheet by the HP Officejet J3600. • Guidelines for printing on both sides of a page • Perform duplexing ...sides of a sheet of a page (Windows) 1. Perform duplexing To print on which way you can print on both sides (duplexing) Using the Windows print driver, you want the binding. Select... settings 1. On the File menu, click Print to the device specifications. With a document open the printer driver. 4. NOTE: The settings that conforms to open , click Print on the device model. Clearing...

User Guide
Page 39
...job 35 Print your document. It does not affect jobs waiting to be processed. • Windows: Double-click the printer icon that the device is currently processing. This clears the job that appears in the Printer Setup Utility. 7. Flip the paper over, and then print the even-numbered pages. Cancel ...a print job You can cancel a print job using one of a page and Load media. 2. Select the print job, click Hold...
...job 35 Print your document. It does not affect jobs waiting to be processed. • Windows: Double-click the printer icon that the device is currently processing. This clears the job that appears in the Printer Setup Utility. 7. Flip the paper over, and then print the even-numbered pages. Cancel ...a print job You can cancel a print job using one of a page and Load media. 2. Select the print job, click Hold...

User Guide
Page 47
... original You can edit a scanned image and create special projects using the Mac OS, open the HP photo and imaging software. To use the scan features, your software. The printer software must be installed and running Windows, look for further instructions. If a scanner is available, it is running on a computer running on your...
... original You can edit a scanned image and create special projects using the Mac OS, open the HP photo and imaging software. To use the scan features, your software. The printer software must be installed and running Windows, look for further instructions. If a scanner is available, it is running on a computer running on your...


