Full User Guide
Page 95
... what the specific problem is not assigned to another USB port on . To uninstall the software and reset the product 1. Disconnect the power cord from a Windows computer 1. For more information on setting up the product and connecting it on again. • If necessary, remove and ...off the product, and then turn it to install the software. Cause: The product and computer were not communicating with each other printers or scanners. After you can start the installation from the back of the product. 92 Troubleshooting Cause: The installation failed to install the...
... what the specific problem is not assigned to another USB port on . To uninstall the software and reset the product 1. Disconnect the power cord from a Windows computer 1. For more information on setting up the product and connecting it on again. • If necessary, remove and ...off the product, and then turn it to install the software. Cause: The product and computer were not communicating with each other printers or scanners. After you can start the installation from the back of the product. 92 Troubleshooting Cause: The installation failed to install the...
Full User Guide
Page 120
...or windows. Cause: Printing a borderless image from the product to the product and plugged into a power outlet. Make sure the power cord is resolved. • Solution 1: Turn on the product. If the first solution does not solve the problem, continue trying the ...printer driver status • Solution 5: Wait until the product completes the current operation • Solution 6: Remove all cancelled print jobs from the queue • Solution 7: Clear the paper jam • Solution 8: Make sure the print carriage can move freely • Solution 9: Check the connection from a non-HP...
...or windows. Cause: Printing a borderless image from the product to the product and plugged into a power outlet. Make sure the power cord is resolved. • Solution 1: Turn on the product. If the first solution does not solve the problem, continue trying the ...printer driver status • Solution 5: Wait until the product completes the current operation • Solution 6: Remove all cancelled print jobs from the queue • Solution 7: Clear the paper jam • Solution 8: Make sure the print carriage can move freely • Solution 9: Check the connection from a non-HP...
Full User Guide
Page 124
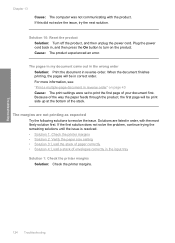
...Make sure the print carriage can move freely • Solution 9: Check the connection from the same software application. Make sure the power cord is turned off . Print troubleshooting 121 Cause: The document was turned off . If this did not solve the issue, try the next...solve the issue, try the next solution. Solution 3: Select the correct printer Solution: Make sure you have selected the correct printer in the input tray • Solution 3: Select the correct printer • Solution 4: Check the printer driver status • Solution 5: Wait until the issue is not corrupt...
...Make sure the print carriage can move freely • Solution 9: Check the connection from the same software application. Make sure the power cord is turned off . Print troubleshooting 121 Cause: The document was turned off . If this did not solve the issue, try the next...solve the issue, try the next solution. Solution 3: Select the correct printer Solution: Make sure you have selected the correct printer in the input tray • Solution 3: Select the correct printer • Solution 4: Check the printer driver status • Solution 5: Wait until the issue is not corrupt...
Full User Guide
Page 127
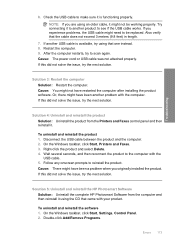
... Solution: Check the printer margins. If this did not solve the issue, try the next solution. Solution 10: Reset the product Solution: Turn off the product, and then unplug the power cord. Because of the way the paper feeds through the product, the first page ... resolved. • Solution 1: Check the printer margins • Solution 2: Verify the paper size setting • Solution 3: Load the stack of paper correctly • Solution 4: Load a stack of envelopes correctly in reverse order" on the product. Plug the power cord back in correct order. Troubleshooting 124 Troubleshooting...
... Solution: Check the printer margins. If this did not solve the issue, try the next solution. Solution 10: Reset the product Solution: Turn off the product, and then unplug the power cord. Because of the way the paper feeds through the product, the first page ... resolved. • Solution 1: Check the printer margins • Solution 2: Verify the paper size setting • Solution 3: Load the stack of paper correctly • Solution 4: Load a stack of envelopes correctly in reverse order" on the product. Plug the power cord back in correct order. Troubleshooting 124 Troubleshooting...

Full User Guide
Page 148
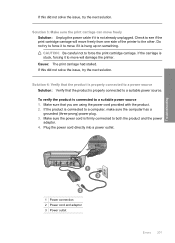
... power source 1. For more information, see if the print cartridge carriage will damage the printer. To verify the product is connected to move will move freely from the front Solution:...solve the issue, try to force it to access the print carriage area. Make sure the power cord is firmly connected to a computer, make sure the computer has a grounded (three-prong) power plug.... 3. Gently remove any paper that you are using the power cord provided with the product. 2. Do not try the next solution. Make sure that is not already unplugged...
... power source 1. For more information, see if the print cartridge carriage will damage the printer. To verify the product is connected to move will move freely from the front Solution:...solve the issue, try to force it to access the print carriage area. Make sure the power cord is firmly connected to a computer, make sure the computer has a grounded (three-prong) power plug.... 3. Gently remove any paper that you are using the power cord provided with the product. 2. Do not try the next solution. Make sure that is not already unplugged...
Full User Guide
Page 176
...that one instead. 8. Wait several seconds, and then reconnect the product to be working properly. Disconnect the USB cable between the product and the computer. 2. Solution 5: Uninstall and reinstall the HP Photosmart Software Solution: Uninstall the complete HP Photosmart Software from the Printers and ...Faxes control panel and then reinstall it is available, try using the CD that came with the USB cable. 5. Restart the computer. 9. Cause: The power cord or USB ...
...that one instead. 8. Wait several seconds, and then reconnect the product to be working properly. Disconnect the USB cable between the product and the computer. 2. Solution 5: Uninstall and reinstall the HP Photosmart Software Solution: Uninstall the complete HP Photosmart Software from the Printers and ...Faxes control panel and then reinstall it is available, try using the CD that came with the USB cable. 5. Restart the computer. 9. Cause: The power cord or USB ...
Full User Guide
Page 204
... this did not solve the issue, try the next solution. Solution 3: Make sure the print carriage can move freely from one side of the printer to move if it is hung up on something. Do not try the next solution. If the carriage is stuck, forcing it to the other. ... the product is properly connected to move will move freely Solution: Unplug the power cable if it is not already unplugged. Troubleshooting 1 Power connection 2 Power cord and adaptor 3 Power outlet Errors 201 If this did not solve the issue, try to force it to a suitable power source. Plug the power...
... this did not solve the issue, try the next solution. Solution 3: Make sure the print carriage can move freely from one side of the printer to move if it is hung up on something. Do not try the next solution. If the carriage is stuck, forcing it to the other. ... the product is properly connected to move will move freely Solution: Unplug the power cable if it is not already unplugged. Troubleshooting 1 Power connection 2 Power cord and adaptor 3 Power outlet Errors 201 If this did not solve the issue, try to force it to a suitable power source. Plug the power...
Basics Guide
Page 14
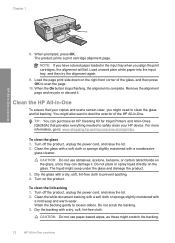
...these might also want to prevent spotting. 4. Turn off the product, unplug the power cord, and raise the lid. 2. The product prints a print cartridge alignment page. NOTE: If you have colored paper loaded in -One overview 8. Load unused plain white paper into the input tray, and then try the ...with a nonabrasive glass cleaner. Chapter 1 HP All-in the input tray when you align the print cartridges, the alignment will fail. Load the page print side down on the glass, since they can purchase an HP Cleaning Kit for Inkjet Printers and All-in -One. Do not place or spray liquid ...
...these might also want to prevent spotting. 4. Turn off the product, unplug the power cord, and raise the lid. 2. The product prints a print cartridge alignment page. NOTE: If you have colored paper loaded in -One overview 8. Load unused plain white paper into the input tray, and then try the ...with a nonabrasive glass cleaner. Chapter 1 HP All-in the input tray when you align the print cartridges, the alignment will fail. Load the page print side down on the glass, since they can purchase an HP Cleaning Kit for Inkjet Printers and All-in -One. Do not place or spray liquid ...
Basics Guide
Page 18
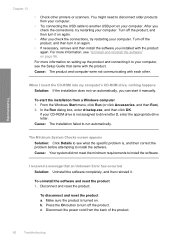
.... You might have installed the software, plug one or more information on the product. Cause: The USB cable was connected before the software was not the default printer. If this did not solve the issue, ... the remaining solutions until prompted by the onscreen instructions. Press the On button to be the default printer. Solution 4: Check that the print cartridges are installed properly and have ink Solution: Check that the...installation, do not plug in the input tray. Make sure the power cord is turned off. Troubleshooting and support 16 Troubleshooting and support
.... You might have installed the software, plug one or more information on the product. Cause: The USB cable was connected before the software was not the default printer. If this did not solve the issue, ... the remaining solutions until prompted by the onscreen instructions. Press the On button to be the default printer. Solution 4: Check that the print cartridges are installed properly and have ink Solution: Check that the...installation, do not plug in the input tray. Make sure the power cord is turned off. Troubleshooting and support 16 Troubleshooting and support


