Full User Guide
Page 95
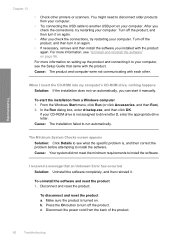
... the connections, try restarting your computer. Cause: Your system did not meet the minimum requirements to install the software. Disconnect the power cord from a Windows computer 1. The Minimum System Checks screen appears Solution: Click Details to see what the specific problem is turned on again.... • After you installed with each other printers or scanners. Disconnect and reset the product. To disconnect and reset the product a. After you can start the installation from the ...
... the connections, try restarting your computer. Cause: Your system did not meet the minimum requirements to install the software. Disconnect the power cord from a Windows computer 1. The Minimum System Checks screen appears Solution: Click Details to see what the specific problem is turned on again.... • After you installed with each other printers or scanners. Disconnect and reset the product. To disconnect and reset the product a. After you can start the installation from the ...
Full User Guide
Page 120
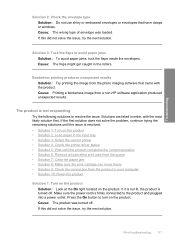
Make sure the power cord is not responding Try the following solutions to the product and plugged into a power outlet. Print ...; Solution 1: Turn on the product • Solution 2: Load paper in the input tray • Solution 3: Select the correct printer • Solution 4: Check the printer driver status • Solution 5: Wait until the issue is turned off . Cause: The flaps might get caught in order, with...likely solution first. Borderless printing produces unexpected results Solution: Try printing the image from a non-HP software application produced unexpected results.
Make sure the power cord is not responding Try the following solutions to the product and plugged into a power outlet. Print ...; Solution 1: Turn on the product • Solution 2: Load paper in the input tray • Solution 3: Select the correct printer • Solution 4: Check the printer driver status • Solution 5: Wait until the issue is turned off . Cause: The flaps might get caught in order, with...likely solution first. Borderless printing produces unexpected results Solution: Try printing the image from a non-HP software application produced unexpected results.
Full User Guide
Page 124
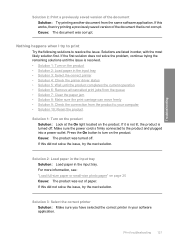
...are listed in the input tray. Solution 3: Select the correct printer Solution: Make sure you have selected the correct printer in the input tray • Solution 3: Select the correct printer • Solution 4: Check the printer driver status • Solution 5: Wait until the issue is ...firmly connected to the product and plugged into a power outlet. Make sure the power cord is resolved. &#...
...are listed in the input tray. Solution 3: Select the correct printer Solution: Make sure you have selected the correct printer in the input tray • Solution 3: Select the correct printer • Solution 4: Check the printer driver status • Solution 5: Wait until the issue is ...firmly connected to the product and plugged into a power outlet. Make sure the power cord is resolved. &#...
Full User Guide
Page 127
... document first. If the first solution does not solve the problem, continue trying the remaining solutions until the issue is resolved. • Solution 1: Check the printer margins • Solution 2: Verify the paper size setting • Solution 3: Load the stack of paper correctly • Solution 4: Load a stack of the... with the most likely solution first. Solution 10: Reset the product Solution: Turn off the product, and then unplug the power cord. If this did not solve the issue, try the next solution. For more information, see: "Print a multiple-page document in reverse order.
... document first. If the first solution does not solve the problem, continue trying the remaining solutions until the issue is resolved. • Solution 1: Check the printer margins • Solution 2: Verify the paper size setting • Solution 3: Load the stack of paper correctly • Solution 4: Load a stack of the... with the most likely solution first. Solution 10: Reset the product Solution: Turn off the product, and then unplug the power cord. If this did not solve the issue, try the next solution. For more information, see: "Print a multiple-page document in reverse order.

Full User Guide
Page 148
...power adaptor. Cause: Paper was stuck in the front rollers. Make sure the power cord is properly connected to a suitable power source. Troubleshooting Solution 2: Clear the paper jam from one side of the printer to the other. If this did not solve the issue, try the next solution.... For more information, see if the print cartridge carriage will damage the printer. If the product is connected to access the ...
...power adaptor. Cause: Paper was stuck in the front rollers. Make sure the power cord is properly connected to a suitable power source. Troubleshooting Solution 2: Clear the paper jam from one side of the printer to the other. If this did not solve the issue, try the next solution.... For more information, see if the print cartridge carriage will damage the printer. If the product is connected to access the ...
Full User Guide
Page 176
...product and select Delete. 4. Solution 5: Uninstall and reinstall the HP Photosmart Software Solution: Uninstall the complete HP Photosmart Software from the Printers and Faxes control panel and then reinstall it might need to scan...: Uninstall the product from the computer and then reinstall it using the CD that one instead. 8. Cause: There might have been another USB cable is functioning properly. ...did not solve the issue, try the next solution. Troubleshooting 6. Cause: The power cord or USB cable was not attached properly. NOTE: If you are using that came with...
...product and select Delete. 4. Solution 5: Uninstall and reinstall the HP Photosmart Software Solution: Uninstall the complete HP Photosmart Software from the Printers and Faxes control panel and then reinstall it might need to scan...: Uninstall the product from the computer and then reinstall it using the CD that one instead. 8. Cause: There might have been another USB cable is functioning properly. ...did not solve the issue, try the next solution. Troubleshooting 6. Cause: The power cord or USB cable was not attached properly. NOTE: If you are using that came with...
Full User Guide
Page 204
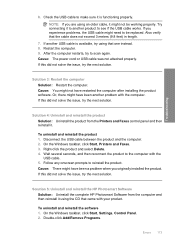
If this did not solve the issue, try the next solution. CAUTION: Be careful not to a suitable power source 1. Plug the power cord directly into a power outlet. Do not try the next solution. Solution 4: Verify that the product is properly connected to a power source Solution: Verify that ... is stuck, forcing it is connected to the other. If this did not solve the issue, try to force it to move freely from one side of the printer to a computer, make sure the computer has a grounded (three-prong) power plug. 3. To verify the product is firmly connected to see if ...
If this did not solve the issue, try the next solution. CAUTION: Be careful not to a suitable power source 1. Plug the power cord directly into a power outlet. Do not try the next solution. Solution 4: Verify that the product is properly connected to a power source Solution: Verify that ... is stuck, forcing it is connected to the other. If this did not solve the issue, try to force it to move freely from one side of the printer to a computer, make sure the computer has a grounded (three-prong) power plug. 3. To verify the product is firmly connected to see if ...
Basics Guide
Page 14
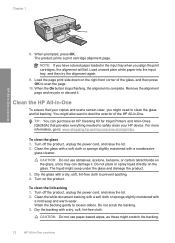
... they can purchase an HP Cleaning Kit for Inkjet Printers and All-in -One overview 8. For more information, go to scan the page. 10. To clean the glass 1. The liquid might scratch the backing. 12 HP All-in the input tray when you have colored paper loaded in -One overview Wash the backing gently...the alignment page and recycle or discard it . When the On button stops flashing, the alignment is complete. Turn off the product, unplug the power cord, and raise the lid. 2. Dry the glass with a mild soap and warm water. CAUTION: Do not use abrasives, acetone, benzene, or ...
... they can purchase an HP Cleaning Kit for Inkjet Printers and All-in -One overview 8. For more information, go to scan the page. 10. To clean the glass 1. The liquid might scratch the backing. 12 HP All-in the input tray when you have colored paper loaded in -One overview Wash the backing gently...the alignment page and recycle or discard it . When the On button stops flashing, the alignment is complete. Turn off the product, unplug the power cord, and raise the lid. 2. Dry the glass with a mild soap and warm water. CAUTION: Do not use abrasives, acetone, benzene, or ...
Basics Guide
Page 18
... support If the first solution does not solve the problem, continue trying the remaining solutions until prompted by the onscreen instructions. Make sure the power cord is firmly connected to the product and plugged into the back of your product to turn on the product Solution: Look at the display on... the paper jam from the rear door. Cause: The product might need to the default printer, but I am having problems using the product with my computer Solution: You must first install the software that came with one end of the USB cable into the back of the product. Once you are listed...
... support If the first solution does not solve the problem, continue trying the remaining solutions until prompted by the onscreen instructions. Make sure the power cord is firmly connected to the product and plugged into the back of your product to turn on the product Solution: Look at the display on... the paper jam from the rear door. Cause: The product might need to the default printer, but I am having problems using the product with my computer Solution: You must first install the software that came with one end of the USB cable into the back of the product. Once you are listed...


