Basics Guide
Page 5
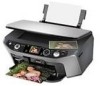
...photo ■ Restore color in faded photos ■ Print photos stored on a memory card ■ Print photos directly from your camera, mobile phone, or PDA ■ Print on CDs or DVDs ■ Print a basic document or photo from your computer ■ Scan a document or photo ■ Back up your photos... up your Epson Stylus® Photo RX580 all-in-one as described on the Start Here sheet, read your RX580 instructions: Warning: Warnings must be followed carefully to your Windows® or Macintosh® computer. For additional instructions, see the onscreen User's Guide by selecting the...
...photo ■ Restore color in faded photos ■ Print photos stored on a memory card ■ Print photos directly from your camera, mobile phone, or PDA ■ Print on CDs or DVDs ■ Print a basic document or photo from your computer ■ Scan a document or photo ■ Back up your photos... up your Epson Stylus® Photo RX580 all-in-one as described on the Start Here sheet, read your RX580 instructions: Warning: Warnings must be followed carefully to your Windows® or Macintosh® computer. For additional instructions, see the onscreen User's Guide by selecting the...

Basics Guide
Page 9
... the right edge. Insert the paper, printable side up to 120 sheets of plain paper or up , against the left edge of photo paper. Slide the left edge guide. 6. Loading Paper 9 5. Make sure the paper lies beneath the tabs. 4 × 6-inch, 5 × 7-inch Letter-size, 8 × 10-inch You can load up... paper (but not too tightly). 4 × 6-inch, 5 × 7-inch Letter-size, 8 × 10-inch For additional information and instructions on loading envelopes, see your onscreen User's Guide. The printable side is often whiter or brighter than the other side.
... the right edge. Insert the paper, printable side up to 120 sheets of plain paper or up , against the left edge of photo paper. Slide the left edge guide. 6. Loading Paper 9 5. Make sure the paper lies beneath the tabs. 4 × 6-inch, 5 × 7-inch Letter-size, 8 × 10-inch You can load up... paper (but not too tightly). 4 × 6-inch, 5 × 7-inch Letter-size, 8 × 10-inch For additional information and instructions on loading envelopes, see your onscreen User's Guide. The printable side is often whiter or brighter than the other side.
Basics Guide
Page 20
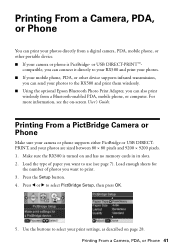
...color and lighting in your digital camera, mobile phone, or PDA, see your computer! You can follow the same steps to print photos from your digital camera's memory card; You can also crop your photos, manually adjust the brightness and contrast, and correct red eyes-all without using your on-screen User's Guide... 40 ■ "Restoring Default Settings" on page 40 For instructions on copying memory card files between your RX580 and a computer, or on the RX580 and you print color photos directly from a USB flash drive. just insert it into one of the memory card slots on printing from...
...color and lighting in your digital camera, mobile phone, or PDA, see your computer! You can follow the same steps to print photos from your digital camera's memory card; You can also crop your photos, manually adjust the brightness and contrast, and correct red eyes-all without using your on-screen User's Guide... 40 ■ "Restoring Default Settings" on page 40 For instructions on copying memory card files between your RX580 and a computer, or on the RX580 and you print color photos directly from a USB flash drive. just insert it into one of the memory card slots on printing from...
Basics Guide
Page 41
... turned on and has no memory cards in its slots. 2. Make sure the RX580 is PictBridge- Load the type of photos you want to select your print settings, as described on -screen User's Guide. Press the Setup button. 4. Use the buttons to use (see the on page...print wirelessly from a digital camera, PDA, mobile phone, or other device supports infrared transmission, you can send your photos to the RX580 and print them wirelessly. ■ Using the optional Epson Bluetooth Photo Print Adapter, you can print your photos directly from a Bluetooth-enabled PDA, mobile phone, or computer.
... turned on and has no memory cards in its slots. 2. Make sure the RX580 is PictBridge- Load the type of photos you want to select your print settings, as described on -screen User's Guide. Press the Setup button. 4. Use the buttons to use (see the on page...print wirelessly from a digital camera, PDA, mobile phone, or other device supports infrared transmission, you can send your photos to the RX580 and print them wirelessly. ■ Using the optional Epson Bluetooth Photo Print Adapter, you can print your photos directly from a Bluetooth-enabled PDA, mobile phone, or computer.
Basics Guide
Page 45
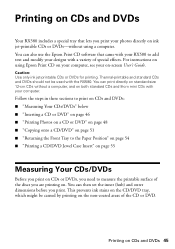
... "Measuring Your CDs/DVDs" below ■ "Inserting a CD or DVD" on page 46 ■ "Printing Photos on a CD or DVD" on page 48 ■ "Copying onto a CD/DVD" on page 51 ■...you print on CDs or DVDs, you need to add text and modify your on-screen User's Guide. You can then set the inner (hub) and outer dimensions before you print. This...RX580 to measure the printable surface of special effects. You can print directly on standard-size 12-cm CDs without a computer, and on both standard CDs and 8-cm mini CDs with your photos directly on ink jet-printable CDs or DVDs-without using Epson...
... "Measuring Your CDs/DVDs" below ■ "Inserting a CD or DVD" on page 46 ■ "Printing Photos on a CD or DVD" on page 48 ■ "Copying onto a CD/DVD" on page 51 ■...you print on CDs or DVDs, you need to add text and modify your on-screen User's Guide. You can then set the inner (hub) and outer dimensions before you print. This...RX580 to measure the printable surface of special effects. You can print directly on standard-size 12-cm CDs without a computer, and on both standard CDs and 8-cm mini CDs with your photos directly on ink jet-printable CDs or DVDs-without using Epson...

Basics Guide
Page 48
...you can use the Epson Print CD software on your CD or DVD from your computer. Insert a CD or DVD for instructions. Follow the instructions in the next section to select Print on CD/DVD, then press OK. 48 Printing on a CD or DVD 1. See your on-screen User's Guide for printing, as... described on the trays are aligned. Press l or r to print photos on your memory card or USB flash drive. Printing Photos on CDs and DVDs Press the Specialty Print mode button. 3. line up the arrows...
...you can use the Epson Print CD software on your CD or DVD from your computer. Insert a CD or DVD for instructions. Follow the instructions in the next section to select Print on CD/DVD, then press OK. 48 Printing on a CD or DVD 1. See your on-screen User's Guide for printing, as... described on the trays are aligned. Press l or r to print photos on your memory card or USB flash drive. Printing Photos on CDs and DVDs Press the Specialty Print mode button. 3. line up the arrows...

Basics Guide
Page 56
...Paper Type" on printing, see page 7). 2. Be sure to open your computer as described on -screen User's Guide. Open the photo or document in the printer driver. (See page 62 for printing a photo or document stored on your application program. 3. Load paper (see the on the Start Here sheet. Before...menu and select Print. Note: For detailed instructions on page 62 Printing With Windows 1. You see a window like this one: Select EPSON Stylus Photo RX580 Series Click here to load the right paper and select the correct paper type setting in your Windows or Macintosh computer.
...Paper Type" on printing, see page 7). 2. Be sure to open your computer as described on -screen User's Guide. Open the photo or document in the printer driver. (See page 62 for printing a photo or document stored on your application program. 3. Load paper (see the on the Start Here sheet. Before...menu and select Print. Note: For detailed instructions on page 62 Printing With Windows 1. You see a window like this one: Select EPSON Stylus Photo RX580 Series Click here to load the right paper and select the correct paper type setting in your Windows or Macintosh computer.
Basics Guide
Page 63
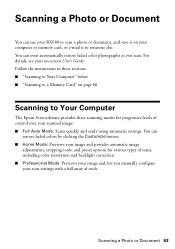
...these sections: ■ "Scanning to Your Computer" below ■ "Scanning to a Memory Card" on -screen User's Guide. Scanning a Photo or Document 63 You can even automatically restore faded color photographs as you manually configure your scanned image: ■ Full Auto Mode: Scans quickly and easily using automatic settings...scan. Scanning a Photo or Document You can use your RX580 to scan a photo or document, and save it to someone else. For details, see your computer or memory card, or e-mail it on your on page 66 Scanning to Your Computer The Epson Scan software provides ...
...these sections: ■ "Scanning to Your Computer" below ■ "Scanning to a Memory Card" on -screen User's Guide. Scanning a Photo or Document 63 You can even automatically restore faded color photographs as you manually configure your scanned image: ■ Full Auto Mode: Scans quickly and easily using automatic settings...scan. Scanning a Photo or Document You can use your RX580 to scan a photo or document, and save it to someone else. For details, see your computer or memory card, or e-mail it on your on page 66 Scanning to Your Computer The Epson Scan software provides ...

Basics Guide
Page 65
...then check the Color Restoration box. If you are scanning from an application (such as you want to Full Auto Mode, click the Scan button. You see the Epson Scan settings window. (You can change the mode using the Mode selector in your on -screen User's Guide.) Scanning to ... application window. If you are in Home or Professional Mode, you are scanning from Epson Scan directly, the scanned image is automatically saved as a JPEG file in the upper right corner is set to automatically restore a color photo as PhotoImpression), the scanned image(s) open in the upper right corner.
...then check the Color Restoration box. If you are scanning from an application (such as you want to Full Auto Mode, click the Scan button. You see the Epson Scan settings window. (You can change the mode using the Mode selector in your on -screen User's Guide.) Scanning to ... application window. If you are in Home or Professional Mode, you are scanning from Epson Scan directly, the scanned image is automatically saved as a JPEG file in the upper right corner is set to automatically restore a color photo as PhotoImpression), the scanned image(s) open in the upper right corner.

Basics Guide
Page 67
Note: Epson cannot guarantee the compatibility of the RX580. Make sure the RX580 is turned on inserting a memory card. 3. Backing Up Your Photos 67 See page 22 for instructions on and the memory card containing your photos is connected to your computer, unplug the USB cable or turn off your files are ... as a USB flash drive. For more pictures. Then insert a CD or disk into the external device USB (EXT.I/F) port on -screen User's Guide. Backing Up Your Photos You can back up , you can delete them from your drive to the external device USB port. Once your computer. 2.
Note: Epson cannot guarantee the compatibility of the RX580. Make sure the RX580 is turned on inserting a memory card. 3. Backing Up Your Photos 67 See page 22 for instructions on and the memory card containing your photos is connected to your computer, unplug the USB cable or turn off your files are ... as a USB flash drive. For more pictures. Then insert a CD or disk into the external device USB (EXT.I/F) port on -screen User's Guide. Backing Up Your Photos You can back up , you can delete them from your drive to the external device USB port. Once your computer. 2.
Basics Guide
Page 70
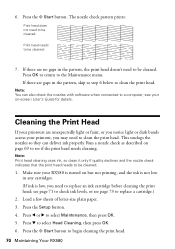
... also check the nozzles with software when connected to check ink levels, or see if the print head needs cleaning. Make sure your RX580 is turned on -screen User's Guide for details. Press the x Start button to select Maintenance, then press OK. 5. The nozzle check pattern prints: Print head does not need to...
... also check the nozzles with software when connected to check ink levels, or see if the print head needs cleaning. Make sure your RX580 is turned on -screen User's Guide for details. Press the x Start button to select Maintenance, then press OK. 5. The nozzle check pattern prints: Print head does not need to...

Basics Guide
Page 78
...the message, contact Epson as described on page 82. Contact Epson as described on page 82 Error Messages Message A printer error has occurred. Make sure the ink cartridges are installed correctly. See the documentation for basic troubleshooting suggestions, or double-click the User's Guide icon on your dealer... scanner unit and remove any jammed paper or other foreign objects. Solution Paper may be printed. Turn off the RX580, then turn the RX580 back on the RX580 screen and trying the recommended solutions. If you 've removed all of the print head. Also, make sure ...
...the message, contact Epson as described on page 82. Contact Epson as described on page 82 Error Messages Message A printer error has occurred. Make sure the ink cartridges are installed correctly. See the documentation for basic troubleshooting suggestions, or double-click the User's Guide icon on your dealer... scanner unit and remove any jammed paper or other foreign objects. Solution Paper may be printed. Turn off the RX580, then turn the RX580 back on the RX580 screen and trying the recommended solutions. If you 've removed all of the print head. Also, make sure ...

Basics Guide
Page 80
... your paper is loaded short edge first and is stuck inside the left edge guide. ■ Make sure the paper size settings are in numbered folders on the device. See your User's Guide for the feature you have used the RX580 to Mid or Min. Do not pull it from the edges to clear... of the feeder guard. ■ Do not load too many sheets at once (up photos on a USB storage device, the RX580 will recognize only the photos in JPEG or uncompressed TIFF format and taken with the left edge guide against the paper (but not too tightly). If the jammed paper is not in the...
... your paper is loaded short edge first and is stuck inside the left edge guide. ■ Make sure the paper size settings are in numbered folders on the device. See your User's Guide for the feature you have used the RX580 to Mid or Min. Do not pull it from the edges to clear... of the feeder guard. ■ Do not load too many sheets at once (up photos on a USB storage device, the RX580 will recognize only the photos in JPEG or uncompressed TIFF format and taken with the left edge guide against the paper (but not too tightly). If the jammed paper is not in the...
Product Information Guide
Page 8
...four times. Epson Stylus Photo RX580 11/06 Glossy, Ultra Glossy, Photo Paper, or Matte, depending on -screen User's Guide for more information. You can either scan a photo (or ...photos. ❏ Color Effect: choose Off (to print in color) or B&W (to save energy. You see the screen above. 4. If this setting Epson Premium Photo Paper Glossy Epson Premium Glossy Photo Paper PremGlossy Epson Ultra Premium Photo Paper Glossy Epson Ultra Premium Glossy Photo Paper UltraGlossy Epson Photo Paper Glossy Epson Glossy Photo Paper Photo Paper Plain paper Epson Bright White Paper Epson...
...four times. Epson Stylus Photo RX580 11/06 Glossy, Ultra Glossy, Photo Paper, or Matte, depending on -screen User's Guide for more information. You can either scan a photo (or ...photos. ❏ Color Effect: choose Off (to print in color) or B&W (to save energy. You see the screen above. 4. If this setting Epson Premium Photo Paper Glossy Epson Premium Glossy Photo Paper PremGlossy Epson Ultra Premium Photo Paper Glossy Epson Ultra Premium Glossy Photo Paper UltraGlossy Epson Photo Paper Glossy Epson Glossy Photo Paper Photo Paper Plain paper Epson Bright White Paper Epson...
Product Information Guide
Page 11
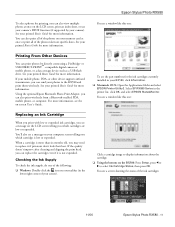
... User's Guide. Click a cartridge image to replace it is not expended. See your computer screen telling you which cartridges are low or expended. You can send your RX580, click Information. ❏ Macintosh OS X: Open the Applications folder and select EPSON Printer...photos on your printed Basics Guide for more information. See your camera). If the quality doesn't improve after cleaning and aligning the print head, you can also view multiple photos at once or print all of the ink cartridges: 11/06 Epson Stylus Photo RX580 - 11 Epson Stylus Photo RX580 To select photos...
... User's Guide. Click a cartridge image to replace it is not expended. See your computer screen telling you which cartridges are low or expended. You can send your RX580, click Information. ❏ Macintosh OS X: Open the Applications folder and select EPSON Printer...photos on your printed Basics Guide for more information. See your camera). If the quality doesn't improve after cleaning and aligning the print head, you can also view multiple photos at once or print all of the ink cartridges: 11/06 Epson Stylus Photo RX580 - 11 Epson Stylus Photo RX580 To select photos...
Product Information Guide
Page 16
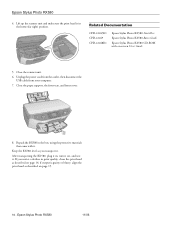
...output is in the box, using the protective materials that came with on , and test it on -screen User's Guide 5. After transporting the RX580, plug it in print quality, clean the print head as you transport it . Lift up the scanner unit... If you notice a decline in , turn it . Related Documentation CPD-22267R1 CPD-22269 CPD-22268R1 Epson Stylus Photo RX580 Start Here Epson Stylus Photo RX580 Basics Guide Epson Stylus Photo RX580 CD-ROM with it . Epson Stylus Photo RX580 4. Epson Stylus Photo RX580 11/06 Close the paper support, the front tray, and front cover. 8.
...output is in the box, using the protective materials that came with on , and test it on -screen User's Guide 5. After transporting the RX580, plug it in print quality, clean the print head as you transport it . Lift up the scanner unit... If you notice a decline in , turn it . Related Documentation CPD-22267R1 CPD-22269 CPD-22268R1 Epson Stylus Photo RX580 Start Here Epson Stylus Photo RX580 Basics Guide Epson Stylus Photo RX580 CD-ROM with it . Epson Stylus Photo RX580 4. Epson Stylus Photo RX580 11/06 Close the paper support, the front tray, and front cover. 8.


