
Technical Brief (Ink Jet Printers)
Page 1
... -in-one printers. Epson MicroPiezo® technology Produces precise ink droplet size and placement Epson Papers Epson papers are designed to receive Epson inks and offer the optimal output quality High Resolution Printing High resolution allows the printer to produce greater detail in photos and sharper text and line art High Quality Halftoning Generates fast, color-accurate results...
... -in-one printers. Epson MicroPiezo® technology Produces precise ink droplet size and placement Epson Papers Epson papers are designed to receive Epson inks and offer the optimal output quality High Resolution Printing High resolution allows the printer to produce greater detail in photos and sharper text and line art High Quality Halftoning Generates fast, color-accurate results...

Technical Brief (Ink Jet Printers)
Page 2
... the print head. Smallest ink droplets produce smooth photos, especially beneficial for highlights and detailed areas Variable sizes combine to achieve more color combinations and smoother color gradations. Gradations and blends become smoother as resolution and droplet control are used in other ink jet printers: Epson MicroPiezo Technology Mechanical method: Precise electrical pulses...
... the print head. Smallest ink droplets produce smooth photos, especially beneficial for highlights and detailed areas Variable sizes combine to achieve more color combinations and smoother color gradations. Gradations and blends become smoother as resolution and droplet control are used in other ink jet printers: Epson MicroPiezo Technology Mechanical method: Precise electrical pulses...

Technical Brief (Ink Jet Printers)
Page 3
... jet papers are designed in the Ink Solutions document. 5. Epson Printer + Epson Ink + Epson Paper Delivers Epson Quality 6. Epson, Exceed Your Vision, MicroPiezo, AcuPhoto Halftoning, Claria, Epson UltraChrome K3, Epson UltraChrome Hi-Gloss, and PictureMate are for applying ink droplets to get sharp black text, superb photo quality photos, or both on the content, selected output quality, and paper type...
... jet papers are designed in the Ink Solutions document. 5. Epson Printer + Epson Ink + Epson Paper Delivers Epson Quality 6. Epson, Exceed Your Vision, MicroPiezo, AcuPhoto Halftoning, Claria, Epson UltraChrome K3, Epson UltraChrome Hi-Gloss, and PictureMate are for applying ink droplets to get sharp black text, superb photo quality photos, or both on the content, selected output quality, and paper type...
Printer Basics
Page 2
... parties for any damages or problems arising from the use of Fuji Photo Film Co.,Ltd. Trademarks Epson, Epson Stylus, Epson Photo Stickers, MicroWeave, PRINT Image Matching, and the PRINT Image Matching logo are service marks of Seiko Epson Corporation. All rights reserved. DPOF™ is a trademark. xD...improper copying or printing of the copyright laws when using digital cameras, scanners, and ink jet printers. Epson disclaims any use of any consumable products other printers. The ENERGY STAR emblem does not represent EPA endorsement of any options or any product or ...
... parties for any damages or problems arising from the use of Fuji Photo Film Co.,Ltd. Trademarks Epson, Epson Stylus, Epson Photo Stickers, MicroWeave, PRINT Image Matching, and the PRINT Image Matching logo are service marks of Seiko Epson Corporation. All rights reserved. DPOF™ is a trademark. xD...improper copying or printing of the copyright laws when using digital cameras, scanners, and ink jet printers. Epson disclaims any use of any consumable products other printers. The ENERGY STAR emblem does not represent EPA endorsement of any options or any product or ...
Printer Basics
Page 4
... 29 Basic Printing in Windows 29 Selecting Default Settings 31 Basic Printing in Mac OS X 31 Selecting the Correct Paper Type 34 Printing Borderless Photos 35 Windows 36 Mac OS X 37 Printing on CDs or DVDs 38 Cleaning the Roller 38 Inserting a CD or DVD 39 Printing Your... Design 41 Adjusting the Print Position 41 Adjusting the Print Density 43 Maintaining Your Printer 45 Cleaning the Print Head 45 Replacing an Ink Cartridge 47 Removing and Installing Ink Cartridges 48 Aligning the Print Head 50 Cleaning the...
... 29 Basic Printing in Windows 29 Selecting Default Settings 31 Basic Printing in Mac OS X 31 Selecting the Correct Paper Type 34 Printing Borderless Photos 35 Windows 36 Mac OS X 37 Printing on CDs or DVDs 38 Cleaning the Roller 38 Inserting a CD or DVD 39 Printing Your... Design 41 Adjusting the Print Position 41 Adjusting the Print Density 43 Maintaining Your Printer 45 Cleaning the Print Head 45 Replacing an Ink Cartridge 47 Removing and Installing Ink Cartridges 48 Aligning the Print Head 50 Cleaning the...
Printer Basics
Page 7
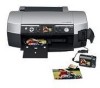
... your PC. Here are perfect for sending prints wirelessly from your computer.) ■ A color LCD preview panel helps you can print pictures directly from your digital camera's memory card. Your Epson Stylus® Photo R340 can transfer them immediately to your printer in a variety of sizes just minutes after taking pictures with manageable print file sizes...
... your PC. Here are perfect for sending prints wirelessly from your computer.) ■ A color LCD preview panel helps you can print pictures directly from your digital camera's memory card. Your Epson Stylus® Photo R340 can transfer them immediately to your printer in a variety of sizes just minutes after taking pictures with manageable print file sizes...

Printer Basics
Page 8
... Tips contain additional hints for better printing. You need a browser-such as described below. About Your Documentation To set up your printer and install its software, see the Quick Reference card. Warnings, Cautions, Notes, and Tips Please follow these guidelines throughout: Warnings ...requirements, important safety information, your warranty, and instructions on: ■ Viewing your on-screen User's Guide ■ Printing all types of photos without a computer, see the Start Here sheet. If you are using a different browser, the pages may not display correctly. (A browser is...
... Tips contain additional hints for better printing. You need a browser-such as described below. About Your Documentation To set up your printer and install its software, see the Quick Reference card. Warnings, Cautions, Notes, and Tips Please follow these guidelines throughout: Warnings ...requirements, important safety information, your warranty, and instructions on: ■ Viewing your on-screen User's Guide ■ Printing all types of photos without a computer, see the Start Here sheet. If you are using a different browser, the pages may not display correctly. (A browser is...
Printer Basics
Page 10
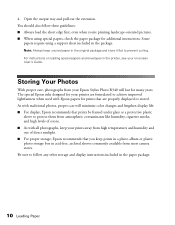
Open the output tray and pull out the extension. Storing Your Photos With proper care, photographs from your Epson Stylus Photo R340 will minimize color changes and lengthen display life: ■ For display, Epson recommends that you 're printing landscape-oriented pictures. ■ When using a support... papers, check the paper package for additional instructions. 4. Note: Always keep prints in a photo album or plastic photo storage box in the printer, see your printer are properly displayed or stored. You should also follow any other storage and display instructions included ...
Open the output tray and pull out the extension. Storing Your Photos With proper care, photographs from your Epson Stylus Photo R340 will minimize color changes and lengthen display life: ■ For display, Epson recommends that you 're printing landscape-oriented pictures. ■ When using a support... papers, check the paper package for additional instructions. 4. Note: Always keep prints in a photo album or plastic photo storage box in the printer, see your printer are properly displayed or stored. You should also follow any other storage and display instructions included ...

Printer Basics
Page 12
... USB powered ■ Memory cards with the printer. 12 Accessing Photos If you can try connecting it must be formatted as the MicroTech™ ZiO!™) Note: Epson cannot guarantee the compatibility of any cameras or drives. After a moment, the printer reads and counts the number of images on ...your memory card. Otherwise, make sure the card light is connected to your camera or drive, you 're not sure about your printer using a Zip...
... USB powered ■ Memory cards with the printer. 12 Accessing Photos If you can try connecting it must be formatted as the MicroTech™ ZiO!™) Note: Epson cannot guarantee the compatibility of any cameras or drives. After a moment, the printer reads and counts the number of images on ...your memory card. Otherwise, make sure the card light is connected to your camera or drive, you 're not sure about your printer using a Zip...
Printer Basics
Page 13
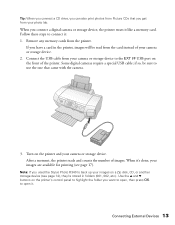
...; if so, be read from the card instead of your camera or storage device to the EXT I/F USB port on the printer's control panel to use the one that you used the Stylus Photo R340 to back up your images on a Zip disk, CD, or another storage device (see page 17). After a moment, the... printer reads and counts the number of the printer. Connecting External Devices 13 Follow these steps to open , then press OK to connect it...
...; if so, be read from the card instead of your camera or storage device to the EXT I/F USB port on the printer's control panel to use the one that you used the Stylus Photo R340 to back up your images on a Zip disk, CD, or another storage device (see page 17). After a moment, the... printer reads and counts the number of the printer. Connecting External Devices 13 Follow these steps to open , then press OK to connect it...

Printer Basics
Page 14
... cameras or drives. Follow the steps below to save photos that are on your camera's memory card to an external device that you connect directly to your external storage device. Note: Epson cannot guarantee the compatibility of the printer (see a screen saying that connects the printer to your computer (otherwise files on the memory...
... cameras or drives. Follow the steps below to save photos that are on your camera's memory card to an external device that you connect directly to your external storage device. Note: Epson cannot guarantee the compatibility of the printer (see a screen saying that connects the printer to your computer (otherwise files on the memory...

Printer Basics
Page 15
...11. Viewing a Slide Show of Your Photos 1. Press OK. To pause the slide show . Open the memory card door. 3. Insert the memory card into your printer's memory card slot and copy the photos to Your Computer If you've taken digital photos with your camera, you can access the... contents of the card just like any portrait photos so they appear upright. 5. The printer plays the slide show while it ...
...11. Viewing a Slide Show of Your Photos 1. Press OK. To pause the slide show . Open the memory card door. 3. Insert the memory card into your printer's memory card slot and copy the photos to Your Computer If you've taken digital photos with your camera, you can access the... contents of the card just like any portrait photos so they appear upright. 5. The printer plays the slide show while it ...

Printer Basics
Page 16
... icon to your computer. You can open the drive and copy your printer. Removing a Memory Card Once you're finished copying photos from your photos to open when you don't see a screen like the one on ... copy files to the card from your desktop to remove it will open , view, or print your photos. In Windows 98, Me, or 2000, double-click the My Computer icon. If you have iPhoto&#... card, follow the steps below , or you have been removed before unplugging the USB cable from your photos. Caution: If you access the card from your computer and delete files from the card, add files to...
... icon to your computer. You can open the drive and copy your printer. Removing a Memory Card Once you're finished copying photos from your photos to open when you don't see a screen like the one on ... copy files to the card from your desktop to remove it will open , view, or print your photos. In Windows 98, Me, or 2000, double-click the My Computer icon. If you have iPhoto&#... card, follow the steps below , or you have been removed before unplugging the USB cable from your photos. Caution: If you access the card from your computer and delete files from the card, add files to...
Printer Basics
Page 18
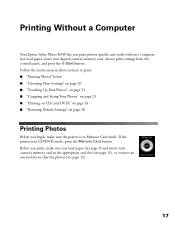
... page 24 ■ "Resetting Default Settings" on page 28 Printing Photos Before you print photos quickly and easily without a computer. Follow the instructions in Memory Card mode. Before you print, make sure the printer is in the appropriate card slot (see page 11), or connect an... external device that has photos (see page 9) and insert your digital camera's memory card, choose print settings from the control panel, and press the x Start button. Printing Without a Computer Your Epson Stylus Photo R340 lets ...
... page 24 ■ "Resetting Default Settings" on page 28 Printing Photos Before you print photos quickly and easily without a computer. Follow the instructions in Memory Card mode. Before you print, make sure the printer is in the appropriate card slot (see page 11), or connect an... external device that has photos (see page 9) and insert your digital camera's memory card, choose print settings from the control panel, and press the x Start button. Printing Without a Computer Your Epson Stylus Photo R340 lets ...
Printer Basics
Page 22
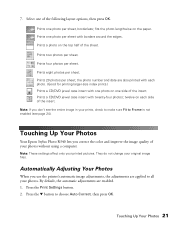
... of the insert. Touching Up Your Photos Your Epson Stylus Photo R340 lets you use the printer's automatic image adjustments, the adjustments are enabled. 1. Automatically Adjusting Your Photos When you correct the color and improve the image quality of the insert. Prints two photos per sheet. Prints one side of your photos. Prints eight photos per sheet; They do not change...
... of the insert. Touching Up Your Photos Your Epson Stylus Photo R340 lets you use the printer's automatic image adjustments, the adjustments are enabled. 1. Automatically Adjusting Your Photos When you correct the color and improve the image quality of the insert. Prints two photos per sheet. Prints one side of your photos. Prints eight photos per sheet; They do not change...

Printer Basics
Page 25
...Printing Position" on your selected layout, part of the image will be used with this printer. Caution: Use only ink jet-printable CDs or DVDs for printing. Highlight Fit to Frame and press r. 3. To reset all photos, not just borderless layouts. You can print on ink jet-printable CDs and DVDs ..., www.warehouse.com, www.macconnection.com, and www.pcconnection.com. Follow the steps in effect until you change them. Fit to Frame If your photo is too long or wide to fit inside the available space on page 27 24 Printing Without a Computer Thermal-printable and regular CDs and DVDs...
...Printing Position" on your selected layout, part of the image will be used with this printer. Caution: Use only ink jet-printable CDs or DVDs for printing. Highlight Fit to Frame and press r. 3. To reset all photos, not just borderless layouts. You can print on ink jet-printable CDs and DVDs ..., www.warehouse.com, www.macconnection.com, and www.pcconnection.com. Follow the steps in effect until you change them. Fit to Frame If your photo is too long or wide to fit inside the available space on page 27 24 Printing Without a Computer Thermal-printable and regular CDs and DVDs...

Printer Basics
Page 29
... mm in either direction. If you made and return to Factory Settings feature. 28 Printing Without a Computer Then press the OK button. Note: The printer remembers this setting even after it has been turned off, so you don't need to adjust the position each time you are returned to their... to choose Restore Factory Settings. 3. Resetting Default Settings You can adjust the position by up to the default settings before printing other photos. 1. Press OK. 5. You can reset the printer's settings (such as the layout, color effects, or crop settings) to 2 mm in either direction. 4.
... mm in either direction. If you made and return to Factory Settings feature. 28 Printing Without a Computer Then press the OK button. Note: The printer remembers this setting even after it has been turned off, so you don't need to adjust the position each time you are returned to their... to choose Restore Factory Settings. 3. Resetting Default Settings You can adjust the position by up to the default settings before printing other photos. 1. Press OK. 5. You can reset the printer's settings (such as the layout, color effects, or crop settings) to 2 mm in either direction. 4.
Printer Basics
Page 30
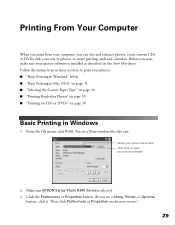
..., you start, make sure your printer software is selected. 3. Before you can edit and enhance photos, create custom CDs or DVDs with your text or photos, or create greeting cards and calendars. Follow the instructions in these sections to open your photos: ■ "Basic Printing in ...button. (If you see a Print window like this one: Select your printer name here Click here to print your printer software 2. You see a Setup, Printer, or Options button, click it. Make sure EPSON Stylus Photo R340 Series is installed as described on the Start Here sheet. Then click Preferences...
..., you start, make sure your printer software is selected. 3. Before you can edit and enhance photos, create custom CDs or DVDs with your text or photos, or create greeting cards and calendars. Follow the instructions in these sections to open your photos: ■ "Basic Printing in ...button. (If you see a Print window like this one: Select your printer name here Click here to print your printer software 2. You see a Setup, Printer, or Options button, click it. Make sure EPSON Stylus Photo R340 Series is installed as described on the Start Here sheet. Then click Preferences...

Printer Basics
Page 31
...paper Type Select your paper Size Select your document or image orientation 4. Tip: For more information about printer settings, click the ? For information on selecting the highest quality (Photo RPM®) on selected papers, see the Printing Preferences or Properties window: Select the type of ...text-only documents with higher text quality. ■ Text & Image: For documents with text and images with higher quality. ■ Photo: For photos and graphics with good quality and speed. ■ Best Photo: For photos or graphics with high print quality. You see your on-screen User's Guide.
...paper Type Select your paper Size Select your document or image orientation 4. Tip: For more information about printer settings, click the ? For information on selecting the highest quality (Photo RPM®) on selected papers, see the Printing Preferences or Properties window: Select the type of ...text-only documents with higher text quality. ■ Text & Image: For documents with text and images with higher quality. ■ Photo: For photos and graphics with good quality and speed. ■ Best Photo: For photos or graphics with high print quality. You see your on-screen User's Guide.

Printer Basics
Page 32
... in Mac OS X Follow the steps below to cancel, pause, or resume printing. Right-click the printer icon in Mac OS X 31 During printing, this : Select Stylus Photo R340 Select your Paper Size Select your document or image orientation Basic Printing in the lower right corner of your print job. From the File menu... programs. 1. You can also see the window shown on page 30. 3. Select the default settings you have left. You can still change the Windows default printer settings for all your program, if necessary. You see how much ink you want , you 're currently using.
... in Mac OS X Follow the steps below to cancel, pause, or resume printing. Right-click the printer icon in Mac OS X 31 During printing, this : Select Stylus Photo R340 Select your Paper Size Select your document or image orientation Basic Printing in the lower right corner of your print job. From the File menu... programs. 1. You can also see the window shown on page 30. 3. Select the default settings you have left. You can still change the Windows default printer settings for all your program, if necessary. You see how much ink you want , you 're currently using.


