
Printer Basics
Page 4
... Selecting the Correct Paper Type 37 Printing Borderless Photos 38 Windows 39 Macintosh OS X 40 Macintosh OS 9 41 Printing on CDs or DVDs 41 Cleaning the Roller 42 Inserting a CD or DVD 42 Printing Your Design 45 Adjusting the Print Position 45 Adjusting the Print Density 48 Maintaining Your Printer 49 Cleaning the Print Head 50 Replacing an Ink Cartridge 51...
... Selecting the Correct Paper Type 37 Printing Borderless Photos 38 Windows 39 Macintosh OS X 40 Macintosh OS 9 41 Printing on CDs or DVDs 41 Cleaning the Roller 42 Inserting a CD or DVD 42 Printing Your Design 45 Adjusting the Print Position 45 Adjusting the Print Density 48 Maintaining Your Printer 49 Cleaning the Print Head 50 Replacing an Ink Cartridge 51...

Printer Basics
Page 5
... or Software Installation Problems Printer Problems Print Quality Problems Problems With Paper Feeding CD/DVD Printing Problems Miscellaneous Printout Problems Uninstalling Printer Software Windows Macintosh OS X Macintosh OS 9 Where To Get Help Notices Windows System Requirements Macintosh System Requirements Important Safety Instructions Ink Cartridge Safety Instructions Energy Star Compliance FCC Compliance Statement Declaration of Conformity Epson America, Inc.
... or Software Installation Problems Printer Problems Print Quality Problems Problems With Paper Feeding CD/DVD Printing Problems Miscellaneous Printout Problems Uninstalling Printer Software Windows Macintosh OS X Macintosh OS 9 Where To Get Help Notices Windows System Requirements Macintosh System Requirements Important Safety Instructions Ink Cartridge Safety Instructions Energy Star Compliance FCC Compliance Statement Declaration of Conformity Epson America, Inc.
Printer Basics
Page 7
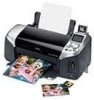
... perfect for superior photo quality and performance, with manageable print file sizes. ■ Three built-in a variety of colors. This lets you connect a digital camera (supported models only) or an external storage device, such as an Iomega® Zip® drive or CD-R drive. Your Epson Stylus® Photo R320 can create true BorderFree™ photos directly from your...
... perfect for superior photo quality and performance, with manageable print file sizes. ■ Three built-in a variety of colors. This lets you connect a digital camera (supported models only) or an external storage device, such as an Iomega® Zip® drive or CD-R drive. Your Epson Stylus® Photo R320 can create true BorderFree™ photos directly from your...

Printer Basics
Page 9
... included on the printer software CD-ROM.) You can also click Start > Programs (or All Programs in Windows XP) > Epson > ESPR320 Reference Guide > Reference Guide. ■ Macintosh: Double-click the ESPR320 Reference Guide icon on your printer. About Your Documentation 9 For basic printing without a computer ■ Printing with , maintaining, or troubleshooting your printer, see your printer and install its...
... included on the printer software CD-ROM.) You can also click Start > Programs (or All Programs in Windows XP) > Epson > ESPR320 Reference Guide > Reference Guide. ■ Macintosh: Double-click the ESPR320 Reference Guide icon on your printer. About Your Documentation 9 For basic printing without a computer ■ Printing with , maintaining, or troubleshooting your printer, see your printer and install its...
Printer Basics
Page 29
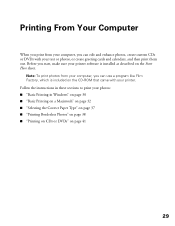
... ■ "Printing Borderless Photos" on page 38 ■ "Printing on CDs or DVDs" on the CD-ROM that came with your text or photos, or create greeting cards and calendars, and then print them out. Printing From Your Computer When you print from your computer, you can edit and enhance photos, create custom CDs or DVDs with your printer. Note: To print photos from...
... ■ "Printing Borderless Photos" on page 38 ■ "Printing on CDs or DVDs" on the CD-ROM that came with your text or photos, or create greeting cards and calendars, and then print them out. Printing From Your Computer When you print from your computer, you can edit and enhance photos, create custom CDs or DVDs with your printer. Note: To print photos from...

Printer Basics
Page 41
.... 3. You see a screen like this printer. Caution: Use only ink jet-printable CDs or DVDs for the paper you print customized text, graphics, and photos directly on both standard-size 12-cm CDs and 8-cm mini CDs. Printing on CDs or DVDs 41 Select print settings as necessary, then click Print to close the Page Setup window. 4. Thermal-printable and regular...
.... 3. You see a screen like this printer. Caution: Use only ink jet-printable CDs or DVDs for the paper you print customized text, graphics, and photos directly on both standard-size 12-cm CDs and 8-cm mini CDs. Printing on CDs or DVDs 41 Select print settings as necessary, then click Print to close the Page Setup window. 4. Thermal-printable and regular...

Printer Basics
Page 45
...Stylus Photo R320 is selected, then click Print. Adjusting the Print Position If your printer or an extra CD. Macintosh Windows Note: After you print, handle the CD or DVD carefully. If you want , you may need to dry fully, wait at least 24 hours before you print on page 48. Start EPSON Print CD.... 3. Use the blank cardboard position check disk included with your printed images and text are not centered or positioned the way you want to check the print position or color, see the EPSON Print CD on-screen Help...
...Stylus Photo R320 is selected, then click Print. Adjusting the Print Position If your printer or an extra CD. Macintosh Windows Note: After you print, handle the CD or DVD carefully. If you want , you may need to dry fully, wait at least 24 hours before you print on page 48. Start EPSON Print CD.... 3. Use the blank cardboard position check disk included with your printed images and text are not centered or positioned the way you want to check the print position or color, see the EPSON Print CD on-screen Help...

Printer Basics
Page 46
4. The confirmation pattern is selected, then click Print Position Confirmation Pattern (Windows) or Print Position Check Pattern (Macintosh). Macintosh Windows 5. Click Print. You'll need a metric ruler with millimeters for these measurements. 46 Printing From Your Computer Remove the position check disk or CD and measure the distance from the edge of the hole to the small cross marks (distances labeled A and B as shown). Make sure Stylus Photo R320 is printed on the position check disk or CD. 6.
4. The confirmation pattern is selected, then click Print Position Confirmation Pattern (Windows) or Print Position Check Pattern (Macintosh). Macintosh Windows 5. Click Print. You'll need a metric ruler with millimeters for these measurements. 46 Printing From Your Computer Remove the position check disk or CD and measure the distance from the edge of the hole to the small cross marks (distances labeled A and B as shown). Make sure Stylus Photo R320 is printed on the position check disk or CD. 6.

Printer Basics
Page 47
Input the A distance in the Width (Right) or Right Space box. 9. Enter the B distance in the Height (Top) or Top Space box. Printing on CDs or DVDs 47 Click OK to save the measurements. Open the File menu and select Adjust Print Position. You see a screen like this: Windows Macintosh Enter measurements here Enter measurements here 8. 7. Make sure Enter Values (Windows) or Value Entry (Macintosh) is checked.
Input the A distance in the Width (Right) or Right Space box. 9. Enter the B distance in the Height (Top) or Top Space box. Printing on CDs or DVDs 47 Click OK to save the measurements. Open the File menu and select Adjust Print Position. You see a screen like this: Windows Macintosh Enter measurements here Enter measurements here 8. 7. Make sure Enter Values (Windows) or Value Entry (Macintosh) is checked.

Printer Basics
Page 48
..., then click Print Density Confirmation Pattern (Windows) or Print Density Check Pattern (Macintosh). 5. Then check the saturation levels again. You can repeat steps 4 through 6, selecting Second or Second Time to adjust color saturation. See the EPSON Print CD on one disc. Start EPSON Print CD. 3. Insert a test CD or DVD for instructions. 48 Printing From Your Computer Make sure Stylus Photo R320 is printed, adjust the...
..., then click Print Density Confirmation Pattern (Windows) or Print Density Check Pattern (Macintosh). 5. Then check the saturation levels again. You can repeat steps 4 through 6, selecting Second or Second Time to adjust color saturation. See the EPSON Print CD on one disc. Start EPSON Print CD. 3. Insert a test CD or DVD for instructions. 48 Printing From Your Computer Make sure Stylus Photo R320 is printed, adjust the...

Printer Basics
Page 69
...sure the paper is positioned correctly in your printer is selected, or is reversed. Clean the roller; Turn off the Flip Horizontal setting in the Page Layout (Windows) or Advanced (Macintosh) window or the mirror setting in your program. (If you're printing on Epson Iron-On Transfer Paper, the image should... inserting it up the arrows exactly as you load it into the printer. The CD or DVD won't feed into the tray guide, not tilting it in the Print Center, Printer Setup Utility, or Macintosh Chooser. ■ The print head nozzles may need cleaning; Don't push in the tray too far...
...sure the paper is positioned correctly in your printer is selected, or is reversed. Clean the roller; Turn off the Flip Horizontal setting in the Page Layout (Windows) or Advanced (Macintosh) window or the mirror setting in your program. (If you're printing on Epson Iron-On Transfer Paper, the image should... inserting it up the arrows exactly as you load it into the printer. The CD or DVD won't feed into the tray guide, not tilting it in the Print Center, Printer Setup Utility, or Macintosh Chooser. ■ The print head nozzles may need cleaning; Don't push in the tray too far...

Printer Basics
Page 83
..., 70 Checking printer, 62 Cleaning print head, 50 printer, 56 roller, 42 sheets, 56 Color Management settings, Macintosh, 34 Color problems, 67 ColorLife Photo Paper, 22, 37 CompactFlash memory card, 13 Control panel messages, 60 to 61 safety, 77 Controlling printing Macintosh, 34, 36 Windows, 31 Copies,... setting number of, 20, 21 Copying photos to computer, 17 to 18 Cropping, 25 to 27 D Declaration of Conformity, 79 Diagnosing problems, 59 to 62 DVDs, see CDs E Edge-to-edge printing, 38 to 41 Electronic manual, 9 to 10 Energy Star, 78 Epson...
..., 70 Checking printer, 62 Cleaning print head, 50 printer, 56 roller, 42 sheets, 56 Color Management settings, Macintosh, 34 Color problems, 67 ColorLife Photo Paper, 22, 37 CompactFlash memory card, 13 Control panel messages, 60 to 61 safety, 77 Controlling printing Macintosh, 34, 36 Windows, 31 Copies,... setting number of, 20, 21 Copying photos to computer, 17 to 18 Cropping, 25 to 27 D Declaration of Conformity, 79 Diagnosing problems, 59 to 62 DVDs, see CDs E Edge-to-edge printing, 38 to 41 Electronic manual, 9 to 10 Energy Star, 78 Epson...

Printer Basics
Page 84
..., 34, 36 Windows, 31 without a computer, 22 to 23 LCD panel messages, 60 to 61 safety, 77 Luster Photo Paper, 37, 38 M Macintosh automatic mode, 33, 35 background printing, 36 basic printing, 32 to 34 cancelling printing, 34, 36 system requirements, 75 uninstalling software, 71 to 72 Maintaining printer, 49 to 56 Marginless printing, 38 to 41...
..., 34, 36 Windows, 31 without a computer, 22 to 23 LCD panel messages, 60 to 61 safety, 77 Luster Photo Paper, 37, 38 M Macintosh automatic mode, 33, 35 background printing, 36 basic printing, 32 to 34 cancelling printing, 34, 36 system requirements, 75 uninstalling software, 71 to 72 Maintaining printer, 49 to 56 Marginless printing, 38 to 41...

Printer Basics
Page 85
... Previewing printout, 36 Print CD software, EPSON, 41, 45 to 48 Print dialog box, 30, 33, 35 Print head aligning, 55 cleaning, 50 Print Head Alignment utility, 55 PRINT Image Matching description, 8 printing photos with, 24 to 25 Print position, CD/DVD, 45 to 47 Print quality problems, 65 to 67 settings, 31, 33, 35 Print window, 30, 33, 35 Printer cable, 75 check, 62...
... Previewing printout, 36 Print CD software, EPSON, 41, 45 to 48 Print dialog box, 30, 33, 35 Print head aligning, 55 cleaning, 50 Print Head Alignment utility, 55 PRINT Image Matching description, 8 printing photos with, 24 to 25 Print position, CD/DVD, 45 to 47 Print quality problems, 65 to 67 settings, 31, 33, 35 Print window, 30, 33, 35 Printer cable, 75 check, 62...

Printer Basics
Page 86
... SmartMedia card, 13 Smeared printout, 68 Software EPSON Print CD, 41, 45 to 48 problems, solving, 63 uninstalling, 70 to 72 Storing photos, 12 System requirements, 75 T Touching up photos, 24 to 25 Transferring photos to computer, 17 to 18 Transparencies, 37 Transporting printer, 57 Troubleshooting, 59 to 73 Type setting, Windows, 30 to 31 U Uninstalling software, 70...
... SmartMedia card, 13 Smeared printout, 68 Software EPSON Print CD, 41, 45 to 48 problems, solving, 63 uninstalling, 70 to 72 Storing photos, 12 System requirements, 75 T Touching up photos, 24 to 25 Transferring photos to computer, 17 to 18 Transparencies, 37 Transporting printer, 57 Troubleshooting, 59 to 73 Type setting, Windows, 30 to 31 U Uninstalling software, 70...

Product Brochure
Page 2
...at 5% coverage per color Warranty Standard one year. * Pages per inch) 5760 x 1440 optimized dpi Minimum Ink Droplet Size 3 picoliters Print Speed* Black text Color text 4" x 6" photo 8" x 10" photo Up to 15 ppm...PRINTER EPSON® STYLUS® PHOTOR320 SPECIFICATIONS Printing Technology 6-color (CcMmYK), advanced Micro Piezo®, optimized for connection between computer and printer USB 1.1 host connection between printer and CD-R/DVD-R drives, Zip drives and PictBridge-enabled digital cameras Operating Systems Windows® USB - The printer ships with images printed, print...
...at 5% coverage per color Warranty Standard one year. * Pages per inch) 5760 x 1440 optimized dpi Minimum Ink Droplet Size 3 picoliters Print Speed* Black text Color text 4" x 6" photo 8" x 10" photo Up to 15 ppm...PRINTER EPSON® STYLUS® PHOTOR320 SPECIFICATIONS Printing Technology 6-color (CcMmYK), advanced Micro Piezo®, optimized for connection between computer and printer USB 1.1 host connection between printer and CD-R/DVD-R drives, Zip drives and PictBridge-enabled digital cameras Operating Systems Windows® USB - The printer ships with images printed, print...

Start Here Card
Page 4
Wait for the system to start up, then insert the Epson® CD-ROM in your computer. Click the Close button to your Printer Basics book. 5 Install Software Windows® The software works with Windows 98SE, Me, 2000, and XP. Flat end continue NOTE: If you see a message. Then follow ... message like this screen, click Continue. 6 Follow the on CDs or DVDs, see this , click Cancel and disconnect the printer from your drive. NOTE: For instructions on loading and printing on -screen instructions to any open port.) NOTE: For Windows XP, if you don't have USB 2.0, you see this :...
Wait for the system to start up, then insert the Epson® CD-ROM in your computer. Click the Close button to your Printer Basics book. 5 Install Software Windows® The software works with Windows 98SE, Me, 2000, and XP. Flat end continue NOTE: If you see a message. Then follow ... message like this screen, click Continue. 6 Follow the on CDs or DVDs, see this , click Cancel and disconnect the printer from your drive. NOTE: For instructions on loading and printing on -screen instructions to any open port.) NOTE: For Windows XP, if you don't have USB 2.0, you see this :...

Start Here Card
Page 5
...is not available for each item.) 6 Click Install EPSON Print CD, then click Install and follow the on-screen instructions. If you 're done installing software, click Exit. The registration screen appears. 9 Follow the on-screen instructions to register your printer. 10 When you see a message telling you will ... follow the on-screen instructions. 9 When you're finished installing software, close any open windows on -screen instructions. (In Mac OS X, you to enable all of the USB cable to your printer. Wait for it . If you 're done installing software, click Exit. The registration ...
...is not available for each item.) 6 Click Install EPSON Print CD, then click Install and follow the on-screen instructions. If you 're done installing software, click Exit. The registration screen appears. 9 Follow the on-screen instructions to register your printer. 10 When you see a message telling you will ... follow the on-screen instructions. 9 When you're finished installing software, close any open windows on -screen instructions. (In Mac OS X, you to enable all of the USB cable to your printer. Wait for it . If you 're done installing software, click Exit. The registration ...


