Product Information Guide
Page 9
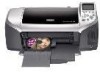
... the icons on the control panel. Try the suggestions in your printer not covered by looking at 5% coverage * The figure given is based on continuous printing after cleaning and aligning the print head, you can replace the cartridge even if the b error light ... otherwise the ink remaining in the printer. 3. EPSON Stylus Photo R300 Series Additional Stand-alone Features See the User's Guide for information on other source. 1. Ink cartridge levels The level of ink shown on the printer. 4. Press the ( Maintenance button. 5. The printer prints a page showing a nozzle check ...
... the icons on the control panel. Try the suggestions in your printer not covered by looking at 5% coverage * The figure given is based on continuous printing after cleaning and aligning the print head, you can replace the cartridge even if the b error light ... otherwise the ink remaining in the printer. 3. EPSON Stylus Photo R300 Series Additional Stand-alone Features See the User's Guide for information on other source. 1. Ink cartridge levels The level of ink shown on the printer. 4. Press the ( Maintenance button. 5. The printer prints a page showing a nozzle check ...

Product Information Guide
Page 11
.... Press the button to clean the print head again. Follow these steps to align the print head using the printer software, the printer must be complete, with no gaps in the printer whenever you 're done. ❏ If any dried ink to soften-and then try cleaning the print head again. EPSON Stylus Photo R300 Series Cleaning the Print Head If your printouts are unexpectedly light...
.... Press the button to clean the print head again. Follow these steps to align the print head using the printer software, the printer must be complete, with no gaps in the printer whenever you 're done. ❏ If any dried ink to soften-and then try cleaning the print head again. EPSON Stylus Photo R300 Series Cleaning the Print Head If your printouts are unexpectedly light...
Product Information Guide
Page 12
... the printer. 3. EPSON Stylus Photo R300 Series 5. Repeat the selection of the best line for set #2, set #3, and then for transportation in the original box using the protective materials that line (1-15), then press OK. 7. If you transport it for set of a similar size. Make sure the CD/DVD tray guide is misaligned, align the print head (see...
... the printer. 3. EPSON Stylus Photo R300 Series 5. Repeat the selection of the best line for set #2, set #3, and then for transportation in the original box using the protective materials that line (1-15), then press OK. 7. If you transport it for set of a similar size. Make sure the CD/DVD tray guide is misaligned, align the print head (see...
User Manual
Page 5
...Printer Cleaning the Print Head Examining the Nozzle Check Pattern Replacing an Ink Cartridge Removing and Installing Ink Cartridges Aligning the Print Head Cleaning the Printer Transporting the Printer Problem Solving Diagnosing Problems Control Panel Messages Running a Printer Check Setup or Software Installation Problems Printer Problems Print...Printing Borderless Photos Windows Macintosh OS X Macintosh OS 8.6 to 9.x Printing On CDs or DVDs Cleaning the Roller Designing CDs and DVDs Inserting a CD or DVD Printing Your Design Adjusting the Print Position Adjusting the Print Density Using PRINT...
...Printer Cleaning the Print Head Examining the Nozzle Check Pattern Replacing an Ink Cartridge Removing and Installing Ink Cartridges Aligning the Print Head Cleaning the Printer Transporting the Printer Problem Solving Diagnosing Problems Control Panel Messages Running a Printer Check Setup or Software Installation Problems Printer Problems Print...Printing Borderless Photos Windows Macintosh OS X Macintosh OS 8.6 to 9.x Printing On CDs or DVDs Cleaning the Roller Designing CDs and DVDs Inserting a CD or DVD Printing Your Design Adjusting the Print Position Adjusting the Print Density Using PRINT...
User Manual
Page 87
...89 ■ "Aligning the Print Head" on page 93 ■ "Cleaning the Printer" on page 94 ■ "Transporting the Printer" on page 95 Note: You can also maintain your printer. Maintaining Your Printer This chapter describes ...maintenance procedures to choose Advanced 87 Press the mode button to Advanced mode. The steps in this chapter must be performed with the printer set to choose Advanced. Follow the instructions here for moving your printer from the EPSON Printer...
...89 ■ "Aligning the Print Head" on page 93 ■ "Cleaning the Printer" on page 94 ■ "Transporting the Printer" on page 95 Note: You can also maintain your printer. Maintaining Your Printer This chapter describes ...maintenance procedures to choose Advanced 87 Press the mode button to Advanced mode. The steps in this chapter must be performed with the printer set to choose Advanced. Follow the instructions here for moving your printer from the EPSON Printer...

User Manual
Page 90
...(U.S. You see a message on continuous printing after cleaning and aligning the print head, you may need new ink cartridges, contact your dealer, call (800) 463-7766 for dealer referral. Make sure the printer is turned on (cartridge is empty...print head moves to continue. Press the button to choose More Options, then press OK. In Canada, please call the EPSON Store at 5% coverage * The figure given is low), press the b maintenance button. If the quality doesn't improve after ink replacement. When an installed cartridge is on and not printing, then open the printer...
...(U.S. You see a message on continuous printing after cleaning and aligning the print head, you may need new ink cartridges, contact your dealer, call (800) 463-7766 for dealer referral. Make sure the printer is turned on (cartridge is empty...print head moves to continue. Press the button to choose More Options, then press OK. In Canada, please call the EPSON Store at 5% coverage * The figure given is low), press the b maintenance button. If the quality doesn't improve after ink replacement. When an installed cartridge is on and not printing, then open the printer...

User Manual
Page 93
... until Print Head Alignment is done printing, examine the first row or set #4. 8. When you're finished, press OK. Use the and buttons to use a magnifying glass. 6. You can align the print head either from the printer software, the printer must be connected directly to your computer (not over a network); Note: For the best results, load letter-size EPSON Photo Quality...
... until Print Head Alignment is done printing, examine the first row or set #4. 8. When you're finished, press OK. Use the and buttons to use a magnifying glass. 6. You can align the print head either from the printer software, the printer must be connected directly to your computer (not over a network); Note: For the best results, load letter-size EPSON Photo Quality...

User Manual
Page 95
... the CD/DVD tray guide is misaligned, align the print head (see page 88); Keep the printer level as shown, then close the paper support. 5. if output is closed, then push in print quality, clean the print head (see page 93). Then disconnect the printer cable from the electrical outlet. If your printer has a preview monitor, disconnect the cable...
... the CD/DVD tray guide is misaligned, align the print head (see page 88); Keep the printer level as shown, then close the paper support. 5. if output is closed, then push in print quality, clean the print head (see page 93). Then disconnect the printer cable from the electrical outlet. If your printer has a preview monitor, disconnect the cable...
User Manual
Page 104
... ■ Make sure your paper meets the specifications listed in the Printing Properties or Preferences window, click Printer and Option Information, then select Thick paper and envelopes. Mac OS X: From the Print window, choose Extension Setting in the paper package. The printable side ... higher print quality setting. see page 89. ■ Run the Print Head Alignment utility; If you 're printing on special paper, check the instructions in the popup menu, then select Thick paper and envelopes. You may need to ensure proper saturation and absorption of genuine EPSON inks....
... ■ Make sure your paper meets the specifications listed in the Printing Properties or Preferences window, click Printer and Option Information, then select Thick paper and envelopes. Mac OS X: From the Print window, choose Extension Setting in the paper package. The printable side ... higher print quality setting. see page 89. ■ Run the Print Head Alignment utility; If you 're printing on special paper, check the instructions in the popup menu, then select Thick paper and envelopes. You may need to ensure proper saturation and absorption of genuine EPSON inks....
User Manual
Page 105
... Run the Print Head Alignment utility. see wrong or missing colors. ■ Make sure the Ink setting is set to get as close as possible. You see your software is not set to Color for instructions. ■ You may be old or low on -screen colors. see if the colors look right.... 're using ; If it is, reload a new stack of paper you 're printing without a computer, check your printer's color management features. To replace an ink cartridge, see page 88 for color printing. ■ The print head nozzles may need to Standard. see page 88 for guidelines. ■ Make sure your...
... Run the Print Head Alignment utility. see wrong or missing colors. ■ Make sure the Ink setting is set to get as close as possible. You see your software is not set to Color for instructions. ■ You may be old or low on -screen colors. see if the colors look right.... 're using ; If it is, reload a new stack of paper you 're printing without a computer, check your printer's color management features. To replace an ink cartridge, see page 88 for color printing. ■ The print head nozzles may need to Standard. see page 88 for guidelines. ■ Make sure your...

User Manual
Page 121
... Characters, incorrect, 108 Checking printer, 100 Cleaning print head, 88 to 89 printer, 94 roller, 36, 67 sheets, 94 Color management settings, 58 Color Management settings Macintosh, 55, 60 printing without a computer, 29 to 30 Windows, 58 Color problems, 105 ColorSync, 55 CompactFlash memory card, 19, 48 Controlling printing Macintosh, 55, 57 Windows, 52 Copying photos to computer, 48 to...
... Characters, incorrect, 108 Checking printer, 100 Cleaning print head, 88 to 89 printer, 94 roller, 36, 67 sheets, 94 Color management settings, 58 Color Management settings Macintosh, 55, 60 printing without a computer, 29 to 30 Windows, 58 Color problems, 105 ColorSync, 55 CompactFlash memory card, 19, 48 Controlling printing Macintosh, 55, 57 Windows, 52 Copying photos to computer, 48 to...
User Manual
Page 123
... 77 Print dialog box, 56 Print head aligning, 93 cleaning, 88 to 89 Print Head Alignment utility, 93 PRINT Image Matching description, 8 plug-in for Photoshop, 9, 82 to 85 printing without computer, 18, 29 to 30 with Film Factory, 78 to 82 Print position check paper, 75 to 76 Print Quality settings, 51 Print quality problems, 103 to 105 Print window, 50 Printer Advanced...
... 77 Print dialog box, 56 Print head aligning, 93 cleaning, 88 to 89 Print Head Alignment utility, 93 PRINT Image Matching description, 8 plug-in for Photoshop, 9, 82 to 85 printing without computer, 18, 29 to 30 with Film Factory, 78 to 82 Print position check paper, 75 to 76 Print Quality settings, 51 Print quality problems, 103 to 105 Print window, 50 Printer Advanced...

User Manual
Page 124
..., 109 to 111 Stopping printing, 27 Storing photos, 16 System requirements, 113 T Transferring photos to computer, 48 to 50 Transparencies, 61 Transporting printer, 95 Troubleshooting, 97 to 112 Type setting, 52 U Uninstalling software, 109 to 111 USB, 20 to 21, 109, 113 Utilities Head Cleaning, 88 to 89 Nozzle Check, 89 Print Head Alignment, 93 W Watermark, 57, 59...
..., 109 to 111 Stopping printing, 27 Storing photos, 16 System requirements, 113 T Transferring photos to computer, 48 to 50 Transparencies, 61 Transporting printer, 95 Troubleshooting, 97 to 112 Type setting, 52 U Uninstalling software, 109 to 111 USB, 20 to 21, 109, 113 Utilities Head Cleaning, 88 to 89 Nozzle Check, 89 Print Head Alignment, 93 W Watermark, 57, 59...


