
User Manual (P.I.M Plug-in)
Page 2
... Epson Stylus® Photo R200 ■ Epson Stylus Photo R300/R300M ■ Epson Stylus Photo R320 ■ Epson Stylus Photo R800 ■ Epson Stylus Photo RX500 ■ Epson Stylus Photo RX600 ■ Epson Stylus Photo 780 ■ Epson Stylus Photo 785EPX ■ Epson Stylus Photo 820 ■ Epson Stylus Photo 825 ■ Epson Stylus Photo 890 ■ Epson Stylus Photo 900 ■ Epson Stylus Photo 925 ■ Epson Stylus Photo 960 ■ Epson Stylus Photo 1280 ■ Epson Stylus Photo 2000P* ■ Epson Stylus Photo 2200 ■ PictureMate™ by Epson * This printer...
... Epson Stylus® Photo R200 ■ Epson Stylus Photo R300/R300M ■ Epson Stylus Photo R320 ■ Epson Stylus Photo R800 ■ Epson Stylus Photo RX500 ■ Epson Stylus Photo RX600 ■ Epson Stylus Photo 780 ■ Epson Stylus Photo 785EPX ■ Epson Stylus Photo 820 ■ Epson Stylus Photo 825 ■ Epson Stylus Photo 890 ■ Epson Stylus Photo 900 ■ Epson Stylus Photo 925 ■ Epson Stylus Photo 960 ■ Epson Stylus Photo 1280 ■ Epson Stylus Photo 2000P* ■ Epson Stylus Photo 2200 ■ PictureMate™ by Epson * This printer...
Start Here Card
Page 4
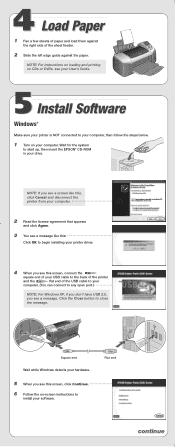
... license agreement that appears and click Agree. 3 You see a message like this: Click OK to begin installing your printer driver. 4 When you see this screen, click Continue. 6 Follow the on your computer. Flat end continue 4 Load ...the USB cable to your computer. (You can connect to any open port.) NOTE: For Windows XP, if you don't have USB 2.0, you see this screen, connect the square end of your USB...the back of the printer and the flat end of the sheet feeder. 2 Slide the left edge guide against the paper. Click the Close button to start up, then insert the EPSON® CD-ROM in...
... license agreement that appears and click Agree. 3 You see a message like this: Click OK to begin installing your printer driver. 4 When you see this screen, click Continue. 6 Follow the on your computer. Flat end continue 4 Load ...the USB cable to your computer. (You can connect to any open port.) NOTE: For Windows XP, if you don't have USB 2.0, you see this screen, connect the square end of your USB...the back of the printer and the flat end of the sheet feeder. 2 Slide the left edge guide against the paper. Click the Close button to start up, then insert the EPSON® CD-ROM in...
User Manual
Page 82
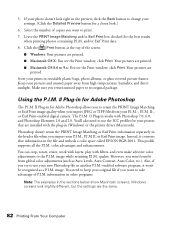
... a color space called EPSON RGB 2001. Click the Print button at the top of the screen. ■ Windows: Your pictures are printed. ■ Macintosh OS 8.6 to 9.x: You see the Print window; Store your prints in the preview, click the Back button to use your photo doesn't...separately in for Adobe Photoshop allows you to its original package. quality. II Plug-in (Windows) or the printer driver (Macintosh). You'll also need to keep your pictures and unused paper away from global color adjustments (such as a P.I .M. information in other programs. Note: The examples in ...
... a color space called EPSON RGB 2001. Click the Print button at the top of the screen. ■ Windows: Your pictures are printed. ■ Macintosh OS 8.6 to 9.x: You see the Print window; Store your prints in the preview, click the Back button to use your photo doesn't...separately in for Adobe Photoshop allows you to its original package. quality. II Plug-in (Windows) or the printer driver (Macintosh). You'll also need to keep your pictures and unused paper away from global color adjustments (such as a P.I .M. information in other programs. Note: The examples in ...
User Manual
Page 87
...-screen Reference Guide (described on your driver (Windows) or from the Maintenance tab on page 10). Press to keep your printer working its best, and preparation steps ...for : ■ "Cleaning the Print Head" on page 88 ■ "Replacing an Ink Cartridge" on page 89 ■ "Aligning the Print Head" on page 93 ■ "Cleaning the Printer" on page 94 ■ "Transporting the Printer..." on page 95 Note: You can also maintain your printer. Press the mode button ...
...-screen Reference Guide (described on your driver (Windows) or from the Maintenance tab on page 10). Press to keep your printer working its best, and preparation steps ...for : ■ "Cleaning the Print Head" on page 88 ■ "Replacing an Ink Cartridge" on page 89 ■ "Aligning the Print Head" on page 93 ■ "Cleaning the Printer" on page 94 ■ "Transporting the Printer..." on page 95 Note: You can also maintain your printer. Press the mode button ...
User Manual
Page 101
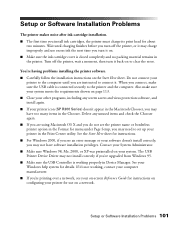
... you may have software installation privileges. Delete any screen savers and virus protection software, and install again. ■ If your printer icon (SP R300 Series) doesn't appear in the Macintosh Chooser, you may not have too many items in the Format for menu under Page Setup... on configuring your printer for instructions. ■ For Windows 2000, if you see an error message or your software doesn't install correctly, you 're printing over a network, see the printer name or borderless printer option in the Chooser. If it . The USB Printer Device Driver may not install...
... you may have software installation privileges. Delete any screen savers and virus protection software, and install again. ■ If your printer icon (SP R300 Series) doesn't appear in the Macintosh Chooser, you may not have too many items in the Format for menu under Page Setup... on configuring your printer for instructions. ■ For Windows 2000, if you see an error message or your software doesn't install correctly, you 're printing over a network, see the printer name or borderless printer option in the Chooser. If it . The USB Printer Device Driver may not install...
User Manual
Page 103
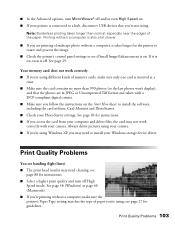
... for instructions. ■ If you access the card from your Windows storage device driver. see banding (light lines). ■ The print head nozzles ...may need cleaning; see if Small Image Enhancement is on . ■ If your camera. Note: Borderless printing takes longer than 999 photos (or the last photos won't display), and that the photos are printing a landscape photo...a computer, it takes longer for the printer to rotate and process the image. ■ Check the printer's control panel settings to see page 88 ...
... for instructions. ■ If you access the card from your Windows storage device driver. see banding (light lines). ■ The print head nozzles ...may need cleaning; see if Small Image Enhancement is on . ■ If your camera. Note: Borderless printing takes longer than 999 photos (or the last photos won't display), and that the photos are printing a landscape photo...a computer, it takes longer for the printer to rotate and process the image. ■ Check the printer's control panel settings to see page 88 ...
User Manual
Page 109
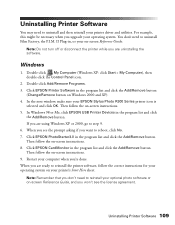
...the correct instructions for your operating system on your EPSON Stylus Photo R300 Series printer icon is selected and click OK. Click EPSON PhotoStarter3.0 in the program list and click the Add/Remove button. Restart your computer when you upgrade your on Windows 2000 and XP). 4. Note: Remember that ... Note: Do not turn off or disconnect the printer while you are uninstalling the software. If you are using Windows XP or 2000, go to reinstall your printer driver and utilities. When you are ready to reinstall the printer software, follow the on -screen Reference Guide, ...
...the correct instructions for your operating system on your EPSON Stylus Photo R300 Series printer icon is selected and click OK. Click EPSON PhotoStarter3.0 in the program list and click the Add/Remove button. Restart your computer when you upgrade your on Windows 2000 and XP). 4. Note: Remember that ... Note: Do not turn off or disconnect the printer while you are uninstalling the software. If you are using Windows XP or 2000, go to reinstall your printer driver and utilities. When you are ready to reinstall the printer software, follow the on -screen Reference Guide, ...
User Manual
Page 110
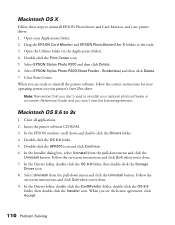
... EPSON window, scroll down menu and click the Uninstall button. In the Installer dialog box, select Uninstall from the pull-down and double-click the Drivers folder. 4. Follow the on -screen instructions and click Quit when you are ready to reinstall the printer software, follow the correct instructions for X folders to the trash. 3. Select EPSON Stylus Photo R300...
... EPSON window, scroll down menu and click the Uninstall button. In the Installer dialog box, select Uninstall from the pull-down and double-click the Drivers folder. 4. Follow the on -screen instructions and click Quit when you are ready to reinstall the printer software, follow the correct instructions for X folders to the trash. 3. Select EPSON Stylus Photo R300...


