
User Manual (P.I.M Plug-in)
Page 2
... Epson Stylus® Photo R200 ■ Epson Stylus Photo R300/R300M ■ Epson Stylus Photo R320 ■ Epson Stylus Photo R800 ■ Epson Stylus Photo RX500 ■ Epson Stylus Photo RX600 ■ Epson Stylus Photo 780 ■ Epson Stylus Photo 785EPX ■ Epson Stylus Photo 820 ■ Epson Stylus Photo 825 ■ Epson Stylus Photo 890 ■ Epson Stylus Photo 900 ■ Epson Stylus Photo 925 ■ Epson Stylus Photo 960 ■ Epson Stylus Photo 1280 ■ Epson Stylus Photo 2000P* ■ Epson Stylus Photo 2200 ■ PictureMate™ by Epson * This printer...
... Epson Stylus® Photo R200 ■ Epson Stylus Photo R300/R300M ■ Epson Stylus Photo R320 ■ Epson Stylus Photo R800 ■ Epson Stylus Photo RX500 ■ Epson Stylus Photo RX600 ■ Epson Stylus Photo 780 ■ Epson Stylus Photo 785EPX ■ Epson Stylus Photo 820 ■ Epson Stylus Photo 825 ■ Epson Stylus Photo 890 ■ Epson Stylus Photo 900 ■ Epson Stylus Photo 925 ■ Epson Stylus Photo 960 ■ Epson Stylus Photo 1280 ■ Epson Stylus Photo 2000P* ■ Epson Stylus Photo 2200 ■ PictureMate™ by Epson * This printer...
Start Here Card
Page 4
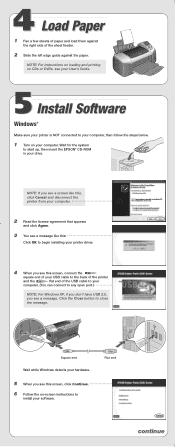
...your printer is NOT connected to your computer, then follow the steps below. 1 Turn on -screen instructions to any open port.) NOTE: For Windows XP, if you don't have USB 2.0, you see a message. Square end Wait while Windows detects your software. Click the Close button to start up, then insert the EPSON&#... and click Agree. 3 You see a message like this: Click OK to begin installing your printer driver. 4 When you see this screen, connect the square end of your USB cable to the back of the printer and the flat end of the sheet feeder. 2 Slide the left edge guide against the right...
...your printer is NOT connected to your computer, then follow the steps below. 1 Turn on -screen instructions to any open port.) NOTE: For Windows XP, if you don't have USB 2.0, you see a message. Square end Wait while Windows detects your software. Click the Close button to start up, then insert the EPSON&#... and click Agree. 3 You see a message like this: Click OK to begin installing your printer driver. 4 When you see this screen, connect the square end of your USB cable to the back of the printer and the flat end of the sheet feeder. 2 Slide the left edge guide against the right...
User Manual
Page 82
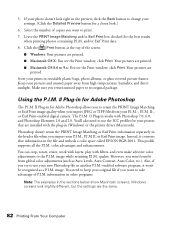
... below show Macintosh screens. II Plug-in (Windows) or the printer driver (Macintosh). II Plug-in the file and embeds a color space called EPSON RGB 2001. You'll also need to keep your printer that information in works with filters, and even make selective color adjustments to use your P.I.M., P.I .M. However,... allows you to retain the PRINT Image Matching or Exif Print image quality when you want to 9.x: You see the Print window; 5. If your photo doesn't look right in the preview, click the Back button to use the ICC profiles for a closer look slightly different,...
... below show Macintosh screens. II Plug-in (Windows) or the printer driver (Macintosh). II Plug-in the file and embeds a color space called EPSON RGB 2001. You'll also need to keep your printer that information in works with filters, and even make selective color adjustments to use your P.I.M., P.I .M. However,... allows you to retain the PRINT Image Matching or Exif Print image quality when you want to 9.x: You see the Print window; 5. If your photo doesn't look right in the preview, click the Back button to use the ICC profiles for a closer look slightly different,...
User Manual
Page 87
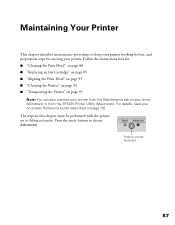
Press the mode button to Advanced mode. The steps in this chapter must be performed with the printer set to choose Advanced. For details, read your driver (Windows) or from the EPSON Printer Utility (Macintosh). Press to keep your printer working its best, and preparation steps for : ■ "Cleaning the Print Head" on page 88 ■ "Replacing...
Press the mode button to Advanced mode. The steps in this chapter must be performed with the printer set to choose Advanced. For details, read your driver (Windows) or from the EPSON Printer Utility (Macintosh). Press to keep your printer working its best, and preparation steps for : ■ "Cleaning the Print Head" on page 88 ■ "Replacing...
User Manual
Page 101
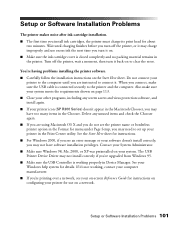
... under Page Setup, you may charge improperly and use on a network. If it on your printer icon (SP R300 Series) doesn't appear in the Chooser. The USB Printer Device Driver may not have too many items in the Macintosh Chooser, you may have software installation privileges. ... OS X and you do not see the printer name or borderless printer option in the Print Center utility. Contact your printer to clear the error. Setup or Software Installation Problems 101 Do not connect your System Administrator. ■ Make sure Windows 98, Me, 2000, or XP was preinstalled...
... under Page Setup, you may charge improperly and use on a network. If it on your printer icon (SP R300 Series) doesn't appear in the Chooser. The USB Printer Device Driver may not have too many items in the Macintosh Chooser, you may have software installation privileges. ... OS X and you do not see the printer name or borderless printer option in the Print Center utility. Contact your printer to clear the error. Setup or Software Installation Problems 101 Do not connect your System Administrator. ■ Make sure Windows 98, Me, 2000, or XP was preinstalled...
User Manual
Page 103
...card utilities: Card Monitor and PhotoStarter. ■ Check your camera. See page 49 for the printer to rotate and process the image. ■ Check the printer's control panel settings to install your Windows storage device driver. see if Small Image Enhancement is also a bit slower. ■ If you 're not... delete files, the card may not work correctly. ■ If you're using . Note: Borderless printing takes longer than 999 photos (or the last photos won't display), and that you are in JPEG or Uncompressed Tiff format and taken with your PhotoStarter settings. see page 88 for ...
...card utilities: Card Monitor and PhotoStarter. ■ Check your camera. See page 49 for the printer to rotate and process the image. ■ Check the printer's control panel settings to install your Windows storage device driver. see if Small Image Enhancement is also a bit slower. ■ If you 're not... delete files, the card may not work correctly. ■ If you're using . Note: Borderless printing takes longer than 999 photos (or the last photos won't display), and that you are in JPEG or Uncompressed Tiff format and taken with your PhotoStarter settings. see page 88 for ...
User Manual
Page 109
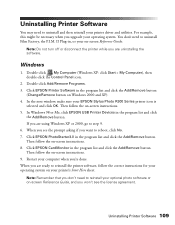
...uninstall and then reinstall your printer driver and utilities. II Plug-in, or your on Windows 2000 and XP). 4. Windows 1. In the next window, make sure your operating system. Uninstalling Printer Software You may need to reinstall your optional photo software or on-screen ...Windows XP: click Start > My Computer), then double-click the Control Panel icon. 2. Click EPSON Printer Software in the program list and click the Add/Remove button. Then follow the correct instructions for your printer's Start Here sheet. When you upgrade your EPSON Stylus Photo R300 Series printer...
...uninstall and then reinstall your printer driver and utilities. II Plug-in, or your on Windows 2000 and XP). 4. Windows 1. In the next window, make sure your operating system. Uninstalling Printer Software You may need to reinstall your optional photo software or on-screen ...Windows XP: click Start > My Computer), then double-click the Control Panel icon. 2. Click EPSON Printer Software in the program list and click the Add/Remove button. Then follow the correct instructions for your printer's Start Here sheet. When you upgrade your EPSON Stylus Photo R300 Series printer...
User Manual
Page 110
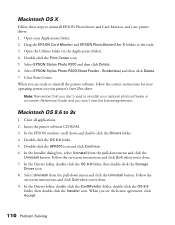
... folder (in the Applications folder). 4. Borderless) and then click Delete. 7. Insert the printer software CD-ROM. 3. In the EPSON window, scroll down menu and click the Uninstall button. Double-click the SPR300 icon and click Continue. 6. Open your printer driver: 1. Select EPSON Stylus Photo R300 and then click Delete. 6. Select EPSON Stylus Photo R300(Sheet Feeder - When you are ready to reinstall the...
... folder (in the Applications folder). 4. Borderless) and then click Delete. 7. Insert the printer software CD-ROM. 3. In the EPSON window, scroll down menu and click the Uninstall button. Double-click the SPR300 icon and click Continue. 6. Open your printer driver: 1. Select EPSON Stylus Photo R300 and then click Delete. 6. Select EPSON Stylus Photo R300(Sheet Feeder - When you are ready to reinstall the...


