Installation Guide
Page 2
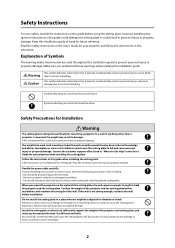
... to Get Help" in the User's Guide for your projector and follow the instructions in a place where it might be performed by incorrect installation. 2 It could cause the setting plate...projector and the setting plate before installation. Incomplete or incorrect installation could cause personal injury or property damage. Install the setting plate so that ignores instructions in this guide could damage the setting plate or could possibly result in this installation guide to fall . Epson takes no responsibility for future reference. Keep this guide when installing...
... to Get Help" in the User's Guide for your projector and follow the instructions in a place where it might be performed by incorrect installation. 2 It could cause the setting plate...projector and the setting plate before installation. Incomplete or incorrect installation could cause personal injury or property damage. Install the setting plate so that ignores instructions in this guide could damage the setting plate or could possibly result in this installation guide to fall . Epson takes no responsibility for future reference. Keep this guide when installing...

Installation Guide
Page 3
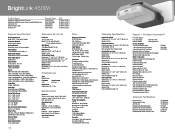
... or things such as fluorescent lights or air conditioners. About This Installation Guide This guide describes how to mount the BrightLink™ 450 Wi, PowerLite® 460, and PowerLite 450W projectors to prevent the lens or optical components from becoming dirty. If the setting plate or projector falls, it could cause personal injury or property damage.
... or things such as fluorescent lights or air conditioners. About This Installation Guide This guide describes how to mount the BrightLink™ 450 Wi, PowerLite® 460, and PowerLite 450W projectors to prevent the lens or optical components from becoming dirty. If the setting plate or projector falls, it could cause personal injury or property damage.

Installation Guide
Page 5
...mm hexagon socket head cap bolt with washer Quantity 2 Application For installing setting plate M5 x 12 mm hexagon socket head cap bolt with washer 2 For securing projector M4 x 12 mm hexagon socket head cap bolt without 2 For installing wall plate cover washer • Use the bolts supplied with any... other types. • Use commercially available M8 x 50 mm anchors (at least 3) or 8 x 80 mm lag bolts (at least 3) to attach the wall plate to install it, as directed in this guide.
...mm hexagon socket head cap bolt with washer Quantity 2 Application For installing setting plate M5 x 12 mm hexagon socket head cap bolt with washer 2 For securing projector M4 x 12 mm hexagon socket head cap bolt without 2 For installing wall plate cover washer • Use the bolts supplied with any... other types. • Use commercially available M8 x 50 mm anchors (at least 3) or 8 x 80 mm lag bolts (at least 3) to attach the wall plate to install it, as directed in this guide.

Installation Guide
Page 27
...with the two M4 x 12 mm hexagon socket head cap bolts (A). You may need to the User's Guide of the wall plate cover. English 7. q If the cables are not installed inside the wall, you need to enlarge the cutouts to allow the cables to secure the cable cover.... wall plate cover with the concave portion facing up (B). Cable cover Screws (2) Only a specialist should remove or reinstall the projector, including for instructions on each side of your projector for maintenance and repairs. Wall plate cover M4 x 12 mm hexagon socket head cap bolts (2) End cap Cable cutouts B...
...with the two M4 x 12 mm hexagon socket head cap bolts (A). You may need to the User's Guide of the wall plate cover. English 7. q If the cables are not installed inside the wall, you need to enlarge the cutouts to allow the cables to secure the cable cover.... wall plate cover with the concave portion facing up (B). Cable cover Screws (2) Only a specialist should remove or reinstall the projector, including for instructions on each side of your projector for maintenance and repairs. Wall plate cover M4 x 12 mm hexagon socket head cap bolts (2) End cap Cable cutouts B...

Installation Guide
Page 28
... them firmly. Appendix Using the Easy Interactive Function (BrightLink 450Wi Only) After you install the BrightLink 450Wi, you need to install the Easy Interactive Driver and perform calibration (to the User's Guide supplied with the projector. 28 Pass the wire of the BrightLink 450Wi is to be installed in the room with the wire lock. After installation of the theft-prevention wire lock through...
... them firmly. Appendix Using the Easy Interactive Function (BrightLink 450Wi Only) After you install the BrightLink 450Wi, you need to install the Easy Interactive Driver and perform calibration (to the User's Guide supplied with the projector. 28 Pass the wire of the BrightLink 450Wi is to be installed in the room with the wire lock. After installation of the theft-prevention wire lock through...

Installation Worksheets
Page 2
...image area (f ). For new computers or laptops, this information. 4:3 XGA 16:10 WXGA 16:9 Widescreen (3) Using the tables in the Installation Guide to determine the required distance from the top of the image area to the bottom of the wall plate (b). (7) Add: Required distance from... of the projected image area by adding distances (f ) and (h). (6) Use the tables in the Installation Guide for your aspect ratio, select the largest image size available for a BrightLink™ installation on a Plain Wall Use this will need to position the wall mount for your ceiling height.
...image area (f ). For new computers or laptops, this information. 4:3 XGA 16:10 WXGA 16:9 Widescreen (3) Using the tables in the Installation Guide to determine the required distance from the top of the image area to the bottom of the wall plate (b). (7) Add: Required distance from... of the projected image area by adding distances (f ) and (h). (6) Use the tables in the Installation Guide for your aspect ratio, select the largest image size available for a BrightLink™ installation on a Plain Wall Use this will need to position the wall mount for your ceiling height.

Installation Worksheets
Page 3
... area on the template sheet with the (b) mark, then align the center line on the board to install the projector. © 2010 Epson America, Inc. 3/10 CPD-28017 Align the line (horizontal) on the template sheet with the center of the wall plate. 10 in the Installation Guide to the bottom of the image area.
... area on the template sheet with the (b) mark, then align the center line on the board to install the projector. © 2010 Epson America, Inc. 3/10 CPD-28017 Align the line (horizontal) on the template sheet with the center of the wall plate. 10 in the Installation Guide to the bottom of the image area.

Installation Worksheets
Page 5
...install the projector. © 2010 Epson America, Inc. 3/10 CPD-28016 For older equipment, this will most likely be XGA (4:3). You may need to consult your IT director for this information. 4:3 XGA 16:10 WXGA 16:9 Widescreen (8) Using the tables in the Installation Guide... for your aspect ratio and desired image height (h), find the required distance between the top of the image area and the _____ (b) wall plate (b). (9) Determine the position for your projector installation by adding the values for (f ), _____ (f...
...install the projector. © 2010 Epson America, Inc. 3/10 CPD-28016 For older equipment, this will most likely be XGA (4:3). You may need to consult your IT director for this information. 4:3 XGA 16:10 WXGA 16:9 Widescreen (8) Using the tables in the Installation Guide... for your aspect ratio and desired image height (h), find the required distance between the top of the image area and the _____ (b) wall plate (b). (9) Determine the position for your projector installation by adding the values for (f ), _____ (f...
Product Brochure
Page 16
... 2-year Extended Fast Turn Depot Epson Road Service Program Epson PrivateLine dedicated toll-free support 90-day limited lamp warranty What's In The Box BrightLink 450Wi interactive projector Projector mount Projector template sheet Installation guide Quick users guide Power cable (5 m, 16.4') USB A/B cable (5 m, 16.4') Computer/VGA cable (4.5 m, 15') User manual Interactive driver Interactive software Network software Projector remote control Two (2) interactive pens Four (4) AAA batteries...
... 2-year Extended Fast Turn Depot Epson Road Service Program Epson PrivateLine dedicated toll-free support 90-day limited lamp warranty What's In The Box BrightLink 450Wi interactive projector Projector mount Projector template sheet Installation guide Quick users guide Power cable (5 m, 16.4') USB A/B cable (5 m, 16.4') Computer/VGA cable (4.5 m, 15') User manual Interactive driver Interactive software Network software Projector remote control Two (2) interactive pens Four (4) AAA batteries...

Quick Guide
Page 3
...Easy Interactive Tools ■ Solve basic problems This booklet explains how to avoid bodily injury. Before using the projector, make sure you read the safety instructions in the onscreen User's Guide on the projector ...CD. For additional information, see the on-screen EasyMP® guides included on -screen User's Guide. Caution: Cautions must be observed to avoid damage to video players, document cameras, or other computer. Note: Notes contain important information about your equipment. For network information, see the on the BrightLink™ 450Wi...
...Easy Interactive Tools ■ Solve basic problems This booklet explains how to avoid bodily injury. Before using the projector, make sure you read the safety instructions in the onscreen User's Guide on the projector ...CD. For additional information, see the on-screen EasyMP® guides included on -screen User's Guide. Caution: Cautions must be observed to avoid damage to video players, document cameras, or other computer. Note: Notes contain important information about your equipment. For network information, see the on the BrightLink™ 450Wi...
Quick Guide
Page 4
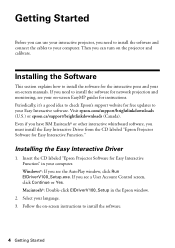
... EasyMP guides for the interactive pens and your Easy Interactive software. Then you can use your interactive projector, you need to install the software and connect the cables to your on -screen manuals. Periodically, it's a good idea to check Epson's support website for free updates to install the software for Easy Interactive Function." Visit epson.com/support/brightlinkdownloads (U.S.) or epson.ca...
... EasyMP guides for the interactive pens and your Easy Interactive software. Then you can use your interactive projector, you need to install the software and connect the cables to your on -screen manuals. Periodically, it's a good idea to check Epson's support website for free updates to install the software for Easy Interactive Function." Visit epson.com/support/brightlinkdownloads (U.S.) or epson.ca...
User's Guide
Page 10
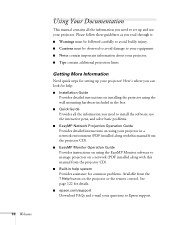
... This manual contains all the information you need to set up your projector in the box. ■ Quick Guide Provides all the information you need to install the software, use your questions to Epson support. See page 122 for setting up and use the interactive pens, and solve basic problems. ■ EasyMP Network Projection Operation...
... This manual contains all the information you need to set up your projector in the box. ■ Quick Guide Provides all the information you need to install the software, use your questions to Epson support. See page 122 for setting up and use the interactive pens, and solve basic problems. ■ EasyMP Network Projection Operation...

User's Guide
Page 13
Save all these parts: Wall plate Wall mount (setting plate) End cap Installation template Hex wrenches Wall plate cover Bolts See the Installation Guide for transportation instructions. See page 120 for instructions on mounting the projector on a wall. Welcome 13 Always use the original packaging (or the equivalent) when you need to send the projector to ship the projector. Unpacking the Mounting Hardware After unpacking the setting plate and mounting hardware, make sure you have all packaging in case you need to another location.
Save all these parts: Wall plate Wall mount (setting plate) End cap Installation template Hex wrenches Wall plate cover Bolts See the Installation Guide for transportation instructions. See page 120 for instructions on mounting the projector on a wall. Welcome 13 Always use the original packaging (or the equivalent) when you need to send the projector to ship the projector. Unpacking the Mounting Hardware After unpacking the setting plate and mounting hardware, make sure you have all packaging in case you need to another location.

User's Guide
Page 18
With slide plate Projector Dimensions Use the dimensions below to guide you in placing or installing the projector. 0.33 in. (8.3 mm) 0.22 in. (5.5 mm) 6.7 in. (170 mm) 18 Welcome 11.5 in. (292 mm) 19.0 in. (483 mm) 14.5 in. (369 mm) 7.0 in. (177 mm)
With slide plate Projector Dimensions Use the dimensions below to guide you in placing or installing the projector. 0.33 in. (8.3 mm) 0.22 in. (5.5 mm) 6.7 in. (170 mm) 18 Welcome 11.5 in. (292 mm) 19.0 in. (483 mm) 14.5 in. (369 mm) 7.0 in. (177 mm)

User's Guide
Page 48
...Quick Guide. 4. Windows: you turn on your computer desktop displayed. If you need to appear after you should see the pen icon in the Dock. Note the following : ■ Make sure the power light on the projector is installed on the computer and projector. 48 Using the Interactive ...Pens Turn on page 40. Mac OS: you display on the CD labeled "Epson Projector Software for the icon to hold down the Fn key while pressing it...
...Quick Guide. 4. Windows: you turn on your computer desktop displayed. If you need to appear after you should see the pen icon in the Dock. Note the following : ■ Make sure the power light on the projector is installed on the computer and projector. 48 Using the Interactive ...Pens Turn on page 40. Mac OS: you display on the CD labeled "Epson Projector Software for the icon to hold down the Fn key while pressing it...

User's Guide
Page 52
... can use the pen to install interactive whiteboard software, such as described in the upper left corner of screen Clear all annotations Capture current screen Create spotlight effect Minimize the toolbar 52 Using the Interactive Pens To start Easy Interactive Tools, select or Start > All Programs or Programs > Epson Projector > Easy Interactive Tools. When you first open...
... can use the pen to install interactive whiteboard software, such as described in the upper left corner of screen Clear all annotations Capture current screen Create spotlight effect Minimize the toolbar 52 Using the Interactive Pens To start Easy Interactive Tools, select or Start > All Programs or Programs > Epson Projector > Easy Interactive Tools. When you first open...

User's Guide
Page 85
...information on your computer screen-including text, graphics, and video-directly to your projector through a wired or wireless network. Using the Projector on installing and using EasyMP Monitor, see the EasyMP Monitor Operation Guide. For information on a Network This chapter tells you how to prepare to... to use Quick Wireless Connection (Windows only) or configure your projector and network. 6l note If you want to use the interactive pens while projecting through a wired or wireless network, you must connect the USB cable from the projector to your projector through the network.
...information on your computer screen-including text, graphics, and video-directly to your projector through a wired or wireless network. Using the Projector on installing and using EasyMP Monitor, see the EasyMP Monitor Operation Guide. For information on a Network This chapter tells you how to prepare to... to use Quick Wireless Connection (Windows only) or configure your projector and network. 6l note If you want to use the interactive pens while projecting through a wired or wireless network, you must connect the USB cable from the projector to your projector through the network.

User's Guide
Page 86
...Mouse in the Extended menu. Point the remote control at the projector and press the Ppower button. 86 Using the Projector on installing the software. If you want to use the interactive pens while projecting through a wired or wireless network, you can ...then project from multiple computers on the projector as shown. Network cable 2. You can connect the projector to your network and configure it with an IP address. Projection Operation Guide...
...Mouse in the Extended menu. Point the remote control at the projector and press the Ppower button. 86 Using the Projector on installing the software. If you want to use the interactive pens while projecting through a wired or wireless network, you can ...then project from multiple computers on the projector as shown. Network cable 2. You can connect the projector to your network and configure it with an IP address. Projection Operation Guide...

User's Guide
Page 93
... to other wireless networks is a standard specification of up to connect (see the EasyMP Network Projection Operation Guide for remote access to the projector, it , turn Projector keyword on the screen. Configuring a Wireless Connection After you install the optional wireless LAN module, you can enter the keyword on your computer to 8 alphanumeric characters. Ad...
... to other wireless networks is a standard specification of up to connect (see the EasyMP Network Projection Operation Guide for remote access to the projector, it , turn Projector keyword on the screen. Configuring a Wireless Connection After you install the optional wireless LAN module, you can enter the keyword on your computer to 8 alphanumeric characters. Ad...

User's Guide
Page 118
... enough power. caution When replacing batteries, take the following precautions: ■ Replace the batteries as soon as you lift the cover off. 2. Install two batteries, inserting the + and - To avoid injury, do not use rechargeable AAA batteries. 1. The life span of children. Replacing the Pen... check the pen batteries, press the button. Press in a battery charger. 118 Maintaining the Projector warning If you have a spare lamp handy if the usage hours on this User's Guide and do not place regular alkaline batteries in the tab on your hands, wash immediately. ■...
... enough power. caution When replacing batteries, take the following precautions: ■ Replace the batteries as soon as you lift the cover off. 2. Install two batteries, inserting the + and - To avoid injury, do not use rechargeable AAA batteries. 1. The life span of children. Replacing the Pen... check the pen batteries, press the button. Press in a battery charger. 118 Maintaining the Projector warning If you have a spare lamp handy if the usage hours on this User's Guide and do not place regular alkaline batteries in the tab on your hands, wash immediately. ■...


