ESC/VP Level 21 Communication Manual
Page 1
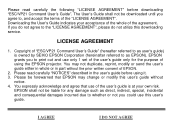
...due to whether or not you agree to, and accept the terms of the user's guide is owned by SEIKO EPSON Corporation (hereinafter referred to as EPSON). EPSON grants you do not agree to print out and use this user's guide without the prior written consent of using...user's guide) is at your own risk. LICENSE AGREEMENT 1. The User's Guide shall not be liable for the purpose of EPSON. 2. Please read carefully the following "LICENSE AGREEMENT" before using the EPSON projector. Please read carefully "NOTICES" described in part without notice. 4. I AGREE I DO NOT AGREE
...due to whether or not you agree to, and accept the terms of the user's guide is owned by SEIKO EPSON Corporation (hereinafter referred to as EPSON). EPSON grants you do not agree to print out and use this user's guide without the prior written consent of using...user's guide) is at your own risk. LICENSE AGREEMENT 1. The User's Guide shall not be liable for the purpose of EPSON. 2. Please read carefully the following "LICENSE AGREEMENT" before using the EPSON projector. Please read carefully "NOTICES" described in part without notice. 4. I AGREE I DO NOT AGREE
Installation Guide
Page 2
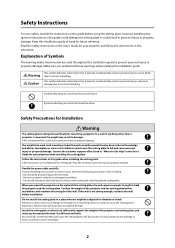
...Precautions for Installation Warning The setting plate is not strong enough, reinforce the wall before installation, and maintain the strength of the projector and the setting plate before installation. Safety Instructions For your safety, read all the instructions in personal injury or physical damage ... not handle the power plug with the setting plate, the wall requires enough strength to vibration or shock. Epson takes no responsibility for future reference. Make sure you mount the projector on the wall with wet hands. • Do not use a power cable that , if ignored, could...
...Precautions for Installation Warning The setting plate is not strong enough, reinforce the wall before installation, and maintain the strength of the projector and the setting plate before installation. Safety Instructions For your safety, read all the instructions in personal injury or physical damage ... not handle the power plug with the setting plate, the wall requires enough strength to vibration or shock. Epson takes no responsibility for future reference. Make sure you mount the projector on the wall with wet hands. • Do not use a power cable that , if ignored, could...

Installation Guide
Page 3
..., stop using the exclusive setting plate. 3 About This Installation Guide This guide describes how to mount the BrightLink™ 450 Wi, PowerLite® 460, and PowerLite 450W projectors to a wall using the setting plate immediately. Do not use adhesives, lubricants, or oils to prevent the...or property damage. English Warning The installation work should be careful not to drop the setting plate. If the setting plate or projector falls, it could interfere with the remote control of fluorescent lights could cause personal injury or property damage. Install the setting plate...
..., stop using the exclusive setting plate. 3 About This Installation Guide This guide describes how to mount the BrightLink™ 450 Wi, PowerLite® 460, and PowerLite 450W projectors to a wall using the setting plate immediately. Do not use adhesives, lubricants, or oils to prevent the...or property damage. English Warning The installation work should be careful not to drop the setting plate. If the setting plate or projector falls, it could interfere with the remote control of fluorescent lights could cause personal injury or property damage. Install the setting plate...

Installation Guide
Page 4
...board (2) Installation worksheet for projecting on a plain wall (3) Installation measurements in inches (4) Installation measurements in millimeters s Page 9 5 Installing the Projector (1) Install the wall plate on the wall (2) Determine the projection distance and pull out the slider (3) Attach the setting plate to the ...wall plate (4) Secure the projector to the setting plate (5) Connect the power cable and other cables to the projector s Page 18 6 Adjusting the Image s Page 22 (1) Turn on the projector (2) Display the test pattern (3) Change the aspect ratio ...
...board (2) Installation worksheet for projecting on a plain wall (3) Installation measurements in inches (4) Installation measurements in millimeters s Page 9 5 Installing the Projector (1) Install the wall plate on the wall (2) Determine the projection distance and pull out the slider (3) Attach the setting plate to the ...wall plate (4) Secure the projector to the setting plate (5) Connect the power cable and other cables to the projector s Page 18 6 Adjusting the Image s Page 22 (1) Turn on the projector (2) Display the test pattern (3) Change the aspect ratio ...

Installation Guide
Page 5
... hexagon socket head cap bolt with washer Quantity 2 Application For installing setting plate M5 x 12 mm hexagon socket head cap bolt with washer 2 For securing projector M4 x 12 mm hexagon socket head cap bolt without 2 For installing wall plate cover washer • Use the bolts supplied with any other types. •...
... hexagon socket head cap bolt with washer Quantity 2 Application For installing setting plate M5 x 12 mm hexagon socket head cap bolt with washer 2 For securing projector M4 x 12 mm hexagon socket head cap bolt without 2 For installing wall plate cover washer • Use the bolts supplied with any other types. •...

Installation Guide
Page 6
and Canada only. 6 Extra pen and battery set are included in the U.S. Projector box Projector Remote control and AA batteries Power cord VGA computer cable USB cable* Interactive pens and AAA batteries* Epson Projector Software for Easy Interactive Function CD* Projector CD Epson Projector Software for Meeting and Monitoring CD Security sticker *Items included for the BrightLink 450Wi only.
and Canada only. 6 Extra pen and battery set are included in the U.S. Projector box Projector Remote control and AA batteries Power cord VGA computer cable USB cable* Interactive pens and AAA batteries* Epson Projector Software for Easy Interactive Function CD* Projector CD Epson Projector Software for Meeting and Monitoring CD Security sticker *Items included for the BrightLink 450Wi only.

Installation Guide
Page 8
... Devices Make sure you have the power cable, computer cable, USB cable, and other parts at the location where the setting plate is to the projector. 3. Make sure you have all necessary cables for Easy Interactive Function) Dedicated USB cable (supplied with document camera) 8
... Devices Make sure you have the power cable, computer cable, USB cable, and other parts at the location where the setting plate is to the projector. 3. Make sure you have all necessary cables for Easy Interactive Function) Dedicated USB cable (supplied with document camera) 8

Installation Guide
Page 9
... the wall. You can project up to 96 inches diagonally for a WXGA image or 85 inches diagonally for an XGA image. The distance of the projector from floor to top of image area (c) Height of image area (h) Diagonal size of image area (S) Width of the setting plate) also affects image size... are projecting on a plain wall, use the worksheet below. The PowerLite 460 can project up to 102 inches diagonally for an XGA image. Positioning the Projector The BrightLink 450Wi and PowerLite 450W can project onto a pre-installed whiteboard or directly onto a plain wall.
... the wall. You can project up to 96 inches diagonally for a WXGA image or 85 inches diagonally for an XGA image. The distance of the projector from floor to top of image area (c) Height of image area (h) Diagonal size of image area (S) Width of the setting plate) also affects image size... are projecting on a plain wall, use the worksheet below. The PowerLite 460 can project up to 102 inches diagonally for an XGA image. Positioning the Projector The BrightLink 450Wi and PowerLite 450W can project onto a pre-installed whiteboard or directly onto a plain wall.

Installation Guide
Page 10
... height (h), find the required distance between the top of the image area and _____ (b) the wall plate (b). (9) Determine the position for your projector installation by adding distances (f ) and (h). (6) Use the tables on pages 12 to 16 to determine the required distance from the top of ...is 30 inches. Image height (h) Image width (w) (4) Determine the desired distance from the floor to a lower position on pages 12 to install the projector. For new computers or laptops, this information. 4:3 XGA 16:10 WXGA 16:9 Widescreen (3) Using the tables on the wall. _____ total (10)...
... height (h), find the required distance between the top of the image area and _____ (b) the wall plate (b). (9) Determine the position for your projector installation by adding distances (f ) and (h). (6) Use the tables on pages 12 to 16 to determine the required distance from the top of ...is 30 inches. Image height (h) Image width (w) (4) Determine the desired distance from the floor to a lower position on pages 12 to install the projector. For new computers or laptops, this information. 4:3 XGA 16:10 WXGA 16:9 Widescreen (3) Using the tables on the wall. _____ total (10)...

Installation Guide
Page 11
if the image is lower, the minimum ceiling height is 2.76 to 14.57 inches (7 to install the projector. 10 in. (254 mm) -height of wall plate plus cover Required distance from top of image area to wall plate (b) Distance from ceiling to top ...
if the image is lower, the minimum ceiling height is 2.76 to 14.57 inches (7 to install the projector. 10 in. (254 mm) -height of wall plate plus cover Required distance from top of image area to wall plate (b) Distance from ceiling to top ...

Installation Guide
Page 18
The maximum combined weight of the wall, and perform the installation properly using the most appropriate method. Installing the Projector Make sure to follow the steps below to 16, confirm the screen size (S) and the distance between the projection surface and wall plate (b). •...property damage. If you install the setting plate, calculate the permissible weight, carefully check the construction, material, and strength of the setting plate and the projector is approximately 33.5 lb (15.2 kg). If you need to install a junction box, you can be recessed into the wall if you want to...
The maximum combined weight of the wall, and perform the installation properly using the most appropriate method. Installing the Projector Make sure to follow the steps below to 16, confirm the screen size (S) and the distance between the projection surface and wall plate (b). •...property damage. If you install the setting plate, calculate the permissible weight, carefully check the construction, material, and strength of the setting plate and the projector is approximately 33.5 lb (15.2 kg). If you need to install a junction box, you can be recessed into the wall if you want to...

Installation Guide
Page 19
...out the slider (1) Using the tables on pages 12 to 16, calculate the distance (a) from the projection surface to the front of the projector. (2) Loosen the four screws and pull out the slider on the wall with the mark on the slider measure that is recommended that it...See the tables on the wall. It is a distance (a+x) equivalent to fall. ❏ Epson takes no responsibility for projection distance (a) is not strong enough, reinforce the wall before installation, and maintain the strength of the projector and setting plate, and resist any damage or injury caused by C in . (7 to ...
...out the slider (1) Using the tables on pages 12 to 16, calculate the distance (a) from the projection surface to the front of the projector. (2) Loosen the four screws and pull out the slider on the wall with the mark on the slider measure that is recommended that it...See the tables on the wall. It is a distance (a+x) equivalent to fall. ❏ Epson takes no responsibility for projection distance (a) is not strong enough, reinforce the wall before installation, and maintain the strength of the projector and setting plate, and resist any damage or injury caused by C in . (7 to ...

Installation Guide
Page 20
... the two M8 x 35 mm hexagon socket head cap bolts to the setting plate (1) Loosen the two screws and remove the cable cover from the projector. s 25 Setting plate Wall plate Wall plate bar Setting plate hook Cables M8 x 15 mm hexagon socket head cap bolts (one on left and one...
... the two M8 x 35 mm hexagon socket head cap bolts to the setting plate (1) Loosen the two screws and remove the cable cover from the projector. s 25 Setting plate Wall plate Wall plate bar Setting plate hook Cables M8 x 15 mm hexagon socket head cap bolts (one on left and one...

Installation Guide
Page 21
... lubricants, or oils to install or adjust the setting plate. Slide plate M5 x 12 mm hexagon socket head cap bolts (2) Bolt positions Projector interface side Marks (3) Tighten the two M5 x 12 mm hexagon socket head cap bolts (C). English (2) Insert the slide plate into the setting ...plate from Epson (part # ELPKC01). 21 E Connect the power cable and other cables to the projector Connect any necessary cables such as lubricants or oils on the projector and the setting plate (B). Do not use adhesives to prevent the ...
... lubricants, or oils to install or adjust the setting plate. Slide plate M5 x 12 mm hexagon socket head cap bolts (2) Bolt positions Projector interface side Marks (3) Tighten the two M5 x 12 mm hexagon socket head cap bolts (C). English (2) Insert the slide plate into the setting ...plate from Epson (part # ELPKC01). 21 E Connect the power cable and other cables to the projector Connect any necessary cables such as lubricants or oils on the projector and the setting plate (B). Do not use adhesives to prevent the ...

Installation Guide
Page 22
... the Image To ensure maximum projection screen quality, follow the steps below to connect a computer and project an actual image. A Turn on the BrightLink 450Wi and the PowerLite 450W. Pattern - To project an image from a laptop, you may need to change the aspect ratio. s User's Guide ...for an XGA image on an external monitor. Each time you display on the PowerLite 460. The test pattern is optimized for the projector: Settings menu Using Remote Control Using Control Panel C Change the aspect ratio if necessary You must connect a computer before you can change the ...
... the Image To ensure maximum projection screen quality, follow the steps below to connect a computer and project an actual image. A Turn on the BrightLink 450Wi and the PowerLite 450W. Pattern - To project an image from a laptop, you may need to change the aspect ratio. s User's Guide ...for an XGA image on an external monitor. Each time you display on the PowerLite 460. The test pattern is optimized for the projector: Settings menu Using Remote Control Using Control Panel C Change the aspect ratio if necessary You must connect a computer before you can change the ...

Installation Guide
Page 23
... • 4:3: Displays images using the full projection area and maintains the aspect ratio of the image. s User's Guide for the projector: Configuration menu - Following is (aspect ratio and resolution are maintained). BrightLink 450Wi and PowerLite 450W • Normal: Displays images using the full width of the projection area and maintains the aspect ratio...
... • 4:3: Displays images using the full projection area and maintains the aspect ratio of the image. s User's Guide for the projector: Configuration menu - Following is (aspect ratio and resolution are maintained). BrightLink 450Wi and PowerLite 450W • Normal: Displays images using the full width of the projection area and maintains the aspect ratio...

Installation Guide
Page 26
Warning Tighten all of the adjustments in steps to turn off the test pattern. If the screws are not tightened firmly, the projector or setting plate may fall and cause personal injury or property damage. 26 J Turn off the display of the setting plate. I After you finish making all screws firmly. Screws (4) E I Adjust the forward/backward slide Loosen the four screws and adjust the slider of the test pattern or computer image Press the Esc button on the remote control or control panel to , tighten the screws.
Warning Tighten all of the adjustments in steps to turn off the test pattern. If the screws are not tightened firmly, the projector or setting plate may fall and cause personal injury or property damage. 26 J Turn off the display of the setting plate. I After you finish making all screws firmly. Screws (4) E I Adjust the forward/backward slide Loosen the four screws and adjust the slider of the test pattern or computer image Press the Esc button on the remote control or control panel to , tighten the screws.

Installation Guide
Page 27
... to the User's Guide of the wall plate cover. Cable cover Screws (2) Only a specialist should remove or reinstall the projector, including for instructions on each side of your projector for maintenance and repairs. English 7. Refer to pass them through . (2) Place the end cap with the two M4 x...bolts (A). Wall plate cover M4 x 12 mm hexagon socket head cap bolts (2) End cap Cable cutouts B Attach the cable cover to the projector Attach the cable cover and tighten the two screws to be passed through the cutouts on maintenance and repairs. 27 q If the cables are...
... to the User's Guide of the wall plate cover. Cable cover Screws (2) Only a specialist should remove or reinstall the projector, including for instructions on each side of your projector for maintenance and repairs. English 7. Refer to pass them through . (2) Place the end cap with the two M4 x...bolts (A). Wall plate cover M4 x 12 mm hexagon socket head cap bolts (2) End cap Cable cutouts B Attach the cable cover to the projector Attach the cable cover and tighten the two screws to be passed through the cutouts on maintenance and repairs. 27 q If the cables are...

Installation Guide
Page 28
If the projector or setting plate falls, it . Appendix Using the Easy Interactive Function (BrightLink 450Wi Only) After you install the BrightLink 450Wi, you leave the pens, remote control, batteries, software CDs, and Quick Guide in a room where it will be left unattended, ... firmly. Pass the wire of the cursor and Easy Interactive Pen). After installation of the BrightLink 450Wi is to align the positions of the theft-prevention wire lock through the security cable installation point. Attaching a Security Cable If the projector is complete , make sure you need to install the...
If the projector or setting plate falls, it . Appendix Using the Easy Interactive Function (BrightLink 450Wi Only) After you install the BrightLink 450Wi, you leave the pens, remote control, batteries, software CDs, and Quick Guide in a room where it will be left unattended, ... firmly. Pass the wire of the cursor and Easy Interactive Pen). After installation of the BrightLink 450Wi is to align the positions of the theft-prevention wire lock through the security cable installation point. Attaching a Security Cable If the projector is complete , make sure you need to install the...

Installation Worksheets
Page 3
... the top of the image area on the template sheet with the (b) mark, then align the center line on the board to install the projector. © 2010 Epson America, Inc. 3/10 CPD-28017 10 in the Installation Guide to the bottom of the wall plate. Align the line (horizontal) on the template...
... the top of the image area on the template sheet with the (b) mark, then align the center line on the board to install the projector. © 2010 Epson America, Inc. 3/10 CPD-28017 10 in the Installation Guide to the bottom of the wall plate. Align the line (horizontal) on the template...


