User Manual (English)
Page 4
... that you route all enclosed instructions for proper use your flat panel display As you enjoy your new product, keep these safety tips in this manual, or otherwise listed by an independent laboratory as a chest of this TV manufacturer, listed in mind The issue The home theater entertainment experience is a growing...
... that you route all enclosed instructions for proper use your flat panel display As you enjoy your new product, keep these safety tips in this manual, or otherwise listed by an independent laboratory as a chest of this TV manufacturer, listed in mind The issue The home theater entertainment experience is a growing...
User Manual (English)
Page 10
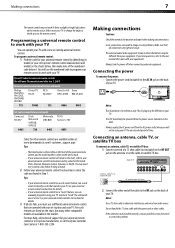
...See your universal remote control's instructions for your universal remote control by identifying its model (or your equipment. For more help, call the Dynex Customer Care Center at which you use a different universal remote control that can result in image or color problems. Make sure that came with... TV, or satellite RF jack RF coaxial cable (75 ohm) 2 Connect the other cables. Notes: Use a 75 ohm cable to the user manual that all else fails, you have questions, refer to eliminate interference and noise from the power source indicated on the remote sensor. To program a ...
...See your universal remote control's instructions for your universal remote control by identifying its model (or your equipment. For more help, call the Dynex Customer Care Center at which you use a different universal remote control that can result in image or color problems. Make sure that came with... TV, or satellite RF jack RF coaxial cable (75 ohm) 2 Connect the other cables. Notes: Use a 75 ohm cable to the user manual that all else fails, you have questions, refer to eliminate interference and noise from the power source indicated on the remote sensor. To program a ...

User Manual (English)
Page 14
The INPUT SOURCE menu opens. Press once to select AV1. Press once to select Component1. Press to select HDMI2. Menus in this manual are shown in TV mode, unless otherwise indicated. Press twice to select TV. Press twice to select HDMI1. Menu items that ...using the following remote control buttons: • COMP- Press four times to select HDMI3. • VIDEO - The illustrations and screens shown in the manual are grayed out. Press three times to select S-Video2. • TV- On-screen menu overview Picture menu Parental Controls Channel menu Notes: Depending on...
The INPUT SOURCE menu opens. Press once to select AV1. Press once to select Component1. Press to select HDMI2. Menus in this manual are shown in TV mode, unless otherwise indicated. Press twice to select TV. Press twice to select HDMI1. Menu items that ...using the following remote control buttons: • COMP- Press four times to select HDMI3. • VIDEO - The illustrations and screens shown in the manual are grayed out. Press three times to select S-Video2. • TV- On-screen menu overview Picture menu Parental Controls Channel menu Notes: Depending on...
User Manual (English)
Page 27
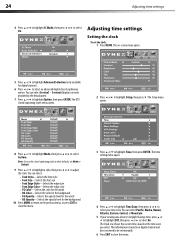
Adjusting time settings Setting the clock To set manually. 6 Press EXIT to select Custom. You can select Pacific, Alaska, Hawaii, Atlantic, Eastern, Central, or Mountain. 5 If your time zone. Service6 (displays content provided by ...
Adjusting time settings Setting the clock To set manually. 6 Press EXIT to select Custom. You can select Pacific, Alaska, Hawaii, Atlantic, Eastern, Central, or Mountain. 5 If your time zone. Service6 (displays content provided by ...
FAQs (English)
Page 4
... channels again. Press ◄ or ► to highlight Time, then press ENTER. o Make sure your time zone. The optimal location may be set manually. • To set manually nor can vary by pressing the Zoom button on your antenna and the broadcast tower. OR Use an antenna mounted on the remote: o Normal...
... channels again. Press ◄ or ► to highlight Time, then press ENTER. o Make sure your time zone. The optimal location may be set manually. • To set manually nor can vary by pressing the Zoom button on your antenna and the broadcast tower. OR Use an antenna mounted on the remote: o Normal...
FAQs (English)
Page 6
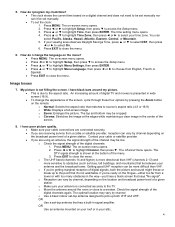
... ◄ or ► to access the Channel menu. 3. Press MENU. The Channel menu opens. I am missing channels or a single channel. • Try entering the channel manually using the number keypad on your remote to select Component to view channels via the cable or satellite box. If a channel has a checkmark under the...
... ◄ or ► to access the Channel menu. 3. Press MENU. The Channel menu opens. I am missing channels or a single channel. • Try entering the channel manually using the number keypad on your remote to select Component to view channels via the cable or satellite box. If a channel has a checkmark under the...
FAQs (English)
Page 8
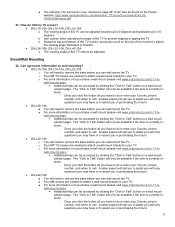
... continues to Manual or Dynex Website o DX-L15-10A: http://www.dynexproducts.com/pc-747-23-dynex-15-class-720p-60hz-lcdhdtv.aspx o DX-L19-10A: http://www.dynexproducts.com/pc-756-23-dynex-19-class-720p-60hz-lcdhdtv.aspx o DX-L22-10A: http://www.dynexproducts.com/p-757-dynex-22-class-720p...the battery compartment cover on my remote. • Make sure the TV is possible your manual on the Dynex website: http://www.dynexproducts.com/skins/skin_1/Topics/Documents/DX-L3210A%20Warranty.pdf • DX-L42-10A 8 Can I get an additional remote? • Additional remotes can I get more ...
... continues to Manual or Dynex Website o DX-L15-10A: http://www.dynexproducts.com/pc-747-23-dynex-15-class-720p-60hz-lcdhdtv.aspx o DX-L19-10A: http://www.dynexproducts.com/pc-756-23-dynex-19-class-720p-60hz-lcdhdtv.aspx o DX-L22-10A: http://www.dynexproducts.com/p-757-dynex-22-class-720p...the battery compartment cover on my remote. • Make sure the TV is possible your manual on the Dynex website: http://www.dynexproducts.com/skins/skin_1/Topics/Documents/DX-L3210A%20Warranty.pdf • DX-L42-10A 8 Can I get an additional remote? • Additional remotes can I get more ...
FAQs (English)
Page 9
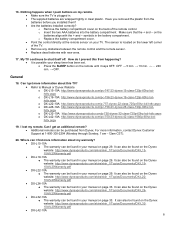
...com/c-17-tvwall-mounts.aspx ƒ Additional help can be accessed by clicking the "Click to Talk" button on the Dynex website: http://www.dynexproducts.com/skins/skin_1/Topics/Documents/DX-L4210A%20Warranty.pdf 21. o Four M4*10 screws are needed to attach a wall-mount bracket to your TV. ... 9 Can I tilt my TV screen? • DX-L15-10A, DX-L19-10A, DX-L22-10A o The viewing angle of the TV can be found in your manual on the top of the monitor to adjust the viewing angle backward or forward. • DX-L26-10A, DX-L32-10A, DX-L42-10A o The viewing angle of this TV cannot be adjusted...
...com/c-17-tvwall-mounts.aspx ƒ Additional help can be accessed by clicking the "Click to Talk" button on the Dynex website: http://www.dynexproducts.com/skins/skin_1/Topics/Documents/DX-L4210A%20Warranty.pdf 21. o Four M4*10 screws are needed to attach a wall-mount bracket to your TV. ... 9 Can I tilt my TV screen? • DX-L15-10A, DX-L19-10A, DX-L22-10A o The viewing angle of the TV can be found in your manual on the top of the monitor to adjust the viewing angle backward or forward. • DX-L26-10A, DX-L32-10A, DX-L42-10A o The viewing angle of this TV cannot be adjusted...
FAQs (English)
Page 10
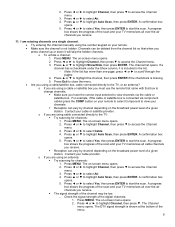
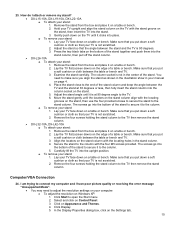
... grooves on page 4. 4. Select and click on the Settings tab. 10 Hold your manual on the stand, then use the four provided screws to secure the stand to the TV then remove the stand column. • DX-L32-10A, DX-L42-10A o To attach your TV is not scratched. 2. o To remove your stand: 1. ... stand column into place. The screws go into the stand. 3. Carefully lift the TV into the stand column, then pull off the stand column. • DX-L26-10A o To attach your stand: 1. o To remove your TV face down ) on the edge of a table or bench. Make sure that you put a ...
... grooves on page 4. 4. Select and click on the Settings tab. 10 Hold your manual on the stand, then use the four provided screws to secure the stand to the TV then remove the stand column. • DX-L32-10A, DX-L42-10A o To attach your TV is not scratched. 2. o To remove your stand: 1. ... stand column into place. The screws go into the stand. 3. Carefully lift the TV into the stand column, then pull off the stand column. • DX-L26-10A o To attach your stand: 1. o To remove your TV face down ) on the edge of a table or bench. Make sure that you put a ...


