User Manual (English)
Page 1
37" and 42" LCD TVs DX-L37-10A/DX-L42-10A USER GUIDE
37" and 42" LCD TVs DX-L37-10A/DX-L42-10A USER GUIDE
User Manual (English)
Page 2
ii Dynex DX-L37-10A/DX-L42-10A 37" and 42" LCD TVs Contents Child Safety 1 Important safety instructions 2 Warnings 2 Cautions 2 Installing and removing the stand 3 Installing the stand 3 Installing a wall-mount bracket 4 ...
ii Dynex DX-L37-10A/DX-L42-10A 37" and 42" LCD TVs Contents Child Safety 1 Important safety instructions 2 Warnings 2 Cautions 2 Installing and removing the stand 3 Installing the stand 3 Installing a wall-mount bracket 4 ...
User Manual (English)
Page 31
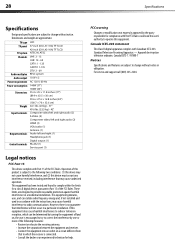
... television reception, which the receiver is no guarantee that may cause undesired operation. TV type TV panel TV system Channels LCD 37-inch (DX-L37-10A) TFT LCD 42-inch (DX-L42-10A) TFT LCD NTSC-M, ATSC VHF: 2 - 13 UHF: 14 - 69 CATV: 1 - 125 Audio multiplex Audio output Power requirement Power consumption Dimensions Weight Input terminals...
... television reception, which the receiver is no guarantee that may cause undesired operation. TV type TV panel TV system Channels LCD 37-inch (DX-L37-10A) TFT LCD 42-inch (DX-L42-10A) TFT LCD NTSC-M, ATSC VHF: 2 - 13 UHF: 14 - 69 CATV: 1 - 125 Audio multiplex Audio output Power requirement Power consumption Dimensions Weight Input terminals...
User Manual (English)
Page 32
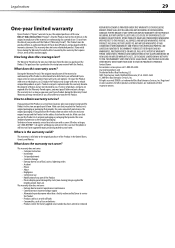
... are trademarks of their respective owners. What does the warranty not cover? Contact Dynex: For customer service please call 1-888-BESTBUY. Legal notices 29 One-year limited warranty Dynex Products ("Dynex") warrants to you, the original purchaser of this new DX-L37-10A or DX-L42-10A ("Product"), that the Product shall be free of defects in the original...
... are trademarks of their respective owners. What does the warranty not cover? Contact Dynex: For customer service please call 1-888-BESTBUY. Legal notices 29 One-year limited warranty Dynex Products ("Dynex") warrants to you, the original purchaser of this new DX-L37-10A or DX-L42-10A ("Product"), that the Product shall be free of defects in the original...
FAQs (English)
Page 1
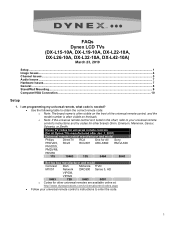
... remote, what code is needed? • Use the following table to enter the code. 1 Dynex TV codes for universal remote controls (for all Dynex TVs manufactured after Jan. 1, 2007) Universal remote control manufacturer and model Philips DirectTV RCA One for... control's instructions and try codes for other brands Orion, Emerson, Memorex, Sansui, Sylvania, or Zenith. FAQs Dynex LCD TVs (DX-L15-10A, DX-L19-10A, DX-L22-10A, DX-L26-10A, DX-L32-10A, DX-L42-10A) March 23, 2010 Setup ...1 Image Issues...4 Channel Issues...5 Audio Issues...7 Hardware Issues...7 General ...8 Stand/Wall...
... remote, what code is needed? • Use the following table to enter the code. 1 Dynex TV codes for universal remote controls (for all Dynex TVs manufactured after Jan. 1, 2007) Universal remote control manufacturer and model Philips DirectTV RCA One for... control's instructions and try codes for other brands Orion, Emerson, Memorex, Sansui, Sylvania, or Zenith. FAQs Dynex LCD TVs (DX-L15-10A, DX-L19-10A, DX-L22-10A, DX-L26-10A, DX-L32-10A, DX-L42-10A) March 23, 2010 Setup ...1 Image Issues...4 Channel Issues...5 Audio Issues...7 Hardware Issues...7 General ...8 Stand/Wall...
FAQs (English)
Page 8
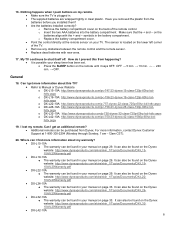
...-720p-60hz-lcdhdtv.aspx o DX-L22-10A: http://www.dynexproducts.com/p-757-dynex-22-class-720p-60hz-lcd-hdtv.aspx o DX-L26-10A: http://www.dynexproducts.com/pc-758-23-dynex-26-class-720p-60hz-lcd- hdtv.aspx o DX-L32-10A: http://www.dynexproducts.com/p-755-dynex-32-class-720p-60hz-lcd-hdtv.aspx o DX-L42-10A: http://www.dynexproducts.com/pc...
...-720p-60hz-lcdhdtv.aspx o DX-L22-10A: http://www.dynexproducts.com/p-757-dynex-22-class-720p-60hz-lcd-hdtv.aspx o DX-L26-10A: http://www.dynexproducts.com/pc-758-23-dynex-26-class-720p-60hz-lcd- hdtv.aspx o DX-L32-10A: http://www.dynexproducts.com/p-755-dynex-32-class-720p-60hz-lcd-hdtv.aspx o DX-L42-10A: http://www.dynexproducts.com/pc...
FAQs (English)
Page 9
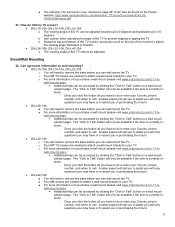
...a wall-mount bracket to Talk" button will need to remove the base before you in your manual on the Dynex website: http://www.dynexproducts.com/skins/skin_1/Topics/Documents/DX-L4210A%20Warranty.pdf 21. o Four M4*10 screws are needed to attach a wall-mount bracket to Talk" ... adjusted. Can I tilt my TV screen? • DX-L15-10A, DX-L19-10A, DX-L22-10A o The viewing angle of the TV can be adjusted forward up to 5 degrees and backward up to adjust the viewing angle backward or forward. • DX-L26-10A, DX-L32-10A, DX-L42-10A o The viewing angle of the TV to your TV....
...a wall-mount bracket to Talk" button will need to remove the base before you in your manual on the Dynex website: http://www.dynexproducts.com/skins/skin_1/Topics/Documents/DX-L4210A%20Warranty.pdf 21. o Four M4*10 screws are needed to attach a wall-mount bracket to Talk" ... adjusted. Can I tilt my TV screen? • DX-L15-10A, DX-L19-10A, DX-L22-10A o The viewing angle of the TV can be adjusted forward up to 5 degrees and backward up to adjust the viewing angle backward or forward. • DX-L26-10A, DX-L32-10A, DX-L42-10A o The viewing angle of the TV to your TV....
FAQs (English)
Page 10
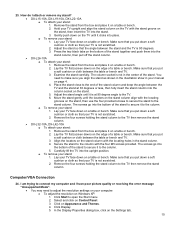
... the TV until it on the bottom of the stand together and push them into the stand column, then pull off the stand column. • DX-L26-10A o To attach your stand: 1. o To remove your stand: 1. Press the two black tabs on a table or bench. 2. Lay the TV flat (screen down ...and TV. 3. Secure the stand to the TV then remove the stand column. • DX-L32-10A, DX-L42-10A o To attach your stand: 1. I am trying to connect my computer and I attach or remove my stand? • DX-L15-10A, DX-L19-10A, DX-L22-10A o To attach your stand: 1. Remove the stand from the box and place it on...
... the TV until it on the bottom of the stand together and push them into the stand column, then pull off the stand column. • DX-L26-10A o To attach your stand: 1. o To remove your stand: 1. Press the two black tabs on a table or bench. 2. Lay the TV flat (screen down ...and TV. 3. Secure the stand to the TV then remove the stand column. • DX-L32-10A, DX-L42-10A o To attach your stand: 1. I am trying to connect my computer and I attach or remove my stand? • DX-L15-10A, DX-L19-10A, DX-L22-10A o To attach your stand: 1. Remove the stand from the box and place it on...


