
Interactive Projector Users Guide
Page 3
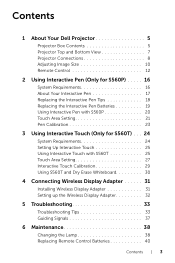
... Area Setting 21 Pen Calibration 23 3 Using Interactive Touch (Only for S560T) . . . 24 System Requirements 24 Setting Up Interactive Touch 25 Using Interactive Touch with S560T 25 Touch Area Setting 27 Interactive Touch Calibration 29 Using S560T and Dry Erase Whiteboard 30 4 Connecting Wireless Display Adapter 31 Installing Wireless Display Adapter 31 Setting up the Wireless Display Adapter 32 5 Troubleshooting 33 Troubleshooting Tips 33 Guiding Signals 37 6 Maintenance 38 Changing the Lamp 38 Replacing Remote Control Batteries...
... Area Setting 21 Pen Calibration 23 3 Using Interactive Touch (Only for S560T) . . . 24 System Requirements 24 Setting Up Interactive Touch 25 Using Interactive Touch with S560T 25 Touch Area Setting 27 Interactive Touch Calibration 29 Using S560T and Dry Erase Whiteboard 30 4 Connecting Wireless Display Adapter 31 Installing Wireless Display Adapter 31 Setting up the Wireless Display Adapter 32 5 Troubleshooting 33 Troubleshooting Tips 33 Guiding Signals 37 6 Maintenance 38 Changing the Lamp 38 Replacing Remote Control Batteries...

Interactive Projector Users Guide
Page 17
.... Turn to "Projector Only" display mode before calibration. About Your Interactive Pen The interactive pen allows user to interact with projected content in different display modes, please go to "S560T Touch setup Guide" Troubleshooting Q2. More details about touch function and calibration in the same fashion as a mouse input. 3 2 1 4 5 1 Power switch 2 Power indicator As you should set to open and replace batteries. 5 Pen tip Using Interactive Pen (Only for S560P) 17...
.... Turn to "Projector Only" display mode before calibration. About Your Interactive Pen The interactive pen allows user to interact with projected content in different display modes, please go to "S560T Touch setup Guide" Troubleshooting Q2. More details about touch function and calibration in the same fashion as a mouse input. 3 2 1 4 5 1 Power switch 2 Power indicator As you should set to open and replace batteries. 5 Pen tip Using Interactive Pen (Only for S560P) 17...

Interactive Projector Users Guide
Page 25
If using HDMI/ VGA cable to setup the touch functionality. Setting Up Interactive Touch To setup the interactive function, install the touch unit as described in different display modes, please go to "Projector Only" display mode before calibration. Using Interactive Touch (Only for using in interactive mode. Using Interactive Touch with S560T Step 1: Connect the computer with the projector using Mac OS, run the S560x Interactive utility to display image. Connect the USB cable for S560T) 25...
If using HDMI/ VGA cable to setup the touch functionality. Setting Up Interactive Touch To setup the interactive function, install the touch unit as described in different display modes, please go to "Projector Only" display mode before calibration. Using Interactive Touch (Only for using in interactive mode. Using Interactive Touch with S560T Step 1: Connect the computer with the projector using Mac OS, run the S560x Interactive utility to display image. Connect the USB cable for S560T) 25...

Interactive Projector Users Guide
Page 33
..., see the following troubleshooting tips. Ensure that the lamp is enabled. Troubleshooting 33 If images are not displayed properly, please upgrade the video driver of your respective documentation. See "Adjusting Image Size" on page 38). • Use the Test Pattern in the Projector Settings of the test pattern are correct. If you experience problems with your projector, see your computer. For Dell computers, see "Changing the Lamp" on page...
..., see the following troubleshooting tips. Ensure that the lamp is enabled. Troubleshooting 33 If images are not displayed properly, please upgrade the video driver of your respective documentation. See "Adjusting Image Size" on page 38). • Use the Test Pattern in the Projector Settings of the test pattern are correct. If you experience problems with your projector, see your computer. For Dell computers, see "Changing the Lamp" on page...
Interactive Projector Users Guide
Page 34
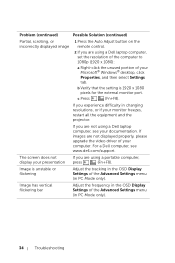
...+F8). Image has vertical flickering bar Adjust the frequency in the OSD Display Settings of the Advanced Settings menu (in changing resolutions, or if your monitor freezes, restart all the equipment and the projector. If images are using a Dell laptop computer, see www.dell.com/support. Problem (continued) Possible Solution (continued) Partial, scrolling, or incorrectly displayed image 1 Press the Auto Adjust button on the remote control. 2 If you are not displayed properly, please upgrade the video driver of...
...+F8). Image has vertical flickering bar Adjust the frequency in the OSD Display Settings of the Advanced Settings menu (in changing resolutions, or if your monitor freezes, restart all the equipment and the projector. If images are using a Dell laptop computer, see www.dell.com/support. Problem (continued) Possible Solution (continued) Partial, scrolling, or incorrectly displayed image 1 Press the Auto Adjust button on the remote control. 2 If you are not displayed properly, please upgrade the video driver of...

Interactive Projector Users Guide
Page 35
... of the Advanced Settings from the OSD and adjust the projector mode. Troubleshooting 35 Problem (continued) Image color is incorrect Image is out of focus The image is stretched when displaying a 16:9 DVD Image is reversed Lamp is burned out or makes a popping sound LAMP light is still stretched, adjust the aspect ratio in the Display Settings of the Advanced Settings menu in the Projector Settings of the Advanced Settings menu. If the image is solid amber...
... of the Advanced Settings from the OSD and adjust the projector mode. Troubleshooting 35 Problem (continued) Image color is incorrect Image is out of focus The image is stretched when displaying a 16:9 DVD Image is reversed Lamp is burned out or makes a popping sound LAMP light is still stretched, adjust the aspect ratio in the Display Settings of the Advanced Settings menu in the Projector Settings of the Advanced Settings menu. If the image is solid amber...

Interactive Projector Users Guide
Page 36
... projector mode by pressing and holding the Power button for 10 seconds. Turn the display on again after the projector cools down . Try to power up again. Problem (continued) LAMP light is blinking amber TEMP light is solid amber TEMP light is blinking amber The remote control is not operating smoothly or works only within a limited range Possible Solution (continued) If the LAMP light is blinking amber, the lamp module connection may be disrupted. Please check the lamp...
... projector mode by pressing and holding the Power button for 10 seconds. Turn the display on again after the projector cools down . Try to power up again. Problem (continued) LAMP light is blinking amber TEMP light is solid amber TEMP light is blinking amber The remote control is not operating smoothly or works only within a limited range Possible Solution (continued) If the LAMP light is blinking amber, the lamp module connection may be disrupted. Please check the lamp...

Interactive Projector Users Guide
Page 37
... operational range. Ready to warm up mode Lamp on again. Projector in Standby mode. The projector automatically shuts down . The lamp driver has failed. Power supply has been interrupted. Lamp module connection may be disrupted. If the problem persists, contact Dell. Projector is properly installed. If the problem persists, contact Dell. Unplug the power cord. After three minutes plug the power cord and turn the display on again. Control Buttons Power White Flashing White White White OFF OFF AMBER Flashing White OFF AMBER Flashing OFF Indicator TEMP (Amber) LAMP...
... operational range. Ready to warm up mode Lamp on again. Projector in Standby mode. The projector automatically shuts down . The lamp driver has failed. Power supply has been interrupted. Lamp module connection may be disrupted. If the problem persists, contact Dell. Projector is properly installed. If the problem persists, contact Dell. Unplug the power cord. After three minutes plug the power cord and turn the display on again. Control Buttons Power White Flashing White White White OFF OFF AMBER Flashing White OFF AMBER Flashing OFF Indicator TEMP (Amber) LAMP...

Interactive Projector Users Guide
Page 38
... screen. The shattered glass pieces are very fragile and may require lamps replaced under warranty to be returned to ensure safe and optimal working condition of its metal handle. Replacement suggested! CAUTION: Use an original lamp to Dell. Projector lamps are sharp and can cause injury. For more information see www.dell.com/hg. 1 Turn off the projector and disconnect the power cord. 2 Let the projector...
... screen. The shattered glass pieces are very fragile and may require lamps replaced under warranty to be returned to ensure safe and optimal working condition of its metal handle. Replacement suggested! CAUTION: Use an original lamp to Dell. Projector lamps are sharp and can cause injury. For more information see www.dell.com/hg. 1 Turn off the projector and disconnect the power cord. 2 Let the projector...

Interactive Projector Users Guide
Page 39
... FOR LAMP-SPECIFIC DISPOSAL INFORMATION, CHECK WWW.LAMPRECYCLE.ORG. 8 Replace the top cover and tighten the screw. 9 Reset the lamp usage time by selecting "Yes" for the US only) LAMP(S) INSIDE THIS PRODUCT CONTAIN MERCURY AND MUST BE RECYCLED OR DISPOSED OF ACCORDING TO LOCAL, STATE, OR FEDERAL LAWS. CAUTION: Lamp Disposal (for Lamp Reset in the OSD Power Settings of the Advanced Settings menu. When a new lamp module...
... FOR LAMP-SPECIFIC DISPOSAL INFORMATION, CHECK WWW.LAMPRECYCLE.ORG. 8 Replace the top cover and tighten the screw. 9 Reset the lamp usage time by selecting "Yes" for the US only) LAMP(S) INSIDE THIS PRODUCT CONTAIN MERCURY AND MUST BE RECYCLED OR DISPOSED OF ACCORDING TO LOCAL, STATE, OR FEDERAL LAWS. CAUTION: Lamp Disposal (for Lamp Reset in the OSD Power Settings of the Advanced Settings menu. When a new lamp module...

Interactive Projector Users Guide
Page 47
Index A Adjusting Projector Focus 10, 31 C Changing the Lamp 38 Connection Ports Audio Input connector 8 Audio Output connector 8 Audio RCA connector 8 Composite Video connector 8 HDMI 1 connector 8 HDMI 2 connector 8 Microphone connector 8 Mini USB (Mini Type B) 8 Power cord connector 8 RJ 45 connector 8 RS232 connector 8 Touch Unit power 8 USB A connector 8 VGA In connector 8 VGA Out connector (monitor loop through) 8 Contact Dell 5, 38 D Dell contacting 45, 46 I Interactive Pen Battery 17 Pen tip 17 Power indicator 17 Power switch 17 Wrist strap...
Index A Adjusting Projector Focus 10, 31 C Changing the Lamp 38 Connection Ports Audio Input connector 8 Audio Output connector 8 Audio RCA connector 8 Composite Video connector 8 HDMI 1 connector 8 HDMI 2 connector 8 Microphone connector 8 Mini USB (Mini Type B) 8 Power cord connector 8 RJ 45 connector 8 RS232 connector 8 Touch Unit power 8 USB A connector 8 VGA In connector 8 VGA Out connector (monitor loop through) 8 Contact Dell 5, 38 D Dell contacting 45, 46 I Interactive Pen Battery 17 Pen tip 17 Power indicator 17 Power switch 17 Wrist strap...

Projectors User Guide
Page 3
... Using an HDMI Cable 8 5 Monitor Loop-Through Connection Using VGA Cables 9 6 Turning Your Projector On 10 7 Turning Your Projector Off 11 8 Raising and Lowering the Projector Height 12 9 Adjusting the Projector Focus 13 10 Adjusting Projection Image Shape 14 11 Input Source...16 12 Auto Adjust...17 13 Brightness/Contrast 18 14 Video Mode...19 15 Audio Volume...20 16 Advanced Settings 21 Image Settings (in PC Mode)...21 Image Settings (in video mode)...22 DISPLAY SETTINGS (IN PC MODE)...23 DISPLAY SETTINGS (IN VIDEO MODE 25 PROJECTOR SETTINGS...27 Menu Settings...28 POWER SETTINGS...
... Using an HDMI Cable 8 5 Monitor Loop-Through Connection Using VGA Cables 9 6 Turning Your Projector On 10 7 Turning Your Projector Off 11 8 Raising and Lowering the Projector Height 12 9 Adjusting the Projector Focus 13 10 Adjusting Projection Image Shape 14 11 Input Source...16 12 Auto Adjust...17 13 Brightness/Contrast 18 14 Video Mode...19 15 Audio Volume...20 16 Advanced Settings 21 Image Settings (in PC Mode)...21 Image Settings (in video mode)...22 DISPLAY SETTINGS (IN PC MODE)...23 DISPLAY SETTINGS (IN VIDEO MODE 25 PROJECTOR SETTINGS...27 Menu Settings...28 POWER SETTINGS...
Projectors User Guide
Page 5
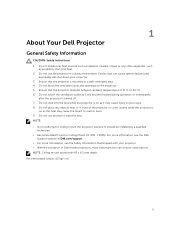
... front of Dell mobile projectors, most Dell projectors can cause system failures and eventually will become heated during operation or immediately after the projector is on the projector. 5. Ensure that shipped with your projector. • With the exception of the projector or cover its lens while the projector is turned off. 7. Do not use alcohol to ceiling mount the projector yourself. 1 About Your Dell Projector General Safety Information CAUTION: Safety Instructions 1.
... front of Dell mobile projectors, most Dell projectors can cause system failures and eventually will become heated during operation or immediately after the projector is on the projector. 5. Ensure that shipped with your projector. • With the exception of the projector or cover its lens while the projector is turned off. 7. Do not use alcohol to ceiling mount the projector yourself. 1 About Your Dell Projector General Safety Information CAUTION: Safety Instructions 1.

Projectors User Guide
Page 10
... remote control to the projector using the appropriate cable. 5. Change the input source of the projector is set to the projector. 2. Press the Power button on the source (computer, DVD player, etc.). By default, the input source of the projector if necessary. 6. 6 Turning Your Projector On NOTE: Turn on the projector before you have multiple sources connected to the projector, press the Source button on your source to select the desired source. 10 Connect the power cord and appropriate signal cables to VGA-In. The Power button light...
... remote control to the projector using the appropriate cable. 5. Change the input source of the projector is set to the projector. 2. Press the Power button on the source (computer, DVD player, etc.). By default, the input source of the projector if necessary. 6. 6 Turning Your Projector On NOTE: Turn on the projector before you have multiple sources connected to the projector, press the Source button on your source to select the desired source. 10 Connect the power cord and appropriate signal cables to VGA-In. The Power button light...
Projectors User Guide
Page 19
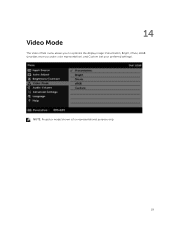
NOTE: Projector model shown is for representational purpose only. 19 14 Video Mode The Video Mode menu allows you to optimize the display image: Presentation, Bright, Movie, sRGB (provides more accurate color representation), and Custom (set your preferred settings).
NOTE: Projector model shown is for representational purpose only. 19 14 Video Mode The Video Mode menu allows you to optimize the display image: Presentation, Bright, Movie, sRGB (provides more accurate color representation), and Custom (set your preferred settings).

Projectors User Guide
Page 23
.... The input source scales to zoom and view the image. 23 Zoom: Press and to fit the screen and projects a 4:3 image. Frequency: Allows you experience an unstable or flickering image, use the Frequency control to move the image left. The display settings menu provides the following options: Horizontal Position: Press to move the image right and to Custom mode. 2. This is a fine adjustment. Aspect Ratio: Allows you adjust the settings for Color Temperature, RGB Color Adjust...
.... The input source scales to zoom and view the image. 23 Zoom: Press and to fit the screen and projects a 4:3 image. Frequency: Allows you experience an unstable or flickering image, use the Frequency control to move the image left. The display settings menu provides the following options: Horizontal Position: Press to move the image right and to Custom mode. 2. This is a fine adjustment. Aspect Ratio: Allows you adjust the settings for Color Temperature, RGB Color Adjust...

Projectors User Guide
Page 24
...). 6. Use to navigate the projection screen. 3D Display: Select On to view on your remote control only. Press to create a 3D experience, you want to activate the Zoom Navigation menu. NOTE: When you will only be enabled in the "Display Settings of the Advanced Settings" menu when the projector detects either of the inputs mentioned above. 4. 3D support and refresh rate are as below: • VGA/HDMI 1280...
...). 6. Use to navigate the projection screen. 3D Display: Select On to view on your remote control only. Press to create a 3D experience, you want to activate the Zoom Navigation menu. NOTE: When you will only be enabled in the "Display Settings of the Advanced Settings" menu when the projector detects either of the inputs mentioned above. 4. 3D support and refresh rate are as below: • VGA/HDMI 1280...

Projectors User Guide
Page 26
... will need to execute 'Invert' to get the correct image. (For DLP 3D goggles) 26 The recommended VGA signal for laptops is Single-mode output (Dual mode is Off). Use to navigate the projection screen. 3D Display: Select On to select the 3D format when the 3D display function is activated. HDMI 1.4a 3D support rates: • 1280 x 720p @ 50 Hz Frame Packing • 1280...
... will need to execute 'Invert' to get the correct image. (For DLP 3D goggles) 26 The recommended VGA signal for laptops is Single-mode output (Dual mode is Off). Use to navigate the projection screen. 3D Display: Select On to select the 3D format when the 3D display function is activated. HDMI 1.4a 3D support rates: • 1280 x 720p @ 50 Hz Frame Packing • 1280...

Projectors User Guide
Page 34
....ORG FOR LAMP-SPECIFIC DISPOSAL INFORMATION, CHECK WWW.LAMPRECYCLE.ORG NOTE: Refer to cool down for Lamp Reset in the operation. Replacement suggested! If this section, follow the Safety Instructions as described in use. Projector lamps are sharp and can cause injury. When a new lamp module has been changed, the projector will automatically detect and reset the lamp hours. CAUTION: Do not touch the bulb or the lamp glass at...
....ORG FOR LAMP-SPECIFIC DISPOSAL INFORMATION, CHECK WWW.LAMPRECYCLE.ORG NOTE: Refer to cool down for Lamp Reset in the operation. Replacement suggested! If this section, follow the Safety Instructions as described in use. Projector lamps are sharp and can cause injury. When a new lamp module has been changed, the projector will automatically detect and reset the lamp hours. CAUTION: Do not touch the bulb or the lamp glass at...

Projectors User Guide
Page 36
... shuts down . Lamp is defective. The projector automatically shuts down . Unplug the Indicator AMBER Flashing OFF AMBER Flashing OFF AMBER OFF AMBER Flashing AMBER Flashing AMBER AMBER 36 DC supply (+12V) Description Power projector automatically shuts down . If the problem persists, contact Dell. Turn the display on again after three minutes and then turn the display on the projector. The lamp driver has AMBER Flashing failed. Color wheel White cannot start. Projector Status Fan breakdown Lamp driver breakdown Color Wheel breakdown Lamp failure...
... shuts down . Lamp is defective. The projector automatically shuts down . Unplug the Indicator AMBER Flashing OFF AMBER Flashing OFF AMBER OFF AMBER Flashing AMBER Flashing AMBER AMBER 36 DC supply (+12V) Description Power projector automatically shuts down . If the problem persists, contact Dell. Turn the display on again after three minutes and then turn the display on the projector. The lamp driver has AMBER Flashing failed. Color wheel White cannot start. Projector Status Fan breakdown Lamp driver breakdown Color Wheel breakdown Lamp failure...


