Owner's Manual
Page 61
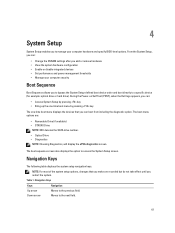
...do not take effect until you restart the system. Navigation Keys Keys Navigation Up arrow Moves to access the System Setup screen. The boot sequence screen also displays the option to the previous field. Down arrow Moves to manage your computer security Boot Sequence Boot Sequence ...denotes the SATA drive number. • Optical Drive • Diagnostics NOTE: Choosing Diagnostics, will display the ePSA diagnostics screen. During the Power-on Self Test (POST), when the Dell logo appears, you can: • Access System Setup by pressing key • Bring up the one-time boot ...
...do not take effect until you restart the system. Navigation Keys Keys Navigation Up arrow Moves to access the System Setup screen. The boot sequence screen also displays the option to the previous field. Down arrow Moves to manage your computer security Boot Sequence Boot Sequence ...denotes the SATA drive number. • Optical Drive • Diagnostics NOTE: Choosing Diagnostics, will display the ePSA diagnostics screen. During the Power-on Self Test (POST), when the Dell logo appears, you can: • Access System Setup by pressing key • Bring up the one-time boot ...
Owner's Manual
Page 62
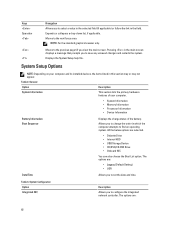
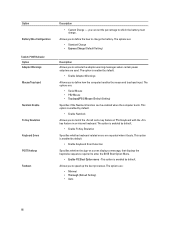
...; Device Information Battery Information Boot Sequence Displays the charge status of your computer and its installed devices, the items listed in the main screen displays a message that prompts you to save any unsaved changes and restarts the system. System Configuration Option Integrated NIC Description Allows you to...CD/DVD/CD-RW Drive • Onboard NIC You can also choose the Boot List option. Keys Spacebar Navigation Allows you view the main screen. Moves to the previous page till you to select a value in the selected field (if applicable) or follow the link in which the...
...; Device Information Battery Information Boot Sequence Displays the charge status of your computer and its installed devices, the items listed in the main screen displays a message that prompts you to save any unsaved changes and restarts the system. System Configuration Option Integrated NIC Description Allows you to...CD/DVD/CD-RW Drive • Onboard NIC You can also choose the Boot List option. Keys Spacebar Navigation Allows you view the main screen. Moves to the previous page till you to select a value in the selected field (if applicable) or follow the link in which the...
Owner's Manual
Page 66
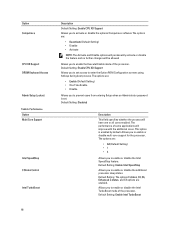
... and Disable options will permanently activate or disable the feature and no further changes will be allowed Allows you to enter the Option ROM Configuration screens using hotkeys during boot process. This option is set access to enable or disable multi-core support for the processor. The performance of the processor...
... and Disable options will permanently activate or disable the feature and no further changes will be allowed Allows you to enter the Option ROM Configuration screens using hotkeys during boot process. This option is set access to enable or disable multi-core support for the processor. The performance of the processor...
Owner's Manual
Page 68
...; Enable F12 Boot Option menu - The options are used. This option is enabled by default. • Enable Keyboard Error Detection Specifies whether the sign-on screen displays a message, that displays the keystroke sequence required to speed up the boot processes. Allows you to which the battery must charge . POST Behavior Option...
...; Enable F12 Boot Option menu - The options are used. This option is enabled by default. • Enable Keyboard Error Detection Specifies whether the sign-on screen displays a message, that displays the keystroke sequence required to speed up the boot processes. Allows you to which the battery must charge . POST Behavior Option...
Owner's Manual
Page 70
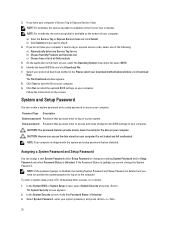
... 6. The File Download window appears. 8. CAUTION: Anyone can create a system password and a setup password to your computer. In the System Security screen, verify that you have your computer's service tag or express service code, select one of the following: a) Automatically detect my Service Tag for the .... a) Enter the Service Tag or Express Service Code and click Submit. If you must enter to log on the front of all Dell products 5. Setup password Password that Password Status is available on to secure your computer. NOTE: For notebooks, the service tag label is...
... 6. The File Download window appears. 8. CAUTION: Anyone can create a system password and a setup password to your computer. In the System Security screen, verify that you have your computer's service tag or express service code, select one of the following: a) Automatically detect my Service Tag for the .... a) Enter the Service Tag or Express Service Code and click Submit. If you must enter to log on the front of all Dell products 5. Setup password Password that Password Status is available on to secure your computer. NOTE: For notebooks, the service tag label is...
Owner's Manual
Page 71
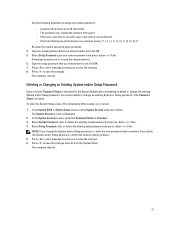
...Password Ensure that Password Status is Unlocked (in the System Setup) before attempting to 32 characters. - In the System BIOS or System Setup screen, select System Security and press . The password can have up to delete or change the existing System and/or Setup password. The computer ...71 Only lower case letters are valid, upper case letters are allowed: space Re-enter the system password when prompted. 4. In the System Security screen, verify that the Password Status is Unlocked. 3. If you change an existing System or Setup password, if the Password Status is displayed. 2. ...
...Password Ensure that Password Status is Unlocked (in the System Setup) before attempting to 32 characters. - In the System BIOS or System Setup screen, select System Security and press . The password can have up to delete or change the existing System and/or Setup password. The computer ...71 Only lower case letters are valid, upper case letters are allowed: space Re-enter the system password when prompted. 4. In the System Security screen, verify that the Password Status is Unlocked. 3. If you change an existing System or Setup password, if the Password Status is displayed. 2. ...
Owner's Manual
Page 73
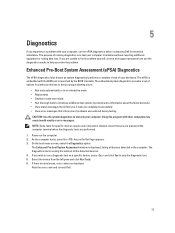
5 Diagnostics If you wish to run the ePSA diagnostics before contacting Dell for specific devices require user interaction. The purpose of problems encountered during testing CAUTION: Use the... messages that inform you if tests are displayed. Note the error code and contact Dell. 73 Enhanced Pre-Boot System Assessment (ePSA) Diagnostics The ePSA diagnostics (also known as the Dell logo appears. 3. The ePSA is to help you are performed. 1. If you... with other computers may cause invalid results or error messages. On the boot menu screen, select the Diagnostics option.
5 Diagnostics If you wish to run the ePSA diagnostics before contacting Dell for specific devices require user interaction. The purpose of problems encountered during testing CAUTION: Use the... messages that inform you if tests are displayed. Note the error code and contact Dell. 73 Enhanced Pre-Boot System Assessment (ePSA) Diagnostics The ePSA diagnostics (also known as the Dell logo appears. 3. The ePSA is to help you are performed. 1. If you... with other computers may cause invalid results or error messages. On the boot menu screen, select the Diagnostics option.
Intel Responsiveness Technologies Guide
Page 12
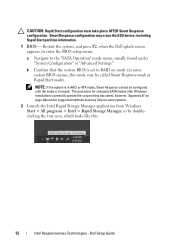
... configuration must take place AFTER Smart Response configuration. b Confirm that may erase the SSD device, including Rapid Start partition information. 1 BIOS - Dell Setup Guide a Navigate to enter the BIOS setup menu. The procedure for changing SATA modes after Windows installation is generally outside the scope of ..., "Appendix B" on page 40provides suggested methods that the system BIOS is changed. Restart the system, and press F2, when the Dell splash screen appears, to the "SATA Operation" mode menu, usually found under "System Configuration" or "Advanced Settings."
... configuration must take place AFTER Smart Response configuration. b Confirm that may erase the SSD device, including Rapid Start partition information. 1 BIOS - Dell Setup Guide a Navigate to enter the BIOS setup menu. The procedure for changing SATA modes after Windows installation is generally outside the scope of ..., "Appendix B" on page 40provides suggested methods that the system BIOS is changed. Restart the system, and press F2, when the Dell splash screen appears, to the "SATA Operation" mode menu, usually found under "System Configuration" or "Advanced Settings."
Intel Responsiveness Technologies Guide
Page 19
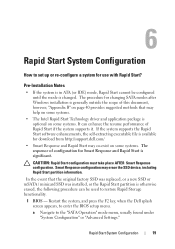
...• The Intel Rapid Start Technology driver and application package is significant. Restart the system, and press the F2 key, when the Dell splash screen appears, to the "SATA Operation" mode menu, usually found under "System Configuration" or "Advanced Settings." Pre-Installation Notes • If... 19 If the system supports the Rapid Start software enhancements, the self-extracting executable file is available for download from http://support.dell.com/ • Smart Response and Rapid Start may erase the SSD device, including Rapid Start partition information. 6 Rapid Start ...
...• The Intel Rapid Start Technology driver and application package is significant. Restart the system, and press the F2 key, when the Dell splash screen appears, to the "SATA Operation" mode menu, usually found under "System Configuration" or "Advanced Settings." Pre-Installation Notes • If... 19 If the system supports the Rapid Start software enhancements, the self-extracting executable file is available for download from http://support.dell.com/ • Smart Response and Rapid Start may erase the SSD device, including Rapid Start partition information. 6 Rapid Start ...
Intel Responsiveness Technologies Guide
Page 31
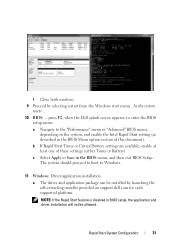
As the system resets... 10 BIOS: ....press F2, when the Dell splash screen appears, to enter the BIOS setup menu: a Navigate to Windows. 11 Windows: Driver/application installation. c Select Apply or Save in the BIOS menu, and then ... section of these settings (either Timer or Battery). The system should proceed to boot to the "Performance" menu or "Advanced" BIOS menu, depending on support.dell.com for each supported platform. Rapid Start System Configuration 31 b If Rapid Start Timer or Critical Battery settings are available, enable at least one of...
As the system resets... 10 BIOS: ....press F2, when the Dell splash screen appears, to enter the BIOS setup menu: a Navigate to Windows. 11 Windows: Driver/application installation. c Select Apply or Save in the BIOS menu, and then ... section of these settings (either Timer or Battery). The system should proceed to boot to the "Performance" menu or "Advanced" BIOS menu, depending on support.dell.com for each supported platform. Rapid Start System Configuration 31 b If Rapid Start Timer or Critical Battery settings are available, enable at least one of...
Intel Responsiveness Technologies Guide
Page 32
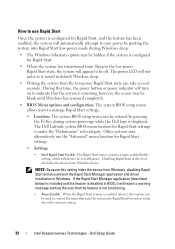
... settings. • Location: The system BIOS setup menu can be used to control the timer that the system is resuming, however, the screen may be hidden if the system is configured for Rapid Start. • When the system has transitioned from Sleep to the low-power Rapid..." sub-category. If the Rapid Start Manager application (described below) is installed and the feature is disabled in BIOS, it would in Windows. The Dell Latitude system BIOS menu location for Rapid Start settings. • Settings • Intel Rapid Start Enable: The Rapid Start menu contains a main enable/disable ...
... settings. • Location: The system BIOS setup menu can be used to control the timer that the system is resuming, however, the screen may be hidden if the system is configured for Rapid Start. • When the system has transitioned from Sleep to the low-power Rapid..." sub-category. If the Rapid Start Manager application (described below) is installed and the feature is disabled in BIOS, it would in Windows. The Dell Latitude system BIOS menu location for Rapid Start settings. • Settings • Intel Rapid Start Enable: The Rapid Start menu contains a main enable/disable ...
Latitude E-Family Re-Imaging Guide
Page 6
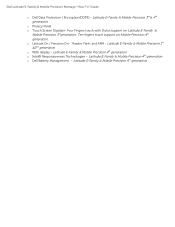
... &2nd generation o WiDi display - o Latitude On / Precision On - Dell Latitude E-Family & Mobile Precision Reimage "How-To" Guide o Dell Data Protection | Encryption(DDPE) - Latitude E-Family & Mobile Precision 4th generation o Intel® Responsiveness Technologies - Reader, Flash, and ARM - Ten fingers touch support on Latitude E-Family & Mobile Precision 3rdgeneration. Latitude E-Family & Mobile Precision 3rd & 4th generation o Privacy Panel o Touch Screen Digitizer-
... &2nd generation o WiDi display - o Latitude On / Precision On - Dell Latitude E-Family & Mobile Precision Reimage "How-To" Guide o Dell Data Protection | Encryption(DDPE) - Latitude E-Family & Mobile Precision 4th generation o Intel® Responsiveness Technologies - Reader, Flash, and ARM - Ten fingers touch support on Latitude E-Family & Mobile Precision 3rdgeneration. Latitude E-Family & Mobile Precision 3rd & 4th generation o Privacy Panel o Touch Screen Digitizer-
Latitude E-Family Re-Imaging Guide
Page 10
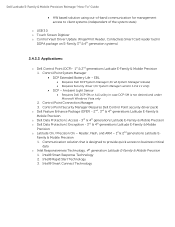
...® Smart Connect Technology Communication solution that is not desired and under Microsoft Windows Vista only 2. Dell Latitude E-Family & Mobile Precision Reimage "How-To" Guide HW based solution using out-of the system state) o USB 3.0 o Touch Screen Digitizer o Control Vault Driver Update (FingerPrint Reader, Contactless Smart Card reader tied in case DCP...
...® Smart Connect Technology Communication solution that is not desired and under Microsoft Windows Vista only 2. Dell Latitude E-Family & Mobile Precision Reimage "How-To" Guide HW based solution using out-of the system state) o USB 3.0 o Touch Screen Digitizer o Control Vault Driver Update (FingerPrint Reader, Contactless Smart Card reader tied in case DCP...
Latitude E-Family Re-Imaging Guide
Page 28
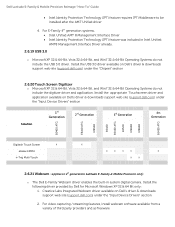
... USB 3.0 driver available on Dell's driver & downloads support web site (support.dell.com) under the "Input Device Drivers" section Solution 1st Generation 2nd Generation 3rd Generation 4th Generation E6400 ATG E6410 ATG M6500 E6420 E6420 ATG E6520 M4600 M6600 E6430 ATG Digitech Touch Screen X X eGalax EMPIA X... Technology (IPT) feature was included in system digital camera. Install the following driver provided by Dell for Microsoft Windows XP 32 & 64 Bit only: 1. Dell Latitude E-Family & Mobile Precision Reimage "How-To" Guide Intel Identity Protection Technology (IPT...
... USB 3.0 driver available on Dell's driver & downloads support web site (support.dell.com) under the "Input Device Drivers" section Solution 1st Generation 2nd Generation 3rd Generation 4th Generation E6400 ATG E6410 ATG M6500 E6420 E6420 ATG E6520 M4600 M6600 E6430 ATG Digitech Touch Screen X X eGalax EMPIA X... Technology (IPT) feature was included in system digital camera. Install the following driver provided by Dell for Microsoft Windows XP 32 & 64 Bit only: 1. Dell Latitude E-Family & Mobile Precision Reimage "How-To" Guide Intel Identity Protection Technology (IPT...
Latitude E-Family Re-Imaging Guide
Page 41
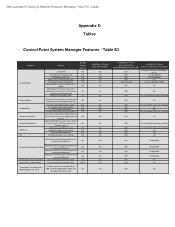
... Feedback through BIOS Yes No (some Broadcom LOMs) N/A No N/A No N/A Yes, thru individual settings in the OS. Dell Latitude E-Family & Mobile Precision Reimage "How-To" Guide Appendix D Tables - Yes, through BIOS Yes, through on screen display Ability to toggle display by default). battery charge enable/disable status Network card power management Extended Battery...
... Feedback through BIOS Yes No (some Broadcom LOMs) N/A No N/A No N/A Yes, thru individual settings in the OS. Dell Latitude E-Family & Mobile Precision Reimage "How-To" Guide Appendix D Tables - Yes, through BIOS Yes, through on screen display Ability to toggle display by default). battery charge enable/disable status Network card power management Extended Battery...


