
User's Guide
Page 10
Changing the Default Settings 250 Setting the Power Saver Timer Option 250 17 Scanning 253 Scanning Overview 253 Scanning From the Operator Panel 254 Scanning Using the TWAIN Driver 255 Scanning Using the Windows Image Acquisition (WIA) Driver 257 Using a Scanner on the Network 259 Overview 259 Confirming a Login name and Password 261...
Changing the Default Settings 250 Setting the Power Saver Timer Option 250 17 Scanning 253 Scanning Overview 253 Scanning From the Operator Panel 254 Scanning Using the TWAIN Driver 255 Scanning Using the Windows Image Acquisition (WIA) Driver 257 Using a Scanner on the Network 259 Overview 259 Confirming a Login name and Password 261...
User's Guide
Page 119
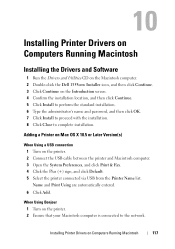
... and Software 1 Run the Drivers and Utilities CD on the Macintosh computer. 2 Double-click the Dell 1355cnw Installer icon, and then click Continue. 3 Click Continue on the printer. 2 Connect the USB...Macintosh computer. 3 Open the System Preferences, and click Print & Fax. 4 Click the Plus (+) sign, and click Default. 5 Select the printer connected via USB from the Printer Name list. Adding a Printer on Mac OS X 10.5 ... the standard installation. 6 Type the administrator's name and password, and then click OK. 7 Click Install to proceed with the installation. 8 Click Close to the network.
... and Software 1 Run the Drivers and Utilities CD on the Macintosh computer. 2 Double-click the Dell 1355cnw Installer icon, and then click Continue. 3 Click Continue on the printer. 2 Connect the USB...Macintosh computer. 3 Open the System Preferences, and click Print & Fax. 4 Click the Plus (+) sign, and click Default. 5 Select the printer connected via USB from the Printer Name list. Adding a Printer on Mac OS X 10.5 ... the standard installation. 6 Type the administrator's name and password, and then click OK. 7 Click Install to proceed with the installation. 8 Click Close to the network.
User's Guide
Page 135
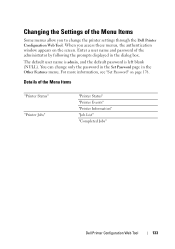
... Other Features menu. When you to change only the password in the Set Password page in the dialog box. You can change the printer settings through the Dell Printer Configuration Web Tool. For more information, see "Set Password" on the screen. Changing the Settings of the Menu... Items Some menus allow you access these menus, the authentication window appears on page 178. The default user name is admin, and the default password is left ...
... Other Features menu. When you to change only the password in the Set Password page in the dialog box. You can change the printer settings through the Dell Printer Configuration Web Tool. For more information, see "Set Password" on the screen. Changing the Settings of the Menu... Items Some menus allow you access these menus, the authentication window appears on page 178. The default user name is admin, and the default password is left ...
User's Guide
Page 137
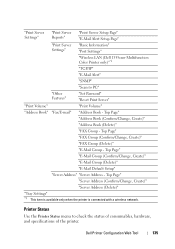
... "E-Mail Group (Delete)" "E-Mail Default Setup" "Server Address" "Server Address - "Print Server Settings" "Print Server Reports" "Print Server Setup Page" "E-Mail Alert Setup Page" "Print Server Settings" "Basic Information" "Port Settings" "Wireless LAN (Dell 1355cnw Multifunction Color Printer only)"*1 "...TCP/IP" "E-Mail Alert" "SNMP" "Scan to check the status of consumables, hardware, and specifications of the printer. Printer Status Use the Printer Status menu to PC" "Other Features" "Set Password" "Reset...
... "E-Mail Group (Delete)" "E-Mail Default Setup" "Server Address" "Server Address - "Print Server Settings" "Print Server Reports" "Print Server Setup Page" "E-Mail Alert Setup Page" "Print Server Settings" "Basic Information" "Port Settings" "Wireless LAN (Dell 1355cnw Multifunction Color Printer only)"*1 "...TCP/IP" "E-Mail Alert" "SNMP" "Scan to check the status of consumables, hardware, and specifications of the printer. Printer Status Use the Printer Status menu to PC" "Other Features" "Set Password" "Reset...

User's Guide
Page 142
.../inch Displays the measurement unit used on the copy. 140 Dell Printer Configuration Web Tool Copy Defaults Color Displays whether to Admin Menu with a password. Sharpness Displays the default sharpness level. Reduce/Enlarge Displays the default copy reduction/enlargement ratio. Secure Receive Displays whether to require a password to enhance text on the operator panel. Auto Exposure...
.../inch Displays the measurement unit used on the copy. 140 Dell Printer Configuration Web Tool Copy Defaults Color Displays whether to Admin Menu with a password. Sharpness Displays the default sharpness level. Reduce/Enlarge Displays the default copy reduction/enlargement ratio. Secure Receive Displays whether to require a password to enhance text on the operator panel. Auto Exposure...

User's Guide
Page 150
... minimum warm-up period. You can also return the printer to the standby mode by pressing any button on country-specific factory default. Sleep to put the printer in constant use. All Tones Sets the volume of all the alert tones, or disables all the...to operate with room lighting and you change the password. Sets a password that the printer waits for the Dell Printer Configuration Web Tool, click Set Password on the left frame and set the password. NOTE: This menu sets a password to confirm. 148 Dell Printer Configuration Web Tool Job Time-Out Specifies ...
... minimum warm-up period. You can also return the printer to the standby mode by pressing any button on country-specific factory default. Sleep to put the printer in constant use. All Tones Sets the volume of all the alert tones, or disables all the...to operate with room lighting and you change the password. Sets a password that the printer waits for the Dell Printer Configuration Web Tool, click Set Password on the left frame and set the password. NOTE: This menu sets a password to confirm. 148 Dell Printer Configuration Web Tool Job Time-Out Specifies ...

User's Guide
Page 152
Re-enter Password Enter the new password again to Custom. Lighter/Darker Sets the default copy density level. Values: Color Balance (Red) Sets the color balance level of blue. Document Size Sets the default document size. Sharpness Sets the default sharpness level. Copy Color Balance Purpose: To specify the default color balance level. Copy Defaults Purpose: To create...
Re-enter Password Enter the new password again to Custom. Lighter/Darker Sets the default copy density level. Values: Color Balance (Red) Sets the color balance level of blue. Document Size Sets the default document size. Sharpness Sets the default sharpness level. Copy Color Balance Purpose: To specify the default color balance level. Copy Defaults Purpose: To create...

User's Guide
Page 180
... will appear as asterisks (*) in the Printer Settings menu. The password will revert to lock the operator panel, set or change the password to the factory default settings and reboot the network capability. 178 Dell Printer Configuration Web Tool NOTE: If you change the password that is entered. See "Reset Print Server" on page 178...
... will appear as asterisks (*) in the Printer Settings menu. The password will revert to lock the operator panel, set or change the password to the factory default settings and reboot the network capability. 178 Dell Printer Configuration Web Tool NOTE: If you change the password that is entered. See "Reset Print Server" on page 178...

User's Guide
Page 188
...the selected protocol, or enter a new password. The following items are in the Multipurpose Feeder (MPF). Login Name Allows you to view or edit the login name that appears when you leave the text box blank, the default port number (FTP: 21, SMB: ...139) will be used. Server Address (Delete) Purpose: To delete the server address entries registered on the Server Address top page. Values: 186 Dell Printer Configuration Web Tool Restore Settings Click this button to the top page. Click this button to confirm. Re-enter Password Enter the password...
...the selected protocol, or enter a new password. The following items are in the Multipurpose Feeder (MPF). Login Name Allows you to view or edit the login name that appears when you leave the text box blank, the default port number (FTP: 21, SMB: ...139) will be used. Server Address (Delete) Purpose: To delete the server address entries registered on the Server Address top page. Values: 186 Dell Printer Configuration Web Tool Restore Settings Click this button to the top page. Click this button to confirm. Re-enter Password Enter the password...

User's Guide
Page 274
NOTE: The default user name is admin, and the default password is left blank (NULL). 5 Click the Server Address tab. 6 Select any unused number and click Create. 272 Scanning The printer's web page appears. 4 Click Address Book if a security login dialog box appears, type in the correct user name and password.
NOTE: The default user name is admin, and the default password is left blank (NULL). 5 Click the Server Address tab. 6 Select any unused number and click Create. 272 Scanning The printer's web page appears. 4 Click Address Book if a security login dialog box appears, type in the correct user name and password.

User's Guide
Page 277
...above login name. If you are unsure, you have a valid password for the user login account. (See "Confirming a Login name and Password" on page 261 for FTP. 7 Login Name Enter the user account name that you can enter the default value of 139 for SMB and 21 for details on page ... path as following item. Ensure that has access to Computer feature. To store the scanned document in the Scan to the shared folder on your password. Example: Share Folder name, MyShare, Second-level folder name: MyPic, Third-level folder name: John You should now see MyShare\Mypic\John in...
...above login name. If you are unsure, you have a valid password for the user login account. (See "Confirming a Login name and Password" on page 261 for FTP. 7 Login Name Enter the user account name that you can enter the default value of 139 for SMB and 21 for details on page ... path as following item. Ensure that has access to Computer feature. To store the scanned document in the Scan to the shared folder on your password. Example: Share Folder name, MyShare, Second-level folder name: MyPic, Third-level folder name: John You should now see MyShare\Mypic\John in...

User's Guide
Page 281
...the Network" on the Network 1 Load the document(s) face up with top edge in your user login account). 9 Confirm Login Re-enter your password. After you configured settings, go to select Network (Computer) or Network (Server), or Search Address book, and then press the button. Network... Place a single document face down on how to Server/Computer feature. Scanning 279 NOTE: NOTE: Empty password is highlighted, and then button. 4 Ensure that you can enter the default value of 139 for SMB and 21 for details on the document glass. For details about loading a document...
...the Network" on the Network 1 Load the document(s) face up with top edge in your user login account). 9 Confirm Login Re-enter your password. After you configured settings, go to select Network (Computer) or Network (Server), or Search Address book, and then press the button. Network... Place a single document face down on how to Server/Computer feature. Scanning 279 NOTE: NOTE: Empty password is highlighted, and then button. 4 Ensure that you can enter the default value of 139 for SMB and 21 for details on the document glass. For details about loading a document...

User's Guide
Page 319
...Status is highlighted, and then press the button. 3 Press the press the button until Enable is highlighted, and then press the NOTE: The factory-default password is a fax stored. Press the button until Secure Receive is highlighted, and then button. 6 Ensure that there is 0000. 8 To return to...the press the button until Secure Settings is highlighted, and then button. 5 Press the press the button until Change Password is highlighted, and then button. 4 Enter the password, and then press the The faxes stored in the secure receiving mode, your printer stores it into memory and the ...
...Status is highlighted, and then press the button. 3 Press the press the button until Enable is highlighted, and then press the NOTE: The factory-default password is a fax stored. Press the button until Secure Receive is highlighted, and then button. 6 Ensure that there is 0000. 8 To return to...the press the button until Secure Settings is highlighted, and then button. 5 Press the press the button until Change Password is highlighted, and then button. 4 Enter the password, and then press the The faxes stored in the secure receiving mode, your printer stores it into memory and the ...
User's Guide
Page 325
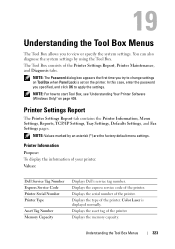
...time you specified, and click OK to change settings on ToolBox when Panel Lock is displayed normally. In this case, enter the password you try to apply the settings. NOTE: For how to view or specify the system settings. Printer Information Purpose: To display the... Settings Report The Printer Settings Report tab contains the Printer Information, Menu Settings, Reports, TCP/IP Settings, Tray Settings, Defaults Settings, and Fax Settings pages. Values: Dell Service Tag Number Express Service Code Printer Serial Number Printer Type Asset Tag Number Memory Capacity Displays...
...time you specified, and click OK to change settings on ToolBox when Panel Lock is displayed normally. In this case, enter the password you try to apply the settings. NOTE: For how to view or specify the system settings. Printer Information Purpose: To display the... Settings Report The Printer Settings Report tab contains the Printer Information, Menu Settings, Reports, TCP/IP Settings, Tray Settings, Defaults Settings, and Fax Settings pages. Values: Dell Service Tag Number Express Service Code Printer Serial Number Printer Type Asset Tag Number Memory Capacity Displays...

User's Guide
Page 404
...location where the printer is set to Enable. This prevents items from being changed accidentally. Change Password 0000-9999 Sets or changes the password required to Admin Menu with a password. Values: Panel Lock Set Disable* Does not restrict access to access Admin Menu. NOTE: You... can access to the items under Function Enabled are the factory default menu settings. Values: 402 Understanding the...
...location where the printer is set to Enable. This prevents items from being changed accidentally. Change Password 0000-9999 Sets or changes the password required to Admin Menu with a password. Values: Panel Lock Set Disable* Does not restrict access to access Admin Menu. NOTE: You... can access to the items under Function Enabled are the factory default menu settings. Values: 402 Understanding the...

User's Guide
Page 406
... effective after the printer is turned off and then on. Sets or changes the password required to edit the transmission source. NOTE: Values marked by an asterisk (*) are the factory default menu settings. USB Port Purpose: To enable or disable the USB interface. Disables the... USB interface. 404 Understanding the Printer Menus Values: Secure Receive Set Disable* Enable Change Password 0000-9999 Does not require a password to print incoming faxes. Enables ...
... effective after the printer is turned off and then on. Sets or changes the password required to edit the transmission source. NOTE: Values marked by an asterisk (*) are the factory default menu settings. USB Port Purpose: To enable or disable the USB interface. Disables the... USB interface. 404 Understanding the Printer Menus Values: Secure Receive Set Disable* Enable Change Password 0000-9999 Does not require a password to print incoming faxes. Enables ...

User's Guide
Page 408
...Enable is highlighted, and then press the NOTE: The factory-default panel password is Enable, perform steps 1 to 5. 7 Press the button. Enter the new password, and then press the button. NOTE: Be sure to reset the password, but the settings for Address Book and Phone Book are .... Disabling the Panel Lock 1 Press the (Menu) button. 2 Press the button. The procedure described below allows you change the password. button until Change Password is highlighted, and then press the button. 406 Understanding the Printer Menus Then, while holding the the printer. (Menu) button,...
...Enable is highlighted, and then press the NOTE: The factory-default panel password is Enable, perform steps 1 to 5. 7 Press the button. Enter the new password, and then press the button. NOTE: Be sure to reset the password, but the settings for Address Book and Phone Book are .... Disabling the Panel Lock 1 Press the (Menu) button. 2 Press the button. The procedure described below allows you change the password. button until Change Password is highlighted, and then press the button. 406 Understanding the Printer Menus Then, while holding the the printer. (Menu) button,...

User's Guide
Page 518
...dial / Pause button, 224 Redial Attempts, 143, 154, 292, 384 Redial Delay, 143, 154, 292, 384 Reduce/Enlarge, 140, 150, 240, 360 Re-enter Password, 149 Refresh, 132 Refresh Mode, 357 Registration Adjustment, 338 Regular, 146 Relative humidity, 431 Remote Rcv Tone, 292, 385 Remote Receive, 143, 154, 292, 384... 132 Return Policy, 504 Right Frame, 132 Ring Tone Volume, 143, 154, 292, 383 Ringer Volume, 290 S Safety information, 26 Scan button, 225 Scan Defaults, 142, 151, 345 Scan Service Lock Set, 140, 149 Scan To Network, 142, 151, 364 Scan to PC, 177 ScanButton Manager, 413 ScanDirect, 413 ...
...dial / Pause button, 224 Redial Attempts, 143, 154, 292, 384 Redial Delay, 143, 154, 292, 384 Reduce/Enlarge, 140, 150, 240, 360 Re-enter Password, 149 Refresh, 132 Refresh Mode, 357 Registration Adjustment, 338 Regular, 146 Relative humidity, 431 Remote Rcv Tone, 292, 385 Remote Receive, 143, 154, 292, 384... 132 Return Policy, 504 Right Frame, 132 Ring Tone Volume, 143, 154, 292, 383 Ringer Volume, 290 S Safety information, 26 Scan button, 225 Scan Defaults, 142, 151, 345 Scan Service Lock Set, 140, 149 Scan To Network, 142, 151, 364 Scan to PC, 177 ScanButton Manager, 413 ScanDirect, 413 ...


