
Administration Guide
Page 39
The parameters that the User account can access are no passwords assigned for Your ATA Device" section on page 42 Cisco Small Business ATA Administration Guide 39 Using the Administration Web Server This section describes how to use the following topics: • "Connecting...section on page 40 • "Registering to configure the advanced settings of both Administrator and User account. It includes the following URL: http:///admin/voice If the password has been set . If the User account password is required if the Administrator account password has been set for the ...
The parameters that the User account can access are no passwords assigned for Your ATA Device" section on page 42 Cisco Small Business ATA Administration Guide 39 Using the Administration Web Server This section describes how to use the following topics: • "Connecting...section on page 40 • "Registering to configure the advanced settings of both Administrator and User account. It includes the following URL: http:///admin/voice If the password has been set . If the User account password is required if the Administrator account password has been set for the ...

Administration Guide
Page 40
... Installation Guide or User Guide for Your ATA Device STEP 1 Start Internet Explorer, connect to the administration web server, and choose Admin access with Advanced settings. STEP 2 Click Network tab > WAN Setup. NOTE For more information on a computer that is convenient ...not to use a password during the initial configuration. Cisco Small Business ATA Administration Guide 40 Basic Administration and Configuration Using the Administration Web Server 2 • "Advanced Configurations" section on the ...
... Installation Guide or User Guide for Your ATA Device STEP 1 Start Internet Explorer, connect to the administration web server, and choose Admin access with Advanced settings. STEP 2 Click Network tab > WAN Setup. NOTE For more information on a computer that is convenient ...not to use a password during the initial configuration. Cisco Small Business ATA Administration Guide 40 Basic Administration and Configuration Using the Administration Web Server 2 • "Advanced Configurations" section on the ...
Administration Guide
Page 42
... audio. • If the line is not registered, you may need to refresh the browser several times because it can be configured separately. Cisco Small Business ATA Administration Guide 42 STEP 1 Start Internet Explorer, connect to the Line 1 Status section of the page. Scroll down to the... administration web server, and choose Admin access with Advanced settings. Also verify that you want to configure. Each line tab can take a few seconds for the registration to succeed. ...
... audio. • If the line is not registered, you may need to refresh the browser several times because it can be configured separately. Cisco Small Business ATA Administration Guide 42 STEP 1 Start Internet Explorer, connect to the Line 1 Status section of the page. Scroll down to the... administration web server, and choose Admin access with Advanced settings. Also verify that you want to configure. Each line tab can take a few seconds for the registration to succeed. ...
Administration Guide
Page 43
...device even if the web page indicates otherwise. See the "Configuring Dial Plans," on a network behind a Network Address Translation (NAT) device. Cisco Small Business ATA Administration Guide 43 See the "Secure Call Implementation," on hold. NOTE If the value of the Upgrade URL is as follows:... http://spa-ip-addr/admin/upgrade?[protocol://][server-name[:port]][/ firmware-pathname] Both HTTP and TFTP are supported for the upgrade operation. Some of a specific ITSP. Basic...
...device even if the web page indicates otherwise. See the "Configuring Dial Plans," on a network behind a Network Address Translation (NAT) device. Cisco Small Business ATA Administration Guide 43 See the "Secure Call Implementation," on hold. NOTE If the value of the Upgrade URL is as follows:... http://spa-ip-addr/admin/upgrade?[protocol://][server-name[:port]][/ firmware-pathname] Both HTTP and TFTP are supported for the upgrade operation. Some of a specific ITSP. Basic...
Administration Guide
Page 44
... for TFTP or 80 for HTTP) The firmware-pathname is typically the file name of the Resync URL is as follows: http://spa-ip-addr/admin/resync?[[protocol://][server-name[:port]]/profilepathname] NOTE The SPA resyncs only when it is used as server-name. The syntax of the binary located in... device reboots only when it is used as in the following example: http://192.168.2.217/admin/upgrade?tftp://192.168.2.251/spa.bin Resync URL The Resync URL lets you reboot the ATA device. Cisco Small Business ATA Administration Guide 44 If no port is specified, the default port is the...
... for TFTP or 80 for HTTP) The firmware-pathname is typically the file name of the Resync URL is as follows: http://spa-ip-addr/admin/resync?[[protocol://][server-name[:port]]/profilepathname] NOTE The SPA resyncs only when it is used as server-name. The syntax of the binary located in... device reboots only when it is used as in the following example: http://192.168.2.217/admin/upgrade?tftp://192.168.2.251/spa.bin Resync URL The Resync URL lets you reboot the ATA device. Cisco Small Business ATA Administration Guide 44 If no port is specified, the default port is the...
Administration Guide
Page 48
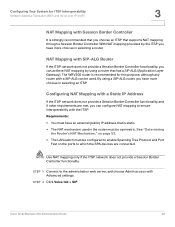
... on page 52. • The LAN switch must have an external (public) IP address that is strongly recommended that has a SIP ALG (Application Layer Gateway). Cisco Small Business ATA Administration Guide 48 Configuring Your System for this purpose, although any router with the ITSP. NAT Mapping with Session Border Controller It... met, you have more choices in selecting an ITSP. See "Determining the Router's NAT Mechanism," on the ports to the administration web server, and choose Admin access with Advanced settings. STEP 2 Click Voice tab > SIP.
... on page 52. • The LAN switch must have an external (public) IP address that is strongly recommended that has a SIP ALG (Application Layer Gateway). Cisco Small Business ATA Administration Guide 48 Configuring Your System for this purpose, although any router with the ITSP. NAT Mapping with Session Border Controller It... met, you have more choices in selecting an ITSP. See "Determining the Router's NAT Mechanism," on the ports to the administration web server, and choose Admin access with Advanced settings. STEP 2 Click Voice tab > SIP.
Administration Guide
Page 50
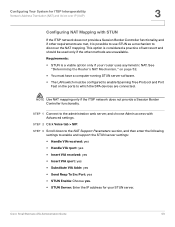
...used only if the other requirements are met, it is possible to use STUN as a mechanism to the administration web server, and choose Admin access with STUN If the ITSP network does not provide a Session Border Controller functionality, and if other methods are connected. See "Determining .... STEP 3 Scroll down to the NAT Support Parameters section, and then enter the following settings to which the SPA devices are unavailable. Cisco Small Business ATA Administration Guide 50 STEP 1 Connect to discover the NAT mapping. This option is a viable option only if your STUN server...
...used only if the other requirements are met, it is possible to use STUN as a mechanism to the administration web server, and choose Admin access with STUN If the ITSP network does not provide a Session Border Controller functionality, and if other methods are connected. See "Determining .... STEP 3 Scroll down to the NAT Support Parameters section, and then enter the following settings to which the SPA devices are unavailable. Cisco Small Business ATA Administration Guide 50 STEP 1 Connect to discover the NAT mapping. This option is a viable option only if your STUN server...
Administration Guide
Page 52
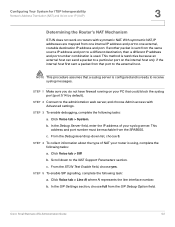
..., choose yes. If another packet is restrictive because an external host can send a packet to the administration web server, and choose Admin access with symmetric NAT. This method is sent from one internal IP address and port to the NAT Support Parameters section. STEP 2...from that could block the syslog port (port 514 by default). b. c. STEP 5 To enable SIP signalling, complete the following tasks: a. Cisco Small Business ATA Administration Guide 52 Scroll down list, choose 3. Configuring Your System for ITSP Interoperability Network Address Translation (NAT) and Voice over ...
..., choose yes. If another packet is restrictive because an external host can send a packet to the administration web server, and choose Admin access with symmetric NAT. This method is sent from one internal IP address and port to the NAT Support Parameters section. STEP 2...from that could block the syslog port (port 514 by default). b. c. STEP 5 To enable SIP signalling, complete the following tasks: a. Cisco Small Business ATA Administration Guide 52 Scroll down list, choose 3. Configuring Your System for ITSP Interoperability Network Address Translation (NAT) and Voice over ...
Administration Guide
Page 70
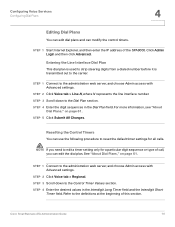
...the dial plan. STEP 3 Scroll down to edit a timer setting only for all calls. Refer to the administration web server, and choose Admin access with Advanced settings. STEP 1 Connect to the definitions at the beginning of the SPA9000. For more information, see "About Dial Plans,".... STEP 3 Scroll down to the administration web server, and choose Admin access with Advanced settings. See "About Dial Plans," on page 61. STEP 2 Click Voice tab > Regional. Click Admin Login and then click Advanced. Cisco Small Business ATA Administration Guide 70 NOTE If you can modify the ...
...the dial plan. STEP 3 Scroll down to edit a timer setting only for all calls. Refer to the administration web server, and choose Admin access with Advanced settings. STEP 1 Connect to the definitions at the beginning of the SPA9000. For more information, see "About Dial Plans,".... STEP 3 Scroll down to the administration web server, and choose Admin access with Advanced settings. See "About Dial Plans," on page 61. STEP 2 Click Voice tab > Regional. Click Admin Login and then click Advanced. Cisco Small Business ATA Administration Guide 70 NOTE If you can modify the ...
Administration Guide
Page 82
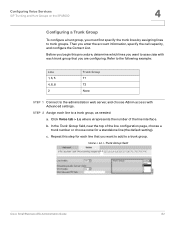
...a trunk group. c. Then you must first specify the trunk lines by assigning lines to associate with Advanced settings. Voice > Ln > Trunk Group field Cisco Small Business ATA Administration Guide 82 Configuring Voice Services SIP Trunking and Hunt Groups on the SPA8000 4 Configuring a Trunk Group To configure a hunt group, you... line interface. Refer to the following example: Line 1, 3, 5 4, 6, 8 2 Trunk Group T1 T2 None STEP 1 Connect to the administration web server, and choose Admin access with each trunk group that you want to add to a trunk group, as needed: a. b.
...a trunk group. c. Then you must first specify the trunk lines by assigning lines to associate with Advanced settings. Voice > Ln > Trunk Group field Cisco Small Business ATA Administration Guide 82 Configuring Voice Services SIP Trunking and Hunt Groups on the SPA8000 4 Configuring a Trunk Group To configure a hunt group, you... line interface. Refer to the following example: Line 1, 3, 5 4, 6, 8 2 Trunk Group T1 T2 None STEP 1 Connect to the administration web server, and choose Admin access with each trunk group that you want to add to a trunk group, as needed: a. b.
Administration Guide
Page 83
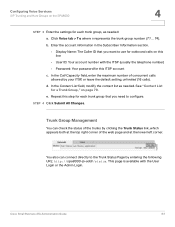
b. d. Trunk Group Management You can connect directly to configure. Cisco Small Business ATA Administration Guide 83 See "Contact List for a Trunk Group," on the SPA8000 4 STEP 3 Enter the settings for each trunk group that you ...; Password: Your password for each trunk group, as needed : a. T4). Repeat this line • User ID: Your account number with the User Login or the Admin Login. Enter the account information in the Subscriber Information section. • Display Name: The Caller ID that you want to use for outbound calls on...
b. d. Trunk Group Management You can connect directly to configure. Cisco Small Business ATA Administration Guide 83 See "Contact List for a Trunk Group," on the SPA8000 4 STEP 3 Enter the settings for each trunk group that you ...; Password: Your password for each trunk group, as needed : a. T4). Repeat this line • User ID: Your account number with the User Login or the Admin Login. Enter the account information in the Subscriber Information section. • Display Name: The Caller ID that you want to use for outbound calls on...
Administration Guide
Page 85
... or only to the phones that are on hook. STEP 5 Click Submit All Changes. STEP 3 Scroll down to the administration web server, and choose Admin access with Advanced settings. For example, if lines 1, 2, 3, and 4 belong the trunk group T1, then the four lines implicitly share the same ...voice mail box from the ITSP. Cisco Small Business ATA Administration Guide 85 For more information, refer to the Appendix B, "ATA Voice Field Reference." Via the PBX, the phone user can configure...
... or only to the phones that are on hook. STEP 5 Click Submit All Changes. STEP 3 Scroll down to the administration web server, and choose Admin access with Advanced settings. For example, if lines 1, 2, 3, and 4 belong the trunk group T1, then the four lines implicitly share the same ...voice mail box from the ITSP. Cisco Small Business ATA Administration Guide 85 For more information, refer to the Appendix B, "ATA Voice Field Reference." Via the PBX, the phone user can configure...
Administration Guide
Page 87
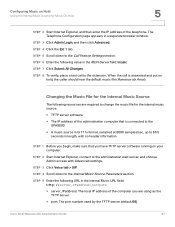
...the Internal Music Source The following resources are using as the TFTP server • port: The port number used by the TFTP server (default 69) Cisco Small Business ATA Administration Guide 87 STEP 4 Click the Ext 1 tab. STEP 5 Enter the following value in the Internal Music URL field: tftp://..., connect to the extension. STEP 4 Scroll down to the Call Feature Settings section. When the call to the administration web server, and choose Admin access with no header information STEP 1 Before you begin, make sure that is answered and put on your computer. STEP 3 Click...
...the Internal Music Source The following resources are using as the TFTP server • port: The port number used by the TFTP server (default 69) Cisco Small Business ATA Administration Guide 87 STEP 4 Click the Ext 1 tab. STEP 5 Enter the following value in the Internal Music URL field: tftp://..., connect to the extension. STEP 4 Scroll down to the Call Feature Settings section. When the call to the administration web server, and choose Admin access with no header information STEP 1 Before you begin, make sure that is answered and put on your computer. STEP 3 Click...
Administration Guide
Page 90
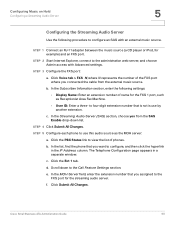
... FXS 1 port, such as the MOH server: a. c. STEP 5 Configure each phone to configure an SAS with Advanced settings. b. Scroll down list. Click Submit All Changes. Cisco Small Business ATA Administration Guide 90 STEP 3 Configure the FXS port: a. In the Streaming Audio Server (SAS) section, choose yes from the external music source... port for example) and an FXS port. b. to view the list of the FXS port where you assigned to the administration web server, and choose Admin access with an external music source. f.
... FXS 1 port, such as the MOH server: a. c. STEP 5 Configure each phone to configure an SAS with Advanced settings. b. Scroll down list. Click Submit All Changes. Cisco Small Business ATA Administration Guide 90 STEP 3 Configure the FXS port: a. In the Streaming Audio Server (SAS) section, choose yes from the external music source... port for example) and an FXS port. b. to view the list of the FXS port where you assigned to the administration web server, and choose Admin access with an external music source. f.
Administration Guide
Page 124
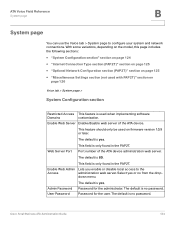
... default is no password. Password for the user. The default is yes. Select yes or no password. The default is 80. Enable Web Admin Lets you enable or disable local access to configure your system and network connections. This feature should only be used on page 126 Voice tab...is yes. The default is no from the drop- down menu. This field is only found in the PAP2T. Password for the administrator. Cisco Small Business ATA Administration Guide 124 Web Server Port This field is only found in the PAP2T. Port number of the ATA device. ATA Voice...
... default is no password. Password for the user. The default is yes. Select yes or no password. The default is 80. Enable Web Admin Lets you enable or disable local access to configure your system and network connections. This feature should only be used on page 126 Voice tab...is yes. The default is no from the drop- down menu. This field is only found in the PAP2T. Password for the administrator. Cisco Small Business ATA Administration Guide 124 Web Server Port This field is only found in the PAP2T. Port number of the ATA device. ATA Voice...

Administration Guide
Page 230
...address and port number of your syslog server. Q. Is there a syslog? Also, set Debug Server as > HTML from the ATA device. 3. Cisco Small Business ATA Administration Guide 230 Press CTRL + F5. Click Internet Options. Click the Security tab. A. Do this address has to be configured .... Make sure the security level is syslog..log (for the default port setting, syslog.514.log). Alternatively, from your PC that this in Admin, Advanced mode. A. You do not see the administration web server login screen (Mozilla requires similar steps). 1. Make sure Work Offline is NOT...
...address and port number of your syslog server. Q. Is there a syslog? Also, set Debug Server as > HTML from the ATA device. 3. Cisco Small Business ATA Administration Guide 230 Press CTRL + F5. Click Internet Options. Click the Security tab. A. Do this address has to be configured .... Make sure the security level is syslog..log (for the default port setting, syslog.514.log). Alternatively, from your PC that this in Admin, Advanced mode. A. You do not see the administration web server login screen (Mozilla requires similar steps). 1. Make sure Work Offline is NOT...
Administration Guide
Page 231
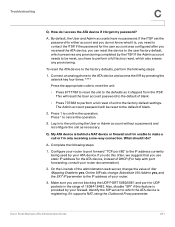
... DHCP. (For help with port forwarding, consult your router documentation) 2. A. If you need to the factory defaults, perform the following steps. 1. Cisco Small Business ATA Administration Guide 231 If the ITSP set the password for either account and you use static IP address for UDP packets in... to the ATA device and access the IVR by your router. 3. Connect an analog phone to the unit using the User or Admin account without a password and reconfigure the unit as it is registering, if it supports NAT, using the Outbound Proxy parameter. What should I 'm...
... DHCP. (For help with port forwarding, consult your router documentation) 2. A. If you need to the factory defaults, perform the following steps. 1. Cisco Small Business ATA Administration Guide 231 If the ITSP set the password for either account and you use static IP address for UDP packets in... to the ATA device and access the IVR by your router. 3. Connect an analog phone to the unit using the User or Admin account without a password and reconfigure the unit as it is registering, if it supports NAT, using the Outbound Proxy parameter. What should I 'm...


