Owners Manual
Page 2
• DLP is forbidden. shall not be held liable for any loss or lost profits or claims from third parties arising out of the use of this product or this manual for any lost profits due to loss of data due to change without the permission of this product, or ...allowed to use this manual. • CASIO COMPUTER CO., LTD. Any other reason. • The sample screens shown in the United States and other countries. • Other company and product names may be registered product names or trademarks of their respective owners. • The contents of this User's Guide are subject...
• DLP is forbidden. shall not be held liable for any loss or lost profits or claims from third parties arising out of the use of this product or this manual for any lost profits due to loss of data due to change without the permission of this product, or ...allowed to use this manual. • CASIO COMPUTER CO., LTD. Any other reason. • The sample screens shown in the United States and other countries. • Other company and product names may be registered product names or trademarks of their respective owners. • The contents of this User's Guide are subject...
Owners Manual
Page 3
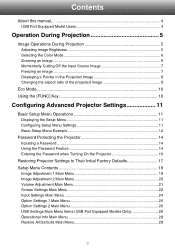
Contents About this manual 4 USB Port Equipped Model Users 4 Operation During Projection 5 Image Operations During Projection 5 Adjusting Image Brightness 5 Selecting the Color Mode 6 Zooming an Image ...6 Momentarily Cutting Off the Input Source Image 7 ......7 Displaying a Pointer in the Projected Image 8 Changing the aspect ratio of the projected image 9 Eco Mode ...10 Using the [FUNC] Key 10 Configuring Advanced Projector Settings 11 Basic Setup Menu Operations 11 Displaying the Setup Menu 11 Configuring Setup Menu Settings 11 Basic Setup Menu Example 12 Password Protecting the...
Contents About this manual 4 USB Port Equipped Model Users 4 Operation During Projection 5 Image Operations During Projection 5 Adjusting Image Brightness 5 Selecting the Color Mode 6 Zooming an Image ...6 Momentarily Cutting Off the Input Source Image 7 ......7 Displaying a Pointer in the Projected Image 8 Changing the aspect ratio of the projected image 9 Eco Mode ...10 Using the [FUNC] Key 10 Configuring Advanced Projector Settings 11 Basic Setup Menu Operations 11 Displaying the Setup Menu 11 Configuring Setup Menu Settings 11 Basic Setup Menu Example 12 Password Protecting the...
Owners Manual
Page 4
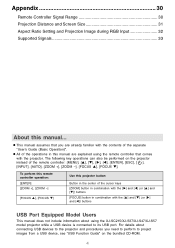
... you are already familiar with the [S] and [T] (or [X] and [W]) buttons USB Port Equipped Model Users This manual does not include information about connecting USB devices to the projector and procedures you need to perform to its USB port. Appendix 30 Remote Controller Signal Range 30 Projection ...and Screen Size 31 Aspect Ratio Setting and Projection Image during RGB Input 32 Supported Signals 33 About this manual are explained using the XJ-SC215/XJ-S37/XJ-S47/XJ-S57 model projector while a USB device is connected to project images from a USB device, see "USB Function Guide" on...
... you are already familiar with the [S] and [T] (or [X] and [W]) buttons USB Port Equipped Model Users This manual does not include information about connecting USB devices to the projector and procedures you need to perform to its USB port. Appendix 30 Remote Controller Signal Range 30 Projection ...and Screen Size 31 Aspect Ratio Setting and Projection Image during RGB Input 32 Supported Signals 33 About this manual are explained using the XJ-SC215/XJ-S37/XJ-S47/XJ-S57 model projector while a USB device is connected to project images from a USB device, see "USB Function Guide" on...
Owners Manual
Page 24
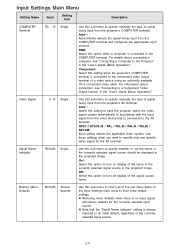
...projected image. z Note that is connected to the AV terminal. Video Signal RCVUN Single Use this sub-menu to specify manually the type of signal being input from the COMPUTER terminal and configures the appropriate input protocol. Signal Name Indicator RCVUN Single ... this option when a computer is connected to the COMPUTER terminal. For details about connection, see "Connecting a Computer to the Projector" in the "User's Guide (Basic Operation)". Input Settings Main Menu Setting Name Input Setting Unit Description COMPUTER Terminal RCUVN Single Use this sub-menu...
...projected image. z Note that is connected to the AV terminal. Video Signal RCVUN Single Use this sub-menu to specify manually the type of signal being input from the COMPUTER terminal and configures the appropriate input protocol. Signal Name Indicator RCVUN Single ... this option when a computer is connected to the COMPUTER terminal. For details about connection, see "Connecting a Computer to the Projector" in the "User's Guide (Basic Operation)". Input Settings Main Menu Setting Name Input Setting Unit Description COMPUTER Terminal RCUVN Single Use this sub-menu...