
Users Manual - English
Page 2
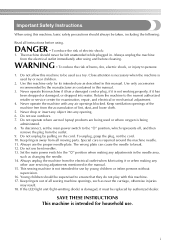
... Keep ventilation openings of the machine free from the outlet. 9. Do not operate where aerosol (spray) products are being administered. 8. Always use outdoors. 7. Set the main power switch to persons: 1. Young children should be supervised to the "{" position, which represents off, and ...has been dropped or damaged, or dropped into any other user servicing adjustments mentioned in the manual. 15. Important Safety Instructions When using this machine, basic safety precautions should always be taken, including the following: Read all sewing machine openings, such as near children...
... Keep ventilation openings of the machine free from the outlet. 9. Do not operate where aerosol (spray) products are being administered. 8. Always use outdoors. 7. Set the main power switch to persons: 1. Young children should be supervised to the "{" position, which represents off, and ...has been dropped or damaged, or dropped into any other user servicing adjustments mentioned in the manual. 15. Important Safety Instructions When using this machine, basic safety precautions should always be taken, including the following: Read all sewing machine openings, such as near children...
Users Manual - English
Page 3
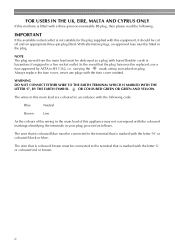
...coloured black or blue. NOTE The plug served from the main lead must be destroyed as marked on plug. Always replace the fuse cover, never use a fuse approved by ASTA to the terminal that is hazardous if engaged in a live socket outlet. The wire that is not suitable for ...red or brown. IMPORTANT If the available socket outlet is coloured brown must be connected to the terminal that the plug fuse must be replaced, use plugs with bared flexible cords is marked with a three-pin non-rewireable BS plug, then please read the following code: Blue Neutral Brown ...
...coloured black or blue. NOTE The plug served from the main lead must be destroyed as marked on plug. Always replace the fuse cover, never use a fuse approved by ASTA to the terminal that is hazardous if engaged in a live socket outlet. The wire that is not suitable for ...red or brown. IMPORTANT If the available socket outlet is coloured brown must be connected to the terminal that the plug fuse must be replaced, use plugs with bared flexible cords is marked with a three-pin non-rewireable BS plug, then please read the following code: Blue Neutral Brown ...
Users Manual - English
Page 4
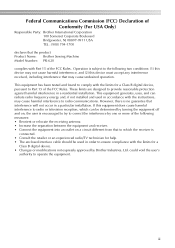
... outlet on , the user is no guarantee that to which can radiate radio frequency energy and, if not installed and used in order to ensure compliance with the instructions, may cause harmful interference to radio communications. However, there is encouraged to ...FCC) Declaration of Conformity (For USA Only) Responsible Party: Brother International Corporation 100 Somerset Corporate Boulevard Bridgewater, NJ 08807-0911 USA TEL : (908) 704-1700 declares that the product Product Name: Brother Sewing Machine Model Number: PR-620 complies with the limits for a Class B digital device, pursuant...
... outlet on , the user is no guarantee that to which can radiate radio frequency energy and, if not installed and used in order to ensure compliance with the instructions, may cause harmful interference to radio communications. However, there is encouraged to ...FCC) Declaration of Conformity (For USA Only) Responsible Party: Brother International Corporation 100 Somerset Corporate Boulevard Bridgewater, NJ 08807-0911 USA TEL : (908) 704-1700 declares that the product Product Name: Brother Sewing Machine Model Number: PR-620 complies with the limits for a Class B digital device, pursuant...
Users Manual - English
Page 5
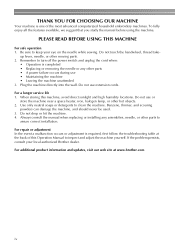
...Plug the machine directly into the wall. Be sure to assure correct installation. up lever, needle, or other parts to keep your local authorized Brother dealer. When storing this Operation Manual to clean the machine. Do not touch the handwheel, thread take- To fully enjoy all the features ... repair or adjustment In the event a malfunction occurs or adjustment is required, first follow the troubleshooting table at www.brother.com iv Do not drop or hit the machine. 4. Do not use or store the machine near a space heater, iron, halogen lamp, or other hot objects. 2. THANK YOU FOR...
...Plug the machine directly into the wall. Be sure to assure correct installation. up lever, needle, or other parts to keep your local authorized Brother dealer. When storing this Operation Manual to clean the machine. Do not touch the handwheel, thread take- To fully enjoy all the features ... repair or adjustment In the event a malfunction occurs or adjustment is required, first follow the troubleshooting table at www.brother.com iv Do not drop or hit the machine. 4. Do not use or store the machine near a space heater, iron, halogen lamp, or other hot objects. 2. THANK YOU FOR...
Users Manual - English
Page 6
...embroidery machine to create embroidery. • Use the CONTENT in writing by regular mail, to do the same. • Alter, translate, modify or adapt the CONTENT or any one copy of the CONTENT to be governed by use of Japan. BROTHER retains all inquiries concerning this Agreement. ...CUSTOMER is not used on more than one embroidery machine at any part thereof for use at a time. "©DISNEY"). The CONTENT are proprietary products of...
...embroidery machine to create embroidery. • Use the CONTENT in writing by regular mail, to do the same. • Alter, translate, modify or adapt the CONTENT or any one copy of the CONTENT to be governed by use of Japan. BROTHER retains all inquiries concerning this Agreement. ...CUSTOMER is not used on more than one embroidery machine at any part thereof for use at a time. "©DISNEY"). The CONTENT are proprietary products of...
Users Manual - English
Page 7
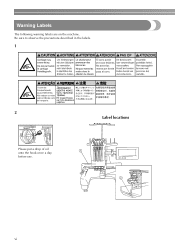
Label locations vi Warning Labels The following warning labels are on the machine. Be sure to observe the precautions described in the labels. 1 2 Please put a drop of oil onto the hook once a day before use.
Label locations vi Warning Labels The following warning labels are on the machine. Be sure to observe the precautions described in the labels. 1 2 Please put a drop of oil onto the hook once a day before use.
Users Manual - English
Page 8
...such as with water, solvents, drinks or any other liquids. • Do not use or store the USB media in a location exposed to strong static electricity or electrical interference. • Do not use or store USB media in locations exposed to vibrations or impacts, direct sunlight, extreme ...protective cases. • If an embroidery card other liquids. • Do not use or store the embroidery cards in a location exposed to strong static electricity or electrical interference. • Do not use or store embroidery cards in the display or while the embroidery machine is being ...
...such as with water, solvents, drinks or any other liquids. • Do not use or store the USB media in a location exposed to strong static electricity or electrical interference. • Do not use or store USB media in locations exposed to vibrations or impacts, direct sunlight, extreme ...protective cases. • If an embroidery card other liquids. • Do not use or store the embroidery cards in a location exposed to strong static electricity or electrical interference. • Do not use or store embroidery cards in the display or while the embroidery machine is being ...
Users Manual - English
Page 9
... by automatically selecting the appropriate needle for each color. This also means that the machine does not always assign colors according to that will be used on the next pattern the machine will assign the color to the needle number, it assigns colors based on the currently threaded colors. Memo ●...
... by automatically selecting the appropriate needle for each color. This also means that the machine does not always assign colors according to that will be used on the next pattern the machine will assign the color to the needle number, it assigns colors based on the currently threaded colors. Memo ●...
Users Manual - English
Page 10
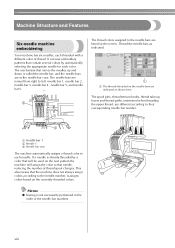
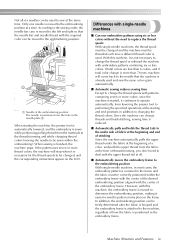
...■ Automatically moves the embroidery frame to the embroidering position With single-needle machine, in most cases, the embroidery pattern is already used and sew the same color again automatically. ■ Automatic sewing reduces sewing time Except to change the thread spools with single-needle machines...in addition to the needle that the needle bar and needle thread with embroidery patterns containing six or less colors. If the pattern uses seven or more thread colors, the machine will come back to changing the thread colors. When sewing is moved to the embroidering ...
...■ Automatically moves the embroidery frame to the embroidering position With single-needle machine, in most cases, the embroidery pattern is already used and sew the same color again automatically. ■ Automatic sewing reduces sewing time Except to change the thread spools with single-needle machines...in addition to the needle that the needle bar and needle thread with embroidery patterns containing six or less colors. If the pattern uses seven or more thread colors, the machine will come back to changing the thread colors. When sewing is moved to the embroidering ...
Users Manual - English
Page 11
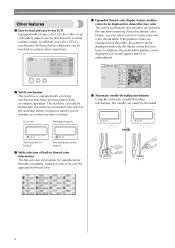
...create your own color thread table. The color of the start/stop button changes to inform you have. If the pattern colors are changed using this thread color library, you can be displayed as it would appear after the machine is unlocked. x The machine can only be ...a touch panel, the keys that are stored in a nearly realistic image. Lit in red Flashing in green ■ Automatic needle-threading mechanism Using the automatic needle-threading mechanism, the needle can be started after it easy to choose the appropriate thread color. The machine can easily be previewed...
...create your own color thread table. The color of the start/stop button changes to inform you have. If the pattern colors are changed using this thread color library, you can be displayed as it would appear after the machine is unlocked. x The machine can only be ...a touch panel, the keys that are stored in a nearly realistic image. Lit in red Flashing in green ■ Automatic needle-threading mechanism Using the automatic needle-threading mechanism, the needle can be started after it easy to choose the appropriate thread color. The machine can easily be previewed...
Users Manual - English
Page 12
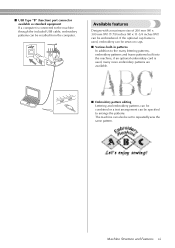
Machine Structure and Features xi If the optional cap frame is used , many lettering patterns, embroidery patterns and frame patterns built into the machine, if an optional embroidery card is connected to the machine through the included ... (H) × 11-3/4 inches (W)) can be set to repeatedly sew the same pattern. ■ USB Type "B" (function) port connector available as standard equipment If a computer is used , embroidery can be sewn on caps. ■ Various built-in patterns In addition to the many more embroidery patterns are available. ■ Embroidery pattern editing...
Machine Structure and Features xi If the optional cap frame is used , many lettering patterns, embroidery patterns and frame patterns built into the machine, if an optional embroidery card is connected to the machine through the included ... (H) × 11-3/4 inches (W)) can be set to repeatedly sew the same pattern. ■ USB Type "B" (function) port connector available as standard equipment If a computer is used , embroidery can be sewn on caps. ■ Various built-in patterns In addition to the many more embroidery patterns are available. ■ Embroidery pattern editing...
Users Manual - English
Page 13
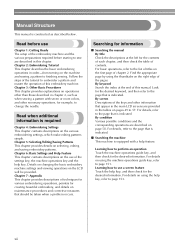
...other information that is indicated. By condition Various possible conditions and the corresponding operations are described in order-from turning on the use a screen feature Touch the help key. Chapter 5: Selecting/Editing/Saving Patterns This chapter provides details on page 58. Chapter ...page that is indicated. For basic operations, refer to the list of the embroidery machine and the various preparations required before use Chapter 1: Getting Ready The setup of titles on maintenance procedures and corrective measures that is indicated. ■ Searching the ...
...other information that is indicated. By condition Various possible conditions and the corresponding operations are described in order-from turning on the use a screen feature Touch the help key. Chapter 5: Selecting/Editing/Saving Patterns This chapter provides details on page 58. Chapter ...page that is indicated. For basic operations, refer to the list of the embroidery machine and the various preparations required before use Chapter 1: Getting Ready The setup of titles on maintenance procedures and corrective measures that is indicated. ■ Searching the ...
Users Manual - English
Page 14
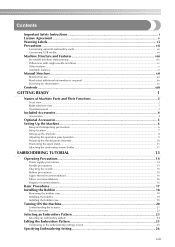
... Structure and Features viii Six-needle machine embroidering ...viii Differences with single-needle machines ...ix Other features ...x Available features...xi Manual Structure...xii Read before use ...xii Read when additional information is required xii Searching for information...xii Contents ...xiii GETTING READY 1 Names of Machine Parts and Their Functions 2 Front view...
... Structure and Features viii Six-needle machine embroidering ...viii Differences with single-needle machines ...ix Other features ...x Available features...xi Manual Structure...xii Read before use ...xii Read when additional information is required xii Searching for information...xii Contents ...xiii GETTING READY 1 Names of Machine Parts and Their Functions 2 Front view...
Users Manual - English
Page 15
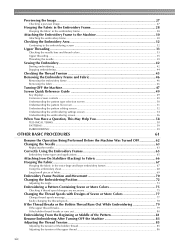
...PROCEDURES 61 Resume the Operation Being Performed Before the Machine Was Turned OFF 62 Changing the Needle ...63 Replacing the needle...63 Correctly Using the Embroidery Frames 65 Embroidery frame types and applications ...65 Attaching Iron-On Stabilizer (Backing) to Fabric 66 Hooping the Fabric......67 Hooping the fabric in the extra-large and large embroidery frames 67 Using the embroidery sheet...68 Large/small pieces of fabric ...69 Embroidery Frame Position and Movement 70 Changing the Embroidering Position 72 Adjusting the...
...PROCEDURES 61 Resume the Operation Being Performed Before the Machine Was Turned OFF 62 Changing the Needle ...63 Replacing the needle...63 Correctly Using the Embroidery Frames 65 Embroidery frame types and applications ...65 Attaching Iron-On Stabilizer (Backing) to Fabric 66 Hooping the Fabric......67 Hooping the fabric in the extra-large and large embroidery frames 67 Using the embroidery sheet...68 Large/small pieces of fabric ...69 Embroidery Frame Position and Movement 70 Changing the Embroidering Position 72 Adjusting the...
Users Manual - English
Page 16
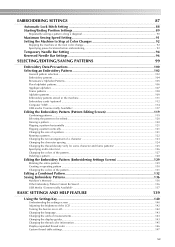
... Embroidery Patterns 136 Machine's Memory ...136 If the Embroidery Pattern Cannot Be Saved ...136 USB Media (Commercially Available) ...137 BASIC SETTINGS AND HELP FEATURE 139 Using the Settings Key ...140 Understanding the settings screen ...140 Adjusting the brightness of the LCD ...142 Turning the buzzer on or off...142 Changing the...
... Embroidery Patterns 136 Machine's Memory ...136 If the Embroidery Pattern Cannot Be Saved ...136 USB Media (Commercially Available) ...137 BASIC SETTINGS AND HELP FEATURE 139 Using the Settings Key ...140 Understanding the settings screen ...140 Adjusting the brightness of the LCD ...142 Turning the buzzer on or off...142 Changing the...
Users Manual - English
Page 17
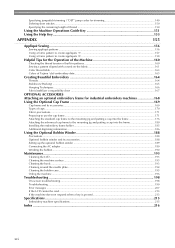
... Techniques...166 Fabric/stabilizer compatibility chart ...167 OPTIONAL ACCESSORIES Attaching an optional embroidery frame for industrial embroidery machines 168 Using the Optional Cap Frame 169 Cap frame and its accessories...169 Types of caps ...170 Fabric precautions...171 Preparing to...to the mounting jig and putting a cap into the frame 180 Installing the embroidery frame holder ...185 Additional digitizing information...186 Using the Optional Bobbin Winder 188 Precautions ...188 Optional bobbin winder and its accessories 188 Setting up the optional bobbin winder ...189 Connecting...
... Techniques...166 Fabric/stabilizer compatibility chart ...167 OPTIONAL ACCESSORIES Attaching an optional embroidery frame for industrial embroidery machines 168 Using the Optional Cap Frame 169 Cap frame and its accessories...169 Types of caps ...170 Fabric precautions...171 Preparing to...to the mounting jig and putting a cap into the frame 180 Installing the embroidery frame holder ...185 Additional digitizing information...186 Using the Optional Bobbin Winder 188 Precautions ...188 Optional bobbin winder and its accessories 188 Setting up the optional bobbin winder ...189 Connecting...
Users Manual - English
Page 19
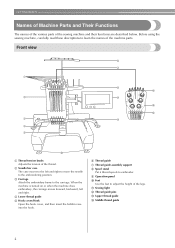
... needle to the embroidering position. 3 Carriage Attach the embroidery frame to the carriage. A Sewing light B Thread guide pins C Upper thread guide D Middle thread guide 2 Before using the sewing machine, carefully read these descriptions to adjust the height of the legs. Front view 1 2 3 6 54321 4 5 6 7 8 C 9 B D A 0 1 Thread tension knobs... case into the hook. 6 Thread guide 7 Thread guide assembly support 8 Spool stand Put 6 thread spools to embroider. 9 Operation panel 0 Feet Use the feet to learn the names of the sewing machine and their functions are described below.
... needle to the embroidering position. 3 Carriage Attach the embroidery frame to the carriage. A Sewing light B Thread guide pins C Upper thread guide D Middle thread guide 2 Before using the sewing machine, carefully read these descriptions to adjust the height of the legs. Front view 1 2 3 6 54321 4 5 6 7 8 C 9 B D A 0 1 Thread tension knobs... case into the hook. 6 Thread guide 7 Thread guide assembly support 8 Spool stand Put 6 thread spools to embroider. 9 Operation panel 0 Feet Use the feet to learn the names of the sewing machine and their functions are described below.

Users Manual - English
Page 20
...Parts and Their Functions 3 Names of the button changes depending on the power supply cord into the power supply plug. 6 Main power switch Use the main power switch to turn the machine ON (I) and OFF ({). 7 Ventilation slots 123 1 Start/stop button Press the start/stop ...Handwheel Rotate the handwheel to select and edit patterns and confirm various information. Right-side/rear view 1 1 USB Type "A" (host) port connector When using USB media, plug the USB media into the USB Type "A" (host) port connector. 2 Embroidery card slot Insert the embroidery cards (sold separately) into...
...Parts and Their Functions 3 Names of the button changes depending on the power supply cord into the power supply plug. 6 Main power switch Use the main power switch to turn the machine ON (I) and OFF ({). 7 Ventilation slots 123 1 Start/stop button Press the start/stop ...Handwheel Rotate the handwheel to select and edit patterns and confirm various information. Right-side/rear view 1 1 USB Type "A" (host) port connector When using USB media, plug the USB media into the USB Type "A" (host) port connector. 2 Embroidery card slot Insert the embroidery cards (sold separately) into...

Users Manual - English
Page 21
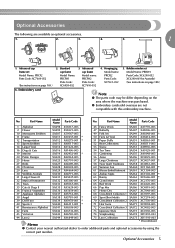
... 31 Spool mat (6pcs.) XC7134-051 32 Spool cap (6pcs.) 130012-054 4 If any item is missing or damaged, contact your retailer. Make sure to use the accessories supplied with this machine. 1. 2. 3. 4. 5. 6. 7. 8. 9. 10. 11. 12. 13. 14. 15. 16. 17. 18. 19. 20. 21. 22. 23. 24. 25. 26. 27. 28...
... 31 Spool mat (6pcs.) XC7134-051 32 Spool cap (6pcs.) 130012-054 4 If any item is missing or damaged, contact your retailer. Make sure to use the accessories supplied with this machine. 1. 2. 3. 4. 5. 6. 7. 8. 9. 10. 11. 12. 13. 14. 15. 16. 17. 18. 19. 20. 21. 22. 23. 24. 25. 26. 27. 28...
Users Manual - English
Page 22
... SA344 XA6849-003 75 Lace Collection SA375 XD1193-003 * Discontinued Memo ● Contact your nearest authorized dealer to order additional parts and optional accessories by using the correct part number. Advanced cap frame set Model Name: PRBW1 Parts Code: XC6290-052 XC6290-061(for Australia) (See instructions on page 188.) Note...
... SA344 XA6849-003 75 Lace Collection SA375 XD1193-003 * Discontinued Memo ● Contact your nearest authorized dealer to order additional parts and optional accessories by using the correct part number. Advanced cap frame set Model Name: PRBW1 Parts Code: XC6290-052 XC6290-061(for Australia) (See instructions on page 188.) Note...


