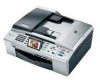
Mfc-440cn Scanner - Brother International MFC440CN Color Inkjet All in One
Mfc-440cn Scanner
View Results Below
Free Brother International MFC440CN manuals!
Problems with Brother International MFC440CN?
Ask a Question
Free Brother International MFC440CN manuals!
Problems with Brother International MFC440CN?
Ask a Question
Related Manual Pages


Similar Questions

Scanner Not Recognised
acer aspire z3801 windows 7 home premium and brother mfc-990cw am unable to get pc to recognise the ...
acer aspire z3801 windows 7 home premium and brother mfc-990cw am unable to get pc to recognise the ...
(Posted by leddge 9 years ago)

How To Setup Scanner For Ubuntu Brother 440cn
(Posted by bewoobr 10 years ago)

Scanner Not Appearing
My printer is working fine but scanner is not working
My printer is working fine but scanner is not working
(Posted by samarhaider84 10 years ago)

Mfc-8690dw Scanner Info
The scanner portion IS HORRIBLE! I love Brother products and the rest of the machine is OK. The manu...
The scanner portion IS HORRIBLE! I love Brother products and the rest of the machine is OK. The manu...
(Posted by hihellotoyou 11 years ago)
Related Terms
The following terms were also used when searching for Mfc-440cn Scanner - Brother International MFC440CN Color Inkjet All in One:- brother mfc440cn
- brother mfc 440cn
- brother mfc-440cn
- brother mfc 440cn driver
- mfc 440cn driver
- mfc 440cn printer
- brother mfc 440cn ink
- brother mfc 440cn printer
- mfc-440cn driver
- brother mfc440cn printer
- brother mfc 440cn printer driver
- brother mfc 440cn scan
- mfc440cn driver
- brother mfc-440cn driver
- brother mfc 440cn software
- mfc 440cn ink
- brother mfc440cn driver
- mfc 440cn driver download
- mfc 440cn printer driver
- mfc 440cn scan
- mfc440cn ink
- brother mfc-440cn printer
- mfc 440cn software
- mfc440cn printer
- brother mfc 440cn manual
- brother mfc440cn ink
- mfc 440cn windows 7
- 440cn driver
- mfc-440cn driver download
- brother mfc 440cn driver download
- brother mfc-440cn software
- mfc 440cn manual
- mfc-440cn printer
- mfc440cn brother
- mfc440cn clean
- brother mfc 440cn windows 7
- brother mfc-440cn ink
- mfc-440cn ink
- mfc440cn driver download
- brother mfc-440cn windows 7
- brother mfc440cn download
- brother mfc440cn software
- mfc-440cn windows 7
- mfc440cn scanner
- mfc440cn windows 7
- brother mfc440cn printer driver
- brother mfc440cn windows 7
- brother mfc440cn wireless
- mfc-440cn usb printer
- mfc440cn download
- mfc440cn printer driver
- mfc440cn review
- mfc440cn wireless
- 440cn brother
- brother mfc 440cn error 50
- brother mfc 440cn troubleshooting
- brother mfc-440cn manual
- brother mfc-440cn usb printer
- brother mfc440cn manual
- mfc 440cn scanner driver
- mfc-440cn software
- mfc440cn troubleshooting
- brother mfc440cn ink cartridges
- brother mfc440cn troubleshooting
- mfc 440cn error 50
- mfc 440cn troubleshooting
- mfc 440cn unable to print 50
- mfc-440cn driver xp
- mfc-440cn manual
- mfc-440cn offline
- mfc-440cn print head
- mfc-440cn unable to print 50
- mfc440cn ink cartridges
- mfc440cn manual
- mfc440cn software
- 440cn black ink problem
- 440cn brother driver
- 440cn brother ocr software
- 440cn brother printer driver
- 440cn cartridges
- 440cn download
- 440cn driver download
- 440cn drivers
- 440cn error 51
- 440cn firmware
- 440cn ink
- 440cn ink cartridges
- 440cn maintenance menu
- 440cn manual
- 440cn mfc
- 440cn parts
- 440cn printer
- 440cn printer brother
- 440cn printer cleaning heads
- 440cn printer driver
- 440cn printer ink
- 440cn repair
- 440cn service manual
- 440cn software
- 440cn specs
- 440cn vista driver
- 440cn windows 7 driver
- brother 440cn
- brother 440cn ink
- brother 440cn manual
- brother 440cn printer
- brother 440cn printer driver
- brother mfc 440cn all in one
- brother mfc 440cn all-in-one
- brother mfc 440cn and ipad
- brother mfc 440cn cartridge
- brother mfc 440cn cleaning print head
- brother mfc 440cn clear memory
- brother mfc 440cn clogged inkjet nozzle
- brother mfc 440cn control center
- brother mfc 440cn control center download
- brother mfc 440cn cost
- brother mfc 440cn disassembly
- brother mfc 440cn download
- brother mfc 440cn download driver
- brother mfc 440cn downloads
- brother mfc 440cn driver for mac
- brother mfc 440cn driver for vista
- brother mfc 440cn driver for windows 7
- brother mfc 440cn driver mac
- brother mfc 440cn driver vista
- brother mfc 440cn driver windows 10
- brother mfc 440cn driver windows 7
- brother mfc 440cn driver windows 8
- brother mfc 440cn driver windows xp
- brother mfc 440cn drivers
- brother mfc 440cn drivers for windows 7
- brother mfc 440cn drivers for windows 8
- brother mfc 440cn erase memory
- brother mfc 440cn error 51
- brother mfc 440cn for sale
- brother mfc 440cn how to fax
- brother mfc 440cn how to manual feed
- brother mfc 440cn how to set up email scan
- brother mfc 440cn in stores
- brother mfc 440cn ink cartridges
- brother mfc 440cn installation
- brother mfc 440cn ip address
- brother mfc 440cn mac driver
- brother mfc 440cn mac software download
- brother mfc 440cn maintenance mode
- brother mfc 440cn manual download
- brother mfc 440cn network printer
- brother mfc 440cn network setup
- brother mfc 440cn not printing
- brother mfc 440cn ocr software download
- brother mfc 440cn offline
- brother mfc 440cn paper jam
- brother mfc 440cn price
- brother mfc 440cn print head cleaning
- brother mfc 440cn printer + for sale
- brother mfc 440cn printer download
- brother mfc 440cn printer driver download
- brother mfc 440cn printer driver windows 7
- brother mfc 440cn printer not working
- brother mfc 440cn printer troubleshooting
- brother mfc 440cn printhead
- brother mfc 440cn printhead cleaning
- brother mfc 440cn printing blank pages
- brother mfc 440cn reset
- brother mfc 440cn review
- brother mfc 440cn scan to pdf
- brother mfc 440cn scanner driver
- brother mfc 440cn scanner software
- brother mfc 440cn scansoft paperport
- brother mfc 440cn service manual
- brother mfc 440cn software download
- brother mfc 440cn software downloads
- brother mfc 440cn software mac
- brother mfc 440cn toner
- brother mfc 440cn unable to change 50
- brother mfc 440cn unable to change 51
- brother mfc 440cn unable to clean 46
- brother mfc 440cn unable to clean 50
- brother mfc 440cn unable to clean 51
- brother mfc 440cn unable to print 4f
- brother mfc 440cn unable to print 50
- brother mfc 440cn unable to print 51
- brother mfc 440cn unable to print 51 error
- brother mfc 440cn usb
- brother mfc 440cn usb printer
- brother mfc 440cn user manual
- brother mfc 440cn will not scan
- brother mfc 440cn windows 10 driver
- brother mfc 440cn windows 7 driver
- brother mfc 440cn windows 8
- brother mfc 440cn windows 8 driver
- brother mfc 440cn wireless
- brother mfc 440cn wireless driver
- brother mfc 440cn wireless printing
- brother mfc 440cn wireless setup
- brother mfc 440cn won't print black
- brother mfc-440cn airprint
- brother mfc-440cn all-in-one inkjet printer
- brother mfc-440cn code 46
- brother mfc-440cn color flatbed all-in-one
- brother mfc-440cn control center download
- brother mfc-440cn download
- brother mfc-440cn downloads
- brother mfc-440cn driver download
- brother mfc-440cn driver download free
- brother mfc-440cn driver download windows 8
- brother mfc-440cn driver for mac
- brother mfc-440cn driver for windows 7
- brother mfc-440cn driver for windows 8
- brother mfc-440cn driver mac
- brother mfc-440cn driver windows 7
- brother mfc-440cn driver windows 8
- brother mfc-440cn driver xp
- brother mfc-440cn drivers
- brother mfc-440cn drivers for windows 10
- brother mfc-440cn error code 50
- brother mfc-440cn error code 51
- brother mfc-440cn fax setup
- brother mfc-440cn how to scan
- brother mfc-440cn ink cartridge replacement
- brother mfc-440cn ink cartridges
- brother mfc-440cn installation software
- brother mfc-440cn mac
- brother mfc-440cn mac driver
- brother mfc-440cn mac software
- brother mfc-440cn maintenance mode
- brother mfc-440cn network setup
- brother mfc-440cn network user's guide
- brother mfc-440cn no cartridge
- brother mfc-440cn not printing
- brother mfc-440cn offline
- brother mfc-440cn owners manual
- brother mfc-440cn parts
- brother mfc-440cn printer driver
- brother mfc-440cn printer driver download
- brother mfc-440cn printer ink cartridges
- brother mfc-440cn printer manual
- brother mfc-440cn problems
- brother mfc-440cn review
- brother mfc-440cn scanner
- brother mfc-440cn scanner driver
- brother mfc-440cn scanner driver mac
- brother mfc-440cn scanner driver windows 10
- brother mfc-440cn scanning instructions
- brother mfc-440cn scanning software
- brother mfc-440cn software download
- brother mfc-440cn troubleshooting
- brother mfc-440cn unable to clean 46
- brother mfc-440cn unable to clean 50
- brother mfc-440cn unable to clean 51
- brother mfc-440cn unable to clean50
- brother mfc-440cn unable to init 46
- brother mfc-440cn unable to print 4f
- brother mfc-440cn unable to print 50
- brother mfc-440cn unable to print 50 error
- brother mfc-440cn unable to print 51
- brother mfc-440cn usb
- brother mfc-440cn usb printer driver
- brother mfc-440cn user manual
- brother mfc-440cn will not scan
- brother mfc-440cn windows 7 driver
- brother mfc-440cn windows 8
- brother mfc-440cn wireless setup
- brother mfc-440cn won't feed paper
- brother mfc-440cn won't print
- brother mfc440cn adf will not feed documents
- brother mfc440cn business center
- brother mfc440cn cartridge
- brother mfc440cn control center
- brother mfc440cn data remaining
- brother mfc440cn downloads
- brother mfc440cn driver download
- brother mfc440cn driver mac
- brother mfc440cn driver windows 7
- brother mfc440cn driver windows 8
- brother mfc440cn drivers
- brother mfc440cn error 50
- brother mfc440cn error 50 unable to print
- brother mfc440cn fax
- brother mfc440cn help
- brother mfc440cn how to manual feed
- brother mfc440cn in stores
- brother mfc440cn installation
- brother mfc440cn mac
- brother mfc440cn maintenance mode
- brother mfc440cn ocr software
- brother mfc440cn paper jam
- brother mfc440cn print head cleaning
- brother mfc440cn printer driver download
- brother mfc440cn printer manual
- brother mfc440cn printhead
- brother mfc440cn problems
- brother mfc440cn quick wireless set up
- brother mfc440cn reset
- brother mfc440cn review
- brother mfc440cn scan
- brother mfc440cn scanner driver
- brother mfc440cn software download
- brother mfc440cn ubuntu driver
- brother mfc440cn unable to clean 46
- brother mfc440cn unable to print 50
- brother mfc440cn unable to print 51
- brother mfc440cn windows 7 driver
- brother mfc440cn windows 8
- brother mfc440cn wireless setup
- brother printer 440cn
- brother printer driver mfc 440cn
- brother printer mfc 440cn
- brother printer mfc-440cn
- brother printer mfc440cn
- brother printers mfc 440cn
- brothers 440cn
- brothers mfc 440cn
- brothers mfc 440cn driver
- brothers mfc 440cn software
- brothers mfc440cn
- cartridge head for mfc440cn
- driver for brother mfc 440cn
- driver for brother mfc-440cn
- driver for brother mfc440cn
- driver for mfc 440cn
- driver for mfc-440cn
- driver for mfc440cn
- drivers for mfc440cn
- impresora mfc440cn
- ink for mfc440cn
- mfc 440cn
- mfc 440cn adf
- mfc 440cn adf not working
- mfc 440cn all in one
- mfc 440cn all-in-one
- mfc 440cn and ipad
- mfc 440cn black ink not working
- mfc 440cn brother
- mfc 440cn brother manual
- mfc 440cn brother printer
- mfc 440cn brother printer forum
- mfc 440cn brother printer no paper fed
- mfc 440cn brother printer problems
- mfc 440cn brother printer troubleshoot
- mfc 440cn brother printer troubleshooting
- mfc 440cn cannot copy 50
- mfc 440cn cartridge
- mfc 440cn change text size when printing
- mfc 440cn clean print head
- mfc 440cn clean unable 46
- mfc 440cn cleaning print head
- mfc 440cn clear memory
- mfc 440cn clogged inkjet nozzle
- mfc 440cn connect to computer
- mfc 440cn control center
- mfc 440cn control center download
- mfc 440cn cost
- mfc 440cn disassembly
- mfc 440cn download
- mfc 440cn download driver
- mfc 440cn downloads
- mfc 440cn driver android
- mfc 440cn driver download windows 7
- mfc 440cn driver download windows 8
- mfc 440cn driver for android
- mfc 440cn driver for mac
- mfc 440cn driver for vista
- mfc 440cn driver for windows 7
- mfc 440cn driver mac
- mfc 440cn driver vista
- mfc 440cn driver windows 10
- mfc 440cn driver windows 7
- mfc 440cn driver windows 8
- mfc 440cn driver windows xp
- mfc 440cn drivers
- mfc 440cn drivers for windows 7
- mfc 440cn drivers for windows 8
- mfc 440cn encoder strip
- mfc 440cn erase memory
- mfc 440cn error 46
- mfc 440cn error 51
- mfc 440cn fax
- mfc 440cn fax setup
- mfc 440cn for sale
- mfc 440cn how to fax
- mfc 440cn how to manual feed
- mfc 440cn how to set up email scan
- mfc 440cn in stores
- mfc 440cn ink absorber pad
- mfc 440cn ink cartridge
- mfc 440cn ink cartridge cheap
- mfc 440cn ink cartridges
- mfc 440cn installation
- mfc 440cn ip address
- mfc 440cn linux
- mfc 440cn mac driver
- mfc 440cn mac software download
- mfc 440cn maintenance mode
- mfc 440cn manual download
- mfc 440cn network printer
- mfc 440cn network setup
- mfc 440cn not printing
- mfc 440cn ocr software
- mfc 440cn ocr software download
- mfc 440cn offline
- mfc 440cn paper jam
- mfc 440cn paper tray jams
- mfc 440cn parts
- mfc 440cn poor line condition
- mfc 440cn price
- mfc 440cn print 51 error
- mfc 440cn print head
- mfc 440cn print head cleaning
- mfc 440cn printer + for sale
- mfc 440cn printer buy used
- mfc 440cn printer download
- mfc 440cn printer driver download
- mfc 440cn printer driver windows 7
- mfc 440cn printer manual
- mfc 440cn printer not working
- mfc 440cn printer troubleshooting
- mfc 440cn printers
- mfc 440cn printhead
- mfc 440cn printhead cleaning
- mfc 440cn printing blank pages
- mfc 440cn pro suites
- mfc 440cn reset
- mfc 440cn review
- mfc 440cn scan check connection
- mfc 440cn scan to pdf
- mfc 440cn scanner does not work
- mfc 440cn scanner software
- mfc 440cn scansoft paperport
- mfc 440cn service manual
- mfc 440cn software download
- mfc 440cn software downloads
- mfc 440cn software mac
- mfc 440cn specs
- mfc 440cn to wireless router
- mfc 440cn to wireless router to mac
- mfc 440cn toner
- mfc 440cn unable 51
- mfc 440cn unable to change 50
- mfc 440cn unable to change 51
- mfc 440cn unable to clean 46
- mfc 440cn unable to clean 50
- mfc 440cn unable to clean 51
- mfc 440cn unable to print 32 error
- mfc 440cn unable to print 4f
- mfc 440cn unable to print 51
- mfc 440cn unable to print 51 error
- mfc 440cn usb
- mfc 440cn usb printer
- mfc 440cn user manual
- mfc 440cn vista driver
- mfc 440cn will not scan
- mfc 440cn windows 10 driver
- mfc 440cn windows 7 driver
- mfc 440cn windows 8
- mfc 440cn windows 8 driver
- mfc 440cn wireless
- mfc 440cn wireless driver
- mfc 440cn wireless printing
- mfc 440cn wireless setup
- mfc 440cn won't print black
- mfc-440cn
- mfc-440cn airprint
- mfc-440cn all-in-one inkjet printer
- mfc-440cn brother
- mfc-440cn brother driver
- mfc-440cn brother manual
- mfc-440cn brother printer
- mfc-440cn brother printer driver
- mfc-440cn check connection
- mfc-440cn clean print head
- mfc-440cn code 46
- mfc-440cn color flatbed all-in-one
- mfc-440cn control center download
- mfc-440cn download
- mfc-440cn downloads
- mfc-440cn driver download free
- mfc-440cn driver download vista
- mfc-440cn driver download windows 7
- mfc-440cn driver download windows 8
- mfc-440cn driver for mac
- mfc-440cn driver for windows 7
- mfc-440cn driver for windows 8
- mfc-440cn driver mac
- mfc-440cn driver windows 10
- mfc-440cn driver windows 7
- mfc-440cn driver windows 8
- mfc-440cn drivers
- mfc-440cn drivers for windows 10
- mfc-440cn drivers mac
- mfc-440cn error 4f
- mfc-440cn error 50
- mfc-440cn error 51
- mfc-440cn error code 50
- mfc-440cn error code 51
- mfc-440cn factory reset
- mfc-440cn fax setup
- mfc-440cn how to scan
- mfc-440cn ink cartridge replacement
- mfc-440cn ink cartridges
- mfc-440cn install
- mfc-440cn installation software
- mfc-440cn instructions
- mfc-440cn linux
- mfc-440cn mac
- mfc-440cn mac driver
- mfc-440cn mac software
- mfc-440cn maintenance mode
- mfc-440cn manuel
- mfc-440cn network setup
- mfc-440cn network user's guide
- mfc-440cn no cartridge
- mfc-440cn not printing
- mfc-440cn or the mfc-5460cn
- mfc-440cn owners manual
- mfc-440cn paper tray stuck
- mfc-440cn parts
- mfc-440cn printer driver
- mfc-440cn printer driver download
- mfc-440cn printer ink cartridges
- mfc-440cn printer manual
- mfc-440cn problems
- mfc-440cn review
- mfc-440cn scan to pdf
- mfc-440cn scanner
- mfc-440cn scanner driver
- mfc-440cn scanner driver mac
- mfc-440cn scanner driver windows 10
- mfc-440cn scanning instructions
- mfc-440cn scanning software
- mfc-440cn service manual
- mfc-440cn software download
- mfc-440cn specs
- mfc-440cn troubleshooting
- mfc-440cn unable to change 50
- mfc-440cn unable to clean 46
- mfc-440cn unable to clean 4f
- mfc-440cn unable to clean 50
- mfc-440cn unable to clean 51
- mfc-440cn unable to clean50
- mfc-440cn unable to init 46
- mfc-440cn unable to print 4f
- mfc-440cn unable to print 50 error
- mfc-440cn unable to print 51
- mfc-440cn usb
- mfc-440cn usb printer driver
- mfc-440cn user manual
- mfc-440cn will not scan
- mfc-440cn windows 10
- mfc-440cn windows 7 driver
- mfc-440cn windows 8
- mfc-440cn wireless
- mfc-440cn wireless setup
- mfc-440cn won't feed paper
- mfc-440cn won't print
- mfc440cn
- mfc440cn adf will not feed documents
- mfc440cn brother driver
- mfc440cn brother drivers
- mfc440cn brother manual
- mfc440cn brother mfc
- mfc440cn brother printer
- mfc440cn brother unable print 50
- mfc440cn business center
- mfc440cn cartridge
- mfc440cn cartridges
- mfc440cn clean print head
- mfc440cn color troubleshooting
- mfc440cn control center
- mfc440cn cups
- mfc440cn data remaining
- mfc440cn downloads
- mfc440cn driver mac
- mfc440cn driver windows 7
- mfc440cn driver windows 8
- mfc440cn drivers
- mfc440cn error 30
- mfc440cn error 50
- mfc440cn error 50 unable to print
- mfc440cn error code 50
- mfc440cn error code unable to init. 4f
- mfc440cn error code unable to print 30
- mfc440cn error code unable to print 51
- mfc440cn error code unable to print.4f
- mfc440cn fax
- mfc440cn for windows 7
- mfc440cn help
- mfc440cn how to manual feed
- mfc440cn in stores
- mfc440cn ink absorber pad
- mfc440cn ink cartridge
- mfc440cn ink cartridge cheap
- mfc440cn ink clean tray full
- mfc440cn installation
- mfc440cn linux
- mfc440cn linux driver
- mfc440cn mac
- mfc440cn mac driver
- mfc440cn maintenance mode
- mfc440cn no cartridge
- mfc440cn ocr software
- mfc440cn paper jam
- mfc440cn parts
- mfc440cn parts list
- mfc440cn print head cleaning
- mfc440cn print without color ink cartridges
- mfc440cn printer driver download
- mfc440cn printer manual
- mfc440cn printhead
- mfc440cn problems
- mfc440cn quick wireless set up
- mfc440cn reset
- mfc440cn scan
- mfc440cn scanner driver
- mfc440cn service manual
- mfc440cn setup
- mfc440cn software download
- mfc440cn troubleshoot
- mfc440cn ubuntu
- mfc440cn ubuntu driver
- mfc440cn unable to clean 46
- mfc440cn unable to clean 51
- mfc440cn unable to print 4f
- mfc440cn unable to print 50
- mfc440cn unable to print 51
- mfc440cn vista driver
- mfc440cn windows 10
- mfc440cn windows 7 driver
- mfc440cn windows 7 scanner driver
- mfc440cn windows 8
- mfc440cn wireless setup