
Aspire 5680/5650/5630/5610/5610Z/3690 User's Guide
Page 18
... ergonomic specifications 103 Index 104 BIOS utility 85 Boot sequence 85 Enable disk-to-disk recovery 85 Password 85 Using software 86 Playing DVD movies 86 Power management 87 Acer eRecovery Management 88 Create backup 88 Burn backup disc 89 Restore and recovery 89 Troubleshooting 90 Troubleshooting tips 90 Error messages 90 Regulations and safety...
... ergonomic specifications 103 Index 104 BIOS utility 85 Boot sequence 85 Enable disk-to-disk recovery 85 Password 85 Using software 86 Playing DVD movies 86 Power management 87 Acer eRecovery Management 88 Create backup 88 Burn backup disc 89 Restore and recovery 89 Troubleshooting 90 Troubleshooting tips 90 Error messages 90 Regulations and safety...
Aspire 5680/5650/5630/5610/5610Z/3690 User's Guide
Page 28
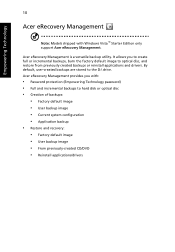
.... Empowering Technology 10 Acer eRecovery Management Note: Models shipped with : • Password protection (Empowering Technology password) • Full and incremental backups to hard disk or optical disc • Creation of backups: • Factory default image • User backup image • Current system configuration • Application backup • Restore and recovery: • Factory default...
.... Empowering Technology 10 Acer eRecovery Management Note: Models shipped with : • Password protection (Empowering Technology password) • Full and incremental backups to hard disk or optical disc • Creation of backups: • Factory default image • User backup image • Current system configuration • Application backup • Restore and recovery: • Factory default...
Aspire 5680/5650/5630/5610/5610Z/3690 User's Guide
Page 63
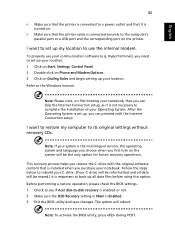
...you purchase your notebook. Before performing a restore operation, please check the BIOS settings. 1 Check to see if Acer disk-to-disk recovery is enabled or not. 2 Make sure the D2D Recovery setting in Main is installed when you can skip the Internet Connection setup, as it is turned on. •... up all data will reboot. I want to restore my computer to the Windows manual. The system will be the only option for future recovery operations. HyperTerminal), you restore the C: drive with the Internet Connection setup. Follow the steps below to rebuild your C: drive. (Your C:...
...you purchase your notebook. Before performing a restore operation, please check the BIOS settings. 1 Check to see if Acer disk-to-disk recovery is enabled or not. 2 Make sure the D2D Recovery setting in Main is installed when you can skip the Internet Connection setup, as it is turned on. •... up all data will reboot. I want to restore my computer to the Windows manual. The system will be the only option for future recovery operations. HyperTerminal), you restore the C: drive with the Internet Connection setup. Follow the steps below to rebuild your C: drive. (Your C:...
Aspire 5680/5650/5630/5610/5610Z/3690 User's Guide
Page 64
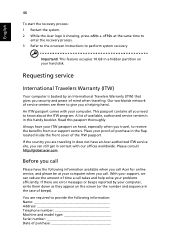
Our worldwide network of beeps). Always have your hard disk. This passport contains all you need to receive the benefits from our support centers. Please consult http://global.acer.com. If there are error messages or beeps reported by an International Travelers Warranty (ITW) that gives you call. With ...ITW passport on the screen (or the number and sequence in the case of service centers are there to perform system recovery. Before you call Please have an Acer-authorized ITW service site, you can reduce the amount of time a call takes and help solve your computer when ...
Our worldwide network of beeps). Always have your hard disk. This passport contains all you need to receive the benefits from our support centers. Please consult http://global.acer.com. If there are error messages or beeps reported by an International Travelers Warranty (ITW) that gives you call. With ...ITW passport on the screen (or the number and sequence in the case of service centers are there to perform system recovery. Before you call Please have an Acer-authorized ITW service site, you can reduce the amount of time a call takes and help solve your computer when ...
Aspire 5680/5650/5630/5610/5610Z/3690 User's Guide
Page 103
..., then select Boot from the categories listed at the top of the screen. Enable disk-to-disk recovery To enable disk-to enable this feature. Find D2D Recovery at the top of the screen and use the and keys to -disk recovery (hard disk recovery), activate the BIOS utility, then select Main from the categories listed at the top...
..., then select Boot from the categories listed at the top of the screen. Enable disk-to-disk recovery To enable disk-to enable this feature. Find D2D Recovery at the top of the screen and use the and keys to -disk recovery (hard disk recovery), activate the BIOS utility, then select Main from the categories listed at the top...
Aspire 5680/5650/5630/5610/5610Z/3690 User's Guide
Page 106
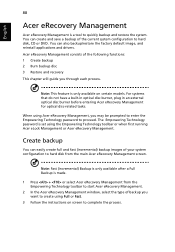
...can also backup/restore the factory default image, and reinstall applications and drivers. Acer eRecovery Management consists of the following functions: 1 Create backup 2 Burn backup disc 3 Restore and recovery This chapter will guide you may be prompted to enter the Empowering Technology password ...can easily create full and fast (incremental) backup images of your system configuration to hard disk from the Empowering Technology toolbar to start Acer eRecovery Management. 2 In the Acer eRecovery Management window, select the type of the current system configuration to complete the process...
...can also backup/restore the factory default image, and reinstall applications and drivers. Acer eRecovery Management consists of the following functions: 1 Create backup 2 Burn backup disc 3 Restore and recovery This chapter will guide you may be prompted to enter the Empowering Technology password ...can easily create full and fast (incremental) backup images of your system configuration to hard disk from the Empowering Technology toolbar to start Acer eRecovery Management. 2 In the Acer eRecovery Management window, select the type of the current system configuration to complete the process...

Aspire 5610 Service Guide
Page 32
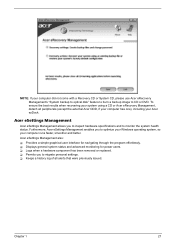
... away with : T Password protection. T Image/data backup: T Back up to HDD (set recovery point). T Image/data recovery tools: T Recover from the HDD (most recent user-defined recovery point). Acer eRecovery Management provides you with the need for recovery disks provided by the manufacturer. The Acer eRecovery Management utility occupies space in a hidden partition on D:\ drive. T Recover from...
... away with : T Password protection. T Image/data backup: T Back up to HDD (set recovery point). T Image/data recovery tools: T Recover from the HDD (most recent user-defined recovery point). Acer eRecovery Management provides you with the need for recovery disks provided by the manufacturer. The Acer eRecovery Management utility occupies space in a hidden partition on D:\ drive. T Recover from...
Aspire 5610 Service Guide
Page 33
... Management enables you to optimize your Windows operating system, so your computer did not come with a Recovery CD or System CD, please use Acer eRecovery Management's "System backup to optical disk" feature to burn a backup image to monitor the system health status. T Logs when a hardware component has been removed or replaced. T Keeps a history...
... Management enables you to optimize your Windows operating system, so your computer did not come with a Recovery CD or System CD, please use Acer eRecovery Management's "System backup to optical disk" feature to burn a backup image to monitor the system health status. T Logs when a hardware component has been removed or replaced. T Keeps a history...
Aspire 5610 Service Guide
Page 59
... power to run the Phlash utility. The process will execute the file automatically. Insert the Crisis diskette to the notebook under Windows mode. 2. Insert a floppy disk to the computer. 2. Press Fn+Esc and power on the sytem. 3. Chapter 2 49 Use the Phlash utility to create a crisis diskette. 1. Wait for the following... Flash Utility The BIOS flash memory update is not completely loaded. NOTE: Do not install memory-related drivers (XMS, EMS, DPMI) when you can then recovery the fail system. 1. Execute "wincris.exe" 3. After you have to create a crisis diskette.
... power to run the Phlash utility. The process will execute the file automatically. Insert the Crisis diskette to the notebook under Windows mode. 2. Insert a floppy disk to the computer. 2. Press Fn+Esc and power on the sytem. 3. Chapter 2 49 Use the Phlash utility to create a crisis diskette. 1. Wait for the following... Flash Utility The BIOS flash memory update is not completely loaded. NOTE: Do not install memory-related drivers (XMS, EMS, DPMI) when you can then recovery the fail system. 1. Execute "wincris.exe" 3. After you have to create a crisis diskette.


