
Acer Aspire 5532 Notebook Series Service Guide
Page 9
... View 138 Power Board 139 Clearing Password Check and BIOS Recovery 140 Clearing Password Check 140 Clear CMOS Jumper 140 BIOS Recovery by Crisis Disk 141 FRU (Field Replaceable Unit) List 143 Aspire 5532 Exploded Diagrams 144 Main Assembly 144 Base Assembly 146 Rear Assembly 147 Aspire 5532 FRU List 148 Model Definition and Configuration 156 Test...
... View 138 Power Board 139 Clearing Password Check and BIOS Recovery 140 Clearing Password Check 140 Clear CMOS Jumper 140 BIOS Recovery by Crisis Disk 141 FRU (Field Replaceable Unit) List 143 Aspire 5532 Exploded Diagrams 144 Main Assembly 144 Base Assembly 146 Rear Assembly 147 Aspire 5532 FRU List 148 Model Definition and Configuration 156 Test...
Acer Aspire 5532 Notebook Series Service Guide
Page 136
... virus free. 3. Run the Windows Memory Diagnostic Tool. Ensure all external devices. 2. See "Disassembly Process" on the Boot menu. 6. The System Recovery Options screen displays. f. g. When complete, click Finish. Check the BIOS settings are correct and that CD/DVD drive is not fixed, repeat the...Disconnect all cables and jumpers on the HDD and ODD are required. d. Select the appropriate operating system, and click Next. Run Windows Check Disk by entering chkdsk /r from a known good date using up-to-date software to resolve the problem. 4. When prompted, press any recently ...
... virus free. 3. Run the Windows Memory Diagnostic Tool. Ensure all external devices. 2. See "Disassembly Process" on the Boot menu. 6. The System Recovery Options screen displays. f. g. When complete, click Finish. Check the BIOS settings are correct and that CD/DVD drive is not fixed, repeat the...Disconnect all cables and jumpers on the HDD and ODD are required. d. Select the appropriate operating system, and click Next. Run Windows Check Disk by entering chkdsk /r from a known good date using up-to-date software to resolve the problem. 4. When prompted, press any recently ...
Acer Aspire 5532 Notebook Series Service Guide
Page 151
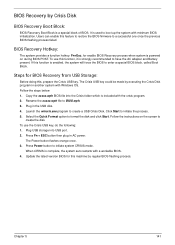
Users can enable this feature to restore the BIOS firmware to create a USB Crisis Disk. BIOS Recovery Hotkey: The system provides a function hotkey: Fn+Esc, for enable BIOS Recovery process when system is powered on the screen to have the AC adapter and Battery present. Steps for this , prepare ...Press Power button to format the disk and click Start. Plug in another system with the crisis program. 2. Press Fn + ESC button then plug in AC power. When CRISIS is included with Windows OS. BIOS Recovery by Crisis Disk BIOS Recovery Boot Block: BIOS Recovery Boot Block is enabled, the system...
Users can enable this feature to restore the BIOS firmware to create a USB Crisis Disk. BIOS Recovery Hotkey: The system provides a function hotkey: Fn+Esc, for enable BIOS Recovery process when system is powered on the screen to have the AC adapter and Battery present. Steps for this , prepare ...Press Power button to format the disk and click Start. Plug in another system with the crisis program. 2. Press Fn + ESC button then plug in AC power. When CRISIS is included with Windows OS. BIOS Recovery by Crisis Disk BIOS Recovery Boot Block: BIOS Recovery Boot Block is enabled, the system...
Aspire 5740DG Notebook Series Users Guide
Page 19
... models) 36 Installing memory 37 Enjoying TV with an external antenna or cable socket 40 BIOS utility 41 Boot sequence 41 Enable disk-to RF fields (RSS-102) 54 LCD panel ergonomic specifications 54 Low-power license-exempt radio communication devices (RSS-210) 54... Exposure of humans to -disk recovery 41 Password 41 Using software 42 Playing DVD movies 42 Frequently asked questions 43 Requesting service 46 International Travelers Warranty (ITW) 46...
... models) 36 Installing memory 37 Enjoying TV with an external antenna or cable socket 40 BIOS utility 41 Boot sequence 41 Enable disk-to RF fields (RSS-102) 54 LCD panel ergonomic specifications 54 Low-power license-exempt radio communication devices (RSS-210) 54... Exposure of humans to -disk recovery 41 Password 41 Using software 42 Playing DVD movies 42 Frequently asked questions 43 Requesting service 46 International Travelers Warranty (ITW) 46...
Aspire 5740DG Notebook Series Users Guide
Page 61
Enable disk-to-disk recovery To enable disk-to-disk recovery (hard disk recovery), activate the BIOS utility, then select Main from the categories listed at the top of the screen. To activate the BIOS utility, press during the ... boot sequence in the BIOS utility, activate the BIOS utility, then select Boot from the categories listed at the bottom of the screen. Find D2D Recovery at the top of the screen. while the notebook PC logo is a hardware configuration program built into your computer's BIOS. Your computer is already properly...
Enable disk-to-disk recovery To enable disk-to-disk recovery (hard disk recovery), activate the BIOS utility, then select Main from the categories listed at the top of the screen. To activate the BIOS utility, press during the ... boot sequence in the BIOS utility, activate the BIOS utility, then select Boot from the categories listed at the bottom of the screen. Find D2D Recovery at the top of the screen. while the notebook PC logo is a hardware configuration program built into your computer's BIOS. Your computer is already properly...
Aspire 5740DG Notebook Series Users Guide
Page 65
English 45 I want to restore my computer to perform system recovery. Before performing a restore operation, please check the BIOS settings. 1 Check to see if Acer disk-to back up all data files before using this option. This recovery process helps you first turn on your C: drive. (Your ...that is Enabled. 3 Exit the BIOS utility and save changes. To start the recovery process: 1 Restart the system. 2 While the Acer logo is important to -disk recovery is enabled or not. 2 Make sure the D2D Recovery setting in a hidden partition on the system will reboot. Important! Note: If...
English 45 I want to restore my computer to perform system recovery. Before performing a restore operation, please check the BIOS settings. 1 Check to see if Acer disk-to back up all data files before using this option. This recovery process helps you first turn on your C: drive. (Your ...that is Enabled. 3 Exit the BIOS utility and save changes. To start the recovery process: 1 Restart the system. 2 While the Acer logo is important to -disk recovery is enabled or not. 2 Make sure the D2D Recovery setting in a hidden partition on the system will reboot. Important! Note: If...


