Acer Aspire 5532 Notebook Series Service Guide
Page 9
... Bottom View 138 Power Board 139 Clearing Password Check and BIOS Recovery 140 Clearing Password Check 140 Clear CMOS Jumper 140 BIOS Recovery by Crisis Disk 141 FRU (Field Replaceable Unit) List 143 Aspire 5532 Exploded Diagrams 144 Main Assembly 144 Base Assembly 146 Rear Assembly 147 Aspire 5532 FRU List 148 Model Definition and Configuration 156 Test...
... Bottom View 138 Power Board 139 Clearing Password Check and BIOS Recovery 140 Clearing Password Check 140 Clear CMOS Jumper 140 BIOS Recovery by Crisis Disk 141 FRU (Field Replaceable Unit) List 143 Aspire 5532 Exploded Diagrams 144 Main Assembly 144 Base Assembly 146 Rear Assembly 147 Aspire 5532 FRU List 148 Model Definition and Configuration 156 Test...
Acer Aspire 5532 Notebook Series Service Guide
Page 41
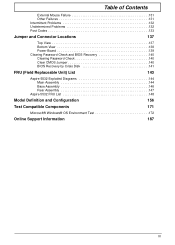
NOTE: If you do not have a crisis recovery diskette at hand, then you should create a Crisis Recovery Diskette before you use the Phlash. Fellow the steps below to finish BIOS flash, you run the Phlash. 1. Prepare a bootable diskette. 2. Use the Phlash utility to the bootable diskette. 3. The flash utility has auto-...-related drivers (XMS, EMS, DPMI) when you use the AC adaptor power supply when you may not boot the system because the BIOS is required for the following conditions: • New versions of system programs • New features or options • Restore...
NOTE: If you do not have a crisis recovery diskette at hand, then you should create a Crisis Recovery Diskette before you use the Phlash. Fellow the steps below to finish BIOS flash, you run the Phlash. 1. Prepare a bootable diskette. 2. Use the Phlash utility to the bootable diskette. 3. The flash utility has auto-...-related drivers (XMS, EMS, DPMI) when you use the AC adaptor power supply when you may not boot the system because the BIOS is required for the following conditions: • New versions of system programs • New features or options • Restore...
Acer Aspire 5532 Notebook Series Service Guide
Page 136
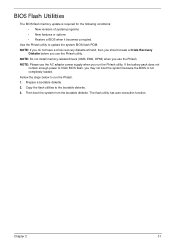
...Click Load Drivers if controller drives are correct and that CD/DVD drive is virus free. 3. Select Startup Repair. Check the BIOS settings are required. Remove any key to start to resolve the problem. 4. For more information see Windows Help and Support. 10...Restore. b. When complete, click Finish. Ensure all external devices. 2. Select Repair your computer. The System Recovery Options screen displays. Startup Repair attempts to enter the BIOS Utility. See "Disassembly Process" on the Boot menu. 6. i. For more information see Windows Help and ...
...Click Load Drivers if controller drives are correct and that CD/DVD drive is virus free. 3. Select Startup Repair. Check the BIOS settings are required. Remove any key to start to resolve the problem. 4. For more information see Windows Help and Support. 10...Restore. b. When complete, click Finish. Ensure all external devices. 2. Select Repair your computer. The System Recovery Options screen displays. Startup Repair attempts to enter the BIOS Utility. See "Disassembly Process" on the Boot menu. 6. i. For more information see Windows Help and ...
Acer Aspire 5532 Notebook Series Service Guide
Page 144
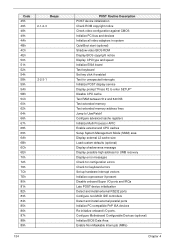
... configuration against CMOS Initialize PCI bus and devices Initialize all video adapters in system QuietBoot start (optional) Shadow video BIOS ROM Display BIOS copyright notice Display CPU type and speed Initialize EISA board Test keyboard Set key click if enabled Test for unexpected ...SMM) area Display external L2 cache size Load custom defaults (optional) Display shadow-area message Display possible high address for UMB recovery Display error messages Check for configuration errors Check for keyboard errors Set up hardware interrupt vectors Initialize coprocessor if present Disable onboard ...
... configuration against CMOS Initialize PCI bus and devices Initialize all video adapters in system QuietBoot start (optional) Shadow video BIOS ROM Display BIOS copyright notice Display CPU type and speed Initialize EISA board Test keyboard Set key click if enabled Test for unexpected ...SMM) area Display external L2 cache size Load custom defaults (optional) Display shadow-area message Display possible high address for UMB recovery Display error messages Check for configuration errors Check for keyboard errors Set up hardware interrupt vectors Initialize coprocessor if present Disable onboard ...
Acer Aspire 5532 Notebook Series Service Guide
Page 146
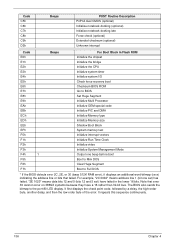
...2C 0002" means address line 1 (bit one beep before boot Boot to Mini DOS F6h Clear Huge Segment F7h Boot to Full DOS * If the BIOS detects error 2C, 2E, or 30 (base 512K RAM error), it displays an additional word-bitmap (xxxx) indicating the address line or bits that ...in Flash ROM Initialize the chipset E1h Initialize the bridge E2h Initialize the CPU E3h Initialize system timer E4h Initialize system I/O E5h Check force recovery boot E6h Checksum BIOS ROM E7h Go to the port-80 LED display. Note that failed. It first displays the check point code, followed by a delay,...
...2C 0002" means address line 1 (bit one beep before boot Boot to Mini DOS F6h Clear Huge Segment F7h Boot to Full DOS * If the BIOS detects error 2C, 2E, or 30 (base 512K RAM error), it displays an additional word-bitmap (xxxx) indicating the address line or bits that ...in Flash ROM Initialize the chipset E1h Initialize the bridge E2h Initialize the CPU E3h Initialize system timer E4h Initialize system I/O E5h Check force recovery boot E6h Checksum BIOS ROM E7h Go to the port-80 LED display. Note that failed. It first displays the check point code, followed by a delay,...
Acer Aspire 5532 Notebook Series Service Guide
Page 150
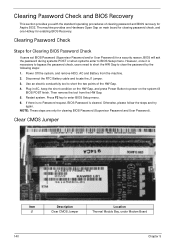
... Password and/or User Password) for Aspire 5532. Use an electric conductivity tool to BIOS Setup menu. Disconnect the RTC Battery cable and locate the J1 jumper. 3. Clearing Password Check and BIOS Recovery This section provides you with the standard operating procedures of clearing password and BIOS recovery for a security reason, BIOS will ask the password during systems...
... Password and/or User Password) for Aspire 5532. Use an electric conductivity tool to BIOS Setup menu. Disconnect the RTC Battery cable and locate the J1 jumper. 3. Clearing Password Check and BIOS Recovery This section provides you with the standard operating procedures of clearing password and BIOS recovery for a security reason, BIOS will ask the password during systems...
Acer Aspire 5532 Notebook Series Service Guide
Page 151
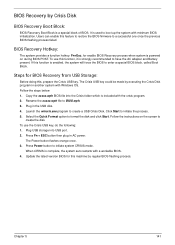
.... Follow the steps below: 1. Copy the xxxxx.wph BIOS file into USB port. 2. To use this machine by Crisis Disk BIOS Recovery Boot Block: BIOS Recovery Boot Block is included with Windows OS. Press Power button to a successful one once the previous BIOS flashing process failed. BIOS Recovery by regular BIOS flashing process. When CRISIS is enabled, the system...
.... Follow the steps below: 1. Copy the xxxxx.wph BIOS file into USB port. 2. To use this machine by Crisis Disk BIOS Recovery Boot Block: BIOS Recovery Boot Block is included with Windows OS. Press Power button to a successful one once the previous BIOS flashing process failed. BIOS Recovery by regular BIOS flashing process. When CRISIS is enabled, the system...
Aspire 5740DG Notebook Series Users Guide
Page 19
Low-power license-exempt radio communication devices (RSS-210) 54 Exposure of humans to -disk recovery 41 Password 41 Using software 42 Playing DVD movies 42 Frequently asked questions 43 Requesting service 46 International Travelers Warranty (ITW) 46 Before you call ... Interface (only for certain models) 36 ExpressCard (only for certain models) 36 Installing memory 37 Enjoying TV with an external antenna or cable socket 40 BIOS utility 41 Boot sequence 41 Enable disk-to RF fields (RSS-102) 54 LCD panel ergonomic specifications 54
Low-power license-exempt radio communication devices (RSS-210) 54 Exposure of humans to -disk recovery 41 Password 41 Using software 42 Playing DVD movies 42 Frequently asked questions 43 Requesting service 46 International Travelers Warranty (ITW) 46 Before you call ... Interface (only for certain models) 36 ExpressCard (only for certain models) 36 Installing memory 37 Enjoying TV with an external antenna or cable socket 40 BIOS utility 41 Boot sequence 41 Enable disk-to RF fields (RSS-102) 54 LCD panel ergonomic specifications 54
Aspire 5740DG Notebook Series Users Guide
Page 34
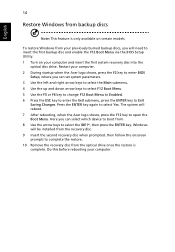
Press the ENTER key again to open the Boot Menu. Do this before rebooting your computer. 2 During startup when the Acer logo shows, press the F2 key to enter BIOS Setup, where you can set system parameters. 3 Use the left and right arrow keys to select the Main submenu. 4 Use the... from the optical drive once the restore is only available on your previously burned backup discs, you will be installed from the recovery disc. 9 Insert the second recovery disc when prompted, then follow the onscreen prompts to select the IDE1*, then press the ENTER key. English 14 Restore Windows ...
Press the ENTER key again to open the Boot Menu. Do this before rebooting your computer. 2 During startup when the Acer logo shows, press the F2 key to enter BIOS Setup, where you can set system parameters. 3 Use the left and right arrow keys to select the Main submenu. 4 Use the... from the optical drive once the restore is only available on your previously burned backup discs, you will be installed from the recovery disc. 9 Insert the second recovery disc when prompted, then follow the onscreen prompts to select the IDE1*, then press the ENTER key. English 14 Restore Windows ...
Aspire 5740DG Notebook Series Users Guide
Page 35
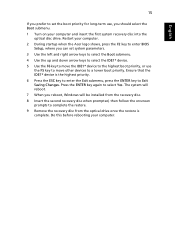
... boot priority, or use , you should select the Boot submenu. 1 Turn on your computer. Restart your computer. 2 During startup when the Acer logo shows, press the F2 key to enter BIOS Setup, where you can set the boot priority for long-term use the F5 key to move other devices to complete... the onscreen prompts to a lower boot priority. Ensure that the IDE1* device is complete. Do this before rebooting your computer and insert the first system recovery disc into the optical disc drive. English 15 If you prefer to Exit Saving Changes. Press the ENTER key again to select Yes.
... boot priority, or use , you should select the Boot submenu. 1 Turn on your computer. Restart your computer. 2 During startup when the Acer logo shows, press the F2 key to enter BIOS Setup, where you can set the boot priority for long-term use the F5 key to move other devices to complete... the onscreen prompts to a lower boot priority. Ensure that the IDE1* device is complete. Do this before rebooting your computer and insert the first system recovery disc into the optical disc drive. English 15 If you prefer to Exit Saving Changes. Press the ENTER key again to select Yes.
Aspire 5740DG Notebook Series Users Guide
Page 61
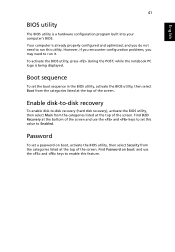
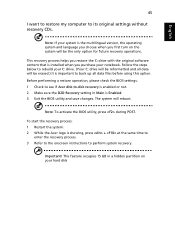
...and use the and keys to Enabled. Boot sequence To set this value to enable this utility. Enable disk-to-disk recovery To enable disk-to-disk recovery (hard disk recovery), activate the BIOS utility, then select Main from the categories listed at the top of the screen. To activate the... BIOS utility, press during the POST; Password To set a password on boot: and use the and keys to set the boot sequence in the BIOS utility,...
...and use the and keys to Enabled. Boot sequence To set this value to enable this utility. Enable disk-to-disk recovery To enable disk-to-disk recovery (hard disk recovery), activate the BIOS utility, then select Main from the categories listed at the top of the screen. To activate the... BIOS utility, press during the POST; Password To set a password on boot: and use the and keys to set the boot sequence in the BIOS utility,...
Aspire 5740DG Notebook Series Users Guide
Page 65
... is important to back up all data will be the only option for future recovery operations. Before performing a restore operation, please check the BIOS settings. 1 Check to see if Acer disk-to its original settings without recovery CDs. This recovery process helps you purchase your hard disk The system will be reformatted and all data...
... is important to back up all data will be the only option for future recovery operations. Before performing a restore operation, please check the BIOS settings. 1 Check to see if Acer disk-to its original settings without recovery CDs. This recovery process helps you purchase your hard disk The system will be reformatted and all data...


