Aspire 5520 Disassembly - Acer
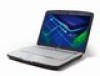
Aspire 5520 Disassembly
Related Manual Pages


Related Videos

Acer Aspire 5715 (Acer Aspire 5520 5220 5710 5315) disassembly and fan cleaning, ???????? ? ??????
Duration: 7:30
Total Views: 1,227
Duration: 7:30
Total Views: 1,227
Similar Questions


Disassembling My Aspire 5742z
i would liuke to disassemble my laptop in order to clean it and to check the ventilator. i did not ...
i would liuke to disassemble my laptop in order to clean it and to check the ventilator. i did not ...
(Posted by davshvo 10 years ago)

How To Disassemble ?
I need to get to the AC power plug for repair. I need to know haw to disassemle , can you provide in...
I need to get to the AC power plug for repair. I need to know haw to disassemle , can you provide in...
(Posted by dkoennecke69 12 years ago)
Related Terms
The following terms were also used when searching for Aspire 5520 Disassembly - Acer:- acer aspire 5520
- acer aspire 5520g
- aspire 5520
- acer aspire 5520 drivers
- acer aspire 5520 laptop
- aspire 5520g
- acer aspire 5520 bios
- aspire 5520 bios
- aspire 5520 drivers
- aspire 5520 laptop
- acer aspire 5520 recovery
- acer aspire 5520 motherboard
- acer aspire 5520 5912
- aspire 5520 motherboard
- aspire 5520 recovery
- acer aspire 5520 battery
- acer aspire 5520 5290
- aspire 5520 5334
- aspire 5520 5912
- aspire 5520 keyboard
- acer aspire 5520 5334
- acer aspire 5520 5908
- aspire 5520 5290
- aspire 5520 5908
- aspire 5520 bluetooth
- aspire 5520 battery
- aspire 5520 memory
- acer aspire 5520 recovery disk
- aspire5520 driver
- aspire 5520 review
- aspire 5520 xp drivers
- aspire 5520 drivers vista
- acer aspire 5520 manual
- acer aspire 5520 charger
- aspire 5520 charger
- aspire 5520 manual
- aspire5520 5912
- acer aspire 5520 review
- aspire5520 5334
- acer aspire 5520 specs
- aspire5520 laptop
- acer aspire5520 specification
- aspire 5520 parts
- aspire 5520 service manual
- aspire 5520 specs
- aspire5520 price
- acer aspire5520 5912 laptop
- aspire 5520 bios password
- acer aspire 5520 5334 drivers
- acer aspire 5520 5334 laptop
- acer aspire 5520 5912 laptop
- acer aspire 5520 5912 motherboard
- acer aspire 5520 5912 problems
- acer aspire 5520 base system device
- acer aspire 5520 base system driver
- acer aspire 5520 bios password
- acer aspire 5520 bios update
- acer aspire 5520 black screen
- acer aspire 5520 blinking power light
- acer aspire 5520 cmos battery
- acer aspire 5520 common problem and fix
- acer aspire 5520 cpu upgrade
- acer aspire 5520 disassembly
- acer aspire 5520 dismantle
- acer aspire 5520 download center
- acer aspire 5520 driver
- acer aspire 5520 drivers for windows 7
- acer aspire 5520 drivers for windows 8
- acer aspire 5520 drivers for windows xp
- acer aspire 5520 drivers vista
- acer aspire 5520 drivers windows 7
- acer aspire 5520 dvd drive not working
- acer aspire 5520 dvd driver
- acer aspire 5520 dvd drivers
- acer aspire 5520 dvd/cd drive
- acer aspire 5520 ethernet controller
- acer aspire 5520 factory reset
- acer aspire 5520 factory restore
- acer aspire 5520 fan
- acer aspire 5520 flashing power light
- acer aspire 5520 for sale
- acer aspire 5520 graphics card
- acer aspire 5520 hard drive
- acer aspire 5520 hard drive replacement
- acer aspire 5520 has a blue screen
- acer aspire 5520 hdd
- acer aspire 5520 how to attach keyboard
- acer aspire 5520 icw50
- acer aspire 5520 keeps turning off and on
- acer aspire 5520 keyboard
- acer aspire 5520 keyboard replacement
- acer aspire 5520 laptop price
- acer aspire 5520 memory
- acer aspire 5520 memory upgrade
- acer aspire 5520 motherboard replacement
- acer aspire 5520 parts
- acer aspire 5520 power adapter
- acer aspire 5520 power button flashes
- acer aspire 5520 power cord
- acer aspire 5520 price
- acer aspire 5520 prices
- acer aspire 5520 problem
- acer aspire 5520 ram
- acer aspire 5520 ram upgrade
- acer aspire 5520 recovery bios blinking
- acer aspire 5520 recovery cd
- acer aspire 5520 recovery partition
- acer aspire 5520 release date
- acer aspire 5520 replace fan
- acer aspire 5520 restore
- acer aspire 5520 restore disk
- acer aspire 5520 reviews
- acer aspire 5520 says no cd drive
- acer aspire 5520 series
- acer aspire 5520 service manual
- acer aspire 5520 shuts down randomly
- acer aspire 5520 software
- acer aspire 5520 sound card
- acer aspire 5520 specification
- acer aspire 5520 specifications
- acer aspire 5520 support
- acer aspire 5520 touchpad driver
- acer aspire 5520 troubleshooting
- acer aspire 5520 turns on and off
- acer aspire 5520 ubuntu
- acer aspire 5520 unknown device
- acer aspire 5520 user manual
- acer aspire 5520 vga
- acer aspire 5520 vista drivers
- acer aspire 5520 webcam driver
- acer aspire 5520 wifi button
- acer aspire 5520 will not boot on power up
- acer aspire 5520 win vista drivers
- acer aspire 5520 windows 7
- acer aspire 5520 windows 7 driver downloads
- acer aspire 5520 windows 7 drivers
- acer aspire 5520 windows 8 drivers
- acer aspire 5520 wireless driver
- acer aspire 5520 wireless switch
- acer aspire 5520 won't boot
- acer aspire 5520 won't power up
- acer aspire 5520 won't start up
- acer aspire 5520 xp drivers
- acer aspire 5520 xp drivers download
- acer aspire 5520 xp vga driver
- acer aspire 5520-5290
- acer aspire 5520-5334
- acer aspire 5520-5912
- acer aspire 5520g motherboard
- acer aspire5520
- acer aspire5520 5334
- acer aspire5520 5912
- acer aspire5520 driver
- acer aspire5520 driver's
- acer aspire5520 drivers
- acer aspire5520 drivers downloads
- acer aspire5520 memory
- acer aspire5520-5912
- aspire 5520 5334 drivers
- aspire 5520 5334 laptop
- aspire 5520 5912 laptop
- aspire 5520 5912 motherboard
- aspire 5520 5912 problems
- aspire 5520 audio device
- aspire 5520 audio device for windows 7
- aspire 5520 audio driver
- aspire 5520 base system device
- aspire 5520 base system driver
- aspire 5520 bios battery
- aspire 5520 bios flash
- aspire 5520 bios password reset
- aspire 5520 bios update
- aspire 5520 black screen
- aspire 5520 blinking
- aspire 5520 blinking power light
- aspire 5520 bluetooth drivers
- aspire 5520 cd/dvd drivers software
- aspire 5520 chipset
- aspire 5520 cmos battery
- aspire 5520 common problem and fix
- aspire 5520 computer
- aspire 5520 cpu upgrade
- aspire 5520 disable touchpad
- aspire 5520 disassembly
- aspire 5520 dismantle
- aspire 5520 download center
- aspire 5520 driver
- aspire 5520 drivers download
- aspire 5520 drivers for windows 7
- aspire 5520 drivers for windows 8
- aspire 5520 drivers for windows xp
- aspire 5520 drivers windows 7
- aspire 5520 drivers windows 7 64
- aspire 5520 dvd drive not working
- aspire 5520 dvd driver
- aspire 5520 dvd drivers
- aspire 5520 dvd not detecting
- aspire 5520 dvd not recognized
- aspire 5520 dvd/cd drive
- aspire 5520 ethernet controller
- aspire 5520 factory reset
- aspire 5520 factory restore
- aspire 5520 fan
- aspire 5520 flashing power light
- aspire 5520 for sale
- aspire 5520 graphic driver
- aspire 5520 graphics card
- aspire 5520 hard drive
- aspire 5520 hard drive replacement
- aspire 5520 has a blue screen
- aspire 5520 hdd
- aspire 5520 how to attach keyboard
- aspire 5520 icw50
- aspire 5520 keeps turning off and on
- aspire 5520 keyboard removal
- aspire 5520 keyboard replacement
- aspire 5520 keyboard spanish
- aspire 5520 laptop price
- aspire 5520 memory slots
- aspire 5520 memory upgrade
- aspire 5520 model #icw50
- aspire 5520 motherboard replacement
- aspire 5520 motherboard used
- aspire 5520 no boot
- aspire 5520 no dvd drive
- aspire 5520 no sound
- aspire 5520 notebook driver download
- aspire 5520 overheating
- aspire 5520 password on boot
- aspire 5520 power adapter
- aspire 5520 power button flashes
- aspire 5520 power cord
- aspire 5520 power issues
- aspire 5520 price
- aspire 5520 prices
- aspire 5520 problem
- aspire 5520 problems
- aspire 5520 ram
- aspire 5520 ram upgrade
- aspire 5520 recovery bios blinking
- aspire 5520 recovery cd
- aspire 5520 recovery disk
- aspire 5520 recovery partition
- aspire 5520 release date
- aspire 5520 replace fan
- aspire 5520 restore
- aspire 5520 restore disk
- aspire 5520 reviews
- aspire 5520 says no cd drive
- aspire 5520 series
- aspire 5520 series specifications
- aspire 5520 shuts down randomly
- aspire 5520 software
- aspire 5520 sound card
- aspire 5520 sound driver
- aspire 5520 spec
- aspire 5520 specifications
- aspire 5520 support
- aspire 5520 touchpad driver
- aspire 5520 touchpad driver xp
- aspire 5520 troubleshooting
- aspire 5520 turns on and off
- aspire 5520 ubuntu
- aspire 5520 unknown device
- aspire 5520 user manual
- aspire 5520 vga
- aspire 5520 vista drivers
- aspire 5520 webcam driver
- aspire 5520 white screen
- aspire 5520 wifi button
- aspire 5520 will not boot on power up
- aspire 5520 win 7
- aspire 5520 win vista drivers
- aspire 5520 windows 10
- aspire 5520 windows 7
- aspire 5520 windows 7 driver downloads
- aspire 5520 windows 7 drivers
- aspire 5520 windows 8
- aspire 5520 windows 8 drivers
- aspire 5520 windows 8 upgrade
- aspire 5520 wireless button
- aspire 5520 wireless card
- aspire 5520 wireless driver
- aspire 5520 wireless switch
- aspire 5520 won't boot
- aspire 5520 won't power up
- aspire 5520 won't start up
- aspire 5520 won't turn on
- aspire 5520 wont boot
- aspire 5520 xp drivers download
- aspire 5520 xp vga driver
- aspire 5520-5290
- aspire 5520-5334
- aspire 5520-5908
- aspire 5520-5912
- aspire 5520g motherboard
- aspire5520 5908
- aspire5520 cpu
- aspire5520 drivers
- aspire5520 hdd
- aspire5520 icw50
- aspire5520 mic problem
- aspire5520 notebook
- aspire5520-5334
- aspire5520-5908
- aspire5520-5912