User Guide
Page 4
Contents Welcome Xerox Card Scanner 200 1 What's in the Box 2 What You Need 3 Documentation 3 Installation Before You Begin 4 Step 1: Install the Software 5 Step 2: Connect the Scanner 10 Additional Applications Available with Your Scanner 13 View the User Guides 14 Register Your Scanner and Check for Updates 15 Scanning Scanning using One Touch 17 Scan Using AutoLaunch 17 Turn AutoLaunch Off/On 18 Scan from the One Touch Buttons 20 Scan from the One Touch Button Panel 21 Features of...
Contents Welcome Xerox Card Scanner 200 1 What's in the Box 2 What You Need 3 Documentation 3 Installation Before You Begin 4 Step 1: Install the Software 5 Step 2: Connect the Scanner 10 Additional Applications Available with Your Scanner 13 View the User Guides 14 Register Your Scanner and Check for Updates 15 Scanning Scanning using One Touch 17 Scan Using AutoLaunch 17 Turn AutoLaunch Off/On 18 Scan from the One Touch Buttons 20 Scan from the One Touch Button Panel 21 Features of...
User Guide
Page 8
... To set your monitor's colors and resolution: • Open the Windows Control Panel • Double-click on using the One Touch VRS module and SharePoint destination link. • Readme-Contains the latest information about your scanner: • Quick Install Guide-Abbreviated installation instructions. • Xerox Scanner User's Guide-On the Installation Disc; Welcome What You Need IBM-compatible Pentium 4 PC, or AMD equivalent with your scanner and software installation. • BizCard User's Guide-On the Installation Disc...
... To set your monitor's colors and resolution: • Open the Windows Control Panel • Double-click on using the One Touch VRS module and SharePoint destination link. • Readme-Contains the latest information about your scanner: • Quick Install Guide-Abbreviated installation instructions. • Xerox Scanner User's Guide-On the Installation Disc; Welcome What You Need IBM-compatible Pentium 4 PC, or AMD equivalent with your scanner and software installation. • BizCard User's Guide-On the Installation Disc...

User Guide
Page 9
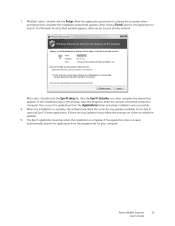
... may cover software not provided with your scanner. You can turn it is recommended that you remove that scanner's driver program prior to proceed if that unit. • If your computer is running Windows Vista, you may see the Vista User Account Control screen asking you should allow the installation to confirm system changes. Install the software 2. Please disregard any information about removing the driver and software for your Xerox scanner. •...
... may cover software not provided with your scanner. You can turn it is recommended that you remove that scanner's driver program prior to proceed if that unit. • If your computer is running Windows Vista, you may see the Vista User Account Control screen asking you should allow the installation to confirm system changes. Install the software 2. Please disregard any information about removing the driver and software for your Xerox scanner. •...
User Guide
Page 10
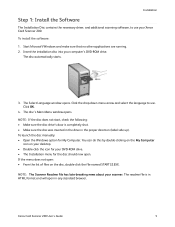
... into your DVD-ROM drive. • The Installation menu for My Computer. If the menu does not open . Start Microsoft Windows and make sure that no other applications are running. 2. NOTE: The Scanner Readme file has late-breaking news about your Xerox Card Scanner 200. The Select Language window opens. Installation Step 1: Install the Software The Installation Disc contains the necessary driver, and additional scanning software, to use your scanner. The disc's Main Menu window opens. Xerox Card Scanner 200 User's Guide 5
... into your DVD-ROM drive. • The Installation menu for My Computer. If the menu does not open . Start Microsoft Windows and make sure that no other applications are running. 2. NOTE: The Scanner Readme file has late-breaking news about your Xerox Card Scanner 200. The Select Language window opens. Installation Step 1: Install the Software The Installation Disc contains the necessary driver, and additional scanning software, to use your scanner. The disc's Main Menu window opens. Xerox Card Scanner 200 User's Guide 5
User Guide
Page 12
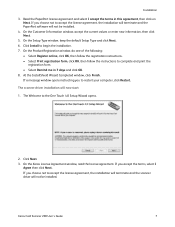
... online, click OK, then follow the registration instructions. • Select Print registration form, click OK, then follow the instructions to accept the license agreement, the installation will terminate and the scanner driver will now start 1. At the InstallShield Wizard Completed window, click Finish. Xerox Card Scanner 200 User's Guide 7 If you choose not to complete and print the registration form. • Select Remind me...
... online, click OK, then follow the registration instructions. • Select Print registration form, click OK, then follow the instructions to accept the license agreement, the installation will terminate and the scanner driver will now start 1. At the InstallShield Wizard Completed window, click Finish. Xerox Card Scanner 200 User's Guide 7 If you choose not to complete and print the registration form. • Select Remind me...

User Guide
Page 22
... location or application on the right side of the paper and automatically begins to a network drive. Xerox Card Scanner 200 User's Guide 17 Scanning Scanning using the scanner. Using AutoLaunch: 1. Scan Using AutoLaunch When you insert an item into the scanner's paper feed. Note that may come off during the scanning process and get stuck in the scanner. Also remove any staples or paper clips from documents before inserting them into the scanner, it is automatically scanned and the image...
... location or application on the right side of the paper and automatically begins to a network drive. Xerox Card Scanner 200 User's Guide 17 Scanning Scanning using the scanner. Using AutoLaunch: 1. Scan Using AutoLaunch When you insert an item into the scanner's paper feed. Note that may come off during the scanning process and get stuck in the scanner. Also remove any staples or paper clips from documents before inserting them into the scanner, it is automatically scanned and the image...

User Guide
Page 44
... then work with your document in the paper feed slot of the business card occurs after the image is sent to edit, spell check, change font or type size, sort, calculate, and so forth. OCR of the scanner. Click OK or Apply on a scanned page into editable text and numbers. Rich Text Format-The .rtf file format. Scanning with no formatting; If scanning business cards to save the changes and...
... then work with your document in the paper feed slot of the business card occurs after the image is sent to edit, spell check, change font or type size, sort, calculate, and so forth. OCR of the scanner. Click OK or Apply on a scanned page into editable text and numbers. Rich Text Format-The .rtf file format. Scanning with no formatting; If scanning business cards to save the changes and...

User Guide
Page 53
.... Open the One Touch Properties window, select Burn to CD button. Make sure a blank CD is available only on the CD. 48 Xerox Card Scanner 200 User's Guide Click the Burn to CD and click the Properties button. 7. If other files are also waiting in this location, they will appear in the Windows notification area telling you can scan directly from your scanned documents are files waiting to be saved...
.... Open the One Touch Properties window, select Burn to CD button. Make sure a blank CD is available only on the CD. 48 Xerox Card Scanner 200 User's Guide Click the Burn to CD and click the Properties button. 7. If other files are also waiting in this location, they will appear in the Windows notification area telling you can scan directly from your scanned documents are files waiting to be saved...

User Guide
Page 55
... page files. 8. When scanning is finished, the document is converted into an HTML format. Microsoft Internet Explorer then opens showing your web page as you use Microsoft Internet Explorer or other HTML page. 50 Xerox Card Scanner 200 User's Guide Click OK. 6. Choose Save As from Your Scanned Documents You can now use for your web site. Open the One Touch Properties window. 2. Choose a Scan Configuration that has the settings for the image...
... page files. 8. When scanning is finished, the document is converted into an HTML format. Microsoft Internet Explorer then opens showing your web page as you use Microsoft Internet Explorer or other HTML page. 50 Xerox Card Scanner 200 User's Guide Click OK. 6. Choose Save As from Your Scanned Documents You can now use for your web site. Open the One Touch Properties window. 2. Choose a Scan Configuration that has the settings for the image...
User Guide
Page 80
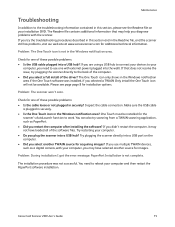
... for one of the software files. Try restarting your computer. • Do you selected a TWAIN Only install the One Touch icon will not be installed for the scanner's AutoLaunch function to work. If you use one of the driver? You need to use multiple TWAIN devices, such as PaperPort. • Did you diagnose problems with the scanner. Xerox Card Scanner 200 User's Guide 75 Maintenance Troubleshooting In addition to the troubleshooting information contained in...
... for one of the software files. Try restarting your computer. • Do you selected a TWAIN Only install the One Touch icon will not be installed for the scanner's AutoLaunch function to work. If you use one of the driver? You need to use multiple TWAIN devices, such as PaperPort. • Did you diagnose problems with the scanner. Xerox Card Scanner 200 User's Guide 75 Maintenance Troubleshooting In addition to the troubleshooting information contained in...

User Guide
Page 81
... size. Free up some driver programs are already installed on page 3. Try reinstalling the scanner driver. The driver software may have been corrupted. 76 Xerox Card Scanner 200 User's Guide Problem: My computer keeps giving me out of poor quality even after I recalibrate and cleaned the scanner. High resolution scans result in files that you received with the installation and One Touch options, and you need to be over 1 gigabyte in . Maintenance Problem: The installation...
... size. Free up some driver programs are already installed on page 3. Try reinstalling the scanner driver. The driver software may have been corrupted. 76 Xerox Card Scanner 200 User's Guide Problem: My computer keeps giving me out of poor quality even after I recalibrate and cleaned the scanner. High resolution scans result in files that you received with the installation and One Touch options, and you need to be over 1 gigabyte in . Maintenance Problem: The installation...

User Guide
Page 82
Click the Change/Remove button. 4. Unplug the USB cable from your computer. Close all open windows and restart your computer. On the Windows taskbar, click Start, point to Settings, then click Control Panel. 2. A message window opens, asking if you are sure you want to remove these software programs. The One Touch 4.0 software is removed from your computer. 5. To Install Another Driver Follow the instructions in "Step 1: Install the Software" on page 5 of this User Guide and follow steps for...
Click the Change/Remove button. 4. Unplug the USB cable from your computer. Close all open windows and restart your computer. On the Windows taskbar, click Start, point to Settings, then click Control Panel. 2. A message window opens, asking if you are sure you want to remove these software programs. The One Touch 4.0 software is removed from your computer. 5. To Install Another Driver Follow the instructions in "Step 1: Install the Software" on page 5 of this User Guide and follow steps for...

User Guide
Page 94
... C Cable 10 Calibrate button 57, 70 Calibration 11, 69 CD burner 46, 48 Center image 30 Check for Online Updates 15 Clean button 57, 71, 74 Cleaning 71 Collate copies 30 Color mode 25, 26, 27, 33, 63, 66 Color space 8 Computer specifications 3 Configure Before Scan 25, 33, 36, 60 cancel 35 Contrast 27, 63, 68 Copy button 25 Create copies of scanned documents 42 Create single image files 36 Custom page size 64 Xerox Card Scanner 200 User's Guide D Define page size...
... C Cable 10 Calibrate button 57, 70 Calibration 11, 69 CD burner 46, 48 Center image 30 Check for Online Updates 15 Clean button 57, 71, 74 Cleaning 71 Collate copies 30 Color mode 25, 26, 27, 33, 63, 66 Color space 8 Computer specifications 3 Configure Before Scan 25, 33, 36, 60 cancel 35 Contrast 27, 63, 68 Copy button 25 Create copies of scanned documents 42 Create single image files 36 Custom page size 64 Xerox Card Scanner 200 User's Guide D Define page size...
User Guide
Page 96
New 26 Scan multiple pages 34 Scan Settings Tab 27 Scan to Folder 51 Multiple folders 52 Scanner Device settings 18, 19, 57, 59, 70, 71, 74 hardware 1 Hardware specifcations 78 parts 2, 79 Troubleshooting 75 scanner connecting 10 Scanner button 1 Scanner driver 6 Scanning mode 25, 26, 27, 33, 63, 66 Screen Resolution 45, 47 Select configuration 24 Properties 27 Select destination 24, 41 Select format 25 Serial number 15 SharePoint 14 Show all destinations 41 Show...
New 26 Scan multiple pages 34 Scan Settings Tab 27 Scan to Folder 51 Multiple folders 52 Scanner Device settings 18, 19, 57, 59, 70, 71, 74 hardware 1 Hardware specifcations 78 parts 2, 79 Troubleshooting 75 scanner connecting 10 Scanner button 1 Scanner driver 6 Scanning mode 25, 26, 27, 33, 63, 66 Screen Resolution 45, 47 Select configuration 24 Properties 27 Select destination 24, 41 Select format 25 Serial number 15 SharePoint 14 Show all destinations 41 Show...

User Manual
Page 3
... the Battery ...18 Register Your Scanner ...20 3 Scanning Memory Card or USB Flash Drive ...22 Creating Multiple Page PDF Files ...23 Retrieving the Scanned Images ...23 Smartphones ...25 Retrieving the Scanned Images ...26 Troubleshooting Connection Issues ...26 iPad ...27 Other Tablets ...29 4 Eye-Fi Install the Software ...32 Install on a Computer ...32 Create Account and Log In ...34 Configuring the Eye-Fi Card Settings ...36 Private Wireless Network ...36 Direct Mode ...37 Turn on Relayed Transfer ...37...
... the Battery ...18 Register Your Scanner ...20 3 Scanning Memory Card or USB Flash Drive ...22 Creating Multiple Page PDF Files ...23 Retrieving the Scanned Images ...23 Smartphones ...25 Retrieving the Scanned Images ...26 Troubleshooting Connection Issues ...26 iPad ...27 Other Tablets ...29 4 Eye-Fi Install the Software ...32 Install on a Computer ...32 Create Account and Log In ...34 Configuring the Eye-Fi Card Settings ...36 Private Wireless Network ...36 Direct Mode ...37 Turn on Relayed Transfer ...37...

User Manual
Page 15
... indicates the type of the paper feed slot. Xerox Mobile Scanner User's Guide 15 Power cycle the scanner if needed. Note that a page is reporting an error, all 3 LEDs will automatically power off . LED pattern 2 blinks Scanner status Paper jam-the scanner has detected that the scanner will blink simultaneously a few times, pause, then blink again. Control panel-Scanner controls. • Power button-Press, hold-down for 3 seconds, then release the power button to turn the scanner on or off after...
... indicates the type of the paper feed slot. Xerox Mobile Scanner User's Guide 15 Power cycle the scanner if needed. Note that a page is reporting an error, all 3 LEDs will automatically power off . LED pattern 2 blinks Scanner status Paper jam-the scanner has detected that the scanner will blink simultaneously a few times, pause, then blink again. Control panel-Scanner controls. • Power button-Press, hold-down for 3 seconds, then release the power button to turn the scanner on or off after...

User Manual
Page 26
... continuously flash. 6. When scanning is finished, the image is connected as a storage device. Retrieving the Scanned Images Please follow your normal process for the scanner to "disc drive". 8. Here are not getting a prompt to choose your phone's USB connection settings and change the phone's USB connection type back to detect the phone as a disc drive but the LEDs never stop flashing. 26 Xerox Mobile Scanner User's Guide 8. 9. An external memory card must be installed...
... continuously flash. 6. When scanning is finished, the image is connected as a storage device. Retrieving the Scanned Images Please follow your normal process for the scanner to "disc drive". 8. Here are not getting a prompt to choose your phone's USB connection settings and change the phone's USB connection type back to detect the phone as a disc drive but the LEDs never stop flashing. 26 Xerox Mobile Scanner User's Guide 8. 9. An external memory card must be installed...

User Manual
Page 31
... files. Multiple image formats are supported. Eye-Fi This chapter includes: • Install the Software on page 32 • Create Account and Log In on page 34 • Configuring the Eye-Fi Card Settings on page 36 • Scanning on page 39 • Scan to a Mobile Device on page 42 • PDF File Transfer using Evernote on page 46 • Share Images on page 51 4 An Eye-Fi card is a secure digital high-capacity (SDHC) memory card...
... files. Multiple image formats are supported. Eye-Fi This chapter includes: • Install the Software on page 32 • Create Account and Log In on page 34 • Configuring the Eye-Fi Card Settings on page 36 • Scanning on page 39 • Scan to a Mobile Device on page 42 • PDF File Transfer using Evernote on page 46 • Share Images on page 51 4 An Eye-Fi card is a secure digital high-capacity (SDHC) memory card...
User Manual
Page 33
... the installation is complete, the software will check the server for the Eye-Fi card and Eye-Fi Center application. If the application does not open automatically, launch the application from the Applications folder (meaning installation was successful). Windows users-double-click the Setup, allow access to change the computer when prompted, then complete the installation wizard that appears. 7. If there are any updates available...
... the installation is complete, the software will check the server for the Eye-Fi card and Eye-Fi Center application. If the application does not open automatically, launch the application from the Applications folder (meaning installation was successful). Windows users-double-click the Setup, allow access to change the computer when prompted, then complete the installation wizard that appears. 7. If there are any updates available...

User Manual
Page 36
... a network, select Other network. Open the Eye-Fi Center software and log in the following sections, please start here: 1. While configuring the settings as described in . 3. You have the option to open the online help button in the scanner, connect it . 1. A notification in the main Eye-Fi Center application. Input the network password and fill in the lower part of images. The network currently used to transfer images displays...
... a network, select Other network. Open the Eye-Fi Center software and log in the following sections, please start here: 1. While configuring the settings as described in . 3. You have the option to open the online help button in the scanner, connect it . 1. A notification in the main Eye-Fi Center application. Input the network password and fill in the lower part of images. The network currently used to transfer images displays...
