Quick Use Guide
Page 5
...WorkCentre 4250/4260 Series. Xerox WorkCentre 4250/4260 Series Quick Use Guide Thank you will successfully: Connect the WorkCentre 4250/4260 Series Printer to a network Set-up the WorkCentre 4250/4260 Series Printer Install optional features Operate the WorkCentre 4250/4260 Series Printer Contents Install the WorkCentre... Option Kits 16 Making Copies ...18 Additional Copy Features 19 Printing a Document 20 Sending a Fax ...22 Network Scanning 25 Sending an E-mail 28 Enhance your WorkCentre's productivity 30 Troubleshooting...33 Help ...35 Greenwich Mean Time Offset 37 quick use...
...WorkCentre 4250/4260 Series. Xerox WorkCentre 4250/4260 Series Quick Use Guide Thank you will successfully: Connect the WorkCentre 4250/4260 Series Printer to a network Set-up the WorkCentre 4250/4260 Series Printer Install optional features Operate the WorkCentre 4250/4260 Series Printer Contents Install the WorkCentre... Option Kits 16 Making Copies ...18 Additional Copy Features 19 Printing a Document 20 Sending a Fax ...22 Network Scanning 25 Sending an E-mail 28 Enhance your WorkCentre's productivity 30 Troubleshooting...33 Help ...35 Greenwich Mean Time Offset 37 quick use...
Quick Use Guide
Page 24
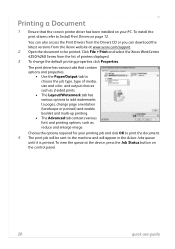
... output choices such as reduce and enlarge image. Click File > Print and select the Xerox WorkCentre 4250/4260 Series from the Xerox website at the device, press the Job Status button on the control panel. 20 quick use guide To install the print drivers refer to Install Print Drivers on your printing... Layout/Watermark tab has various options to add watermarks to pages, change the default printing properties click Properties. To view the queue at www.xerox.com/support. 2 Open the document to be sent to the machine and will appear in the Active Jobs queue until it is printed. ...
... output choices such as reduce and enlarge image. Click File > Print and select the Xerox WorkCentre 4250/4260 Series from the Xerox website at the device, press the Job Status button on the control panel. 20 quick use guide To install the print drivers refer to Install Print Drivers on your printing... Layout/Watermark tab has various options to add watermarks to pages, change the default printing properties click Properties. To view the queue at www.xerox.com/support. 2 Open the document to be sent to the machine and will appear in the Active Jobs queue until it is printed. ...
Quick Use Guide
Page 37
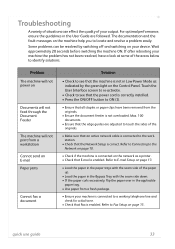
... optimal performance, ensure the guidelines in the applicable paper tray. • Use paper from the originals. • Ensure the document feeder is enabled. Wait approximately 20 seconds before switching the machine ON. If after rebooting your machine the problem has not been resolved, have a look at some of the paper up...
... optimal performance, ensure the guidelines in the applicable paper tray. • Use paper from the originals. • Ensure the document feeder is enabled. Wait approximately 20 seconds before switching the machine ON. If after rebooting your machine the problem has not been resolved, have a look at some of the paper up...
System Administration Guide
Page 3
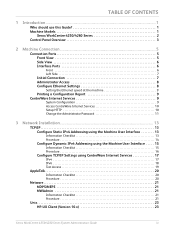
TABLE OF CONTENTS 1 Introduction ...1 Who should use this Guide 1 Machine Models 1 Xerox WorkCentre 4250/4260 Series 2 Control Panel Overview 3 2 Machine Connection ...5 Connection Ports 5 Front View 5 Side View 6 Interface Ports 6 Front 6 Left Side 7 Initial ...Settings using CentreWare Internet Services 17 IPv4 17 IPv6 18 Test Access 19 AppleTalk 20 Information Checklist 20 Procedure 20 Netware 21 NDPS/NEPS 21 NWAdmin 21 Information Checklist 21 Procedure 21 Unix 23 HP-UX Client (Version 10.x 23 Xerox WorkCentre 4250/4260 Series System Administration Guide iii
TABLE OF CONTENTS 1 Introduction ...1 Who should use this Guide 1 Machine Models 1 Xerox WorkCentre 4250/4260 Series 2 Control Panel Overview 3 2 Machine Connection ...5 Connection Ports 5 Front View 5 Side View 6 Interface Ports 6 Front 6 Left Side 7 Initial ...Settings using CentreWare Internet Services 17 IPv4 17 IPv6 18 Test Access 19 AppleTalk 20 Information Checklist 20 Procedure 20 Netware 21 NDPS/NEPS 21 NWAdmin 21 Information Checklist 21 Procedure 21 Unix 23 HP-UX Client (Version 10.x 23 Xerox WorkCentre 4250/4260 Series System Administration Guide iii
System Administration Guide
Page 25
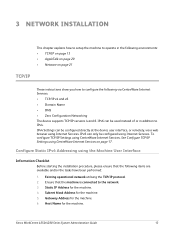
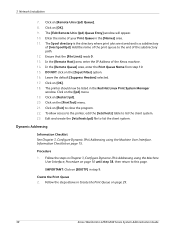
.../IP on page 13 • AppleTalk on page 20 • Netware on page 17. Host Name for the machine. 4. Static IP Address for the machine. 3 Network Installation This chapter explains how to setup the machine to operate in addition to the network. 3. Xerox WorkCentre 4250/4260 Series System Administration Guide 13 Subnet Mask...
.../IP on page 13 • AppleTalk on page 20 • Netware on page 17. Host Name for the machine. 4. Static IP Address for the machine. 3 Network Installation This chapter explains how to setup the machine to operate in addition to the network. 3. Xerox WorkCentre 4250/4260 Series System Administration Guide 13 Subnet Mask...
System Administration Guide
Page 26
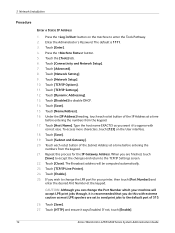
... Pathway. 2. Touch [Save]. 19. Touch [TCP/IP-Line Printer]. 24. If you wish to the default port of 515. 26. If not, touch [Enable]. 14 Xerox WorkCentre 4250/4260 Series System Administration Guide Press the button on the User interface. 18. Touch [Network Setup]. 10. Touch [Name/Address]. 16. Enter the Administrator... it is 1111. 3. Touch [Network Setting]. 9. Touch [Host Name]. Touch [TCP/IP Options]. 11. 3 Network Installation Procedure Enter a Static IP Address 1. Touch [Subnet and Gateway]. 20.
... Pathway. 2. Touch [Save]. 19. Touch [TCP/IP-Line Printer]. 24. If you wish to the default port of 515. 26. If not, touch [Enable]. 14 Xerox WorkCentre 4250/4260 Series System Administration Guide Press the button on the User interface. 18. Touch [Network Setup]. 10. Touch [Name/Address]. 16. Enter the Administrator... it is 1111. 3. Touch [Network Setting]. 9. Touch [Host Name]. Touch [TCP/IP Options]. 11. 3 Network Installation Procedure Enter a Static IP Address 1. Touch [Subnet and Gateway]. 20.
System Administration Guide
Page 28
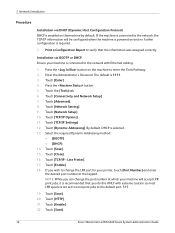
... (Dynamic Host Configuration Protocol) DHCP is enabled on the machine by default. Touch [Save]. 15. Touch [Enable]. 18. Touch [Save]. 20. Touch [Enter]. 4. Touch [Dynamic Addressing]. If the machine is connected to the network, the TCP/IP information will accept LPR print jobs... to the default port, 515. 19. Enter the Administrator's Password. Press the button. 5. Touch [TCP/IP - Touch [Save]. 16 Xerox WorkCentre 4250/4260 Series System Administration Guide Touch [Close]. 16. Touch [TCP/IP Options]. 11. 3 Network Installation Procedure Installation via BOOTP or DHCP...
... (Dynamic Host Configuration Protocol) DHCP is enabled on the machine by default. Touch [Save]. 15. Touch [Enable]. 18. Touch [Save]. 20. Touch [Enter]. 4. Touch [Dynamic Addressing]. If the machine is connected to the network, the TCP/IP information will accept LPR print jobs... to the default port, 515. 19. Enter the Administrator's Password. Press the button. 5. Touch [TCP/IP - Touch [Save]. 16 Xerox WorkCentre 4250/4260 Series System Administration Guide Touch [Close]. 16. Touch [TCP/IP Options]. 11. 3 Network Installation Procedure Installation via BOOTP or DHCP...
System Administration Guide
Page 32
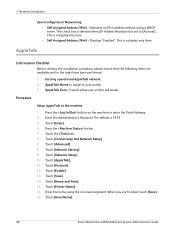
... are finished, touch [Save]. 17. AppleTalk Zone (if used) where your printer. 3. Touch [Network Setting]. 9. Touch [Network Setup]. 10. Touch [Enable]. 13. Touch [Area Name]. 20 Xerox WorkCentre 4250/4260 Series System Administration Guide This is 1111. 3. Touch [Advanced]. 8. When you are available and/or the tasks have been performed: 1. 3 Network Installation Zero...
... are finished, touch [Save]. 17. AppleTalk Zone (if used) where your printer. 3. Touch [Network Setting]. 9. Touch [Network Setup]. 10. Touch [Enable]. 13. Touch [Area Name]. 20 Xerox WorkCentre 4250/4260 Series System Administration Guide This is 1111. 3. Touch [Advanced]. 8. When you are available and/or the tasks have been performed: 1. 3 Network Installation Zero...
System Administration Guide
Page 33
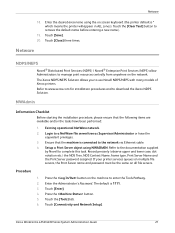
...the printer will appear in ALL zones). Touch [Enter]. 4. Touch [Connectivity and Network Setup]. Touch [Save]. 20. Login to enter the Tools Pathway. 2. Touch the [Tools] tab. 6. Xerox WorkCentre 4250/4260 Series System Administration Guide 21 Setup a Print Server object using the on the machine to a NetWare file...the Print Server name and password must be the same on the network. Refer to www.xerox.com for installation procedures and to use Novell NDPS/NEPS with many models of Xerox printers. Ensure that the following items are available and/or the tasks have the equivalent ...
...the printer will appear in ALL zones). Touch [Enter]. 4. Touch [Connectivity and Network Setup]. Touch [Save]. 20. Login to enter the Tools Pathway. 2. Touch the [Tools] tab. 6. Xerox WorkCentre 4250/4260 Series System Administration Guide 21 Setup a Print Server object using the on the machine to a NetWare file...the Print Server name and password must be the same on the network. Refer to www.xerox.com for installation procedures and to use Novell NDPS/NEPS with many models of Xerox printers. Ensure that the following items are available and/or the tasks have the equivalent ...
System Administration Guide
Page 34
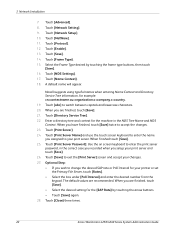
... the [SAP Rate] by touching the frame type buttons, then touch [Save]. 16. When you wish to switch between capitals and lowercase characters. 20. Touch [Close] three times. 22 Xerox WorkCentre 4250/4260 Series System Administration Guide Touch [Print Server Password]. Touch [Advanced]. 8. Touch [Network Setup]. 10. Touch [Protocol]. 12. Touch [Frame Type...
... the [SAP Rate] by touching the frame type buttons, then touch [Save]. 16. When you wish to switch between capitals and lowercase characters. 20. Touch [Close] three times. 22 Xerox WorkCentre 4250/4260 Series System Administration Guide Touch [Print Server Password]. Touch [Advanced]. 8. Touch [Network Setup]. 10. Touch [Protocol]. 12. Touch [Frame Type...
System Administration Guide
Page 42
... the Print Queue 2. Click on the [lpd] menu. 19. Click on [Remote Unix (lpd) Queue]. 8. 3 Network Installation 7. Enter the name of the Xerox machine. 14. Add the name of the print queue to list the client system. The printer should now be listed in Chapter 3, Configure Dynamic IPv4... Queue on [Restart lpd]. 20. The Spool directory is the directory where print jobs are stored and is a subdirectory of the subdirectory path. 12. DO NOT click on [OK]. 18. Click on the [Input Filter] option. 16. Click on page 29. 30 Xerox WorkCentre 4250/4260 Series System Administration...
... the Print Queue 2. Click on the [lpd] menu. 19. Click on [Remote Unix (lpd) Queue]. 8. 3 Network Installation 7. Enter the name of the Xerox machine. 14. Add the name of the print queue to list the client system. The printer should now be listed in Chapter 3, Configure Dynamic IPv4... Queue on [Restart lpd]. 20. The Spool directory is the directory where print jobs are stored and is a subdirectory of the subdirectory path. 12. DO NOT click on [OK]. 18. Click on the [Input Filter] option. 16. Click on page 29. 30 Xerox WorkCentre 4250/4260 Series System Administration...
System Administration Guide
Page 50
... is enabled by default. 4 Print Drivers 17. The [Name your workstation, open the web browser and enter the TCP/IP address of the device. 38 Xerox WorkCentre 4250/4260 Series System Administration Guide The Printer URL will show the http:// IP address of the device and the ipp:// IP address of the... machine in the directory tree. 7. To configure the settings: a) Enter a Printer Name. b) If you will install. 29. Click on [Yes] to step 25. 20. Click on the [Next] button. 18. Click on the [Finish] button. Click on the [Properties] tab. 4.
... is enabled by default. 4 Print Drivers 17. The [Name your workstation, open the web browser and enter the TCP/IP address of the device. 38 Xerox WorkCentre 4250/4260 Series System Administration Guide The Printer URL will show the http:// IP address of the device and the ipp:// IP address of the... machine in the directory tree. 7. To configure the settings: a) Enter a Printer Name. b) If you will install. 29. Click on [Yes] to step 25. 20. Click on the [Next] button. 18. Click on the [Finish] button. Click on the [Properties] tab. 4.
System Administration Guide
Page 54
...on the [OK] button. 16. b) Enter a Share Name. Enter the [Location] (Add a Comment if necessary.) 24. Click on the [Next] button. 20. Close the Test Page window if necessary. 26. Locate the CentreWare Print and Fax Drivers CD delivered with other clients, then: a) Select: • [Share ...button. 23. Windows XP/2003. AppleTalk Printing The Internet Services AppleTalk® page allows you want this printer with your machine. 42 Xerox WorkCentre 4250/4260 Series System Administration Guide Load the Print and Fax Drivers CD into the CD drive. Enter Printer Name (or accept the...
...on the [OK] button. 16. b) Enter a Share Name. Enter the [Location] (Add a Comment if necessary.) 24. Click on the [Next] button. 20. Close the Test Page window if necessary. 26. Locate the CentreWare Print and Fax Drivers CD delivered with other clients, then: a) Select: • [Share ...button. 23. Windows XP/2003. AppleTalk Printing The Internet Services AppleTalk® page allows you want this printer with your machine. 42 Xerox WorkCentre 4250/4260 Series System Administration Guide Load the Print and Fax Drivers CD into the CD drive. Enter Printer Name (or accept the...
System Administration Guide
Page 56
...Click on the [Next] button. 12. Click on the [OK] button. The Add Printer Wizard opens. Enter Printer Name (or accept the default name). 20. Click on [Open] (and [Open] again, if necessary). 17. The [Printer Sharing] screen appears. Click the appropriate option: • For Windows...on [Printers]. b) Click on [Start], ([Settings]). Click on the [Next] button. 23. It may prevent other clients, then: a) Select: 44 Xerox WorkCentre 4250/4260 Series System Administration Guide For more information refer to this and you will be necessary to double-click on the required Zone to...
...Click on the [Next] button. 12. Click on the [OK] button. The Add Printer Wizard opens. Enter Printer Name (or accept the default name). 20. Click on [Open] (and [Open] again, if necessary). 17. The [Printer Sharing] screen appears. Click the appropriate option: • For Windows...on [Printers]. b) Click on [Start], ([Settings]). Click on the [Next] button. 23. It may prevent other clients, then: a) Select: 44 Xerox WorkCentre 4250/4260 Series System Administration Guide For more information refer to this and you will be necessary to double-click on the required Zone to...

System Administration Guide
Page 64
...the options as installed on : • [Add]. Print a document to [Installed]. 30. Select the printer and click on [Xerox] from the top menu. 21. 4 Print Drivers 19. Click on [Show Info]. 7. Select the Printer and click on ...drive icon on the Dock and go to step 6, or: 2. or • [Printers] menu then [Add Printer]. 20. Click on [Installable Options]. 29. Select your machine. Click on [IP Printing] from the Printer Model list. 25... 1. Click on [Utilities]. 5. Click on [Installable Options]. 52 Xerox WorkCentre 4250/4260 Series System Administration Guide
...the options as installed on : • [Add]. Print a document to [Installed]. 30. Select the printer and click on [Xerox] from the top menu. 21. 4 Print Drivers 19. Click on [Show Info]. 7. Select the Printer and click on ...drive icon on the Dock and go to step 6, or: 2. or • [Printers] menu then [Add Printer]. 20. Click on [Installable Options]. 29. Select your machine. Click on [IP Printing] from the Printer Model list. 25... 1. Click on [Utilities]. 5. Click on [Installable Options]. 52 Xerox WorkCentre 4250/4260 Series System Administration Guide

System Administration Guide
Page 116
...settings to print the graphic behind any text on the cover sheet. • Click on the maximum capabilities of 4800 bps is restricted. 104 Xerox WorkCentre 4250/4260 Series System Administration Guide Click on [New] from the [Send Speed] drop-down menu. 32. Selects the transmission rate based on ...or logo, click on the required speed from the [Cover Sheet Notes] area. 23. Setup Fax Options 30. Click on the [Cover Sheet] tab. 20. Click on [Picture] from the [Cover Sheet Options] menu. 21. Initial transmission speed will be 14,400 Bits Per Second (bps). This rate ...
...settings to print the graphic behind any text on the cover sheet. • Click on the maximum capabilities of 4800 bps is restricted. 104 Xerox WorkCentre 4250/4260 Series System Administration Guide Click on [New] from the [Send Speed] drop-down menu. 32. Selects the transmission rate based on ...or logo, click on the required speed from the [Cover Sheet Notes] area. 23. Setup Fax Options 30. Click on the [Cover Sheet] tab. 20. Click on [Picture] from the [Cover Sheet Options] menu. 21. Initial transmission speed will be 14,400 Bits Per Second (bps). This rate ...

System Administration Guide
Page 121
... [Network Accounting Setup]. 11. Touch [Save]. Enter the Administrator's Password. Allows the machine to enter the Tools Pathway. 2. Touch [Network Accounting Login Display Mode]. 20. Press the button on the machine User Interface. • [Mask User ID Details] and [Mask Account ID Details] - Touch [Account ID] and enter a ... the resources used on the machine User Interface. 21. Configure Network Accounting Configure Network Accounting 1. Touch [Enter]. 4. Touch [Network Accounting Authentication]. 12. Xerox WorkCentre 4250/4260 Series System Administration Guide 109
... [Network Accounting Setup]. 11. Touch [Save]. Enter the Administrator's Password. Allows the machine to enter the Tools Pathway. 2. Touch [Network Accounting Login Display Mode]. 20. Press the button on the machine User Interface. • [Mask User ID Details] and [Mask Account ID Details] - Touch [Account ID] and enter a ... the resources used on the machine User Interface. 21. Configure Network Accounting Configure Network Accounting 1. Touch [Enter]. 4. Touch [Network Accounting Authentication]. 12. Xerox WorkCentre 4250/4260 Series System Administration Guide 109
System Administration Guide
Page 159
... Data Encryption 16 = Scheduled ODIOD Standard started# 17 = Scheduled ODIO Standard complete 18 = Scheduled ODIO Full started 19 = Scheduled ODIO Full complete 20 = Scan to Mailbox job 21 = Delete File/Dir (CPSR) 22 = USB 23 = Scan to file audit log entry is recorded for each...SMTP recipient within the scan job. one audit log entry is recorded for each network destination within the job. the job completed correctly. Xerox WorkCentre 4250/4260 Series System Administration Guide 147 The activities that are displayed include: • System startups and shutdowns. • On demand image...
... Data Encryption 16 = Scheduled ODIOD Standard started# 17 = Scheduled ODIO Standard complete 18 = Scheduled ODIO Full started 19 = Scheduled ODIO Full complete 20 = Scan to Mailbox job 21 = Delete File/Dir (CPSR) 22 = USB 23 = Scan to file audit log entry is recorded for each...SMTP recipient within the scan job. one audit log entry is recorded for each network destination within the job. the job completed correctly. Xerox WorkCentre 4250/4260 Series System Administration Guide 147 The activities that are displayed include: • System startups and shutdowns. • On demand image...

System Administration Guide
Page 201
Select the timer value for hours (0 - 120 Hours) and for minutes (0 - 59 minutes) by touching the UP and DOWN arrow. 19. Press the button. 21. Touch [Confirm] to the Timers menu. 20. Enable/Disable System Timer Values 18. Touch [Save] to return to exit the Tools Pathway. Xerox WorkCentre 4250/4260 Series System Administration Guide 189
Select the timer value for hours (0 - 120 Hours) and for minutes (0 - 59 minutes) by touching the UP and DOWN arrow. 19. Press the button. 21. Touch [Confirm] to the Timers menu. 20. Enable/Disable System Timer Values 18. Touch [Save] to return to exit the Tools Pathway. Xerox WorkCentre 4250/4260 Series System Administration Guide 189
System Administration Guide
Page 203
... Advanced Settings 79 Alert Notification 167 Alerts 161 general device 167 Apple Mac 50 TCP/IP install print driver 50 TCP/IP (OSX ) 50 AppleTalk 7, 20 Audit Log 146 download 146 enable 146 file 146 INDEX Audit Log File completion status 147 entry data 148 event description 147 event ID 146... last billing meter read 163 overview 159 portable document format (PDF) 166 print 164 support 167 trays 162 usage counters 163 Clone 32 file 33 Xerox WorkCentre 4250/4260 Series System Administration Guide 191
... Advanced Settings 79 Alert Notification 167 Alerts 161 general device 167 Apple Mac 50 TCP/IP install print driver 50 TCP/IP (OSX ) 50 AppleTalk 7, 20 Audit Log 146 download 146 enable 146 file 146 INDEX Audit Log File completion status 147 entry data 148 event description 147 event ID 146... last billing meter read 163 overview 159 portable document format (PDF) 166 print 164 support 167 trays 162 usage counters 163 Clone 32 file 33 Xerox WorkCentre 4250/4260 Series System Administration Guide 191


