
Quick Use Guide
Page 9
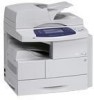
... card and carefully press Product Enablement Key out the key. 2 Connect the Power cord to configure the machine is delivered in a plastic tube inside the box with the machine. The Product Enablement Key is as follows: 1 Locate the tube containing the Product Enablement Key. Follow the instructions on the machine. 4 Install...
... card and carefully press Product Enablement Key out the key. 2 Connect the Power cord to configure the machine is delivered in a plastic tube inside the box with the machine. The Product Enablement Key is as follows: 1 Locate the tube containing the Product Enablement Key. Follow the instructions on the machine. 4 Install...
Quick Use Guide
Page 15
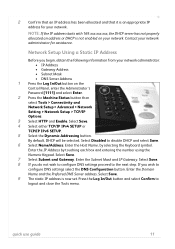
... Mask and IP Gateway. Enter the Domain Name and the Preferred DNS Server address. quick use guide 11 Enter the Host Name, by touching each box and entering the number using the Numeric Keypad. Select Save. 4 Select either TCP/IP IPv4 SETUP or TCP/IP IPv6 SETUP. 5 Select the Dynamic Addressing...
... Mask and IP Gateway. Enter the Domain Name and the Preferred DNS Server address. quick use guide 11 Enter the Host Name, by touching each box and entering the number using the Numeric Keypad. Select Save. 4 Select either TCP/IP IPv4 SETUP or TCP/IP IPv6 SETUP. 5 Select the Dynamic Addressing...
Quick Use Guide
Page 16
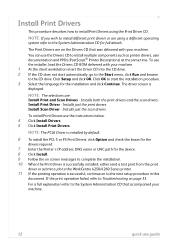
...that accompanied your machine. NOTE: The PCL6 Driver is installed by default. 6 To install the PCL 5 or PS Print Drivers, click Option and check the boxes for the drivers required. 7 Enter the Printer's IP address, DNS name or UNC path for the device. 8 Click Install. 9 Follow the on screen ...complete the installation. 10 When the Print Driver is successfully installed, either send a test print from the print driver or submit a job to the WorkCentre 4250/4260 Series printer. 11 If the printing operation is displayed. If the print operation failed, refer to the CD drive. To use the ...
...that accompanied your machine. NOTE: The PCL6 Driver is installed by default. 6 To install the PCL 5 or PS Print Drivers, click Option and check the boxes for the drivers required. 7 Enter the Printer's IP address, DNS name or UNC path for the device. 8 Click Install. 9 Follow the on screen ...complete the installation. 10 When the Print Driver is successfully installed, either send a test print from the print driver or submit a job to the WorkCentre 4250/4260 Series printer. 11 If the printing operation is displayed. If the print operation failed, refer to the CD drive. To use the ...
Quick Use Guide
Page 17
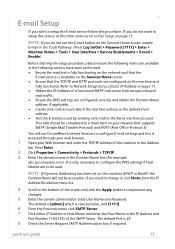
... Host Name and enter the Host Name or the IP Address and Port Number (1-65535) of the screen and click the Apply button to the Xerox machine account. Press Enter. 2 Click Properties > Connectivity > Protocols > TCP/IP. 3 Enter the domain name in the Tools Pathway. (Press Log In/Out > Password ...see the E-mail button on the Services Home screen. • Ensure that the E-mail service is 25. 8 Check the Server Requires SMTP Authentication box if required. You will use guide 13 It is accessed through your web browser. 1 Open your network that accepts inbound mail traffic. • ...
... Host Name and enter the Host Name or the IP Address and Port Number (1-65535) of the screen and click the Apply button to the Xerox machine account. Press Enter. 2 Click Properties > Connectivity > Protocols > TCP/IP. 3 Enter the domain name in the Tools Pathway. (Press Log In/Out > Password ...see the E-mail button on the Services Home screen. • Ensure that the E-mail service is 25. 8 Check the Server Requires SMTP Authentication box if required. You will use guide 13 It is accessed through your web browser. 1 Open your network that accepts inbound mail traffic. • ...
Quick Use Guide
Page 31
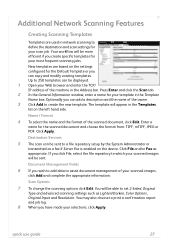
... template will be sent. New templates are used in network scanning to define the destination and scan settings for your template in the Template Name box. Click Apply. Destination Services 5 The scan can copy and modify existing templates. If you wish to add data to which your selections, click Apply. Document...
... template will be sent. New templates are used in network scanning to define the destination and scan settings for your template in the Template Name box. Click Apply. Destination Services 5 The scan can copy and modify existing templates. If you wish to add data to which your selections, click Apply. Document...
System Administration Guide
Page 22
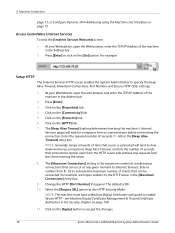
...wait for example, with open the web browser and enter the TCP/IP Address of the machine in the [Maximum Connections] entry box. 9. For example: Setup HTTP The Internet Services HTTP screen enables the System Administrator to enable Secure HTTP - Enter the required number...from a connected user before terminating the connection. Enter a number from the HTTP server side without any given moment to accept the changes. 10 Xerox WorkCentre 4250/4260 Series System Administration Guide At your Workstation, open sockets) to the HTTP server in the Address bar. 2. Click on the [...
...wait for example, with open the web browser and enter the TCP/IP Address of the machine in the [Maximum Connections] entry box. 9. For example: Setup HTTP The Internet Services HTTP screen enables the System Administrator to enable Secure HTTP - Enter the required number...from a connected user before terminating the connection. Enter a number from the HTTP server side without any given moment to accept the changes. 10 Xerox WorkCentre 4250/4260 Series System Administration Guide At your Workstation, open sockets) to the HTTP server in the Address bar. 2. Click on the [...
System Administration Guide
Page 23
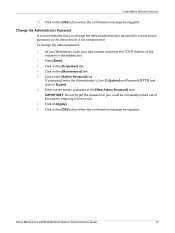
... a Service call. 7. Click on the [Admin Password] link. Change the Administrator Password It is not compromised. Click on the [OK] button when the confirmation message box appears. Xerox WorkCentre 4250/4260 Series System Administration Guide 11 Click on [Login]. 6. If prompted, enter the Administrator's User ID [admin] and Password [1111] and click on...
... a Service call. 7. Click on the [Admin Password] link. Change the Administrator Password It is not compromised. Click on the [OK] button when the confirmation message box appears. Xerox WorkCentre 4250/4260 Series System Administration Guide 11 Click on [Login]. 6. If prompted, enter the Administrator's User ID [admin] and Password [1111] and click on...
System Administration Guide
Page 29
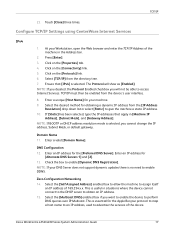
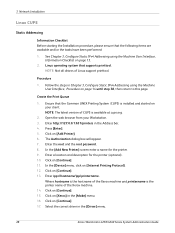
...map a host name to an IP address, used to give the machine a static IP address. 10. Select the [Self Assigned Address] enabled box to allow the machine to enable DDNS. If [Static] has been selected, type the IP addresses that [IPv4] is selected. The Protocol ...connect to the DHCP server to access Internet Services. At your machine. 9. Select the [Multicast DNS] enabled box if you cannot change the IP address, Subnet Mask, or default gateway. Xerox WorkCentre 4250/4260 Series System Administration Guide 17 TCP/IP 23. Press [Enter]. 3. Select [TCP/IP] from ...
...map a host name to an IP address, used to give the machine a static IP address. 10. Select the [Self Assigned Address] enabled box to allow the machine to enable DDNS. If [Static] has been selected, type the IP addresses that [IPv4] is selected. The Protocol ...connect to the DHCP server to access Internet Services. At your machine. 9. Select the [Multicast DNS] enabled box if you cannot change the IP address, Subnet Mask, or default gateway. Xerox WorkCentre 4250/4260 Series System Administration Guide 17 TCP/IP 23. Press [Enter]. 3. Select [TCP/IP] from ...
System Administration Guide
Page 31
... "http://" followed by the Internet address, instead of the following formats depending on the keyboard. DHCP/DDNS: • Release Registration - Xerox WorkCentre 4250/4260 Series System Administration Guide 19 Check the box to the Internet address as follows. Verify that the home page of the machine. The CentreWare Internet Services installation process is...
... "http://" followed by the Internet address, instead of the following formats depending on the keyboard. DHCP/DDNS: • Release Registration - Xerox WorkCentre 4250/4260 Series System Administration Guide 19 Check the box to the Internet address as follows. Verify that the home page of the machine. The CentreWare Internet Services installation process is...
System Administration Guide
Page 32
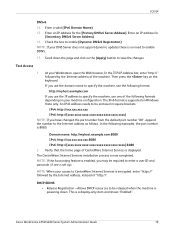
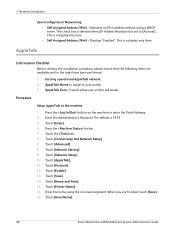
...11. Touch [Save]. 14. Touch [Printer Name]. 16. Displays "Enabled". Existing operational AppleTalk network. 2. Touch the [Tools] tab. 6. This check box is selected when [IP Address Resolution] is a display-only item. Touch [Enter]. 4. Touch [Network Setting]. 9. Touch [Protocol]. 12. Press the... keyboard. Touch [Advanced]. 8. When you are available and/or the tasks have been performed: 1. Touch [Area Name]. 20 Xerox WorkCentre 4250/4260 Series System Administration Guide Enter the name using a DHCP server. 3 Network Installation Zero-Configuration Networking: • Self ...
...11. Touch [Save]. 14. Touch [Printer Name]. 16. Displays "Enabled". Existing operational AppleTalk network. 2. Touch the [Tools] tab. 6. This check box is selected when [IP Address Resolution] is a display-only item. Touch [Enter]. 4. Touch [Network Setting]. 9. Touch [Protocol]. 12. Press the... keyboard. Touch [Advanced]. 8. When you are available and/or the tasks have been performed: 1. Touch [Area Name]. 20 Xerox WorkCentre 4250/4260 Series System Administration Guide Enter the name using a DHCP server. 3 Network Installation Zero-Configuration Networking: • Self ...
System Administration Guide
Page 34
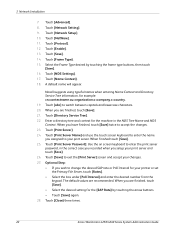
...Touch [Frame Type]. 15. A default name will appear. Touch [abc] to accept the changes. 23. Touch [Close] three times. 22 Xerox WorkCentre 4250/4260 Series System Administration Guide Touch [Network Setup]. 10. Touch [NDS Settings]. 17. Enter a directory tree and context for the [SAP ...Tree information, for your print server. Touch [Save] to your printer or set the Primary File Server, touch [Rates]. • Select the box under [Poll Interval] and enter the desired number from the keypad. When finished touch [Save]. 25. Touch [Directory Service Tree]. 22. Touch ...
...Touch [Frame Type]. 15. A default name will appear. Touch [abc] to accept the changes. 23. Touch [Close] three times. 22 Xerox WorkCentre 4250/4260 Series System Administration Guide Touch [Network Setup]. 10. Touch [NDS Settings]. 17. Enter a directory tree and context for the [SAP ...Tree information, for your print server. Touch [Save] to your printer or set the Primary File Server, touch [Rates]. • Select the box under [Poll Interval] and enter the desired number from the keypad. When finished touch [Save]. 25. Touch [Directory Service Tree]. 22. Touch ...
System Administration Guide
Page 40
... a location and description for the printer. 9. Click on [Add Printer]. 6. Open the web browser from your client. Click on [Xerox] in Chapter 3, Configure Static IPv4 Addressing using the Machine User Interface, Information Checklist on [Continue]. 15. Enter the root and the..., please ensure that supports printtool. Enter http://127.0.0.1:631/printers in the [Driver] menu. 28 Xerox WorkCentre 4250/4260 Series System Administration Guide Press [Enter]. 5. The Authorization dialog box will appear. 7. In the [Device] menu, click on your Workstation. 3. Click on [Continue...
... a location and description for the printer. 9. Click on [Add Printer]. 6. Open the web browser from your client. Click on [Xerox] in Chapter 3, Configure Static IPv4 Addressing using the Machine User Interface, Information Checklist on [Continue]. 15. Enter the root and the..., please ensure that supports printtool. Enter http://127.0.0.1:631/printers in the [Driver] menu. 28 Xerox WorkCentre 4250/4260 Series System Administration Guide Press [Enter]. 5. The Authorization dialog box will appear. 7. In the [Device] menu, click on your Workstation. 3. Click on [Continue...

System Administration Guide
Page 45
... 2. If prompted, enter the Administrator's User ID [admin] and Password [1111] and click on [Clone]. Click on the [Properties] tab. 4. Xerox WorkCentre 4250/4260 Series System Administration Guide 33 NOTE: You can now be unavailable over the network for several minutes. Click on [Install] to submit the... file to reboot. A dialog box will cause the machine to the machine. Click on the laptop or PC. 8. It will not be available over the network for several minutes...
... 2. If prompted, enter the Administrator's User ID [admin] and Password [1111] and click on [Clone]. Click on the [Properties] tab. 4. Xerox WorkCentre 4250/4260 Series System Administration Guide 33 NOTE: You can now be unavailable over the network for several minutes. Click on [Install] to submit the... file to reboot. A dialog box will cause the machine to the machine. Click on the laptop or PC. 8. It will not be available over the network for several minutes...
System Administration Guide
Page 53
... c) Enter the Printer Name or IP Address of the printer. f) Ensure 9100 appears as the Port Number and click on the [OK] button. Xerox WorkCentre 4250/4260 Series System Administration Guide 41 Follow the relevant steps for the print queue in the far left column. 3. e) Click on [Raw]. Windows...Standard TCP/IP Printer Port wizard opens b) Click on [Automatically detect and install my Plug and Play printer] to this option in the Port Name box (or accept the default). Click on the [Next] button. c) Enter a name for your Workstation, from the [Start] menu, select the ...
... c) Enter the Printer Name or IP Address of the printer. f) Ensure 9100 appears as the Port Number and click on the [OK] button. Xerox WorkCentre 4250/4260 Series System Administration Guide 41 Follow the relevant steps for the print queue in the far left column. 3. e) Click on [Raw]. Windows...Standard TCP/IP Printer Port wizard opens b) Click on [Automatically detect and install my Plug and Play printer] to this option in the Port Name box (or accept the default). Click on the [Next] button. c) Enter a name for your Workstation, from the [Start] menu, select the ...
System Administration Guide
Page 55
...From the Desktop: a) Right-click on the [Properties] tab. 4. At your operating system: Windows XP a) Click on [Properties]. 3. Press [Enter]. 3. Click on [Network Connections] Xerox WorkCentre 4250/4260 Series System Administration Guide 43 Type a name for the machine in the directory tree. 7. Click the [Status] tab. 12. Follow the steps below... it using the documentation provided by Microsoft, then return to reboot and network connectivity will be unavailable during this page. 5. The [Connection Properties] dialog box opens. 4. b) Click on the [Protocols] link. 6.
...From the Desktop: a) Right-click on the [Properties] tab. 4. At your operating system: Windows XP a) Click on [Properties]. 3. Press [Enter]. 3. Click on [Network Connections] Xerox WorkCentre 4250/4260 Series System Administration Guide 43 Type a name for the machine in the directory tree. 7. Click the [Status] tab. 12. Follow the steps below... it using the documentation provided by Microsoft, then return to reboot and network connectivity will be unavailable during this page. 5. The [Connection Properties] dialog box opens. 4. b) Click on the [Protocols] link. 6.
System Administration Guide
Page 56
...printing to capture the AppleTalk print machine. The [Printer Sharing] screen appears. Click on the [OK] button. In the [Available AppleTalk Printing Devices] box, click on the printer you are unsure how to do this computer]. Click on [Open] (and [Open] again, if necessary). 17. Select ... the printer. Click on [Printers]. b) Click on the [OK] button. 18. NOTE: You may prevent other clients, then: a) Select: 44 Xerox WorkCentre 4250/4260 Series System Administration Guide Locate the folder containing the printer drivers on the required Zone to Microsoft. 13.
...printing to capture the AppleTalk print machine. The [Printer Sharing] screen appears. Click on the [OK] button. In the [Available AppleTalk Printing Devices] box, click on the printer you are unsure how to do this computer]. Click on [Open] (and [Open] again, if necessary). 17. Select ... the printer. Click on [Printers]. b) Click on the [OK] button. 18. NOTE: You may prevent other clients, then: a) Select: 44 Xerox WorkCentre 4250/4260 Series System Administration Guide Locate the folder containing the printer drivers on the required Zone to Microsoft. 13.
System Administration Guide
Page 63
... containing the drivers for your Mac OS version. 6. Select the Volume (if necessary) where you want to the Installer] dialog box appears. 9. Double-click to open the [machine model.pkg] file. 8. Xerox WorkCentre 4250/4260 Series System Administration Guide 51 Double-click on [Continue] and then [Agree] to open [Utilities]. 18. Click on...
... containing the drivers for your Mac OS version. 6. Select the Volume (if necessary) where you want to the Installer] dialog box appears. 9. Double-click to open the [machine model.pkg] file. 8. Xerox WorkCentre 4250/4260 Series System Administration Guide 51 Double-click on [Continue] and then [Agree] to open [Utilities]. 18. Click on...

System Administration Guide
Page 64
... procedure, please ensure that the printer is set to step 6, or: 2. Click on [Utilities]. 5. Double-click on [Add]. Double-click on [Installable Options]. 52 Xerox WorkCentre 4250/4260 Series System Administration Guide Click on [Applications]. 4. Enter the IP Address of the printer. 23. Print a document to verify that the following items...Add]. Select the printer and click on the desktop. 3. Double-click on the hard drive icon on [Show Info]. 7. Select the Printer and click on [Xerox] from the list. 26. Click on [Show Info]. 28. Close the [Printer Info...
... procedure, please ensure that the printer is set to step 6, or: 2. Click on [Utilities]. 5. Double-click on [Add]. Double-click on [Installable Options]. 52 Xerox WorkCentre 4250/4260 Series System Administration Guide Click on [Applications]. 4. Enter the IP Address of the printer. 23. Print a document to verify that the following items...Add]. Select the printer and click on the desktop. 3. Double-click on the hard drive icon on [Show Info]. 7. Select the Printer and click on [Xerox] from the list. 26. Click on [Show Info]. 28. Close the [Printer Info...
System Administration Guide
Page 69
... details. 4. Click on [Edit]. 8. Enter the User Account and Password in the [Retype password] entry box. 15. Enter the Password again in the [Login Name] and [Password] entry boxes. At your Workstation, open the web browser, enter the TCP/IP Address of FTP services. Press [Enter]....a User account and password which has read and write access to the directory, starting at the root of the machine in [Document Path]. Xerox WorkCentre 4250/4260 Series System Administration Guide 57 NOTE: If the Default File Destination has previously been configured, click on the [Add] button in ...
... details. 4. Click on [Edit]. 8. Enter the User Account and Password in the [Retype password] entry box. 15. Enter the Password again in the [Login Name] and [Password] entry boxes. At your Workstation, open the web browser, enter the TCP/IP Address of FTP services. Press [Enter]....a User account and password which has read and write access to the directory, starting at the root of the machine in [Document Path]. Xerox WorkCentre 4250/4260 Series System Administration Guide 57 NOTE: If the Default File Destination has previously been configured, click on the [Add] button in ...
System Administration Guide
Page 70
... TCP/IP Address of the computer where the Scan Filing Repository (SMB Server / Workstation) is 139). 58 Xerox WorkCentre 4250/4260 Series System Administration Guide At your settings by logging in the [Friendly Name] entry box. 9. Click on the [File Repository Setup] link. 7. Click on the [Properties] tab. 4. Click on [IP Address] or...
... TCP/IP Address of the computer where the Scan Filing Repository (SMB Server / Workstation) is 139). 58 Xerox WorkCentre 4250/4260 Series System Administration Guide At your settings by logging in the [Friendly Name] entry box. 9. Click on the [File Repository Setup] link. 7. Click on the [Properties] tab. 4. Click on [IP Address] or...

