Quick Use Guide
Page 5
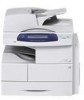
Xerox WorkCentre 4250/4260 Series Quick Use Guide Thank you will successfully: Connect the WorkCentre 4250/4260 Series Printer to a network Set-up the WorkCentre 4250/4260 Series Printer Install optional features Operate the WorkCentre 4250/4260 Series Printer Contents Install the WorkCentre 4250/4260 Series 3 Switch On the Machine 5 Your WorkCentre 4250/4260 7 Connecting to the Network 10 Install Print Drivers 12 E-mail...
Xerox WorkCentre 4250/4260 Series Quick Use Guide Thank you will successfully: Connect the WorkCentre 4250/4260 Series Printer to a network Set-up the WorkCentre 4250/4260 Series Printer Install optional features Operate the WorkCentre 4250/4260 Series Printer Contents Install the WorkCentre 4250/4260 Series 3 Switch On the Machine 5 Your WorkCentre 4250/4260 7 Connecting to the Network 10 Install Print Drivers 12 E-mail...

Quick Use Guide
Page 7
...Standard Optional Standard Standard Optional Standard Optional Standard Standard Optional Standard Optional NOTE: The type of the following configurations. Install the WorkCentre 4250/4260 Series 1 Unpack the machine and any hardware options. 2 Locate the Installation Instructions. 3 Follow the Installation Instructions to ... Scan - The result will be one of stand available depends on the configuration. Features WorkCentre 4250 WorkCentre 4250S/ 4260S WorkCentre 4250X/ 4260X WorkCentre 4250XF/ 4260XF Digital Copying Standard Standard Standard Standard Direct/Network -
...Standard Optional Standard Standard Optional Standard Optional Standard Standard Optional Standard Optional NOTE: The type of the following configurations. Install the WorkCentre 4250/4260 Series 1 Unpack the machine and any hardware options. 2 Locate the Installation Instructions. 3 Follow the Installation Instructions to ... Scan - The result will be one of stand available depends on the configuration. Features WorkCentre 4250 WorkCentre 4250S/ 4260S WorkCentre 4250X/ 4260X WorkCentre 4250XF/ 4260XF Digital Copying Standard Standard Standard Standard Direct/Network -

System Administration Guide
Page 6
TABLE OF CONTENTS Copy Jobs to the machine 72 Print Jobs to the Machine 72 Store to USB 72 Print Files 73 Print file from the machine (stored on ... Address Book 86 Create a New Address 86 Test the Group Address Book 86 9 Server Fax...89 Overview 89 Server Fax and Embedded Fax 89 vi Xerox WorkCentre 4250/4260 Series System Administration Guide
TABLE OF CONTENTS Copy Jobs to the machine 72 Print Jobs to the Machine 72 Store to USB 72 Print Files 73 Print file from the machine (stored on ... Address Book 86 Create a New Address 86 Test the Group Address Book 86 9 Server Fax...89 Overview 89 Server Fax and Embedded Fax 89 vi Xerox WorkCentre 4250/4260 Series System Administration Guide
System Administration Guide
Page 7
...Enable Embedded Fax from Phonebook 103 Setting up a Cover Sheet 104 Setup Fax Options 104 Setup Phonebook Preferences 105 User Preferences 105 Xerox WorkCentre 4250/4260 Series System Administration Guide vii Manually 102 Use the Feature 102 Windows 102 Mac OS Users 103 Add Fax Recipient 103 Add...98 Test the Embedded Fax 98 Additional Features 98 Forward to Fax 98 Procedure 98 Forward to E-mail 99 Procedure 99 Print Local Copy 100 11 LAN Fax...101 Overview 101 Information Checklist 101 Enable LAN Fax (Windows Printer Drivers 101 Configure the Printer Driver - ...
...Enable Embedded Fax from Phonebook 103 Setting up a Cover Sheet 104 Setup Fax Options 104 Setup Phonebook Preferences 105 User Preferences 105 Xerox WorkCentre 4250/4260 Series System Administration Guide vii Manually 102 Use the Feature 102 Windows 102 Mac OS Users 103 Add Fax Recipient 103 Add...98 Test the Embedded Fax 98 Additional Features 98 Forward to Fax 98 Procedure 98 Forward to E-mail 99 Procedure 99 Print Local Copy 100 11 LAN Fax...101 Overview 101 Information Checklist 101 Enable LAN Fax (Windows Printer Drivers 101 Configure the Printer Driver - ...
System Administration Guide
Page 13
.... The features and functions available on your machine depend on their network. This Guide is intended for copying, printing, faxing and scanning. Xerox WorkCentre 4250/4260 Series System Administration Guide 1 Machine Models The Xerox WorkCentre 4250/4260 series of multi-function machines are capable of how to the network. 1 Introduction WELCOME to install, setup and manage printers...
.... The features and functions available on your machine depend on their network. This Guide is intended for copying, printing, faxing and scanning. Xerox WorkCentre 4250/4260 Series System Administration Guide 1 Machine Models The Xerox WorkCentre 4250/4260 series of multi-function machines are capable of how to the network. 1 Introduction WELCOME to install, setup and manage printers...

System Administration Guide
Page 14
...Paper Tray and Bypass Tray are also provided and 2-sided copying and printing are supported. Features WorkCentre 4250 WorkCentre 4250S/ 4260S WorkCentre 4250X/ 4260X WorkCentre 4250XF/ 4260XF Digital Copying Standard Standard Standard Standard Direct / Network Printing Standard Standard Standard...Optional Optional Optional NOTE: The type of storing print, copy and scan files on the configuration. Optional 2 Xerox WorkCentre 4250/4260 Series System Administration Guide 1 Introduction Xerox WorkCentre 4250/4260 Series The machine supports scanning to and printing from...
...Paper Tray and Bypass Tray are also provided and 2-sided copying and printing are supported. Features WorkCentre 4250 WorkCentre 4250S/ 4260S WorkCentre 4250X/ 4260X WorkCentre 4250XF/ 4260XF Digital Copying Standard Standard Standard Standard Direct / Network Printing Standard Standard Standard...Optional Optional Optional NOTE: The type of storing print, copy and scan files on the configuration. Optional 2 Xerox WorkCentre 4250/4260 Series System Administration Guide 1 Introduction Xerox WorkCentre 4250/4260 Series The machine supports scanning to and printing from...
System Administration Guide
Page 44
... conveniently copy the settings and scan templates of one of the following cloning options: a) All features - Procedure 1. NOTE: All machines involved in the cloning procedure show the same system software version. Click on the machine. Verify that all machines involved in Create the Print Queue. DO NOT deselect any checkboxes. 32 Xerox WorkCentre 4250...
... conveniently copy the settings and scan templates of one of the following cloning options: a) All features - Procedure 1. NOTE: All machines involved in the cloning procedure show the same system software version. Click on the machine. Verify that all machines involved in Create the Print Queue. DO NOT deselect any checkboxes. 32 Xerox WorkCentre 4250...
System Administration Guide
Page 65
... • Paper Handling - Specify colour conversion and quartz filters. • Cover Page - saved job or fax), 2 sided, output destination. 4. Xerox WorkCentre 4250/4260 Series System Administration Guide 53 Click on the CentreWare Print and Fax Drivers CD delivered with your device. Printed before or after the job... to the documentation contained on the [Close] button. Select the printer, then select the Preset you want to print, and how many copies. • Layout - Click on the CD for the driver. Options are used for the Preset. 5. Print now, hold, or specify...
... • Paper Handling - Specify colour conversion and quartz filters. • Cover Page - saved job or fax), 2 sided, output destination. 4. Xerox WorkCentre 4250/4260 Series System Administration Guide 53 Click on the CentreWare Print and Fax Drivers CD delivered with your device. Printed before or after the job... to the documentation contained on the [Close] button. Select the printer, then select the Preset you want to print, and how many copies. • Layout - Click on the CD for the driver. Options are used for the Preset. 5. Print now, hold, or specify...
System Administration Guide
Page 67
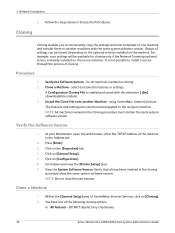
... that the machine's web browser can manually retrieve their hard copy documents to the User Guide delivered with your machine. File Destinations Setup on page 62 7. The instructions on the following items are available and/or the tasks have been performed: 1. Xerox WorkCentre 4250/4260 Series System Administration Guide 55 Enable the Feature from...
... that the machine's web browser can manually retrieve their hard copy documents to the User Guide delivered with your machine. File Destinations Setup on page 62 7. The instructions on the following items are available and/or the tasks have been performed: 1. Xerox WorkCentre 4250/4260 Series System Administration Guide 55 Enable the Feature from...

System Administration Guide
Page 83
... machine's internal drive or a USB flash drive. Ensure that the following ways: • Using the appropriate printer driver. • Using the Copy Service on the machine in its existing configuration. 2. Optional - 6 Store Files This chapter explains how to setup the optional Store Files feature, which...a job at the machine. Use the Feature You can be printed from your Workstation. You can be saved on page 71 2. Xerox WorkCentre 4250/4260 Series System Administration Guide 71 Jobs can print jobs at the machine or from the device or USB Flash drive by using the...
... machine's internal drive or a USB flash drive. Ensure that the following ways: • Using the appropriate printer driver. • Using the Copy Service on the machine in its existing configuration. 2. Optional - 6 Store Files This chapter explains how to setup the optional Store Files feature, which...a job at the machine. Use the Feature You can be printed from your Workstation. You can be saved on page 71 2. Xerox WorkCentre 4250/4260 Series System Administration Guide 71 Jobs can print jobs at the machine or from the device or USB Flash drive by using the...

System Administration Guide
Page 84
... front of the machine. 2. Store to the Machine 1. save your Xerox machine. 4. NOTE: If you want the job name to be saved. 5. 6 Store Files Copy Jobs to the machine The Copy service allows the user to: • Copy a job to the machine. • Save a job to the ...a document. 2. From your job into a folder and print of copy of the document, click the [V] button to the machine. Touch [OK]. 6. Touch the [File Format...] button to choose from: a) TIFF (1 File per Page) 72 Xerox WorkCentre 4250/4260 Series System Administration Guide Insert a USB flash drive into a folder...
... front of the machine. 2. Store to the Machine 1. save your Xerox machine. 4. NOTE: If you want the job name to be saved. 5. 6 Store Files Copy Jobs to the machine The Copy service allows the user to: • Copy a job to the machine. • Save a job to the ...a document. 2. From your job into a folder and print of copy of the document, click the [V] button to the machine. Touch [OK]. 6. Touch the [File Format...] button to choose from: a) TIFF (1 File per Page) 72 Xerox WorkCentre 4250/4260 Series System Administration Guide Insert a USB flash drive into a folder...

System Administration Guide
Page 85
... file(s) to scan your job. Select the [Job Quantity] (number of the machine. 2. Insert a USB flash drive into the USB port at the front of copies) required if necessary. 9. Press the green button to the file name. 6. When you want to the file name. Touch [Done] when you to retrieve and... c) JPEG (1 File per Page) d) PDF 8. Print file from the machine (stored on how to select your file(s). 8. Touch the [Print from the USB flash drive. Xerox WorkCentre 4250/4260 Series System Administration Guide 73
... file(s) to scan your job. Select the [Job Quantity] (number of the machine. 2. Insert a USB flash drive into the USB port at the front of copies) required if necessary. 9. Press the green button to the file name. 6. When you want to the file name. Touch [Done] when you to retrieve and... c) JPEG (1 File per Page) d) PDF 8. Print file from the machine (stored on how to select your file(s). 8. Touch the [Print from the USB flash drive. Xerox WorkCentre 4250/4260 Series System Administration Guide 73
System Administration Guide
Page 96
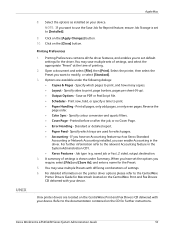
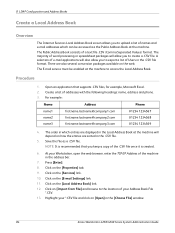
..., Microsoft Excel. 2. At your Workstation, open the web browser, enter the TCP/IP Address of the machine in the [Choose File] window. 84 Xerox WorkCentre 4250/4260 Series System Administration Guide Click on the [Local Address Book] link. 12. Click on the [E-mail Settings] link. 11. A selection of e-mail...Import from File] and browse to the location of your *.CSV file and click on the web. Open an application that you keep a copy of the .CSV file once it is created. 6. The majority of word processing or spreadsheet packages will depend on how the entries are also...
..., Microsoft Excel. 2. At your Workstation, open the web browser, enter the TCP/IP Address of the machine in the [Choose File] window. 84 Xerox WorkCentre 4250/4260 Series System Administration Guide Click on the [Local Address Book] link. 12. Click on the [E-mail Settings] link. 11. A selection of e-mail...Import from File] and browse to the location of your *.CSV file and click on the web. Open an application that you keep a copy of the .CSV file once it is created. 6. The majority of word processing or spreadsheet packages will depend on how the entries are also...
System Administration Guide
Page 97
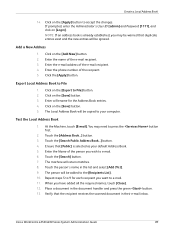
...a New Address 1. Click on the [Save] button. 3. Click on the [Save] button. 5. Click on the [Export to the [Recipients List]. 10. You may be copied to e-mail. 11. The machine will be warned that the recipient receives the scanned document in their e-mail inbox. Verify that duplicate entries exist and... first. 2. Enter the name of the person you may need to accept the changes. Repeat steps 5 to File 1. Test the Local Address Book 1. Xerox WorkCentre 4250/4260 Series System Administration Guide 85 Click on [Login]. Enter the Name of the e-mail recipient. 3.
...a New Address 1. Click on the [Save] button. 3. Click on the [Save] button. 5. Click on the [Export to the [Recipients List]. 10. You may be copied to e-mail. 11. The machine will be warned that the recipient receives the scanned document in their e-mail inbox. Verify that duplicate entries exist and... first. 2. Enter the name of the person you may need to accept the changes. Repeat steps 5 to File 1. Test the Local Address Book 1. Xerox WorkCentre 4250/4260 Series System Administration Guide 85 Click on [Login]. Enter the Name of the e-mail recipient. 3.
System Administration Guide
Page 109
...automatically. Enable Embedded Fax from the Machine on page 97 2. Test the Embedded Fax on page 98 Overview Embedded Fax enables Users to send hard copy documents to a telephone connection. 3. Additional Features on page 98 5. Obtain the telephone number that the machine has access to another fax machine (or...Information Checklist Before starting the Installation procedure, please ensure that the machine is then enabled, Server Fax will configure as the machine's fax number. 4. Xerox WorkCentre 4250/4260 Series System Administration Guide 97 Connect your machine. 5.
...automatically. Enable Embedded Fax from the Machine on page 97 2. Test the Embedded Fax on page 98 Overview Embedded Fax enables Users to send hard copy documents to a telephone connection. 3. Additional Features on page 98 5. Obtain the telephone number that the machine has access to another fax machine (or...Information Checklist Before starting the Installation procedure, please ensure that the machine is then enabled, Server Fax will configure as the machine's fax number. 4. Xerox WorkCentre 4250/4260 Series System Administration Guide 97 Connect your machine. 5.
System Administration Guide
Page 111
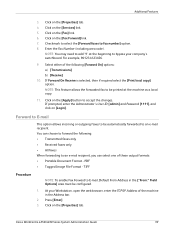
... local copy] option. You can choose to an e-mail recipient, you can select one of the machine in the ["From:" Field Options] area must be printed at the beginning to E-mail, Default From Address in the Address bar. 2. PDF • Tagged Image File Format - Xerox WorkCentre 4250/4260 ...an e-mail recipient. Press [Enter]. 3. Click on the [Services] link. 5. NOTE: You may need to add '9' at the machine as a local copy. 11. For example, 901234123456. 9. At your company's switchboard. Checkmark to select the [Forward faxes to accept the changes. Click on the [Apply] button...
... local copy] option. You can choose to an e-mail recipient, you can select one of the machine in the ["From:" Field Options] area must be printed at the beginning to E-mail, Default From Address in the Address bar. 2. PDF • Tagged Image File Format - Xerox WorkCentre 4250/4260 ...an e-mail recipient. Press [Enter]. 3. Click on the [Services] link. 5. NOTE: You may need to add '9' at the machine as a local copy. 11. For example, 901234123456. 9. At your company's switchboard. Checkmark to select the [Forward faxes to accept the changes. Click on the [Apply] button...
System Administration Guide
Page 112
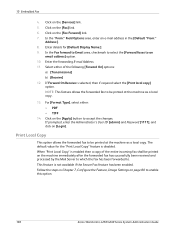
...printed at the machine as a local copy. 13. Enter details for the "Print Local Copy" feature is selected, then if required select the [Print local copy] option. NOTE: This feature allows the forwarded fax to enable this option. 100 Xerox WorkCentre 4250/4260 Series System Administration Guide Follow ... of the entire incoming fax shall be printed at the machine as a local copy. When "Print Local Copy" is not available if the Secure Fax feature has been enabled. Print Local Copy This option allows the forwarded fax to be printed on the machine immediately after...
...printed at the machine as a local copy. 13. Enter details for the "Print Local Copy" feature is selected, then if required select the [Print local copy] option. NOTE: This feature allows the forwarded fax to enable this option. 100 Xerox WorkCentre 4250/4260 Series System Administration Guide Follow ... of the entire incoming fax shall be printed at the machine as a local copy. When "Print Local Copy" is not available if the Secure Fax feature has been enabled. Print Local Copy This option allows the forwarded fax to be printed on the machine immediately after...
System Administration Guide
Page 115
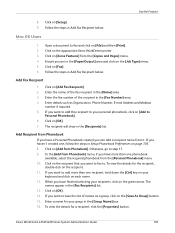
...]. 6. The names appear in the [Recipients] list. To view the details for the recipient, double-click on [Xerox Features] from Phonebook] menu, if you want to fax to Personal Phonebook]. 6. Xerox WorkCentre 4250/4260 Series System Administration Guide 103 Mac OS Users 1. Click on [File] and then [Print]. 2. Enter the ...[Fax Number] area. 4. Click on page 105. 8. Follow the steps in the [Group Name] box. 16. In the [Add from the [Copies and Pages] menu. 4. If you want to your group in Add Fax Recipient below . If you want to add this list of names as Organization...
...]. 6. The names appear in the [Recipients] list. To view the details for the recipient, double-click on [Xerox Features] from Phonebook] menu, if you want to fax to Personal Phonebook]. 6. Xerox WorkCentre 4250/4260 Series System Administration Guide 103 Mac OS Users 1. Click on [File] and then [Print]. 2. Enter the ...[Fax Number] area. 4. Click on page 105. 8. Follow the steps in the [Group Name] box. 16. In the [Add from the [Copies and Pages] menu. 4. If you want to your group in Add Fax Recipient below . If you want to add this list of names as Organization...
System Administration Guide
Page 119
...access the machine, which allows information about the jobs performed as recorded in a job log. Xerox WorkCentre 4250/4260 Series System Administration Guide 107 Print, Scan, Server Fax, and copy jobs are required to be inserted and network access to install and setup this service: 1. Ensure... that the machine is the procedure to follow to a Xerox-certified Network Accounting third party software solution. Refer to enable...
...access the machine, which allows information about the jobs performed as recorded in a job log. Xerox WorkCentre 4250/4260 Series System Administration Guide 107 Print, Scan, Server Fax, and copy jobs are required to be inserted and network access to install and setup this service: 1. Ensure... that the machine is the procedure to follow to a Xerox-certified Network Accounting third party software solution. Refer to enable...
System Administration Guide
Page 123
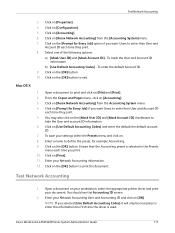
...Open a document on your workstation, select the appropriate printer driver and print your settings select the Presets menu and click on [File] and [Print]. 2. Xerox WorkCentre 4250/4260 Series System Administration Guide 111 Click on [Accounting]. 6. To enter the default Account ID. 9. Enter a name to print the document. You should see...ID information. Click on [Accounting]. 3. Open a document to enter their User and Account ID each time you print. 10. From the Copies and Pages menu, click on the [OK] button. Click on [Properties]. 4. Click on [Print]. 11.
...Open a document on your workstation, select the appropriate printer driver and print your settings select the Presets menu and click on [File] and [Print]. 2. Xerox WorkCentre 4250/4260 Series System Administration Guide 111 Click on [Accounting]. 6. To enter the default Account ID. 9. Enter a name to print the document. You should see...ID information. Click on [Accounting]. 3. Open a document to enter their User and Account ID each time you print. 10. From the Copies and Pages menu, click on the [OK] button. Click on [Properties]. 4. Click on [Print]. 11.

