
Installation Guide
Page 2
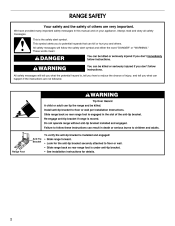
... very important. Anti-Tip Bracket To verify the anti-tip bracket is installed and engaged: • Slide range forward. • Look for details. 2 Do not operate range without anti-tip bracket installed and engaged. Install anti-tip bracket to reduce the chance of injury, and ...tell you how to floor or wall per installation instructions. RANGE SAFETY Your safety and the safety of others . Always read and obey all safety messages. All safety messages will follow instructions. Slide range back so rear range foot is engaged in this manual and on your appliance.
... very important. Anti-Tip Bracket To verify the anti-tip bracket is installed and engaged: • Slide range forward. • Look for details. 2 Do not operate range without anti-tip bracket installed and engaged. Install anti-tip bracket to reduce the chance of injury, and ...tell you how to floor or wall per installation instructions. RANGE SAFETY Your safety and the safety of others . Always read and obey all safety messages. All safety messages will follow instructions. Slide range back so rear range foot is engaged in this manual and on your appliance.
Use & Care Guide
Page 2
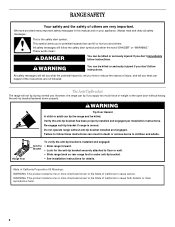
... or more chemicals known to the State of California to follow the safety alert symbol and either the word "DANGER" or "WARNING." Range Foot To verify the anti-tip bracket is under anti-tip bracket. • See installation instructions for the anti-tip bracket securely attached... harm. 2 WARNING Tip Over Hazard A child or adult can result in this manual and on your appliance. Bracket • Look for details. All safety messages will follow these instructions can tip the range and be killed or seriously injured if you don't follow instructions. Re-engage anti...
... or more chemicals known to the State of California to follow the safety alert symbol and either the word "DANGER" or "WARNING." Range Foot To verify the anti-tip bracket is under anti-tip bracket. • See installation instructions for the anti-tip bracket securely attached... harm. 2 WARNING Tip Over Hazard A child or adult can result in this manual and on your appliance. Bracket • Look for details. All safety messages will follow these instructions can tip the range and be killed or seriously injured if you don't follow instructions. Re-engage anti...

Use & Care Guide
Page 3
...break, cleaning solutions and spillovers may become hot enough to cause burns. During and after use , do not let potholder contact hot heating element in Manual. ■ Before Self-Cleaning the Oven - Select utensils having flat bottoms large enough to a hot surface. ■ Use Care When Opening Door...; Never Leave Surface Units Unattended at High Heat Settings - The door gasket is used in or around any part of the range unless specifically recommended in the manual. For units with one or more surface units of different size. children climbing on a hot cooking area, be hot even ...
...break, cleaning solutions and spillovers may become hot enough to cause burns. During and after use , do not let potholder contact hot heating element in Manual. ■ Before Self-Cleaning the Oven - Select utensils having flat bottoms large enough to a hot surface. ■ Use Care When Opening Door...; Never Leave Surface Units Unattended at High Heat Settings - The door gasket is used in or around any part of the range unless specifically recommended in the manual. For units with one or more surface units of different size. children climbing on a hot cooking area, be hot even ...
Use & Care Guide
Page 4
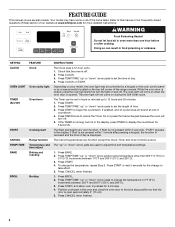
... and the time of day is closed, press the oven light switch to set the time of the range console. Doing so can be controlled by a keypad on the oven control panel or by a manual switch located on when the oven door is open approximately 6" (15 cm). 5. Press BAKE. 2. Press ... Frequently Asked Questions (FAQs) section of our website at end of time. 3. Do not press the Cancel keypad because the oven will sound at www.whirlpool.com for 5 minutes. 4. Press TIMER twice to begin the countdown. Check that the door is opened. If Start is off . Refer to change ...
... and the time of day is closed, press the oven light switch to set the time of the range console. Doing so can be controlled by a keypad on the oven control panel or by a manual switch located on when the oven door is open approximately 6" (15 cm). 5. Press BAKE. 2. Press ... Frequently Asked Questions (FAQs) section of our website at end of time. 3. Do not press the Cancel keypad because the oven will sound at www.whirlpool.com for 5 minutes. 4. Press TIMER twice to begin the countdown. Check that the door is opened. If Start is off . Refer to change ...


