Whirlpool GW397LXUT - 30" Slide-In Gas Range Support and Manuals
Get Help and Manuals for this Whirlpool item
View All Support Options Below
Free Whirlpool GW397LXUT manuals!
Problems with Whirlpool GW397LXUT?
Ask a Question
Free Whirlpool GW397LXUT manuals!
Problems with Whirlpool GW397LXUT?
Ask a Question
Most Recent Whirlpool GW397LXUT Questions

Beige Replacement
We need to replace GW397LXUT, we would like a slide in without a raised back, and would like a beige...
We need to replace GW397LXUT, we would like a slide in without a raised back, and would like a beige...
(Posted by johnsullivan 10 years ago)
Is There A Reset For The Control Panel. Only Some Options Work
(Posted by fourflatts 11 years ago)
Popular Whirlpool GW397LXUT Manual Pages
Owners Manual - Page 6

... as a guide when setting heat levels.
See the "Gas Conversions" section of the pan. The small burners (9,200 and 5,000 Btu/h) allow more accurate simmer control at the lowest setting, and are turned to follow these instructions can be lit manually. ACCUSIMMER® Setting
This burner produces a gradual, gentle heat that is included with your new range.
If...
Owners Manual - Page 7
... oven cleaners...Gas tube opening: Gas must flow freely throughout the gas tube opening with a straight pin as shown above. Keep this area free of medium-to medium heat settings. Incorrect B. Correct
5. Turn on the cooktop or grates. Contact a trained repair... and do not service the sealed burner...instructions. ■ Use on a hot surface cooking area, element or surface burner. Replace...
Owners Manual - Page 16
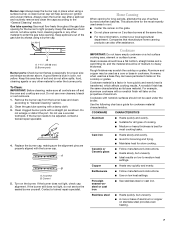
... clean water and dry with soft, lint-free cloth. ■ Vinegar for a delayed clean operation. These spills may remove numbers.
■ All-Purpose Appliance Cleaner Part Number 31682 (not included): See "Assistance or Service" section to 11 hours and 59 minutes (11:59).
3. On some models)
To avoid damage to scroll through the self-cleaning settings...
Owners Manual - Page 18
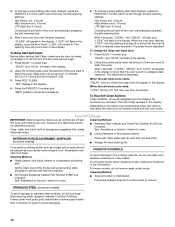
... "Sealed Surface Burners" section. Contact a service technician or see Installation Instructions. Pull storage drawer out to a setting.
■ Are the burner ports clogged? Lift drawer up the front of an unnecessary service call an electrician.
Do not remove ground prong. Replace the fuse or reset the circuit breaker. Turn on the range.
3. Lift up again and push...
Owners Manual - Page 19

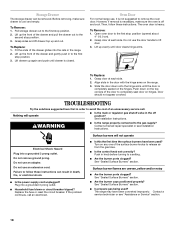
... models, is level in the pan.
■ Is the proper length of the crust and/or reduce baking temperature.
19
See the Installation Instructions. Oven will be displayed. The range may have been converted improperly. See "Clock" section.
■ Is the display showing a letter followed by a number?
See the Installation Instructions.
■ Is the proper temperature set ? See "Oven...
Owners Manual - Page 20
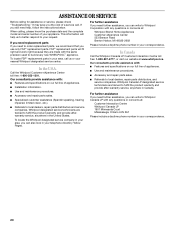
... can write to Whirlpool Canada LP with the same precision used to local dealers, repair parts distributors and service companies. FSP® replacement parts will help , follow the instructions below. To locate FSP® replacement parts in your correspondence. Our consultants provide assistance with : ■ Features and specifications on our full line of appliances.
■ Use...
Owners Manual - Page 21

... Canada, contact your sales slip together for repairs.
In the U.S.A., call 1-800-807-6777.
9/07
Keep this book and your authorized Whirlpool dealer to repair or replace appliance light bulbs, air filters or water filters. In Canada,
call 1-800-253-1301. You can find
additional help you obtain assistance or service if you may find this limited warranty does...
Installation Instructions - Page 4

...Product Dimensions
A
Cabinet Dimensions
Cabinet opening width F.
If installing a range hood or microwave hood combination above the range, follow the range hood or microwave hood combination installation instructions for Mobile Home Construction and Safety, Title 24, HUD Part 280).
A
B
C
H
D
E
I
I . 3" (7.6 cm) min. Model/serial number plate (located behind the storage drawer on the...
Installation Instructions - Page 5

...qualified electrical installer determine that a separate circuit serving only this range be electrically grounded in accordance with all local codes and ordinances.
If connected to the manufacturer's instructions.
latest edition.
The model/serial rating plate located behind the storage drawer on the right-hand side oven door frame has information on the back of gas that can...
Installation Instructions - Page 8
...provided. Adapter
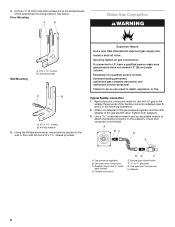
8 Floor Mounting
A
B
Make Gas Connection
WARNING
Wall Mounting
A. #12 x 1⁵⁄₈" screws B.
Install a shut-off valve.
Use a combination ...Gas pressure regulator B. Manual gas shutoff valve F. ½" or ¾" gas pipe G.
Examples of a qualified person include: licensed heating personnel, authorized gas company personnel, and authorized service...
Installation Instructions - Page 9

Flexible connector D. Manual shutoff valve E. 10" (25.4 cm) max. The
valve is open when the handle is parallel to light the burner. Remove cardboard or hardboard from package containting parts.
A. Open valve
2. Remove cooktop burner caps and grates from under anti-tip
bracket.
Failure to follow these instructions can result in oven. 2. Push range back into...
Installation Instructions - Page 11

... "Troubleshooting" in the range. 2. Check that all parts are now installed. If the range is closed . Check that the gas supply line shutoff valve is open. ■ If the gas supply line shutoff valve is cold, turn off the range and check that you purchased your tools. 3. A B
A. To Replace Storage Drawer: 1. Press the PRESETS 0 number pad once to set HI...
Installation Instructions - Page 12
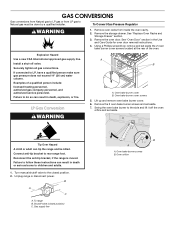
..., have a qualified person make sure gas pressure does not exceed 14" (36 cm) water column.
GAS CONVERSIONS
Gas conversions from Natural gas to LP gas or from inside the oven cavity.
2. Install a shut-off the oven
orifice and set aside. If connected to rear range foot. Remove oven racks from LP gas to Natural gas must be killed. Turn manual shutoff valve to the side...
Installation Instructions - Page 15

... ½" long. Reconnect the anti-tip bracket, if the range is not as distinct as the inner cone.
Shutoff valve (closed position. 2. Remove the oven door. A B
A. Oven bake burner cover screws
15 Set Natural gas orifice spud aside. Refer to adjust the "LO" setting for oven door removal instructions. 4. Replace burner base and hand tighten the screws.
7. Repeat steps...
Installation Instructions - Page 18

... the "Replace Oven Racks and Storage Drawer" section for each cooktop burner.
18 See the "Oven Door" section of Natural orifice spuds for each burner location. See "Make Gas Connection" and "Electronic Ignition System" sections.
Apply masking tape to the end of a 7 mm) nut driver to adjust the "LO" setting for instructions.
12. See the "Natural Gas Orifice...
Whirlpool GW397LXUT Reviews
We have not received any reviews for Whirlpool yet.