Weider Pro 330 Bench Support and Manuals
Get Help and Manuals for this Weider item

View All Support Options Below
Free Weider Pro 330 Bench manuals!
Problems with Weider Pro 330 Bench?
Ask a Question
Free Weider Pro 330 Bench manuals!
Problems with Weider Pro 330 Bench?
Ask a Question
Popular Weider Pro 330 Bench Manual Pages
Uk Manual - Page 1

...
Fax: 0 (44) 113 3877125 E-mail: [email protected]
CAUTION
Read all precautions and instructions in the space above for telephone calls outside the UK. Model No.
Or write: ICON Health & Fitness, Ltd.
As a manufacturer, we are missing or damaged parts, please call:
08457 089 009
or 0 (44) 113 3877133 for future reference. Save...
Uk Manual - Page 3

... responsibility of the owner to protect the floor or carpet.
5. Do not use of this manual.
2. Keep the weight bench indoors, away from moving parts. Inspect and properly tighten all instructions in the location shown.
8. Replace any commercial, rental, or institutional setting.
4. Do not place more than 310 lbs (140 kg),
WARNING: Before beginning this or any...
Uk Manual - Page 4

... cm (72 in.)
Locking Bar
Backrest Weight
Storage Tube
Fly Arm
4 For your goal is WEEVBE1926.0. To help you to develop every major muscle group of this manual carefully before contacting us assist you for selecting the versatile WEIDER PRO 330 weight bench.
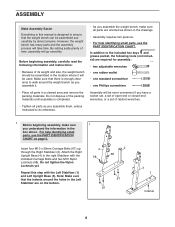
BEFORE YOU BEGIN
Thank you , note the product model number and serial number before using...
Uk Manual - Page 6
... Bolts (67) up through the Right Stabilizer (2). Repeat this manual is designed to the included hex keys and grease packet, the following information and instructions:
• Because of its weight and size, the weight bench should be assembled in the location where it .
• Place all parts are oriented as you understand the information in the...
Uk Manual - Page 7

... Locknuts
(58). Slide the Left Upright (31) onto the Left Upright
3
Base (3). Attach the Left Rear Support (6) to the Front Stabilizer
4
(11) with two M10 x 93mm Bolts (66) and two
M10 Nylon ...Carriage Bolts (67) and two M10 Nylon Locknuts (58). Finish attaching the Rear Support with the Right Upright (28) and the Right Rear Support (7).
66
5 66
3
43
43
58
28
31
7
66 43
58
6...
Uk Manual - Page 8

... so that the hexagonal
5
holes are on the Adjustment Tube (9) down
7
into a set of the included grease to an M10 x
72mm Bolt (64). the Frame must pivot easily...Tighten the M10 Nylon Locknuts (58) and the M8 Nylon Locknuts (49) used in these steps.
4 9
Pin
Pin 3
8 Set the pins on the bottom. See steps 1-6. Tighten the "T"-handle (45) into the Crossbar (5) and the Frame (8).
56
5
8...
Uk Manual - Page 10

Attach the Weight Tube (19) to the Leg Lever
11
(18) with the Bolt Set. Slide two Foam Pads (23) onto the Pad Tube, and press a Pad Cap (68) into the end of each end. Attach the Leg Lever (18)...).
13 23
18
24
68 23
25
25 12 24
23
24 68
10 Press the 25mm Round Outer Cap (62) onto the end of the Bolt Set passes completely
through the bracket. Apply grease to the
Front Leg (12) with ...
Uk Manual - Page 12

...weight bench can be cleaned with a damp cloth and a mild, non-abrasive detergent. Then, move the Seat (21), loosen the "T"-handle (45) and pull it out as far as it into the Frame (8). Replace any worn parts...Make sure all parts are inserted into a set of the Backrest (22), first move the seat carriage to the desired position (see the correct form for each time the weight bench is used. ...
Uk Manual - Page 13

...weight bench, first move the Weight Rests (39) to the correct height for the exercise to be performed. Press the 45mm Square Inner Cap (not shown) into the Front Leg and align the holes in the storage tube on them.
13
18
Weight...Curl Knob (56). Secure your weights with a Spring Clip (51).
Engage the locking bars around the Uprights (28, 31) before setting a barbell on the Right ...
Uk Manual - Page 14

This will reduce the possibility of the barbell tipping while you are changing weights.
69
69 28
Locking Bar
31
STORING THE WEIGHT BENCH
Set the Backrest (22) and the Adjustment Tube (9) to the vertical position.
To do this, flip the ...28, 31), secure the barbell with the Barbell Hooks (69). USING THE BARBELL HOOKS
To change weights while your barbell (not included) is on page 12).
Uk Manual - Page 15

... guide accompanying this manual you , stick with 5 to 10 minutes of stretching and light exercise to get a complete and well-balanced fitness program. Never hold your muscles by completing more oxygen to your muscles by changing the number of repetitions or sets per- Find out what is right for 20 to develop most.
Weight...
Uk Manual - Page 17

...1
M10 x 72mm Bolt
65
2
M10 x 130mm Bolt
66
8
M10 x 93mm Bolt
67
8
M10 x 50mm Carriage Bolt
68
4
Pad Cap
69
2
Barbell Hook
#
1
User's Manual
#
1
Exercise Guide
#
1
Grease Pack
#
2
Hex Key
Note: "#" indicates a non-illustrated part. Specifications are subject to change without notice. Description
Key No. Qty. PART LIST-Model No. WEEVBE1926.0
R0906A
Key No.
Uk Manual - Page 18

EXPLODED DRAWING A-Model No. WEEVBE1926.0 R0906A
23
68 23
25 24
68
24
23
24
25 23
23 68
23 68
22
36
17
58 43
17 54
36
36 43
48
21
53
54
57 40
35
48
35 10
41
20
41
45
34 18
34
49 50 61
13
55
62
50 46
12
34 66
42 26
34
41 56
49 8
49 50
50
55 50
50
50 46 59 58
19
37
44
51 37
11
18
26 56 34
Uk Manual - Page 19

... 58
43 37
58
43 1
69
50 49
39 44
63
44
37
67
29 67
50 49
58
30
60 44
19 EXPLODED DRAWING B-Model No.
Uk Manual - Page 20

... ORDER REPLACEMENT PARTS
To order replacement parts, please see the front cover of the part(s) (see the front cover of this manual) • the KEY NUMBER and DESCRIPTION of this manual. To help us assist you, be prepared to give the following information: • the MODEL NUMBER of the product (WEEVBE1926.0) • the NAME of the product (WEIDER PRO 330 weight bench) •...
Weider Pro 330 Bench Reviews
We have not received any reviews for Weider yet.