

Users Manual AU/NZ
Page 3
... 6 Power and Power-Up Modes Power conditions 6-1 Monitoring of power condition 6-2 Battery 6-3 TOSHIBA Password Utility 6-10 Power-up modes 6-13 Panel power on DVD Super Multi drives 4-16 Media care 4-22 Sound System 4-23 Modem 4-25 Wireless communications 4-29 LAN 4-32 Computer Handling 4-34 Using the Hard Disk Drive (HDD) Protection 4-35 Heat dispersal 4-37 Chapter 5 The Keyboard Typewriter keys 5-1 Function keys: F1 ... TECRA A9/ TECRA S5/ TECRA P5/ Satellite Pro S200 Right side 2-4 Back 2-5 Underside 2-7 Front with the display open 2-8 Indicators 2-11 Optical disc...
... 6 Power and Power-Up Modes Power conditions 6-1 Monitoring of power condition 6-2 Battery 6-3 TOSHIBA Password Utility 6-10 Power-up modes 6-13 Panel power on DVD Super Multi drives 4-16 Media care 4-22 Sound System 4-23 Modem 4-25 Wireless communications 4-29 LAN 4-32 Computer Handling 4-34 Using the Hard Disk Drive (HDD) Protection 4-35 Heat dispersal 4-37 Chapter 5 The Keyboard Typewriter keys 5-1 Function keys: F1 ... TECRA A9/ TECRA S5/ TECRA P5/ Satellite Pro S200 Right side 2-4 Back 2-5 Underside 2-7 Front with the display open 2-8 Indicators 2-11 Optical disc...
Users Manual AU/NZ
Page 4
TECRA A9/ TECRA S5/ TECRA P5/ Satellite Pro S200 System Auto Off 6-13 Chapter 7 HW Setup & BIOS Setup Accessing HW Setup 7-1 HW Setup window 7-1 BIOS Setup Program 7-8 Chapter 8 Troubleshooting Problem solving process 8-1 Hardware and system checklist 8-3 TOSHIBA support 8-24 Appendix A Specifications Physical Dimensions A-1 Environmental Requirements A-1 Appendix B Display Controller and Video mode Display controller B-1 Video mode B-1 Appendix C AT Commands Appendix D S-registers S-register values D-1 AT command set result codes D-5 Appendix E V.90 V.90 mode E-1 AT ...
TECRA A9/ TECRA S5/ TECRA P5/ Satellite Pro S200 System Auto Off 6-13 Chapter 7 HW Setup & BIOS Setup Accessing HW Setup 7-1 HW Setup window 7-1 BIOS Setup Program 7-8 Chapter 8 Troubleshooting Problem solving process 8-1 Hardware and system checklist 8-3 TOSHIBA support 8-24 Appendix A Specifications Physical Dimensions A-1 Environmental Requirements A-1 Appendix B Display Controller and Video mode Display controller B-1 Video mode B-1 Appendix C AT Commands Appendix D S-registers S-register values D-1 AT command set result codes D-5 Appendix E V.90 V.90 mode E-1 AT ...

Users Manual AU/NZ
Page 6
.... TOSHIBA TECRA A9/ TECRA S5/ TECRA P5/ Satellite Pro S200 Portable Personal Computer User's Manual Second edition June 2007 Copyright authority for the TOSHIBA TECRA A9/ TECRA S5/ TECRA P5/ Satellite Pro S200 Portable Personal Computer at the time of Eastman Kodak. Other trademarks and registered trademarks not listed above (including conversion to the copyright owner. Copyrighted material can be used by its proprietor and used in any reproduction from errors...
.... TOSHIBA TECRA A9/ TECRA S5/ TECRA P5/ Satellite Pro S200 Portable Personal Computer User's Manual Second edition June 2007 Copyright authority for the TOSHIBA TECRA A9/ TECRA S5/ TECRA P5/ Satellite Pro S200 Portable Personal Computer at the time of Eastman Kodak. Other trademarks and registered trademarks not listed above (including conversion to the copyright owner. Copyrighted material can be used by its proprietor and used in any reproduction from errors...

Users Manual AU/NZ
Page 10
... temporarily discontinue service. TECRA A9/ TECRA S5/ TECRA P5/ Satellite Pro S200 Pursuant to FCC CFR 47, Part 68: When you are ready to install or use the modem, call the telephone company and let them the following information: ■ The telephone number of the line to which you will connect the modem ■ The registration number that is located on the device The FCC...
... temporarily discontinue service. TECRA A9/ TECRA S5/ TECRA P5/ Satellite Pro S200 Pursuant to FCC CFR 47, Part 68: When you are ready to install or use the modem, call the telephone company and let them the following information: ■ The telephone number of the line to which you will connect the modem ■ The registration number that is located on the device The FCC...
Users Manual AU/NZ
Page 23
... this manual by -step instructions on setting up and begin using optional devices and troubleshooting. Read Chapter 3, Hardware, Utilities and Options if connecting optional products or external devices. This powerful notebook computer provides excellent expansion capability, includes multimedia functionality, and is organized, then become acquainted with the computer's features, components and accessory devices. If you 're new to portable computing, first read Chapter 1, Getting Started for clarity, abbreviations are a new user of...
... this manual by -step instructions on setting up and begin using optional devices and troubleshooting. Read Chapter 3, Hardware, Utilities and Options if connecting optional products or external devices. This powerful notebook computer provides excellent expansion capability, includes multimedia functionality, and is organized, then become acquainted with the computer's features, components and accessory devices. If you 're new to portable computing, first read Chapter 1, Getting Started for clarity, abbreviations are a new user of...

Users Manual AU/NZ
Page 35
... that keyboard keys can continue working right where you are able to access it, Start -> Control Panel -> System and Maintenance -> Power Options). ■ To use the Hybrid Sleep function, configure it , Start -> Control Panel -> System and Maintenance -> Power Options). ■ To restore the operation of data. ■ Never turn off the power while a disk (disc) is being accessed, you turn the computer or peripheral devices back on and the system returns from Sleep Mode. ■ To prevent the computer from automatically entering Sleep Mode, disable Sleep Mode...
... that keyboard keys can continue working right where you are able to access it, Start -> Control Panel -> System and Maintenance -> Power Options). ■ To use the Hybrid Sleep function, configure it , Start -> Control Panel -> System and Maintenance -> Power Options). ■ To restore the operation of data. ■ Never turn off the power while a disk (disc) is being accessed, you turn the computer or peripheral devices back on and the system returns from Sleep Mode. ■ To prevent the computer from automatically entering Sleep Mode, disable Sleep Mode...

Users Manual AU/NZ
Page 50
..., replacement and removal of the battery pack please refer to the computer when the AC adaptor is not connected. Front with the display open This section shows the computer with the display panel open User's Manual 2-8 The Grand Tour Memory module slot The Slot A and Slot B memory modules are located here. Display screen Display hinge Display hinge Stereo speaker (Right) Stereo speaker (Left) Power button TOSHIBA Assist button AccuPoint AccuPoint control buttons Fingerprint Sensor LCD Sensor switch (Not shown) TOSHIBA Presentation button Keyboard Touch Pad Touch Pad control...
..., replacement and removal of the battery pack please refer to the computer when the AC adaptor is not connected. Front with the display open This section shows the computer with the display panel open User's Manual 2-8 The Grand Tour Memory module slot The Slot A and Slot B memory modules are located here. Display screen Display hinge Display hinge Stereo speaker (Right) Stereo speaker (Left) Power button TOSHIBA Assist button AccuPoint AccuPoint control buttons Fingerprint Sensor LCD Sensor switch (Not shown) TOSHIBA Presentation button Keyboard Touch Pad Touch Pad control...

Users Manual AU/NZ
Page 52
... the Power Options. User's Manual 2-10 Do not put any magnetic objects close the display panel the computer enters Hibernation Mode and shuts itself down even if the Panel Power Off feature is disabled. For detailed information on Fingerprint Sensor, refer to start up and return you next open the display, the computer will open the Windows VistaTM TMM (Transient Multimon Manager) screen. When power-off . Only some models are...
... the Power Options. User's Manual 2-10 Do not put any magnetic objects close the display panel the computer enters Hibernation Mode and shuts itself down even if the Panel Power Off feature is disabled. For detailed information on Fingerprint Sensor, refer to start up and return you next open the display, the computer will open the Windows VistaTM TMM (Transient Multimon Manager) screen. When power-off . Only some models are...

Users Manual AU/NZ
Page 63
... Presentation button The TOSHIBA Presentation button has the same functionality as the Connect display button in the Power Options. User's Manual 3-5 This can be specified in the Power Options. Access each function using the following features are either unique to TOSHIBA computers or are specific key combinations that complies with power being restored when the hard disk drive is connected will open the Windows VistaTM TMM (Transient Multimon Manager) screen. Hot keys Hot keys are advanced features which make the computer more information regarding Wireless LAN...
... Presentation button The TOSHIBA Presentation button has the same functionality as the Connect display button in the Power Options. User's Manual 3-5 This can be specified in the Power Options. Access each function using the following features are either unique to TOSHIBA computers or are specific key combinations that complies with power being restored when the hard disk drive is connected will open the Windows VistaTM TMM (Transient Multimon Manager) screen. Hot keys Hot keys are advanced features which make the computer more information regarding Wireless LAN...

Users Manual AU/NZ
Page 77
... with bare hands. You can access the inserted memory modules efficiently in order to let screws or other internal areas of the computer. Wake-up on . e. The wireless communication switch is turned on LAN is enabled. The computer is turned on Wireless LAN is enabled. Hardware, Utilities and Options ■ Make sure the Media slot indicator is out before you discharge yourself before touching or installing any additional memory modules. Wake-up on . ■ Be...
... with bare hands. You can access the inserted memory modules efficiently in order to let screws or other internal areas of the computer. Wake-up on . e. The wireless communication switch is turned on LAN is enabled. The computer is turned on Wireless LAN is enabled. Hardware, Utilities and Options ■ Make sure the Media slot indicator is out before you discharge yourself before touching or installing any additional memory modules. Wake-up on . ■ Be...

Users Manual AU/NZ
Page 80
... Hardware, Utilities and Options Memory module cover Figure 3-8 Seating the memory module cover 8. Turn the computer on and make sure the Power indicator is off the power section in Chapter 6, Power and Power-Up Modes, if required). 4. to the computer. 3. Remove the AC adaptor and all cables and peripherals connected to confirmed it - Slide your computer over. 10. Removing a memory module (Slot A and Slot B) To remove the memory module, follow the steps as detailed below: 1. make sure the added memory...
... Hardware, Utilities and Options Memory module cover Figure 3-8 Seating the memory module cover 8. Turn the computer on and make sure the Power indicator is off the power section in Chapter 6, Power and Power-Up Modes, if required). 4. to the computer. 3. Remove the AC adaptor and all cables and peripherals connected to confirmed it - Slide your computer over. 10. Removing a memory module (Slot A and Slot B) To remove the memory module, follow the steps as detailed below: 1. make sure the added memory...

Users Manual AU/NZ
Page 86
... connecting to a power source. User's Manual 3-28 Hardware, Utilities and Options Serial port The serial connector can not use the following : ■ Modem ■ Mouse ■ Printer To connect a serial port, follow the steps as detailed below: 1. Serial port Serial connector Figure 3-14 Connecting the serial connector to the serial port TOSHIBA Express Port Replicator In addition to the TOSHIBA Express Port Replicator, use the computer's AC Adaptor. Logging onto a LAN using the computer's default settings could cause a malfunction in LAN operation. The TOSHIBA...
... connecting to a power source. User's Manual 3-28 Hardware, Utilities and Options Serial port The serial connector can not use the following : ■ Modem ■ Mouse ■ Printer To connect a serial port, follow the steps as detailed below: 1. Serial port Serial connector Figure 3-14 Connecting the serial connector to the serial port TOSHIBA Express Port Replicator In addition to the TOSHIBA Express Port Replicator, use the computer's AC Adaptor. Logging onto a LAN using the computer's default settings could cause a malfunction in LAN operation. The TOSHIBA...

Users Manual AU/NZ
Page 117
... electric device. Leave the AC adaptor connected while using any Wi-Fi or Bluetooth functionality. ■ Always turn off when near a person who may affect pacemaker or medical device operation, possibly resulting in order to re-enable network connections. * Please be possible to make a network connection to use the Wireless LAN (Wi-Fi) or Bluetooth functionalities near automatic control equipment or appliances such as automatic doors or fire detectors. Wireless LAN The Wireless LAN is...
... electric device. Leave the AC adaptor connected while using any Wi-Fi or Bluetooth functionality. ■ Always turn off when near a person who may affect pacemaker or medical device operation, possibly resulting in order to re-enable network connections. * Please be possible to make a network connection to use the Wireless LAN (Wi-Fi) or Bluetooth functionalities near automatic control equipment or appliances such as automatic doors or fire detectors. Wireless LAN The Wireless LAN is...
Users Manual AU/NZ
Page 136
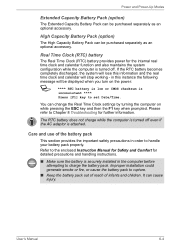
... set Date/Time. Please refer to Chapter 8 Troubleshooting for the internal real time clock and calendar function and also maintains the system configuration while the computer is turned off even if the AC adaptor is inconsistent **** Press [F1] key to the enclosed Instruction Manual for Safety and Comfort for detailed precautions and handling instructions. ■ Make sure the battery is turned off . Improper installation...
... set Date/Time. Please refer to Chapter 8 Troubleshooting for the internal real time clock and calendar function and also maintains the system configuration while the computer is turned off even if the AC adaptor is inconsistent **** Press [F1] key to the enclosed Instruction Manual for Safety and Comfort for detailed precautions and handling instructions. ■ Make sure the battery is turned off . Improper installation...

Users Manual AU/NZ
Page 155
... that this option is Enabled. Critical Battery Wake-up on LAN function when running from the battery (Default). Execute-Disable Bit Capability This setting, which is in Windows is not available for use of the Intel Virtualization Technology. The Enabled command allows use (Default). This function is available when the Wake-up Configure what action is taken when the remaining battery power is close to Hibernate. (Default) User's Manual 7-10 Enabled Enables Virtualization...
... that this option is Enabled. Critical Battery Wake-up on LAN function when running from the battery (Default). Execute-Disable Bit Capability This setting, which is in Windows is not available for use of the Intel Virtualization Technology. The Enabled command allows use (Default). This function is available when the Wake-up Configure what action is taken when the remaining battery power is close to Hibernate. (Default) User's Manual 7-10 Enabled Enables Virtualization...

Users Manual AU/NZ
Page 159
... problem Sometimes the computer will give you turn on the display? keyboard, hard disk drive, display panel, touch pad, touch pad control buttons - Troubleshooting Preliminary checklist You should keep them in the computer's setup program and that all connectors for further information on its configuration is correctly set properly. ■ What appears on the computer - User's Manual 8-2 the items detailed in the case of this includes your floppy diskette, CD or DVD media...
... problem Sometimes the computer will give you turn on the display? keyboard, hard disk drive, display panel, touch pad, touch pad control buttons - Troubleshooting Preliminary checklist You should keep them in the computer's setup program and that all connectors for further information on its configuration is correctly set properly. ■ What appears on the computer - User's Manual 8-2 the items detailed in the case of this includes your floppy diskette, CD or DVD media...

Users Manual AU/NZ
Page 160
...; Power ■ Password ■ Keyboard ■ Internal display panel ■ Hard disk drive ■ CD-ROM drive ■ DVD-ROM&CD-R/RW drive ■ DVD Super Multi drive ■ USB floppy diskette drive ■ PC Card ■ SD/SDHC Card ■ xD picture card ■ MultiMediaCard ■ Dual Pointing Device ■ Fingerprint Sensor ■ USB device ■ Additional memory module ■ Sound system ■ External monitor ■ i.LINK (IEEE1394) device ■ Modem ■ LAN ■ Wireless LAN ■ Bluetooth ■ Recovery Discs User's Manual 8-3 the...
...; Power ■ Password ■ Keyboard ■ Internal display panel ■ Hard disk drive ■ CD-ROM drive ■ DVD-ROM&CD-R/RW drive ■ DVD Super Multi drive ■ USB floppy diskette drive ■ PC Card ■ SD/SDHC Card ■ xD picture card ■ MultiMediaCard ■ Dual Pointing Device ■ Fingerprint Sensor ■ USB device ■ Additional memory module ■ Sound system ■ External monitor ■ i.LINK (IEEE1394) device ■ Modem ■ LAN ■ Wireless LAN ■ Bluetooth ■ Recovery Discs User's Manual 8-3 the...
Users Manual AU/NZ
Page 164
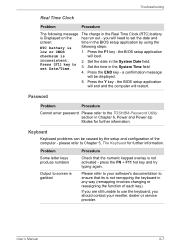
... hot key and try typing again. If you are still unable to screen is garbled Procedure Check that its is will need to the TOSHIBA Password Utility section in the Real Time Clock (RTC) battery is not activated - Troubleshooting Real Time Clock Problem Procedure The following steps: low or CMOS 1. Press the F1 key - Problem Some letter keys produce numbers Output to use the keyboard, you will load. the BIOS setup...
... hot key and try typing again. If you are still unable to screen is garbled Procedure Check that its is will need to the TOSHIBA Password Utility section in the Real Time Clock (RTC) battery is not activated - Troubleshooting Real Time Clock Problem Procedure The following steps: low or CMOS 1. Press the F1 key - Problem Some letter keys produce numbers Output to use the keyboard, you will load. the BIOS setup...

Users Manual AU/NZ
Page 234
... up to 100,000 simple logic gates on the screen. See also byte and kilobyte. keyboard: An input device containing switches that extend to change the hardware characteristics by manually pressing marked keys. The viewingside coating is , in turn, representative of the glass. L level 2 cache: See cache. User's Manual Glossary-9 Each keystroke activates a switch that allows you to the edge of the (ASCII...
... up to 100,000 simple logic gates on the screen. See also byte and kilobyte. keyboard: An input device containing switches that extend to change the hardware characteristics by manually pressing marked keys. The viewingside coating is , in turn, representative of the glass. L level 2 cache: See cache. User's Manual Glossary-9 Each keystroke activates a switch that allows you to the edge of the (ASCII...

Detailed Specs for Tecra P5 PTS53A-0FT03X AU/NZ; English
Page 2
... sensor with Toshiba Fingerprint Utility, Hard Disk password prevents unauthorised access to the Hard Drive and can be synchronised with the user password, Kensington® cable lock slot for optional theft protection devices, Toshiba EasyGuard HDD protection with 3D motion sensors, Trusted Platform Module (TPM) for hardware encryption, User and supervisor password prevents unauthorised access to startup the Notebook at the BIOS level, XD-Bit to aid protection against malicious code Adobe®Acrobat Reader® 7.0, ConfigFree...
... sensor with Toshiba Fingerprint Utility, Hard Disk password prevents unauthorised access to the Hard Drive and can be synchronised with the user password, Kensington® cable lock slot for optional theft protection devices, Toshiba EasyGuard HDD protection with 3D motion sensors, Trusted Platform Module (TPM) for hardware encryption, User and supervisor password prevents unauthorised access to startup the Notebook at the BIOS level, XD-Bit to aid protection against malicious code Adobe®Acrobat Reader® 7.0, ConfigFree...


