User Guide
Page 5
... until the problem is resolved. In order to do this equipment, for repair or limited warranty information, please contact Toshiba Corporation, Toshiba America Information Systems, Inc. If these changes might affect your service or the operation of your modem from its present line, please call the telephone company and let them to make any message unless such message clearly contains...
... until the problem is resolved. In order to do this equipment, for repair or limited warranty information, please contact Toshiba Corporation, Toshiba America Information Systems, Inc. If these changes might affect your service or the operation of your modem from its present line, please call the telephone company and let them to make any message unless such message clearly contains...

User Guide
Page 29
... specifications ....54 Turning on the power 54 Adding memory (optional 55 Installing a memory module 56 Removing a memory module 61 Hard Drive Recovery Utilities 63 Creating Recovery CDs/DVDs 64 Hard Disk Drive Recovery using the recovery partition 65 Hard Disk Drive Recovery using the Recovery media 68 Deleting the Hard Disk Recovery Utility 71 Installing drivers and applications 72 Using the TouchPad 73 Scrolling with the TouchPad 74 Control buttons 74 Disabling or enabling the TouchPad 74 Turning off the computer 76 Closing the display panel 77 Using external display devices...
... specifications ....54 Turning on the power 54 Adding memory (optional 55 Installing a memory module 56 Removing a memory module 61 Hard Drive Recovery Utilities 63 Creating Recovery CDs/DVDs 64 Hard Disk Drive Recovery using the recovery partition 65 Hard Disk Drive Recovery using the Recovery media 68 Deleting the Hard Disk Recovery Utility 71 Installing drivers and applications 72 Using the TouchPad 73 Scrolling with the TouchPad 74 Control buttons 74 Disabling or enabling the TouchPad 74 Turning off the computer 76 Closing the display panel 77 Using external display devices...

User Guide
Page 57
... memory module slot cover. The operating system turns off computer window appears. 2 Click Turn Off. You can install one or two memory modules. otherwise, skip to the computer, including the AC adapter. 4 Remove the battery. Memory module slot cover Sample locating the memory module slot cover The Turn off the computer. 3 Unplug and remove any cables connected to step 3. 1 If the computer is on, begin at step 1; For information on removing the battery, see "Changing batteries" on , click Start, Turn off the computer using...
... memory module slot cover. The operating system turns off computer window appears. 2 Click Turn Off. You can install one or two memory modules. otherwise, skip to the computer, including the AC adapter. 4 Remove the battery. Memory module slot cover Sample locating the memory module slot cover The Turn off the computer. 3 Unplug and remove any cables connected to step 3. 1 If the computer is on, begin at step 1; For information on removing the battery, see "Changing batteries" on , click Start, Turn off the computer using...

User Guide
Page 58
... not to discharge any static electricity you insert into the computer. 9 Remove the new memory module from its pin connector on the side you may cause memory access problems. Unscrewing the memory module slot cover 7 Remove the memory slot cover. 8 Place the screw and the cover in a safe place so that secures the memory module slot cover. 58 Getting Started Adding memory (optional) 6 Using a standard Phillips no. 1 screwdriver, unscrew the screw that you can damage...
... not to discharge any static electricity you insert into the computer. 9 Remove the new memory module from its pin connector on the side you may cause memory access problems. Unscrewing the memory module slot cover 7 Remove the memory slot cover. 8 Place the screw and the cover in a safe place so that secures the memory module slot cover. 58 Getting Started Adding memory (optional) 6 Using a standard Phillips no. 1 screwdriver, unscrew the screw that you can damage...

User Guide
Page 60
... memory module is properly inserted. 14 Replace the memory module slot cover and tighten the screw. 15 Re-insert the battery. The clips on page 123. 16 Turn the computer right side up. 17 Reconnect the cables. 18 Restart the computer. clip clip Sample pressing down on the memory module Do not force the memory module into position. 60 Getting Started Adding memory (optional) Sample aligning the module...
... memory module is properly inserted. 14 Replace the memory module slot cover and tighten the screw. 15 Re-insert the battery. The clips on page 123. 16 Turn the computer right side up. 17 Reconnect the cables. 18 Restart the computer. clip clip Sample pressing down on the memory module Do not force the memory module into position. 60 Getting Started Adding memory (optional) Sample aligning the module...

User Guide
Page 62
... work. Sample removing the memory module 4 Replace the memory module slot cover and screw. 5 Turn the computer over and restart it. Checking total memory When you add or remove a memory module, you can check that the computer has recognized the change. To do this: 1 Click Start, then click Control Panel. 2 Click Performance and Maintenance. 3 Click System. 4 The General tab view automatically appears and shows total memory. 62 Getting Started Adding memory (optional) The memory module...
... work. Sample removing the memory module 4 Replace the memory module slot cover and screw. 5 Turn the computer over and restart it. Checking total memory When you add or remove a memory module, you can check that the computer has recognized the change. To do this: 1 Click Start, then click Control Panel. 2 Click Performance and Maintenance. 3 Click System. 4 The General tab view automatically appears and shows total memory. 62 Getting Started Adding memory (optional) The memory module...

User Guide
Page 63
... creating Recovery media, see "Creating Recovery CDs/DVDs" on page 55. Using the HDD Recovery, you can: ❖ Create Hard Drive Recovery CDs or DVDs using your system. Getting Started Hard Drive Recovery Utilities 63 If the computer does not recognize the memory configuration, turn off the computer, remove the memory slot cover, and make sure the memory module is strongly recommended that you to the factory-set default. ❖ Recover just your C: drive, leaving any other partitions you may have created intact, for example, a D: drive. ❖ Recover your hard disk drive...
... creating Recovery media, see "Creating Recovery CDs/DVDs" on page 55. Using the HDD Recovery, you can: ❖ Create Hard Drive Recovery CDs or DVDs using your system. Getting Started Hard Drive Recovery Utilities 63 If the computer does not recognize the memory configuration, turn off the computer, remove the memory slot cover, and make sure the memory module is strongly recommended that you to the factory-set default. ❖ Recover just your C: drive, leaving any other partitions you may have created intact, for example, a D: drive. ❖ Recover your hard disk drive...

User Guide
Page 77
... : 1 Connect the monitor's video cable to the RGB (monitor) port on the left side of the computer. 2 Connect the device's power cable to a live electrical outlet. 3 Turn on . ❖ If you have the audible warning set , the computer will beep to your operating system and devices. Before connecting an external monitor or video projector, configure your computer for your computer if you need a larger screen. Using external display devices Your computer comes with a built-in LCD display...
... : 1 Connect the monitor's video cable to the RGB (monitor) port on the left side of the computer. 2 Connect the device's power cable to a live electrical outlet. 3 Turn on . ❖ If you have the audible warning set , the computer will beep to your operating system and devices. Before connecting an external monitor or video projector, configure your computer for your computer if you need a larger screen. Using external display devices Your computer comes with a built-in LCD display...
User Guide
Page 183
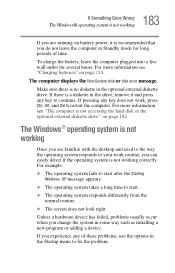
... key to continue. The Windows® operating system is not working Once you are familiar with the desktop and used to the way the operating system responds to restart the computer. To charge the battery, leave the computer plugged into a live wall outlet for long periods of these problems, use the options in some way such as installing a new program or adding a device. Unless a hardware device...
... key to continue. The Windows® operating system is not working Once you are familiar with the desktop and used to the way the operating system responds to restart the computer. To charge the battery, leave the computer plugged into a live wall outlet for long periods of these problems, use the options in some way such as installing a new program or adding a device. Unless a hardware device...
User Guide
Page 194
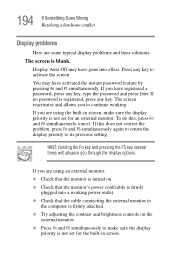
...-in screen, make sure the display priority is not set for an external monitor. Display Auto Off may have gone into a working . If you are using an external monitor: ❖ Check that the monitor's power cord/cable is firmly plugged into effect. If you to continue working power outlet. ❖ Check that the cable connecting the external monitor to the computer is firmly attached. ❖ Try adjusting the contrast and brightness controls on...
...-in screen, make sure the display priority is not set for an external monitor. Display Auto Off may have gone into a working . If you are using an external monitor: ❖ Check that the monitor's power cord/cable is firmly plugged into effect. If you to continue working power outlet. ❖ Check that the cable connecting the external monitor to the computer is firmly attached. ❖ Try adjusting the contrast and brightness controls on...
User Guide
Page 209
.... To verify your drive to an authorized service provider to get it is not set to fix the problem yourself. If it does, the utility may be a video format error. DVD operating problems If you experience a problem playing DVDs, you have tried several discs and all fail, consider sending your display settings: ❖ Click Start, Control Panel, Appearance and Themes, and double-click Display. ❖ Click on the Settings tab and check...
.... To verify your drive to an authorized service provider to get it is not set to fix the problem yourself. If it does, the utility may be a video format error. DVD operating problems If you experience a problem playing DVDs, you have tried several discs and all fail, consider sending your display settings: ❖ Click Start, Control Panel, Appearance and Themes, and double-click Display. ❖ Click on the Settings tab and check...

User Guide
Page 228
... hot key turns the numeric overlay on page 172. Fn + This hot key turns the scroll lock feature on page 172. 228 Hot Keys Disabling or enabling the TouchPad Disabling or enabling the TouchPad Fn + This hot key enables/disables the TouchPad. For more information, see "Using the TOSHIBA Zooming Utility" on and off . For more information, see "Disabling or enabling the TouchPad" on and off. Keyboard hot keys Fn + This hot key turns the cursor control overlay on page 74. Sample disable and enable TouchPad windows Zooming...
... hot key turns the numeric overlay on page 172. Fn + This hot key turns the scroll lock feature on page 172. 228 Hot Keys Disabling or enabling the TouchPad Disabling or enabling the TouchPad Fn + This hot key enables/disables the TouchPad. For more information, see "Using the TOSHIBA Zooming Utility" on and off . For more information, see "Disabling or enabling the TouchPad" on and off. Keyboard hot keys Fn + This hot key turns the cursor control overlay on page 74. Sample disable and enable TouchPad windows Zooming...

User Guide
Page 231
... includes a screen saver that you switch between network configurations. For more information, see "ConfigFree SUMMIT" on the Connectivity Doctor screen to access the screen saver option. Click Options on page 245. on the taskbar. ❖ Press the TOSHIBA Assist button (if applicable to your Toshiba Computer Getting Started ❖ Profile Settings-The Profiles utility lets you can customize by adding identifying text to devices. 231 Using ConfigFree™...
... includes a screen saver that you switch between network configurations. For more information, see "ConfigFree SUMMIT" on the Connectivity Doctor screen to access the screen saver option. Click Options on page 245. on the taskbar. ❖ Press the TOSHIBA Assist button (if applicable to your Toshiba Computer Getting Started ❖ Profile Settings-The Profiles utility lets you can customize by adding identifying text to devices. 231 Using ConfigFree™...

User Guide
Page 263
.... Memory cache built into the processor to interact with the Fn key can set system options or control system parameters, such as the battery save mode. (2) A key or combination of using a pointing device such as the TouchPad. See also diskette. Compare non-interlaced. It is running and have the operating system automatically recognize the change. I icon - internal device - hot swapping - See also World Wide Web. K keyboard shortcut...
.... Memory cache built into the processor to interact with the Fn key can set system options or control system parameters, such as the battery save mode. (2) A key or combination of using a pointing device such as the TouchPad. See also diskette. Compare non-interlaced. It is running and have the operating system automatically recognize the change. I icon - internal device - hot swapping - See also World Wide Web. K keyboard shortcut...

User Guide
Page 269
... audio .wav files 145 audio features 142 Auto-Run 143 B backing up files 87 battery caring for 126 changing 123 charge indicator light 51 charge not lasting 192 charging 48, 52 conserving power 120 disposal 128 low charge 119 monitoring power 51 not charging 191 power usage hot key 122 power usage mode 224 real-time clock (RTC) 113 removing 123, 125 unlocking 124 battery power displaying remaining 118 monitoring 116 Bridge Media adapter 151 button power 54, 64 start...
... audio .wav files 145 audio features 142 Auto-Run 143 B backing up files 87 battery caring for 126 changing 123 charge indicator light 51 charge not lasting 192 charging 48, 52 conserving power 120 disposal 128 low charge 119 monitoring power 51 not charging 191 power usage hot key 122 power usage mode 224 real-time clock (RTC) 113 removing 123, 125 unlocking 124 battery power displaying remaining 118 monitoring 116 Bridge Media adapter 151 button power 54, 64 start...

User Guide
Page 270
... not accessing disk drives 182 setting up 45, 57 turning off 76 warning resume failure message 182 computer setup 48 computer-friendly environment 41 computing tips 86 connecting to a power source 48 connection set up 136 control buttons 74 critical applications 3 Ctrl keys 89 D desktop creating new icon 131 major features 131 desktop exploration 130 desktop icons 131 Device Manager 188 checking properties 189 disabling a device 189 devices keyboard 79 mouse 79 disable/enable TOSHIBA Touch...
... not accessing disk drives 182 setting up 45, 57 turning off 76 warning resume failure message 182 computer setup 48 computer-friendly environment 41 computing tips 86 connecting to a power source 48 connection set up 136 control buttons 74 critical applications 3 Ctrl keys 89 D desktop creating new icon 131 major features 131 desktop exploration 130 desktop icons 131 Device Manager 188 checking properties 189 disabling a device 189 devices keyboard 79 mouse 79 disable/enable TOSHIBA Touch...
User Guide
Page 271
... DVD-ROM drive problems 199 troubleshooting 199 DVD-ROM/multi-function drive problems 199 E energy saving features 111 error messages device driver conflict 186 general hardware problem 186 non-system disk or disk error 183, 198 problem with display settings/ current settings not working with hardware 195 program has performed an illegal operation 180 warning resume failure 182 Error-checking 197 Ethernet LAN port 137 expansion capability 153 expansion memory slot 58 exploring the desktop 130 external monitor not working 196 mouse 79 external diskette drive connecting...
... DVD-ROM drive problems 199 troubleshooting 199 DVD-ROM/multi-function drive problems 199 E energy saving features 111 error messages device driver conflict 186 general hardware problem 186 non-system disk or disk error 183, 198 problem with display settings/ current settings not working with hardware 195 program has performed an illegal operation 180 warning resume failure 182 Error-checking 197 Ethernet LAN port 137 expansion capability 153 expansion memory slot 58 exploring the desktop 130 external monitor not working 196 mouse 79 external diskette drive connecting...

User Guide
Page 272
... J jack RJ-11 135 K key assign 157 changing 158 direct assign 157 popup 158 removing 158 key assignment viewing existing 158 key assignments changing or removing existing 158 keyboard character keys 88 function keys 89 hot keys 228 not working 182 overlay keys 90 troubleshooting 193 Windows special keys 90 keyboard, external 79 keyboard, full-size 88 keyboard, PS/2-compatible 79 L LCD power-saver 77 M main battery removing 123 memory adding 55 expansion slots 57 problem solving 190 removing expansion slot cover 58 memory module...
... J jack RJ-11 135 K key assign 157 changing 158 direct assign 157 popup 158 removing 158 key assignment viewing existing 158 key assignments changing or removing existing 158 keyboard character keys 88 function keys 89 hot keys 228 not working 182 overlay keys 90 troubleshooting 193 Windows special keys 90 keyboard, external 79 keyboard, full-size 88 keyboard, PS/2-compatible 79 L LCD power-saver 77 M main battery removing 123 memory adding 55 expansion slots 57 problem solving 190 removing expansion slot cover 58 memory module...
User Guide
Page 273
273 Index resetting port to default settings 134 upgrading 134 monitor 77 connecting 77 not working 194 mouse installing 79 serial 79 N network accessing 136 Dial-Up Networking Wizard 136 networking wireless 136 O opening the display panel 53 other documentation 39 overlay keys 90 P password deleting a supervisor 171 disabling a user 169 supervisor set up 170 passwords instant, using 168 setting user 167 PC Card checklist 201 CIS (Card Information Structure) 201 computer stops working 202 configuring 149 errors 203 hot swapping 149 hot swapping fails 203...
273 Index resetting port to default settings 134 upgrading 134 monitor 77 connecting 77 not working 194 mouse installing 79 serial 79 N network accessing 136 Dial-Up Networking Wizard 136 networking wireless 136 O opening the display panel 53 other documentation 39 overlay keys 90 P password deleting a supervisor 171 disabling a user 169 supervisor set up 170 passwords instant, using 168 setting user 167 PC Card checklist 201 CIS (Card Information Structure) 201 computer stops working 202 configuring 149 errors 203 hot swapping 149 hot swapping fails 203...
User Guide
Page 275
... 221 registering computer 47 worldwide offices 221 Toshiba Hardware Setup 165 Toshiba online resources 110 TOSHIBA Touch and Launch 173 disable/enable 176 Toshiba utilities 154 traveling tips 129 troubleshooting DVD player general problems 209 DVD-ROM drive 199 external keyboard 193 keyboard 193 keypad overlay 193 turning off the computer 76 turning on the computer 55 turning on the power 54 U user password, disabling 169 user passwords setting 167 using a file extension 97 utilities Toshiba Power Saver Utility 161 V video projector adjusting display 79 volume mute hot key 223
... 221 registering computer 47 worldwide offices 221 Toshiba Hardware Setup 165 Toshiba online resources 110 TOSHIBA Touch and Launch 173 disable/enable 176 Toshiba utilities 154 traveling tips 129 troubleshooting DVD player general problems 209 DVD-ROM drive 199 external keyboard 193 keyboard 193 keypad overlay 193 turning off the computer 76 turning on the computer 55 turning on the power 54 U user password, disabling 169 user passwords setting 167 using a file extension 97 utilities Toshiba Power Saver Utility 161 V video projector adjusting display 79 volume mute hot key 223


