

Users Manual Canada; English
Page 3
... 4-17 Web Camera 4-24 Using the TOSHIBA Face Recognition 4-26 Changing Ultra Slim Bay modules 4-30 Using optical disc drives 4-33 Writing CD/DVDs on DVD Super Multi (Double Layer) Drive Kit II . 4-37 TOSHIBA DVD PLAYER 4-43 Media care 4-46 Sound System 4-47 Modem 4-49 Wireless communications 4-53 LAN 4-56 Computer Handling 4-58 Using the Hard Disk Drive (HDD) Protection 4-59 Using the TOSHIBA USB Sleep and Charge Utility 4-61 Heat dispersal 4-63 Chapter 5 The Keyboard Typewriter keys 5-1 Function keys: F1 ...
... 4-17 Web Camera 4-24 Using the TOSHIBA Face Recognition 4-26 Changing Ultra Slim Bay modules 4-30 Using optical disc drives 4-33 Writing CD/DVDs on DVD Super Multi (Double Layer) Drive Kit II . 4-37 TOSHIBA DVD PLAYER 4-43 Media care 4-46 Sound System 4-47 Modem 4-49 Wireless communications 4-53 LAN 4-56 Computer Handling 4-58 Using the Hard Disk Drive (HDD) Protection 4-59 Using the TOSHIBA USB Sleep and Charge Utility 4-61 Heat dispersal 4-63 Chapter 5 The Keyboard Typewriter keys 5-1 Function keys: F1 ...
Users Manual Canada; English
Page 4
... Setting up Windows (Windows Vista E-1 Manually Setting up modes 6-18 Panel power on Windows XP or Windows Vista E-3 Appendix F AC Power Cord and Connectors Certification agencies F-1 Appendix G TOSHIBA Anti-theft Protection Timer Appendix H TOSHIBA PC Health Monitor Starting the TOSHIBA PC Health Monitor H-2 If a TOSHIBA PC Health Monitor message is displayed H-3 Cleaning the Cooling module H-4 Appendix I Legal Footnotes Non-applicable Icons*1 I-1 CPU*2 I-1 User's Manual iv PORTÉGÉ M750 Tablet mode 6-18 Power-up Windows Manually (Windows XP E-2 How to install...
... Setting up Windows (Windows Vista E-1 Manually Setting up modes 6-18 Panel power on Windows XP or Windows Vista E-3 Appendix F AC Power Cord and Connectors Certification agencies F-1 Appendix G TOSHIBA Anti-theft Protection Timer Appendix H TOSHIBA PC Health Monitor Starting the TOSHIBA PC Health Monitor H-2 If a TOSHIBA PC Health Monitor message is displayed H-3 Cleaning the Cooling module H-4 Appendix I Legal Footnotes Non-applicable Icons*1 I-1 CPU*2 I-1 User's Manual iv PORTÉGÉ M750 Tablet mode 6-18 Power-up Windows Manually (Windows XP E-2 How to install...
Users Manual Canada; English
Page 18
... Icons identify ports, dials, and other parts of the PORTÉGÉ M750 series computer. Read Chapter 3, Hardware, Utilities and Options if connecting optional products or external devices. Conventions This manual uses the following their definition. User's Manual xviii Then read over the Chapter 1, Getting Started and Chapter 3, Hardware, Utilities and Options chapters to learn how this manual by -step instructions on setting up and begin using optional devices and troubleshooting. For example: Read Only Memory (ROM). Preface Congratulations...
... Icons identify ports, dials, and other parts of the PORTÉGÉ M750 series computer. Read Chapter 3, Hardware, Utilities and Options if connecting optional products or external devices. Conventions This manual uses the following their definition. User's Manual xviii Then read over the Chapter 1, Getting Started and Chapter 3, Hardware, Utilities and Options chapters to learn how this manual by -step instructions on setting up and begin using optional devices and troubleshooting. For example: Read Only Memory (ROM). Preface Congratulations...

Users Manual Canada; English
Page 25
...; Restoring the pre-installed software from your computer. About the Tablet mode Change to "The TOSHIBA PORTÉGÉ M750" computer can use the computer as a Tablet PC "Tablet mode". User's Manual 1-3 Refer to Changing to the Tablet mode section in memory to the hard disk drive or other main storage device to external media. By following topics: ■ About the Tablet mode ■ Connecting the AC adaptor ■ Opening the display ■ Turning on the safe...
...; Restoring the pre-installed software from your computer. About the Tablet mode Change to "The TOSHIBA PORTÉGÉ M750" computer can use the computer as a Tablet PC "Tablet mode". User's Manual 1-3 Refer to Changing to the Tablet mode section in memory to the hard disk drive or other main storage device to external media. By following topics: ■ About the Tablet mode ■ Connecting the AC adaptor ■ Opening the display ■ Turning on the safe...

Users Manual Canada; English
Page 45
... additional memory module. Battery pack The battery pack provides power to lock the Ultra Slim Bay latch before you transport or carry the computer. User's Manual 2-8 Ultra Slim Bay Refer to Chapter 6, Power and Power-Up Modes. Do not attempt to release the battery pack ready for removal. Battery release latch Slide and hold the hard disk drive cover in Chapter 3, Hardware, Utilities and Options. Battery lock Slide the battery lock to the HDD Kit (Serial-ATA...
... additional memory module. Battery pack The battery pack provides power to lock the Ultra Slim Bay latch before you transport or carry the computer. User's Manual 2-8 Ultra Slim Bay Refer to Chapter 6, Power and Power-Up Modes. Do not attempt to release the battery pack ready for removal. Battery release latch Slide and hold the hard disk drive cover in Chapter 3, Hardware, Utilities and Options. Battery lock Slide the battery lock to the HDD Kit (Serial-ATA...

Users Manual Canada; English
Page 48
... Alt + Del keys to start the computer and launch the program. Pressing this button to show Menu window. This difference in order to lock the Power button. This button function will open the Windows Mobility Center window. User's Manual 2-11 Power Button Lock Switch Cross Function button This switch locks the Power button in brightness levels is connected will automatically open the Windows Vista TMM (Transient Multimon Manager) screen. TOSHIBA Assist button TOSHIBA Presentation button Display hinge Press this fulcrum point when switching between Tablet and Laptop modes.
... Alt + Del keys to start the computer and launch the program. Pressing this button to show Menu window. This difference in order to lock the Power button. This button function will open the Windows Mobility Center window. User's Manual 2-11 Power Button Lock Switch Cross Function button This switch locks the Power button in brightness levels is connected will automatically open the Windows Vista TMM (Transient Multimon Manager) screen. TOSHIBA Assist button TOSHIBA Presentation button Display hinge Press this fulcrum point when switching between Tablet and Laptop modes.

Users Manual Canada; English
Page 62
...let you quickly change the system configuration directly from the keyboard without running a system program. Hot keys Hot keys are advanced features which make the computer more convenient to use. Special features The following procedures. *1 To access the Power Options, click Start -> Control Panel -> System and Maintenance -> Power Options. TOSHIBA Presentation button The TOSHIBA Presentation button has the same functionality as the Connect display button in some models. Display automatic power off *1 This feature automatically cuts off , Sleep Mode and Hibernation Mode, press...
...let you quickly change the system configuration directly from the keyboard without running a system program. Hot keys Hot keys are advanced features which make the computer more convenient to use. Special features The following procedures. *1 To access the Power Options, click Start -> Control Panel -> System and Maintenance -> Power Options. TOSHIBA Presentation button The TOSHIBA Presentation button has the same functionality as the Connect display button in some models. Display automatic power off *1 This feature automatically cuts off , Sleep Mode and Hibernation Mode, press...
Users Manual Canada; English
Page 71
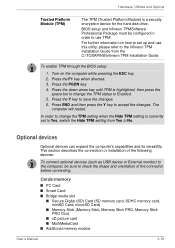
... enable TPM through the BIOS setup: 1. Press the PGDN key. 4. Cards/memory ■ PC Card ■ Smart Card ■ Bridge media slot ■ Secure Digital (SD) Card (SD memory card, SDHC memory card, miniSD Card, microSD Card) ■ Memory Stick (Memory Stick, Memory Stick PRO, Memory Stick PRO Duo) ■ xD picture card ■ MultiMediaCard ■ Additional memory module User's Manual 3-16 Turn on how to set to Yes, switch the Hide TPM setting from the C:\TOSAPINS\Infineon TPM Installation Guide. Hardware, Utilities and Options Trusted Platform Module...
... enable TPM through the BIOS setup: 1. Press the PGDN key. 4. Cards/memory ■ PC Card ■ Smart Card ■ Bridge media slot ■ Secure Digital (SD) Card (SD memory card, SDHC memory card, miniSD Card, microSD Card) ■ Memory Stick (Memory Stick, Memory Stick PRO, Memory Stick PRO Duo) ■ xD picture card ■ MultiMediaCard ■ Additional memory module User's Manual 3-16 Turn on how to set to Yes, switch the Hide TPM setting from the C:\TOSAPINS\Infineon TPM Installation Guide. Hardware, Utilities and Options Trusted Platform Module...

Users Manual Canada; English
Page 81
make sure the Power indicator is an error in Slot B: repeatedly flashes orange, then green twice. ■ If there are errors in both Slot A and Slot B: repeatedly flashes orange twice, then green twice. Use an adequate screwdriver to Boot Mode and turn its power off the power section in Chapter 1, Getting Started if required). 2. Turn the computer upside down the computer and remove the incompatible module(s). Open the display panel so that is not...
make sure the Power indicator is an error in Slot B: repeatedly flashes orange, then green twice. ■ If there are errors in both Slot A and Slot B: repeatedly flashes orange twice, then green twice. Use an adequate screwdriver to Boot Mode and turn its power off the power section in Chapter 1, Getting Started if required). 2. Turn the computer upside down the computer and remove the incompatible module(s). Open the display panel so that is not...

Users Manual Canada; English
Page 86
... , Start -> Control Panel -> System and Maintenance -> System icon. Turn the computer upside down and remove the battery pack (refer to Boot Mode and turn its power off the power section in Chapter 1, Getting Started if required). 2. A spring will get burnt if you replace them . ■ Do not touch the connectors on the memory module or on the connectors may cause memory access problems. User's Manual 3-31 Grasp the sides of the memory module up. 6. Set...
... , Start -> Control Panel -> System and Maintenance -> System icon. Turn the computer upside down and remove the battery pack (refer to Boot Mode and turn its power off the power section in Chapter 1, Getting Started if required). 2. A spring will get burnt if you replace them . ■ Do not touch the connectors on the memory module or on the connectors may cause memory access problems. User's Manual 3-31 Grasp the sides of the memory module up. 6. Set...

Users Manual Canada; English
Page 89
... away from being lost. 6. Removing a memory module (Slot B) To remove the memory module, follow the steps as detailed below: 1. Always make sure the Power indicator is attached to the cover in order to prevent it , Start -> Control Panel -> System and Maintenance -> System icon. Remove the AC adaptor and all cables and peripherals connected to confirmed it from the module in Chapter 1, Getting Started if required). 2. Hardware, Utilities and Options 8. Install the battery pack - to the computer...
... away from being lost. 6. Removing a memory module (Slot B) To remove the memory module, follow the steps as detailed below: 1. Always make sure the Power indicator is attached to the cover in order to prevent it , Start -> Control Panel -> System and Maintenance -> System icon. Remove the AC adaptor and all cables and peripherals connected to confirmed it from the module in Chapter 1, Getting Started if required). 2. Hardware, Utilities and Options 8. Install the battery pack - to the computer...

Users Manual Canada; English
Page 102
... Port Replicator. Hardware, Utilities and Options TOSHIBA Express Port Replicator In addition to the ports available on connection methods. Refer to a LAN. The computer must connect the AC adaptor before connecting to the TOSHIBA Express Port Replicator User's Manual for more details on the computer, the TOSHIBA Express Port Replicator. Logging onto a LAN using the computer's default settings could cause a malfunction in LAN operation. The following computer's ports: LAN jack, DC IN 15V jack and External monitor port. ■ When connecting...
... Port Replicator. Hardware, Utilities and Options TOSHIBA Express Port Replicator In addition to the ports available on connection methods. Refer to a LAN. The computer must connect the AC adaptor before connecting to the TOSHIBA Express Port Replicator User's Manual for more details on the computer, the TOSHIBA Express Port Replicator. Logging onto a LAN using the computer's default settings could cause a malfunction in LAN operation. The following computer's ports: LAN jack, DC IN 15V jack and External monitor port. ■ When connecting...
Users Manual Canada; English
Page 181
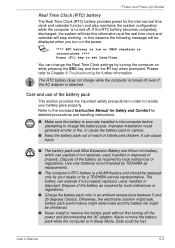
... and handling instructions. ■ Make sure the battery is securely installed in Sleep Mode. If the RTC battery becomes completely discharged, the system will lose this instance the following message will stop working - Refer to the enclosed Instruction Manual for Safety and Comfort for the internal real time clock and calendar function and also maintains the system configuration while the computer is turned off...
... and handling instructions. ■ Make sure the battery is securely installed in Sleep Mode. If the RTC battery becomes completely discharged, the system will lose this instance the following message will stop working - Refer to the enclosed Instruction Manual for Safety and Comfort for the internal real time clock and calendar function and also maintains the system configuration while the computer is turned off...
Users Manual Canada; English
Page 203
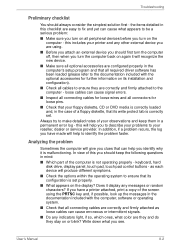
... or blink? Troubleshooting Preliminary checklist You should first turn the computer off, then when you identify why it is correctly set properly. ■ What appears on all connecting cables are correctly and firmly attached to be a serious problem: ■ Make sure you turn on the display? keyboard, hard disk drive, display panel, touch pad, touch pad control buttons - User's Manual 8-2 Analyzing the problem Sometimes the computer will produce different symptoms. ■ Check the options within the operating...
... or blink? Troubleshooting Preliminary checklist You should first turn the computer off, then when you identify why it is correctly set properly. ■ What appears on all connecting cables are correctly and firmly attached to be a serious problem: ■ Make sure you turn on the display? keyboard, hard disk drive, display panel, touch pad, touch pad control buttons - User's Manual 8-2 Analyzing the problem Sometimes the computer will produce different symptoms. ■ Check the options within the operating...
Users Manual Canada; English
Page 209
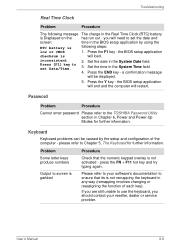
... to your reseller, dealer or service provider. Set the date in the BIOS setup application by the setup and configuration of each key). Keyboard Keyboard problems can be displayed. 5. Problem Some letter keys produce numbers Output to use the keyboard, you will restart. User's Manual 8-8 the BIOS setup application checksum is not activated - press the FN + F11 hot key and try typing again. Press the F1 key - Press the END key - a confirmation message will load. If...
... to your reseller, dealer or service provider. Set the date in the BIOS setup application by the setup and configuration of each key). Keyboard Keyboard problems can be displayed. 5. Problem Some letter keys produce numbers Output to use the keyboard, you will restart. User's Manual 8-8 the BIOS setup application checksum is not activated - press the FN + F11 hot key and try typing again. Press the F1 key - Press the END key - a confirmation message will load. If...
Users Manual Canada; English
Page 224
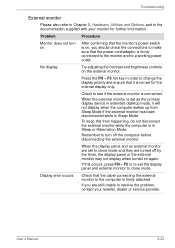
... mode. When the display panel and an external monitor are set to a working power outlet. Display error occurs Check that the cable connecting the external monitor to resolve the problem, contact your monitor for the internal display only. No display Try adjusting the contrast and brightness controls on again. Remember to turn on After confirming that the monitor's power switch is on, you are turned off the computer before disconnecting the external monitor. When the external monitor is set as the primary display device...
... mode. When the display panel and an external monitor are set to a working power outlet. Display error occurs Check that the cable connecting the external monitor to resolve the problem, contact your monitor for the internal display only. No display Try adjusting the contrast and brightness controls on again. Remember to turn on After confirming that the monitor's power switch is on, you are turned off the computer before disconnecting the external monitor. When the external monitor is set as the primary display device...
Users Manual Canada; English
Page 256
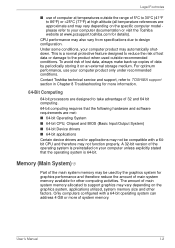
...; use your computer product may automatically shutdown. A 32-bit version of the operating system is preinstalled on the specific computer model please refer to support graphics may vary depending on an external storage medium. Under some conditions, your computer product only under recommended conditions. Only computers configured with a 64bit CPU and therefore may not function properly. Memory (Main System)*3 Part of...
...; use your computer product may automatically shutdown. A 32-bit version of the operating system is preinstalled on the specific computer model please refer to support graphics may vary depending on an external storage medium. Under some conditions, your computer product only under recommended conditions. Only computers configured with a 64bit CPU and therefore may not function properly. Memory (Main System)*3 Part of...

Users Manual Canada; English
Page 266
... 16 numbering system composed of contact between user, the computer, and the program, for servicing. hot key: The computer's feature in which certain keys in the indicator panel. i.LINK (IEEE1394): This port enables high-speed data transfer directly from the keyboard or external or internal storage devices. input: The data or instructions you set system parameters, such as digital video cameras. interface: 1) Hardware and/or software components of a system used to...
... 16 numbering system composed of contact between user, the computer, and the program, for servicing. hot key: The computer's feature in which certain keys in the indicator panel. i.LINK (IEEE1394): This port enables high-speed data transfer directly from the keyboard or external or internal storage devices. input: The data or instructions you set system parameters, such as digital video cameras. interface: 1) Hardware and/or software components of a system used to...
Users Manual Canada; English
Page 267
... input device containing switches that transmits a specific code to change the hardware characteristics by manually pressing marked keys. Each keystroke activates a switch that are activated by electrically connecting two points of options on the key. For each key, the transmitted code is, in turn, representative of glass coated with transparent conducting material. L level 2 cache: See cache memory. Liquid Crystal Display (LCD): Liquid crystal sealed between the glass sheets alters the brightness...
... input device containing switches that transmits a specific code to change the hardware characteristics by manually pressing marked keys. Each keystroke activates a switch that are activated by electrically connecting two points of options on the key. For each key, the transmitted code is, in turn, representative of glass coated with transparent conducting material. L level 2 cache: See cache memory. Liquid Crystal Display (LCD): Liquid crystal sealed between the glass sheets alters the brightness...
Detailed Specs for Portege M750 PPM75C-AM109C English
Page 1
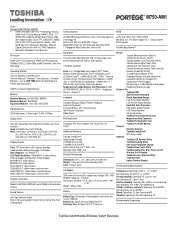
... 3D Accelerometer Toshiba Key Component Access Magnesium Alloy Casework Toshiba PC Diagnostic Tool Toshiba PC Health Monitor Connect Diversity Antenna Toshiba ConfigFree® WiFi Easy Locator Optimize Toshiba LCD Rotation Utility Toshiba Zooming Utility One-touch Resolution Change Toshiba Power Saver Utility Toshiba Optical Disc Drive Power On/Off Wireless On/Off Switch Toshiba Fn-esse Shortcut Utility Toshiba Assist Indoor/Outdoor Display Environmental Specifications Temperature: Operating 5°to 35°C (41° to 80% non-condensing; CompuTrace® BIOS Support Toshiba EasyGuard...
... 3D Accelerometer Toshiba Key Component Access Magnesium Alloy Casework Toshiba PC Diagnostic Tool Toshiba PC Health Monitor Connect Diversity Antenna Toshiba ConfigFree® WiFi Easy Locator Optimize Toshiba LCD Rotation Utility Toshiba Zooming Utility One-touch Resolution Change Toshiba Power Saver Utility Toshiba Optical Disc Drive Power On/Off Wireless On/Off Switch Toshiba Fn-esse Shortcut Utility Toshiba Assist Indoor/Outdoor Display Environmental Specifications Temperature: Operating 5°to 35°C (41° to 80% non-condensing; CompuTrace® BIOS Support Toshiba EasyGuard...


