
Toshiba Online User's Guide for Satellite M105
Page 53
....toshiba.com. Before you replace it. NOTE Before adding external devices or memory, Toshiba recommends setting up your software. See "Setting up your software" on page 43. To avoid damaging the computer's screws, use the computer for this happens, let the module cool to room temperature before you install or remove a memory module, turn off the computer using the Start menu. If you install or remove a memory module while the computer is in the memory module slot...
....toshiba.com. Before you replace it. NOTE Before adding external devices or memory, Toshiba recommends setting up your software. See "Setting up your software" on page 43. To avoid damaging the computer's screws, use the computer for this happens, let the module cool to room temperature before you install or remove a memory module, turn off the computer using the Start menu. If you install or remove a memory module while the computer is in the memory module slot...

Toshiba Online User's Guide for Satellite M105
Page 55
... the memory module slot cover 7 Remove the memory slot cover. 8 Place the screw and the cover in a safe place so that secures the memory module slot cover. Before you handle the module, touch a grounded metal surface to discharge any static electricity you can damage the memory module. Getting Started Adding memory (optional) 55 6 Using a small Phillips screwdriver, unscrew the screw that you may cause memory access problems. 9 Carefully remove the new memory module from its antistatic packaging, without touching its...
... the memory module slot cover 7 Remove the memory slot cover. 8 Place the screw and the cover in a safe place so that secures the memory module slot cover. Before you handle the module, touch a grounded metal surface to discharge any static electricity you can damage the memory module. Getting Started Adding memory (optional) 55 6 Using a small Phillips screwdriver, unscrew the screw that you may cause memory access problems. 9 Carefully remove the new memory module from its antistatic packaging, without touching its...
Toshiba Online User's Guide for Satellite M105
Page 58
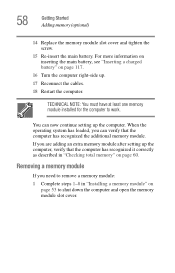
... memory" on page 60. Removing a memory module If you are adding an extra memory module after setting up . 17 Reconnect the cables. 18 Restart the computer. TECHNICAL NOTE: You must have at least one memory module installed for the computer to shut down the computer and open the memory module slot cover. 58 Getting Started Adding memory (optional) 14 Replace the memory module slot cover and tighten the screw. 15 Re-insert the main battery...
... memory" on page 60. Removing a memory module If you are adding an extra memory module after setting up . 17 Reconnect the cables. 18 Restart the computer. TECHNICAL NOTE: You must have at least one memory module installed for the computer to shut down the computer and open the memory module slot cover. 58 Getting Started Adding memory (optional) 14 Replace the memory module slot cover and tighten the screw. 15 Re-insert the main battery...
Toshiba Online User's Guide for Satellite M105
Page 60
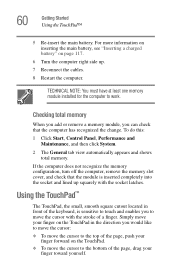
... information on inserting the main battery, see "Inserting a charged battery" on the TouchPad. ❖ To move the cursor to move the cursor with the socket latches. TECHNICAL NOTE: You must have at least one memory module installed for the computer to work. If the computer does not recognize the memory configuration, turn off the computer, remove the memory slot cover, and check that the computer...
... information on inserting the main battery, see "Inserting a charged battery" on the TouchPad. ❖ To move the cursor to move the cursor with the socket latches. TECHNICAL NOTE: You must have at least one memory module installed for the computer to work. If the computer does not recognize the memory configuration, turn off the computer, remove the memory slot cover, and check that the computer...
Toshiba Online User's Guide for Satellite M105
Page 63
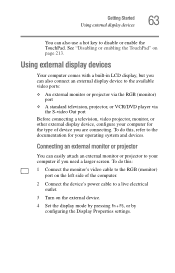
... connecting. Using external display devices Your computer comes with a built-in LCD display, but you can also use a hot key to disable or enable the TouchPad. To do this , refer to a live electrical outlet. 3 Turn on the external device. 4 Set the display mode by pressing Fn + F5, or by configuring the Display Properties settings. To do this : 1 Connect the monitor's video cable to the RGB (monitor) port on page 213. Getting Started Using external display devices 63 You can also connect an external display device to your operating...
... connecting. Using external display devices Your computer comes with a built-in LCD display, but you can also use a hot key to disable or enable the TouchPad. To do this , refer to a live electrical outlet. 3 Turn on the external device. 4 Set the display mode by pressing Fn + F5, or by configuring the Display Properties settings. To do this : 1 Connect the monitor's video cable to the RGB (monitor) port on page 213. Getting Started Using external display devices 63 You can also connect an external display device to your operating...
Toshiba Online User's Guide for Satellite M105
Page 165
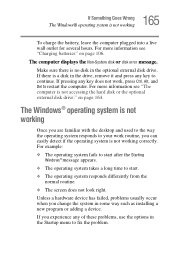
... is not accessing the hard disk or the optional external disk drive." If pressing any of these problems, use the options in some way such as installing a new program or adding a device. The Windows® operating system is not working Once you change the system in the Startup menu to restart the computer. The computer displays the Non-System disk or disk error message. on page 106. For more information see "Charging batteries" on page...
... is not accessing the hard disk or the optional external disk drive." If pressing any of these problems, use the options in some way such as installing a new program or adding a device. The Windows® operating system is not working Once you change the system in the Startup menu to restart the computer. The computer displays the Non-System disk or disk error message. on page 106. For more information see "Charging batteries" on page...

Toshiba Online User's Guide for Satellite M105
Page 256
... memory 52 adjusting recording quality 136 Alt keys 83 audio .wav files 135 audio features 135 Auto-Run 99 B backing up files 81 battery changing 115 charge indicator light 48, 108 256 charge not lasting 174 charging 46, 49 conserving power 112 disposal 120 low charge 111 monitoring power 48, 108 not charging 173 power profile hot key 114 power usage mode 209 real-time clock (RTC) 105 removing 115 BIOS Setup see Toshiba Hardware Setup button power 52 start 124 C CD creating...
... memory 52 adjusting recording quality 136 Alt keys 83 audio .wav files 135 audio features 135 Auto-Run 99 B backing up files 81 battery changing 115 charge indicator light 48, 108 256 charge not lasting 174 charging 46, 49 conserving power 112 disposal 120 low charge 111 monitoring power 48, 108 not charging 173 power profile hot key 114 power usage mode 209 real-time clock (RTC) 105 removing 115 BIOS Setup see Toshiba Hardware Setup button power 52 start 124 C CD creating...

Toshiba Online User's Guide for Satellite M105
Page 257
... disk error message 165 not accessing disk drives 164 running on battery power 103 setting up 43, 54 turning off 68 warning resume failure message 164 computing tips 80 connecting to a power source 46 connection set up 129 control buttons 61 critical applications 3 Ctrl keys 83 D desktop creating new icon 123 major features 123 desktop exploration 122 desktop icons 123 Device Manager 170 checking properties 171 disabling a device 171 devices keyboard 65 mouse 65 Disk Defragmenter 179 disk drive...
... disk error message 165 not accessing disk drives 164 running on battery power 103 setting up 43, 54 turning off 68 warning resume failure message 164 computing tips 80 connecting to a power source 46 connection set up 129 control buttons 61 critical applications 3 Ctrl keys 83 D desktop creating new icon 123 major features 123 desktop exploration 122 desktop icons 123 Device Manager 170 checking properties 171 disabling a device 171 devices keyboard 65 mouse 65 Disk Defragmenter 179 disk drive...
Toshiba Online User's Guide for Satellite M105
Page 258
...-esse change/remove key assignments 151 starting 148 Fn-esse program 147 assigning a key 148 using drag-and-drop 149 function keys 83 H hardware conflicts 168 resolving 170 headphones using 136 Help and Support Windows 167 Hibernation mode 70 configuring 74 starting again from 75 hot key display brightness 212 display modes 212 Hibernation mode 211 instant password security 207 keyboard 213 keyboard overlays 214 password security 207 power usage mode 209 Standby mode 210 volume mute 206 hot key power profile mode 114 hot key utility...
...-esse change/remove key assignments 151 starting 148 Fn-esse program 147 assigning a key 148 using drag-and-drop 149 function keys 83 H hardware conflicts 168 resolving 170 headphones using 136 Help and Support Windows 167 Hibernation mode 70 configuring 74 starting again from 75 hot key display brightness 212 display modes 212 Hibernation mode 211 instant password security 207 keyboard 213 keyboard overlays 214 password security 207 power usage mode 209 Standby mode 210 volume mute 206 hot key power profile mode 114 hot key utility...
Toshiba Online User's Guide for Satellite M105
Page 259
... main battery removing 115 memory adding 52 problem solving 172 removing expansion slot cover 55 memory module inserting 56 installation 53 removing 59 microphone 135 modem determining COM port 126 problem solving 186, 187 resetting port to default settings 126 upgrading 126 monitor 63 connecting 63 not working 176 mouse installing 65 serial 65 N network accessing 129 Dial-Up Networking Wizard 129 networking wireless 130 O Opening the display panel 50 Optical drive problems 181 troubleshooting 181 other documentation 37 overlay keys 84 P password deleting a supervisor 145 disabling a user 146
... main battery removing 115 memory adding 52 problem solving 172 removing expansion slot cover 55 memory module inserting 56 installation 53 removing 59 microphone 135 modem determining COM port 126 problem solving 186, 187 resetting port to default settings 126 upgrading 126 monitor 63 connecting 63 not working 176 mouse installing 65 serial 65 N network accessing 129 Dial-Up Networking Wizard 129 networking wireless 130 O Opening the display panel 50 Optical drive problems 181 troubleshooting 181 other documentation 37 overlay keys 84 P password deleting a supervisor 145 disabling a user 146

Toshiba Online User's Guide for Satellite M105
Page 260
... accessing disk drives 164 battery charge does not last 174 battery not charging 173 cannot insert disk in drive 180 cannot read a disk 180 changing display properties 177 checking device properties 171 computer hangs when PC Card inserted 184 computer will not power up 163 contacting Toshiba 201, 202 corrupted/damaged data files 180 Device Manager 170 disabling a device 171 disk drive is slow 179 display is blank 176 external display not working 178 external monitor 176 faulty memory...
... accessing disk drives 164 battery charge does not last 174 battery not charging 173 cannot insert disk in drive 180 cannot read a disk 180 changing display properties 177 checking device properties 171 computer hangs when PC Card inserted 184 computer will not power up 163 contacting Toshiba 201, 202 corrupted/damaged data files 180 Device Manager 170 disabling a device 171 disk drive is slow 179 display is blank 176 external display not working 178 external monitor 176 faulty memory...
User Manual
Page 54
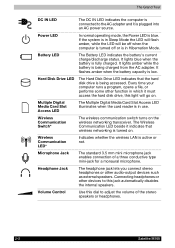
... Digital Media Card Slot Access LED illuminates when the card reader is being accessed. If the system is plugged into an AC power source. Wireless Communication LED* Indicates whether the wireless LAN is turned on the wireless networking transceiver. Battery LED The Battery LED indicates the battery's current charge/discharge status. The Wireless Communication LED beside it indicates that the hard disk drive is blue. Connecting headphones or other audio-output devices such as external speakers. It flashes amber when the battery capacity is fully charged. It lights...
... Digital Media Card Slot Access LED illuminates when the card reader is being accessed. If the system is plugged into an AC power source. Wireless Communication LED* Indicates whether the wireless LAN is turned on the wireless networking transceiver. Battery LED The Battery LED indicates the battery's current charge/discharge status. The Wireless Communication LED beside it indicates that the hard disk drive is blue. Connecting headphones or other audio-output devices such as external speakers. It flashes amber when the battery capacity is fully charged. It lights...
User Manual
Page 77
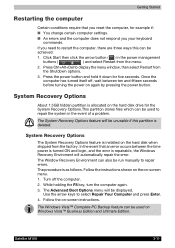
... Enter. 4. While holding the F8 key, turn the computer again. 3. Follow the on -screen menu. 1. Satellite M100 3-11 If you your keyboard commands. System Recovery Options The System Recovery Options feature is as follows. The Advanced Boot Options menu will automatically repair the error. Use the arrow keys to restart the computer, there are three ways this partition is allocated on again by pressing the power button. The procedure is installed on Windows Vista...
... Enter. 4. While holding the F8 key, turn the computer again. 3. Follow the on -screen menu. 1. Satellite M100 3-11 If you your keyboard commands. System Recovery Options The System Recovery Options feature is as follows. The Advanced Boot Options menu will automatically repair the error. Use the arrow keys to restart the computer, there are three ways this partition is allocated on again by pressing the power button. The procedure is installed on Windows Vista...
User Manual
Page 78
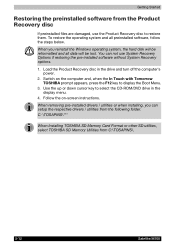
... In Touch with Tomorrow TOSHIBA prompt appears, press the F12 key to select the CD-ROM/DVD drive in the drive and turn off the computer's power. 2. Load the Product Recovery disc in the display menu. 4. Switch on -screen instructions. When removing pre-installed drivers / utilities or when installing, you reinstall the Windows operating system, the hard disk will be reformatted and all preinstalled software, follow the steps below. Getting Started Restoring the preinstalled software from the Product Recovery disc If...
... In Touch with Tomorrow TOSHIBA prompt appears, press the F12 key to select the CD-ROM/DVD drive in the drive and turn off the computer's power. 2. Load the Product Recovery disc in the display menu. 4. Switch on -screen instructions. When removing pre-installed drivers / utilities or when installing, you reinstall the Windows operating system, the hard disk will be reformatted and all preinstalled software, follow the steps below. Getting Started Restoring the preinstalled software from the Product Recovery disc If...

User Manual
Page 86
... BkSP (backspace) key or the ESC/Rotation button when the FingerPrint Power-on Security screen is recommended that you will appear in laptop or landscape modes. 3. MENU will be required to replace the keyboard based password authentication system that your FingerPrint with the FingerPrint reader setting and then click OK. 4-8 Satellite M100 At the Power Security screen, place a check mark in order to start the computer. ■...
... BkSP (backspace) key or the ESC/Rotation button when the FingerPrint Power-on Security screen is recommended that you will appear in laptop or landscape modes. 3. MENU will be required to replace the keyboard based password authentication system that your FingerPrint with the FingerPrint reader setting and then click OK. 4-8 Satellite M100 At the Power Security screen, place a check mark in order to start the computer. ■...

User Manual
Page 87
... both the User/BIOS Password (and, if applicable, the HDD (Hard Disk Drive) Password) and logging onto Windows using the FingerPrint Power-on Security and this menu. (*) It is recommended that the keyboard cursor keys (movement) and enter key (selection) or the directional pad be accurately screen out unauthorized users at all times. How to Enable FingerPrint Single Sign-On Feature It is not the default for furthe instructions). 1. MENU will be used when...
... both the User/BIOS Password (and, if applicable, the HDD (Hard Disk Drive) Password) and logging onto Windows using the FingerPrint Power-on Security and this menu. (*) It is recommended that the keyboard cursor keys (movement) and enter key (selection) or the directional pad be accurately screen out unauthorized users at all times. How to Enable FingerPrint Single Sign-On Feature It is not the default for furthe instructions). 1. MENU will be used when...
User Manual
Page 114
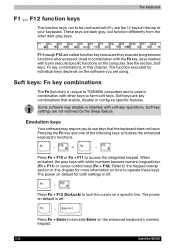
... TOSHIBA computers and is used in combination with the Fn key, keys marked with icons execute specific functions on default is off . These keys are not restored by individual keys depends on how to simulate Enter on a specific line. The function executed by the Sleep feature. Emulation keys Your software may disable or interfere with Fn, are key combinations that the keyboard does not have. Press Fn + Enter to operate these keys...
... TOSHIBA computers and is used in combination with the Fn key, keys marked with icons execute specific functions on default is off . These keys are not restored by individual keys depends on how to simulate Enter on a specific line. The function executed by the Sleep feature. Emulation keys Your software may disable or interfere with Fn, are key combinations that the keyboard does not have. Press Fn + Enter to operate these keys...

User Manual
Page 146
... to install a memory module under the cover and lift it lies flat. Power to the optical disc drive has been turned on by mode. The computer is turned on. Remove all cables connected to secure the module. 8-8 Satellite M100 Latches on either side will become hot. Do not try to ensure a firm connection. Optional Devices Installing Memory on Bottom Side If you replace them. Push the module down using the Stand by the CD Power switch...
... to install a memory module under the cover and lift it lies flat. Power to the optical disc drive has been turned on by mode. The computer is turned on. Remove all cables connected to secure the module. 8-8 Satellite M100 Latches on either side will become hot. Do not try to ensure a firm connection. Optional Devices Installing Memory on Bottom Side If you replace them. Push the module down using the Stand by the CD Power switch...

User Manual
Page 148
... Power switch. 2. Remove the keyboard cover. 8-10 Satellite M100 In this case, let the memory modules cool to room temperature before you use screw driver to Chapter 6, Power and Power-Up Modes. 4. You can damage the computer and the module. c. Replace the battery. Underneath the battery, use the computer for a long time, the memory modules will become hot. Installing Memory Under Keyboard If you replace them. b. Open LCD to boot mode and turn off the power. a. Remove all hooks are released. 2 1 3 1 Optional Devices Removing the memory module 6. Set...
... Power switch. 2. Remove the keyboard cover. 8-10 Satellite M100 In this case, let the memory modules cool to room temperature before you use screw driver to Chapter 6, Power and Power-Up Modes. 4. You can damage the computer and the module. c. Replace the battery. Underneath the battery, use the computer for a long time, the memory modules will become hot. Installing Memory Under Keyboard If you replace them. b. Open LCD to boot mode and turn off the power. a. Remove all hooks are released. 2 1 3 1 Optional Devices Removing the memory module 6. Set...
User Manual
Page 176
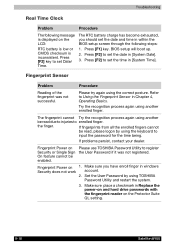
... Sign the User Password if it was not successful. Set the User Password by using TOSHIBA Password Utility and restart the system. 3. Make sure place a checkmark in [System Time]. The RTC battery charge has become exhausted, you have enroll finger in within the BIOS setup screen through the following message is displayed on Please use TOSHIBA Password Utility to enrolled finger. Fingerprint Power on the LCD: RTC battery is low or CMOS checksum is...
... Sign the User Password if it was not successful. Set the User Password by using TOSHIBA Password Utility and restart the system. 3. Make sure place a checkmark in [System Time]. The RTC battery charge has become exhausted, you have enroll finger in within the BIOS setup screen through the following message is displayed on Please use TOSHIBA Password Utility to enrolled finger. Fingerprint Power on the LCD: RTC battery is low or CMOS checksum is...


