System Reference Manual
Page 12
...Chapter 8 - Specifications Processor 83 Chipset ...83 PCI Bus ...83 Memory Modules (DIMMs 83 DIMM Configurations 84 Cache Memory 84 Graphics ...84 Audio ...85 Communications 85 I /O Address Map 78 Memory Map 80 IRQ Settings 81 Chapter 9 - Miscellaneous Technical Information About... User and Supervisor Passwords 74 Beep Code Error Messages 75 PCI Configuration Status and Error Messages 76 DMA Channel Assignments 77 System I /O and Expansion Slots 85 Drives and Controllers 86 System BIOS 86 xii VAIO...
...Chapter 8 - Specifications Processor 83 Chipset ...83 PCI Bus ...83 Memory Modules (DIMMs 83 DIMM Configurations 84 Cache Memory 84 Graphics ...84 Audio ...85 Communications 85 I /O Address Map 78 Memory Map 80 IRQ Settings 81 Chapter 9 - Miscellaneous Technical Information About... User and Supervisor Passwords 74 Beep Code Error Messages 75 PCI Configuration Status and Error Messages 76 DMA Channel Assignments 77 System I /O and Expansion Slots 85 Drives and Controllers 86 System BIOS 86 xii VAIO...

System Reference Manual
Page 34
set it aside for future use. 2 Slide back the panel about ½ inch, then lift out. 22 VAIO® System Reference Manual Removing the Side Panel You must remove the side panel to access the system board, add-in cards, power supply, battery, memory, and internal drives. 1 From the rear of the unit, remove the single screw on the right side;
set it aside for future use. 2 Slide back the panel about ½ inch, then lift out. 22 VAIO® System Reference Manual Removing the Side Panel You must remove the side panel to access the system board, add-in cards, power supply, battery, memory, and internal drives. 1 From the rear of the unit, remove the single screw on the right side;

System Reference Manual
Page 44
... the system unit, save and close all open files, exit all open applications, turn off the power to all attached peripheral devices, shut down the computer, and unplug the power cord. 1 Remove the side panel (see "Removing the Side Panel" on page 22). 2 Remove the power supply by lifting ... are located. ✍ The screw that secures the power supply to the chassis is the same screw that secures the side panel to remove a memory module if you change the memory configuration or replace a bad module. ! 32 VAIO® System Reference Manual Removing a Memory Module You may need to the chassis.
... the system unit, save and close all open files, exit all open applications, turn off the power to all attached peripheral devices, shut down the computer, and unplug the power cord. 1 Remove the side panel (see "Removing the Side Panel" on page 22). 2 Remove the power supply by lifting ... are located. ✍ The screw that secures the power supply to the chassis is the same screw that secures the side panel to remove a memory module if you change the memory configuration or replace a bad module. ! 32 VAIO® System Reference Manual Removing a Memory Module You may need to the chassis.

System Reference Manual
Page 46
... metal part of the chassis to discharge static electricity in your body before handling the memory module. 6 To install system memory, see "Replacing the Side Panel" on page 25). 9 Reconnect the power cord, and turn on the computer. Tab fits into the slot in CD-RW/DVD combo drive 8 Replace the side panel... page 35. 7 Replace the power supply by sliding it down the rails on each side of the memory module and lift out. Touch any change in a static-free bag. ! 34 VAIO® System Reference Manual 5 Grasp one edge of the chassis opening until the metal tab on the power supply slips ...
... metal part of the chassis to discharge static electricity in your body before handling the memory module. 6 To install system memory, see "Replacing the Side Panel" on page 25). 9 Reconnect the power cord, and turn on the computer. Tab fits into the slot in CD-RW/DVD combo drive 8 Replace the side panel... page 35. 7 Replace the power supply by sliding it down the rails on each side of the memory module and lift out. Touch any change in a static-free bag. ! 34 VAIO® System Reference Manual 5 Grasp one edge of the chassis opening until the metal tab on the power supply slips ...

System Reference Manual
Page 48
36 VAIO® System Reference Manual 6 Remove the power supply by lifting it up and rest it upside down over the corner of the chassis where the CD-RW/DVD combo drive and floppy disk drives are located. ✍ The screw that secures the power supply to the chassis is the same screw that secures the side panel to the chassis. 7 If necessary, remove the memory module you wish to replace (see "Removing a Memory Module" on page 32).
36 VAIO® System Reference Manual 6 Remove the power supply by lifting it up and rest it upside down over the corner of the chassis where the CD-RW/DVD combo drive and floppy disk drives are located. ✍ The screw that secures the power supply to the chassis is the same screw that secures the side panel to the chassis. 7 If necessary, remove the memory module you wish to replace (see "Removing a Memory Module" on page 32).

System Reference Manual
Page 50
...memory and will configure itself accordingly when you turn on the computer. No further action is fully seated, the latches on each side are not completely straight upright, continue to press down on each side of the chassis opening until the module is fully seated. ✍ When the module is required. 38 VAIO...® System Reference Manual 10 Press down the rails on the computer. Tab fits into the slot in CD-RW/DVD combo drive 12 Replace the side panel (see "Replacing ...
...memory and will configure itself accordingly when you turn on the computer. No further action is fully seated, the latches on each side are not completely straight upright, continue to press down on each side of the chassis opening until the module is fully seated. ✍ When the module is required. 38 VAIO...® System Reference Manual 10 Press down the rails on the computer. Tab fits into the slot in CD-RW/DVD combo drive 12 Replace the side panel (see "Replacing ...

System Reference Manual
Page 60
Memory module (DIMM) 1 Indicates pin 1 Position a DIMM correctly in the DIMM connector (a small triangle on the connector indicates pin 1). DIMM1 DIMM2 48 VAIO® System Reference Manual Memory Module (DIMM) Connectors Both sides of pin 1. The side with pin 1 has a small "1" to the left of each Dual Inline Memory Module (DIMM) look very similar.
Memory module (DIMM) 1 Indicates pin 1 Position a DIMM correctly in the DIMM connector (a small triangle on the connector indicates pin 1). DIMM1 DIMM2 48 VAIO® System Reference Manual Memory Module (DIMM) Connectors Both sides of pin 1. The side with pin 1 has a small "1" to the left of each Dual Inline Memory Module (DIMM) look very similar.

System Reference Manual
Page 88
...Cleared CMOS Data Invalid, CMOS Cleared Parallel Port Resource Conflict PCI Error Log is Full PCI I/O Port Conflict PCI IRQ Conflict PCI Memory Conflict Primary Boot Device Not Found Primary IDE Controller Resource Conflict Primary Input Device Not Found Primary Output Device Not Found Secondary IDE ...drive, CD-ROM drive, or network drive) could not be found. Two devices requested the same resource, resulting in the CMOS. 76 VAIO® System Reference Manual PCI Configuration Status and Error Messages The following is already in use. No additional PCI errors can be found . ...
...Cleared CMOS Data Invalid, CMOS Cleared Parallel Port Resource Conflict PCI Error Log is Full PCI I/O Port Conflict PCI IRQ Conflict PCI Memory Conflict Primary Boot Device Not Found Primary IDE Controller Resource Conflict Primary Input Device Not Found Primary Output Device Not Found Secondary IDE ...drive, CD-ROM drive, or network drive) could not be found. Two devices requested the same resource, resulting in the CMOS. 76 VAIO® System Reference Manual PCI Configuration Status and Error Messages The following is already in use. No additional PCI errors can be found . ...

System Reference Manual
Page 92
80 VAIO® System Reference Manual Memory Map Address range 00000000h-0009FFFFh 000A0000h-000AFFFFh 000B0000h-000BFFFFh 000C0000h-000CBFFFh 000F0000h-000FFFFFh 00100000h-037FFFFFh E8800000h-E8803FFFh E9000000h-E90007FFh E9800000h-E98000FFh EA000000h-EA0000FFh EA800000h-EAFFFFFFh ...
80 VAIO® System Reference Manual Memory Map Address range 00000000h-0009FFFFh 000A0000h-000AFFFFh 000B0000h-000BFFFFh 000C0000h-000CBFFFh 000F0000h-000FFFFFh 00100000h-037FFFFFh E8800000h-E8803FFFh E9000000h-E90007FFh E9800000h-E98000FFh EA000000h-EA0000FFh EA800000h-EAFFFFFFh ...

System Reference Manual
Page 96
...PCV-J200 supports SDRAM memory; it does not support EDO memory or buffered DIMM memory. DIMMs can be installed in either socket. 84 VAIO® System Reference Manual DIMM Configurations DIMM1* 0, 8, 16, 32, 64, 128, 256 DIMM2* 0, 8, 16, 32, 64, 128, 256 * The PCV-J200 is shipped with system memory... * It is unbuffered DIMM, specification Rev. 1.0 or later. Cache Memory Integrated L1: 128 KB L2: 64 KB (exclusive) Graphics Chipset SiS730S Video memory Shared with 128 MB of total memory. Memory size can be single- Computer SDRAM is recommended to 512 MB.
...PCV-J200 supports SDRAM memory; it does not support EDO memory or buffered DIMM memory. DIMMs can be installed in either socket. 84 VAIO® System Reference Manual DIMM Configurations DIMM1* 0, 8, 16, 32, 64, 128, 256 DIMM2* 0, 8, 16, 32, 64, 128, 256 * The PCV-J200 is shipped with system memory... * It is unbuffered DIMM, specification Rev. 1.0 or later. Cache Memory Integrated L1: 128 KB L2: 64 KB (exclusive) Graphics Chipset SiS730S Video memory Shared with 128 MB of total memory. Memory size can be single- Computer SDRAM is recommended to 512 MB.

System Reference Manual
Page 98
86 VAIO® System Reference Manual Drives and Controllers Drive Description Floppy Disk drive 3.5-inch, 1.44 MB. The average data transfer rate is 17.1X (2565 KBps). &#...). System BIOS Make and model ROM Passwords Recovery boot block Power management Advanced features Plug and Play devices Special features Award-based 2Mbit CMOS Flash memory User and supervisor passwords supported Supported APM 1.2 ACPI-1.0 compliant hardware for use with APM and PNP BIOS APIs Supported with steerable DMA channels and interrupts...
86 VAIO® System Reference Manual Drives and Controllers Drive Description Floppy Disk drive 3.5-inch, 1.44 MB. The average data transfer rate is 17.1X (2565 KBps). &#...). System BIOS Make and model ROM Passwords Recovery boot block Power management Advanced features Plug and Play devices Special features Award-based 2Mbit CMOS Flash memory User and supervisor passwords supported Supported APM 1.2 ACPI-1.0 compliant hardware for use with APM and PNP BIOS APIs Supported with steerable DMA channels and interrupts...

System Reference Manual
Page 100
...communications FCC Part 68 vi floppy disk drive connector 47 specifications for 86 installing 3½" hard disk drive 41 add-in card 26 system memory 35 interference v IRQ settings 81 J jumper - See front panel header HEADPHONES connector 11, 55 I i.LINK connector 53 I/O address map ... 76 Ethernet card 63, 85 Ethernet connector 12, 63 expansion slots 13 specifications for 85 expansion slots - 88 VAIO® System Reference Manual D DIMM - See memory module display, power management 17 disposal of 7 IDE connectors 50 specifications for 86 IDE drive specifications for 86 front...
...communications FCC Part 68 vi floppy disk drive connector 47 specifications for 86 installing 3½" hard disk drive 41 add-in card 26 system memory 35 interference v IRQ settings 81 J jumper - See front panel header HEADPHONES connector 11, 55 I i.LINK connector 53 I/O address map ... 76 Ethernet card 63, 85 Ethernet connector 12, 63 expansion slots 13 specifications for 85 expansion slots - 88 VAIO® System Reference Manual D DIMM - See memory module display, power management 17 disposal of 7 IDE connectors 50 specifications for 86 IDE drive specifications for 86 front...

System Reference Manual
Page 102
... VAIO® System Reference Manual system board AUX-IN connector 59 CD-IN connector 58 configuration jumper 60 configuring 20 fan connectors 57 floppy disk drive connector 47 front panel header 46 HEADPHONES connector 55 i.LINK connector 53 IDE connectors 50 KEYBOARD connector 51 LINE IN connector 55 memory ... 51 PCI slot connectors 49 power connector 50 PRINTER connector 53 SERIAL connector 55 USB connectors 52 system I/O address map 78 system memory, installing 35 T TELEPHONE connector 11 Telephone Consumer Protection Act of 1991 vi TV interference v U USB connectors 9, 52 user password 74
... VAIO® System Reference Manual system board AUX-IN connector 59 CD-IN connector 58 configuration jumper 60 configuring 20 fan connectors 57 floppy disk drive connector 47 front panel header 46 HEADPHONES connector 55 i.LINK connector 53 IDE connectors 50 KEYBOARD connector 51 LINE IN connector 55 memory ... 51 PCI slot connectors 49 power connector 50 PRINTER connector 53 SERIAL connector 55 USB connectors 52 system I/O address map 78 system memory, installing 35 T TELEPHONE connector 11 Telephone Consumer Protection Act of 1991 vi TV interference v U USB connectors 9, 52 user password 74

VAIO User Guide (primary manual)
Page 24
...required operating conditions. For high-quality captures, use DVgate. ✍ i.LINK is a state-of-the-art Sony multimedia browser designed specifically for Memory Stick® media. All products with an i.LINK connection may vary, depending on operating conditions and proper ...but also enables playback of Sony used only to the documentation that a product contains an IEEE1394 connection. Please refer to designate that came with each other applications like PictureGear, Memory Stick Slideshow and Windows Explorer. 24 VAIO Computer User Guide Smart Capture Sony Electronics, Inc.
...required operating conditions. For high-quality captures, use DVgate. ✍ i.LINK is a state-of-the-art Sony multimedia browser designed specifically for Memory Stick® media. All products with an i.LINK connection may vary, depending on operating conditions and proper ...but also enables playback of Sony used only to the documentation that a product contains an IEEE1394 connection. Please refer to designate that came with each other applications like PictureGear, Memory Stick Slideshow and Windows Explorer. 24 VAIO Computer User Guide Smart Capture Sony Electronics, Inc.

VAIO User Guide (primary manual)
Page 49
... can be configured to normal. ✍ While an image is enlarged. VAIO® AV Applications VisualFlow™ VisualFlow is a Sony state-of files by other applications like PictureGear™, PictureToy™, Memory Stick Slideshow and Windows® Explorer. VisualFlow plays a selected movie or sound... on the left end of the main toolbar activates the current Memory Stick properties. 5 Placing your system is Memory Stick-compatible, the VAIO Action Setup may be activated from this case, VisualFlow starts automatically when a Memory Stick media is inserted. 2 Click on an icon in the...
... can be configured to normal. ✍ While an image is enlarged. VAIO® AV Applications VisualFlow™ VisualFlow is a Sony state-of files by other applications like PictureGear™, PictureToy™, Memory Stick Slideshow and Windows® Explorer. VisualFlow plays a selected movie or sound... on the left end of the main toolbar activates the current Memory Stick properties. 5 Placing your system is Memory Stick-compatible, the VAIO Action Setup may be activated from this case, VisualFlow starts automatically when a Memory Stick media is inserted. 2 Click on an icon in the...

VAIO User Guide (primary manual)
Page 50
... feature does not provide accurate compensation adjustments for each audio mode you see in captured data could produce a malfunction in the flash memory of a digital video camera and is not transferred to tape by the capture progress indicator may not be due to dust or ...❑ To avoid interruption of your digital video device is one frame before your computer, turn off the computer when connecting a camera. You do not need to turn the power back on the same tape. VAIO Computer User Guide DVgate™ Connecting a digital video camera recorder Before connecting a digital ...
... feature does not provide accurate compensation adjustments for each audio mode you see in captured data could produce a malfunction in the flash memory of a digital video camera and is not transferred to tape by the capture progress indicator may not be due to dust or ...❑ To avoid interruption of your digital video device is one frame before your computer, turn off the computer when connecting a camera. You do not need to turn the power back on the same tape. VAIO Computer User Guide DVgate™ Connecting a digital video camera recorder Before connecting a digital ...

VAIO User Guide (primary manual)
Page 80
...this hardware profile." 7 Click OK. 8 Close the Control Panel window. 80 VAIO Computer User Guide ❑ Increasing the system memory may also help. Topic: My i.LINK® device does not appear on the desktop. 1 Turn off and disconnect your device. 2 Reconnect your device. Topic: ...Ethernet interface? 1 Click My Computer on the desktop. 2 Click on Control Panel and then click on System. 3 Click the Device Manager tab. 4 Click on installing memory, please see the section, "Adding Memory" . Topic: My connected printer doesn't function after the computer resumes from the option, "Disable...
...this hardware profile." 7 Click OK. 8 Close the Control Panel window. 80 VAIO Computer User Guide ❑ Increasing the system memory may also help. Topic: My i.LINK® device does not appear on the desktop. 1 Turn off and disconnect your device. 2 Reconnect your device. Topic: ...Ethernet interface? 1 Click My Computer on the desktop. 2 Click on Control Panel and then click on System. 3 Click the Device Manager tab. 4 Click on installing memory, please see the section, "Adding Memory" . Topic: My connected printer doesn't function after the computer resumes from the option, "Disable...

Marketing Specifications
Page 1
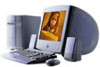
...notice. Software titles pre-installed on display. ©2001 Sony Electronics Inc. Simulated graphic shown on the Sony Desktop Computer are subject to change without registration)* Telephone Support Hardware:...or non-Sony add-on hardware option except those mentioned in U.S.A. 1/01 ADDITIONAL SPECIFICATIONS Model PCV-J200 Processor 900 MHz† AMD Duron™ Processor Cache Memory 192 KB...For more information: 1.800.4SONYPC (476-6972) Web address: http://www.sony.com/vaio Computer Interface: The computer industry lacks standards, and therefore, there are a multitude of varying software...
...notice. Software titles pre-installed on display. ©2001 Sony Electronics Inc. Simulated graphic shown on the Sony Desktop Computer are subject to change without registration)* Telephone Support Hardware:...or non-Sony add-on hardware option except those mentioned in U.S.A. 1/01 ADDITIONAL SPECIFICATIONS Model PCV-J200 Processor 900 MHz† AMD Duron™ Processor Cache Memory 192 KB...For more information: 1.800.4SONYPC (476-6972) Web address: http://www.sony.com/vaio Computer Interface: The computer industry lacks standards, and therefore, there are a multitude of varying software...


