Instruction Manual
Page 4
... has used replacement parts specified by being dropped, or the cabinet has been damaged. - Replacement parts When replacement parts are specified in a confined space, such as specified by a qualified technician to normal operation. - this indicates a need for this set from the wall outlet and disconnect the antenna or cable system. Never place the set to restore the set in the operating instructions. Lightning For added protection for service. Service...
... has used replacement parts specified by being dropped, or the cabinet has been damaged. - Replacement parts When replacement parts are specified in a confined space, such as specified by a qualified technician to normal operation. - this indicates a need for this set from the wall outlet and disconnect the antenna or cable system. Never place the set to restore the set in the operating instructions. Lightning For added protection for service. Service...
Instruction Manual
Page 6
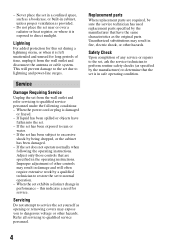
.... By ensuring this product is encouraged to try to correct the interference by turning the equipment off and on a circuit different from that interference will help to provide reasonable protection against harmful interference in the EMC Directive for a Class B digital device, pursuant to discontinue midway (fail), restart the application or disconnect and connect the communication cable (USB, etc.) again.
.... By ensuring this product is encouraged to try to correct the interference by turning the equipment off and on a circuit different from that interference will help to provide reasonable protection against harmful interference in the EMC Directive for a Class B digital device, pursuant to discontinue midway (fail), restart the application or disconnect and connect the communication cable (USB, etc.) again.
Instruction Manual
Page 11
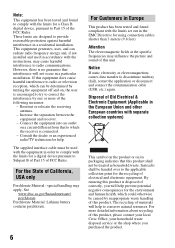
... the drive mode 89 Shooting single shot 89 Shooting continuously 89 Using the self-timer 90 Shooting images with the exposure shifted (Exposure bracket 90 Shooting with white balance shifted (WB bracket) ... 92 Using the viewing Playing back images 93 function Checking the information of recorded images 98 Protecting images (Protect 101 Deleting images (Delete 102 Viewing images on a TV screen 104 Changing your setup Setting image size and image quality 106 Setting the method for recording on a memory card ..... 108 Changing the noise reduction setting 110 Changing the...
... the drive mode 89 Shooting single shot 89 Shooting continuously 89 Using the self-timer 90 Shooting images with the exposure shifted (Exposure bracket 90 Shooting with white balance shifted (WB bracket) ... 92 Using the viewing Playing back images 93 function Checking the information of recorded images 98 Protecting images (Protect 101 Deleting images (Delete 102 Viewing images on a TV screen 104 Changing your setup Setting image size and image quality 106 Setting the method for recording on a memory card ..... 108 Changing the noise reduction setting 110 Changing the...

Instruction Manual
Page 29
... be recorded on a memory card The table shows the approximate number of images that can record more images than the numbers shown in the table above. The number of images that can be recorded on the shooting conditions. The values may vary depending on a memory card formatted with another one, or delete images in yellow, the memory card is flashing in the current memory card (pages 21, 102). Replace the memory card with this camera. Note...
... be recorded on a memory card The table shows the approximate number of images that can record more images than the numbers shown in the table above. The number of images that can be recorded on the shooting conditions. The values may vary depending on a memory card formatted with another one, or delete images in yellow, the memory card is flashing in the current memory card (pages 21, 102). Replace the memory card with this camera. Note...
Instruction Manual
Page 72
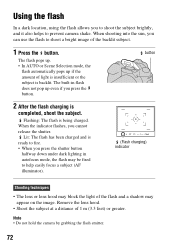
... autofocus mode, the flash may be fired to shoot a bright image of the flash and a shadow may appear on the image. button 2 After the flash charging is backlit. The flash pops up. • In AUTO or Scene Selection mode, the flash automatically pops up even if you can use the flash to help easily focus a subject (AF illuminator). (Flash charging) indicator Shooting techniques • The lens or lens hood may block the light of...
... autofocus mode, the flash may be fired to shoot a bright image of the flash and a shadow may appear on the image. button 2 After the flash charging is backlit. The flash pops up. • In AUTO or Scene Selection mode, the flash automatically pops up even if you can use the flash to help easily focus a subject (AF illuminator). (Flash charging) indicator Shooting techniques • The lens or lens hood may block the light of...
Instruction Manual
Page 79
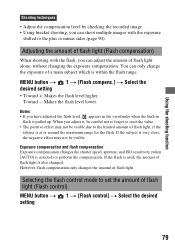
...). Selecting the flash control mode to the limited amount of flash light, if the subject is at or around the maximum range for the flash. Exposure compensation and flash compensation Exposure compensation changes the shutter speed, aperture, and ISO sensitivity (when [AUTO] is also changed. However, flash compensation only changes the amount of flash light (Flash control) MENU button t 1 t [Flash control] t Select the desired setting 79 When you adjust it, be careful not to forget to reset the value...
...). Selecting the flash control mode to the limited amount of flash light, if the subject is at or around the maximum range for the flash. Exposure compensation and flash compensation Exposure compensation changes the shutter speed, aperture, and ISO sensitivity (when [AUTO] is also changed. However, flash compensation only changes the amount of flash light (Flash control) MENU button t 1 t [Flash control] t Select the desired setting 79 When you adjust it, be careful not to forget to reset the value...
Instruction Manual
Page 86
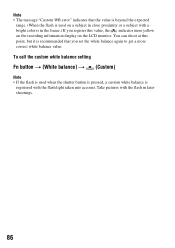
... color is in later shootings. 86 Take pictures with the flash light taken into account. You can shoot at this value, the indicator turns yellow on the recording information display on the LCD monitor. Note • The message "Custom WB error" indicates that you register this point, but it is registered with the flash in the frame.) If you set the white balance again to get a more correct white balance value...
... color is in later shootings. 86 Take pictures with the flash light taken into account. You can shoot at this value, the indicator turns yellow on the recording information display on the LCD monitor. Note • The message "Custom WB error" indicates that you register this point, but it is registered with the flash in the frame.) If you set the white balance again to get a more correct white balance value...
Instruction Manual
Page 88
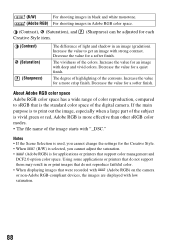
... the digital camera. Increase the value for a more effective than other sRGB color modes. • The file name of the image starts with low saturation. 88 About Adobe RGB color space Adobe RGB color space has a wide range of color reproduction, compared to sRGB that is for a quiet finish. Notes • If the Scene Selection is used, you cannot change the settings for...
... the digital camera. Increase the value for a more effective than other sRGB color modes. • The file name of the image starts with low saturation. 88 About Adobe RGB color space Adobe RGB color space has a wide range of color reproduction, compared to sRGB that is for a quiet finish. Notes • If the Scene Selection is used, you cannot change the settings for...

Instruction Manual
Page 93
... MENU button t 2 t [PlaybackDisplay] t Select the desired setting 93 To switch the recording data display Press the DISP button. Each time you press the DISP button, the screen changes as on the controller. Using the viewing function Playing back images The last recorded image is displayed on the LCD monitor. 1 Press the button. 2 Select an image with b/B on an enlarged screen. To select the orientation when playing back an image recorded in other playback modes, such as follows. Displays previous or next images...
... MENU button t 2 t [PlaybackDisplay] t Select the desired setting 93 To switch the recording data display Press the DISP button. Each time you press the DISP button, the screen changes as on the controller. Using the viewing function Playing back images The last recorded image is displayed on the LCD monitor. 1 Press the button. 2 Select an image with b/B on an enlarged screen. To select the orientation when playing back an image recorded in other playback modes, such as follows. Displays previous or next images...

Instruction Manual
Page 99
Histogram display Using the viewing function A Display 100-0003 DPOF3 Indication Folder - file number (124) Protect (101) DPOF set (133) Image quality (106) Image size (106) Battery remaining warning (17) B Display Indication Histogram (100) P A S M Mode dial (48) Display 35mm Indication Focal length (141) Creative Style (87) AWB +1 5500K M1 2008 1 1 10:37AM 3/7 White balance (Auto, Preset, Color temperature, Color filter, Custom) (83) D-Range Optimizer (87) Date of recording File number/total number of images 1/125 Shutter speed (61) F3.5 Aperture (59) ISO100 ISO sensitivity (...
Histogram display Using the viewing function A Display 100-0003 DPOF3 Indication Folder - file number (124) Protect (101) DPOF set (133) Image quality (106) Image size (106) Battery remaining warning (17) B Display Indication Histogram (100) P A S M Mode dial (48) Display 35mm Indication Focal length (141) Creative Style (87) AWB +1 5500K M1 2008 1 1 10:37AM 3/7 White balance (Auto, Preset, Color temperature, Color filter, Custom) (83) D-Range Optimizer (87) Date of recording File number/total number of images 1/125 Shutter speed (61) F3.5 Aperture (59) ISO100 ISO sensitivity (...
Instruction Manual
Page 119
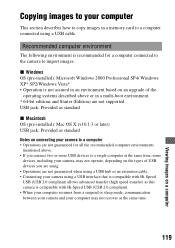
...-installed): Mac OS X (v10.1.3 or later) USB jack: Provided as standard Notes on connecting your camera to a computer • Operations are not guaranteed for all the recommended computer environments mentioned above or in a memory card to a computer connected using a USB interface that is compatible with Hi-Speed USB (USB 2.0 compliant) allows advanced transfer (high speed transfer) as this camera is recommended for a computer connected to the camera to import images. Viewing images on a computer Copying images to...
...-installed): Mac OS X (v10.1.3 or later) USB jack: Provided as standard Notes on connecting your camera to a computer • Operations are not guaranteed for all the recommended computer environments mentioned above or in a memory card to a computer connected using a USB interface that is compatible with Hi-Speed USB (USB 2.0 compliant) allows advanced transfer (high speed transfer) as this camera is recommended for a computer connected to the camera to import images. Viewing images on a computer Copying images to...
Instruction Manual
Page 129
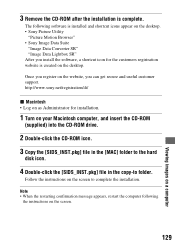
...; Sony Image Data Suite "Image Data Converter SR" "Image Data Lightbox SR" After you can get secure and useful customer support. Once you register on the website, you install the software, a shortcut icon for installation. 1 Turn on your Macintosh computer, and insert the CD-ROM (supplied) into the CD-ROM drive. 2 Double-click the CD-ROM icon. 3 Copy the [SIDS_INST.pkg] file in the [MAC] folder to the hard disk icon...
...; Sony Image Data Suite "Image Data Converter SR" "Image Data Lightbox SR" After you can get secure and useful customer support. Once you register on the website, you install the software, a shortcut icon for installation. 1 Turn on your Macintosh computer, and insert the CD-ROM (supplied) into the CD-ROM drive. 2 Double-click the CD-ROM icon. 3 Copy the [SIDS_INST.pkg] file in the [MAC] folder to the hard disk icon...

Instruction Manual
Page 130
... desktop. Note • The confirmation message of the screen. To start "Picture Motion Browser Guide," click [Start] t [All Programs] (in Windows 2000, [Programs]) t [Sony Picture Utility] t [Picture Motion Browser]. This function informs you can change the shooting date and more. • Print or save still images with Macintosh computers. Or, from the Start menu: Click [Start] t [All Programs] (in Windows 2000, [Programs]) t [Sony Picture Utility] t [Help] t [Picture Motion Browser Guide]. With "Picture Motion Browser" you of news...
... desktop. Note • The confirmation message of the screen. To start "Picture Motion Browser Guide," click [Start] t [All Programs] (in Windows 2000, [Programs]) t [Sony Picture Utility] t [Picture Motion Browser]. This function informs you can change the shooting date and more. • Print or save still images with Macintosh computers. Or, from the Start menu: Click [Start] t [All Programs] (in Windows 2000, [Programs]) t [Sony Picture Utility] t [Help] t [Picture Motion Browser Guide]. With "Picture Motion Browser" you of news...
Instruction Manual
Page 139
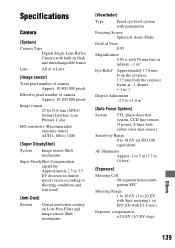
... Primary Color ISO sensitivity (Recommended exposure index) AUTO, 100 to 3200 [Super SteadyShot] System Image sensor-Shift mechanism Super SteadyShot Compensation capability Approximately 2.5 to 3.5 EV decrease in shutter speed (varies according to shooting conditions and lens used) [Anti-Dust] System Charge protection coating on Low-Pass Filter and image sensor-Shift mechanism [Viewfinder] Type Fixed eye-level system with pentamirror Focusing Screen Spherical Acute Matte Field of View...
... Primary Color ISO sensitivity (Recommended exposure index) AUTO, 100 to 3200 [Super SteadyShot] System Image sensor-Shift mechanism Super SteadyShot Compensation capability Approximately 2.5 to 3.5 EV decrease in shutter speed (varies according to shooting conditions and lens used) [Anti-Dust] System Charge protection coating on Low-Pass Filter and image sensor-Shift mechanism [Viewfinder] Type Fixed eye-level system with pentamirror Focusing Screen Spherical Acute Matte Field of View...

Instruction Manual
Page 144
... power saving mode and nearly shuts down (page 48). Use the focus-lock or manual focus function (pages 69, 71). Shooting images Nothing is displayed on the LCD monitor when the power is set to off. The image is not a malfunction. 144 The power turns off suddenly. • If you do not operate the camera for more than five seconds to minimize the battery consumption. Delete unnecessary images (page 102). - You can change the time...
... power saving mode and nearly shuts down (page 48). Use the focus-lock or manual focus function (pages 69, 71). Shooting images Nothing is displayed on the LCD monitor when the power is set to off. The image is not a malfunction. 144 The power turns off suddenly. • If you do not operate the camera for more than five seconds to minimize the battery consumption. Delete unnecessary images (page 102). - You can change the time...
Instruction Manual
Page 145
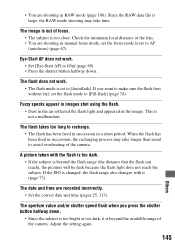
... date and time are shooting in manual focus mode, set the focus mode lever to recharge. • The flash has been fired in succession in RAW mode (page 106). This is large, the RAW mode shooting may take time. The image is too close. The flash does not work . • Set [Eye-Start AF] to [Fill-flash] (page 74). The aperture value and/or shutter speed flash when you want to make sure the flash fires without fail, set...
... date and time are shooting in manual focus mode, set the focus mode lever to recharge. • The flash has been fired in succession in RAW mode (page 106). This is large, the RAW mode shooting may take time. The image is too close. The flash does not work . • Set [Eye-Start AF] to [Fill-flash] (page 74). The aperture value and/or shutter speed flash when you want to make sure the flash fires without fail, set...
Instruction Manual
Page 150
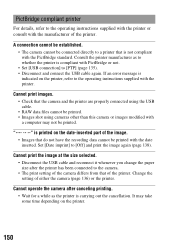
.... If an error message is not compliant with PictBridge or not. • Set [USB connection] to a printer that the camera and the printer are properly connected using the USB cable. • RAW data files cannot be printed. Change the setting of the image. • Images that do not have the recording data cannot be connected directly to [PTP] (page 135). • Disconnect and connect the USB cable again. It may take some time depending on the printer, refer to...
.... If an error message is not compliant with PictBridge or not. • Set [USB connection] to a printer that the camera and the printer are properly connected using the USB cable. • RAW data files cannot be printed. Change the setting of the image. • Images that do not have the recording data cannot be connected directly to [PTP] (page 135). • Disconnect and connect the USB cable again. It may take some time depending on the printer, refer to...
Instruction Manual
Page 151
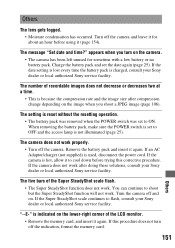
... reset without the resetting operation. • The battery pack was removed when the POWER switch was set to ON. You can continue to cool down before using it for sometime with a low battery or no battery pack. The five bars of recordable images does not decrease or decreases two at a time. • This is charged, consult your Sony dealer or local authorized Sony service facility. Turn the camera off the indication, format the memory card...
... reset without the resetting operation. • The battery pack was removed when the POWER switch was set to ON. You can continue to cool down before using it for sometime with a low battery or no battery pack. The five bars of recordable images does not decrease or decreases two at a time. • This is charged, consult your Sony dealer or local authorized Sony service facility. Turn the camera off the indication, format the memory card...
Instruction Manual
Page 152
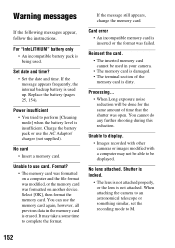
... the shutter was open. Card error • An incompatible memory card is inserted or the format was formatted on another device. Unable to display. • Images recorded with other cameras or images modified with a computer may take a some time to be able to complete the format. If the message appears frequently, the internal backup battery is insufficient. Charge the battery pack or use card. Select [OK], then format the memory card. Reinsert the card. • The inserted memory card...
... the shutter was open. Card error • An incompatible memory card is inserted or the format was formatted on another device. Unable to display. • Images recorded with other cameras or images modified with a computer may take a some time to be able to complete the format. If the message appears frequently, the internal backup battery is insufficient. Charge the battery pack or use card. Select [OK], then format the memory card. Reinsert the card. • The inserted memory card...
Instruction Manual
Page 155
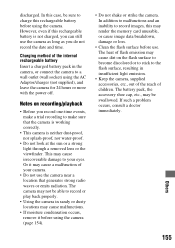
... children. The camera may cause dirt on recording/playback • Before you record one-time events, make a trial recording to make sure that generates strong radio waves or emits radiation. Others 155 The heat of flash emission may not be able to record or play back properly. • Using the camera in the camera, or connect the camera to charge this rechargeable battery before using the camera. However, even if...
... children. The camera may cause dirt on recording/playback • Before you record one-time events, make a trial recording to make sure that generates strong radio waves or emits radiation. Others 155 The heat of flash emission may not be able to record or play back properly. • Using the camera in the camera, or connect the camera to charge this rechargeable battery before using the camera. However, even if...

