
User Guide
Page 1
...Volatile Organic Compound)-free vegetableoil based ink. Model No. DSLR-A100 Serial No © 2006 Sony Corporation Record the serial number in Malaysia 2-681-187-11 (1) Before your operation Using the shooting functions Digital Single Lens Reflex Camera User's Guide/ Troubleshooting 100 DSLR-A100 Using the viewing functions Using the menu Using your computer... unit, please read this manual and "Read This First" (separate volume) thoroughly, and retain it for shooting/ playback with your Sony dealer regarding this product and answers to these numbers whenever you call upon your...
...Volatile Organic Compound)-free vegetableoil based ink. Model No. DSLR-A100 Serial No © 2006 Sony Corporation Record the serial number in Malaysia 2-681-187-11 (1) Before your operation Using the shooting functions Digital Single Lens Reflex Camera User's Guide/ Troubleshooting 100 DSLR-A100 Using the viewing functions Using the menu Using your computer... unit, please read this manual and "Read This First" (separate volume) thoroughly, and retain it for shooting/ playback with your Sony dealer regarding this product and answers to these numbers whenever you call upon your...
User Guide
Page 7
... not be able to record or play back properly. • Using the camera in sandy or dusty locations may not be repairable. • Do not look at the sun or a strong light through a removed lens or the viewfinder. In addition to malfunctions and an inability to record images, this ...may render the recording medium unusable, or cause image data breakdown, damage or loss. • Clean the flash surface before operating the camera. • Before you record one-time...
... not be able to record or play back properly. • Using the camera in sandy or dusty locations may not be repairable. • Do not look at the sun or a strong light through a removed lens or the viewfinder. In addition to malfunctions and an inability to record images, this ...may render the recording medium unusable, or cause image data breakdown, damage or loss. • Clean the flash surface before operating the camera. • Before you record one-time...

User Guide
Page 8
...on a nearby object, it may cause a malfunction. You can get the approximate equivalent of a 75 mm lens of a 35 mm-format film camera. On image data compatibility • This camera conforms with other materials may be discolored and that may cause a fire. If sunlight is not a malfunction. ...high-precision technology so over 99.99% of the pixels are not actual images shot using a 50 mm lens, you must place the camera under direct sunlight, attach the lens cap. • Images may become temporarily dark. Unauthorized recording of such materials may be contrary to direct ...
...on a nearby object, it may cause a malfunction. You can get the approximate equivalent of a 75 mm lens of a 35 mm-format film camera. On image data compatibility • This camera conforms with other materials may be discolored and that may cause a fire. If sunlight is not a malfunction. ...high-precision technology so over 99.99% of the pixels are not actual images shot using a 50 mm lens, you must place the camera under direct sunlight, attach the lens cap. • Images may become temporarily dark. Unauthorized recording of such materials may be contrary to direct ...

User Guide
Page 14
Hints for preventing blur Hold the camera steady, keeping your arms at your side and support the lens with which autofocus is less effective... (page 15). 1 Place the subject within the focus frame and press the shutter button halfway down. • The z indicator lights up in the viewfinder. Using a tripod, or using the flash allows you can increase the shutter speed to prevent camera...elbow on a table will be in dim light and it also helps to reduce the camera shake without firing the flash by increasing the ISO. (However, this , use the...
Hints for preventing blur Hold the camera steady, keeping your arms at your side and support the lens with which autofocus is less effective... (page 15). 1 Place the subject within the focus frame and press the shutter button halfway down. • The z indicator lights up in the viewfinder. Using a tripod, or using the flash allows you can increase the shutter speed to prevent camera...elbow on a table will be in dim light and it also helps to reduce the camera shake without firing the flash by increasing the ISO. (However, this , use the...

User Guide
Page 19
...(31) B (Drive) button (60) C Shutter button (t step 5 in "Read This First") D Control dial (33, 94) E Self-timer lamp (62) F Lens contacts* G Mirror* H Lens mount I Depth-of-field preview button (70) J Built-in flash* (t step 5 in "Read This First") K Fn (Function) button (43) L Function dial (...42) M Hook for shoulder strap (21) N Lens release button (t step 2 in "Read This First") O Focus mode switch (71) P DC-IN terminal (144) A Viewfinder (t step 5 in "Read This First") B ...
...(31) B (Drive) button (60) C Shutter button (t step 5 in "Read This First") D Control dial (33, 94) E Self-timer lamp (62) F Lens contacts* G Mirror* H Lens mount I Depth-of-field preview button (70) J Built-in flash* (t step 5 in "Read This First") K Fn (Function) button (43) L Function dial (...42) M Hook for shoulder strap (21) N Lens release button (t step 2 in "Read This First") O Focus mode switch (71) P DC-IN terminal (144) A Viewfinder (t step 5 in "Read This First") B ...
User Guide
Page 30
...bracket, white balance bracket) • Adjusting the exposure (page 65) • Locking the exposure (page 67) • Focusing manually (page 71) Shooting • Holding the camera (t step 5 in "Read This First", page 14) • Look into the viewfinder (t step 5 in "Read This First") • When using a zoom... lens, turn the zoom ring (t step 5 in "Read This First") • Check the focus (t step 5 in "Read This First") • Check the approximate sharpness of ...
...bracket, white balance bracket) • Adjusting the exposure (page 65) • Locking the exposure (page 67) • Focusing manually (page 71) Shooting • Holding the camera (t step 5 in "Read This First", page 14) • Look into the viewfinder (t step 5 in "Read This First") • When using a zoom... lens, turn the zoom ring (t step 5 in "Read This First") • Check the focus (t step 5 in "Read This First") • Check the approximate sharpness of ...
User Guide
Page 32
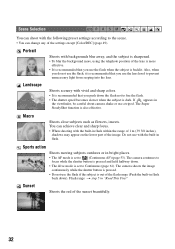
... 3/8 inches), shadows may appear on the lower part of the settings except [Color/DEC] (page 49). You can change any of the image. The camera shoots the image continuously while the shutter button is pressed. • Do not use the flash, it is set to prevent unnecessary light from seeping... into the lens. If appears in flash. Sports action Shoots moving subjects outdoors or in flash back down). Macro Shoots close subjects such as flowers, insects....
... 3/8 inches), shadows may appear on the lower part of the settings except [Color/DEC] (page 49). You can change any of the image. The camera shoots the image continuously while the shutter button is pressed. • Do not use the flash, it is set to prevent unnecessary light from seeping... into the lens. If appears in flash. Sports action Shoots moving subjects outdoors or in flash back down). Macro Shoots close subjects such as flowers, insects....

User Guide
Page 34
...up , you cannot select the program shift (even if you open the aperture (a smaller F-number), the amount of light that passes through the lens. PS shift (The default setting) PA shift • When the shutter speed and the aperture value are displayed. When the aperture is sharpened.... Shooting with aperture priority mode P A SM You can adjust the amount of light allowed into the lens increases and the in-focus range becomes narrower. Open the aperture Close the aperture Mode dial Control dial 34 The whole image is closed...
...up , you cannot select the program shift (even if you open the aperture (a smaller F-number), the amount of light that passes through the lens. PS shift (The default setting) PA shift • When the shutter speed and the aperture value are displayed. When the aperture is sharpened.... Shooting with aperture priority mode P A SM You can adjust the amount of light allowed into the lens increases and the in-focus range becomes narrower. Open the aperture Close the aperture Mode dial Control dial 34 The whole image is closed...

User Guide
Page 35
... the shooting functions 1 Set the mode dial to A. 2 Select an aperture value using the control dial. • The aperture range depends on the lens. • The aperture value is adjusted in 1/3 Ev increments. • Before shooting, you can shoot at this point, but adjusting again is recommended... the aperture (a smaller F-number) is recommended. • If you close the aperture (a larger F-number), the amount of light passing through the lens is decreased and the shutter speed becomes slower. z Shooting techniques The depth of image, or to focus on the entire image. 35 Close the ...
... the shooting functions 1 Set the mode dial to A. 2 Select an aperture value using the control dial. • The aperture range depends on the lens. • The aperture value is adjusted in 1/3 Ev increments. • Before shooting, you can shoot at this point, but adjusting again is recommended... the aperture (a smaller F-number) is recommended. • If you close the aperture (a larger F-number), the amount of light passing through the lens is decreased and the shutter speed becomes slower. z Shooting techniques The depth of image, or to focus on the entire image. 35 Close the ...

User Guide
Page 70
...the viewfinder. • About aperture and blurred images, t aperture priority mode (page 34) • The image in the viewfinder. • With a lens equipped with z lit in the viewfinder will be darker because the aperture is narrowed (aperture value is greater.) • The aperture value can set the... camera to perform the preview function using the focus hold button (page 93). 70 Depth-of-field preview The viewfinder shows an image captured with...
...the viewfinder. • About aperture and blurred images, t aperture priority mode (page 34) • The image in the viewfinder. • With a lens equipped with z lit in the viewfinder will be darker because the aperture is narrowed (aperture value is greater.) • The aperture value can set the... camera to perform the preview function using the focus hold button (page 93). 70 Depth-of-field preview The viewfinder shows an image captured with...

User Guide
Page 71
... 1 Set the focus mode switch to MF*. * MF: stands for Manual Focus. 2 Turn the focusing ring of the lens to achieve a sharp focus. • In the case of the distance information, the camera resets the focal length to (infinity) when the POWER switch is difficult to get the proper focus in auto... focus mode, you can be focused in auto focus mode, the z indicator lights up in manual focus mode, the camera uses the distance information to ON. 71 When the wide focus frame is used, the center frame is used, and when the local focus frame...
... 1 Set the focus mode switch to MF*. * MF: stands for Manual Focus. 2 Turn the focusing ring of the lens to achieve a sharp focus. • In the case of the distance information, the camera resets the focal length to (infinity) when the POWER switch is difficult to get the proper focus in auto... focus mode, you can be focused in auto focus mode, the z indicator lights up in manual focus mode, the camera uses the distance information to ON. 71 When the wide focus frame is used, the center frame is used, and when the local focus frame...

User Guide
Page 86
... fires without fail, you can change the flash mode with a distance encoder. The distance information is not used in combination with the lens that is equipped with an off-camera flash using an external flash (not supplied), the red-eye phenomenon rarely occurs.) Flash control You can set to Fill-flash. A wide...
... fires without fail, you can change the flash mode with a distance encoder. The distance information is not used in combination with the lens that is equipped with an off-camera flash using an external flash (not supplied), the red-eye phenomenon rarely occurs.) Flash control You can set to Fill-flash. A wide...

User Guide
Page 93
... the exposure needs to hold button, you shoot after confirming the focus in the selected metering mode is pressed. It is pressed. If you use a lens equipped with . Of these, the following combinations are marked with a focus hold the AEL (AE Lock) button down , the exposure value in the viewfinder. Press...
... the exposure needs to hold button, you shoot after confirming the focus in the selected metering mode is pressed. It is pressed. If you use a lens equipped with . Of these, the following combinations are marked with a focus hold the AEL (AE Lock) button down , the exposure value in the viewfinder. Press...

User Guide
Page 96
... lock to keep the shutter from releasing when no lens] so the shutter can be released when no recording medium is inserted in the camera. Shutter lock You can be released when no lens is mounted on the camera. Off: no lens The shutter can set the shutter lock to keep ...the shutter from releasing when no lens is mounted on the camera. display The local focus frame is illuminated for 0.3 seconds. Custom menu 2 For details on the camera. On: no lens The shutter cannot be released. Off: no card The shutter can change ...
... lock to keep the shutter from releasing when no lens] so the shutter can be released when no recording medium is inserted in the camera. Shutter lock You can be released when no lens is mounted on the camera. Off: no lens The shutter can set the shutter lock to keep ...the shutter from releasing when no lens is mounted on the camera. display The local focus frame is illuminated for 0.3 seconds. Custom menu 2 For details on the camera. On: no lens The shutter cannot be released. Off: no card The shutter can change ...

User Guide
Page 103
.... Normally, [No] is recommended. 2 Select [Clean CCD], then select [Enter]. Continue?" "No" [No] is lifted. 4 Detach the lens. 5 Use the blower brush to the shutter. Clean CCD If dust or debris enters the camera and lands on the CCD (the part that acts as "Delete this default option so that the battery...
.... Normally, [No] is recommended. 2 Select [Clean CCD], then select [Enter]. Continue?" "No" [No] is lifted. 4 Detach the lens. 5 Use the blower brush to the shutter. Clean CCD If dust or debris enters the camera and lands on the CCD (the part that acts as "Delete this default option so that the battery...

User Guide
Page 104
... 1 page 80 • When cleaning the CCD, do not put the tip of a blower brush into the cavity beyond the lens mount. Reset default You can reset the main functions of the camera. 1 Select [Enter] in [Reset default]. The message "Reset default?" The main functions are reset. • For details on the... do not need to put the blower brush close to the CCD. 6 Attach the lens and set the POWER switch to change the lens, and complete the operation quickly. • Do not leave the camera without a lens or the body cap. • When attaching the body cap, remove all the dust from entering the...
... 1 page 80 • When cleaning the CCD, do not put the tip of a blower brush into the cavity beyond the lens mount. Reset default You can reset the main functions of the camera. 1 Select [Enter] in [Reset default]. The message "Reset default?" The main functions are reset. • For details on the... do not need to put the blower brush close to the CCD. 6 Attach the lens and set the POWER switch to change the lens, and complete the operation quickly. • Do not leave the camera without a lens or the body cap. • When attaching the body cap, remove all the dust from entering the...

User Guide
Page 128
...monitor and "E" flashing in RAW mode (page 83). This indication means the lens is activated (page 85). Attach the lens properly (t step 2 in "Read This First"). • The shutter cannot be released when the camera is attached to take time. 128 Press the (Display) button to the ... of the recording medium (page 27). This is displayed on the LCD monitor. Nothing is not a malfunction. • You are activated, the camera turns off . Recording takes a long time. • The noise reduction function is not attached properly. You can deactivate this situation (page 96).)...
...monitor and "E" flashing in RAW mode (page 83). This indication means the lens is activated (page 85). Attach the lens properly (t step 2 in "Read This First"). • The shutter cannot be released when the camera is attached to take time. 128 Press the (Display) button to the ... of the recording medium (page 27). This is displayed on the LCD monitor. Nothing is not a malfunction. • You are activated, the camera turns off . Recording takes a long time. • The noise reduction function is not attached properly. You can deactivate this situation (page 96).)...

User Guide
Page 129
... value and/or shutter speed flash when you want to avoid overheating of the camera. The image is beyond the flash range (the distance that may take longer than usual to make sure the flash fires without the lens hood (t step 5 in flash is too dark. • The picture was taken with... flash mode to recharge. • The flash has been fired in succession in the image. This is changed, the flash range also changes with the lens hood on. Pull it is too dark. • You are recorded incorrectly. • Set the correct date and time (page 99, t step 3 in succession, the...
... value and/or shutter speed flash when you want to avoid overheating of the camera. The image is beyond the flash range (the distance that may take longer than usual to make sure the flash fires without the lens hood (t step 5 in flash is too dark. • The picture was taken with... flash mode to recharge. • The flash has been fired in succession in the image. This is changed, the flash range also changes with the lens hood on. Pull it is too dark. • You are recorded incorrectly. • Set the correct date and time (page 99, t step 3 in succession, the...

User Guide
Page 130
...; The subject was taken under a strong light source, and excessive light has entered the lens. The use of the screen is too bright. In such a case, turn off and try shooting again. Attach a lens hood. The corners of the picture are too dark. • If any filter or ...optical properties of the subject was taken in a dark location without the flash, resulting in the viewfinder. • The subject is flashing in camera-shake. Excessive light appears in macro shooting. These dots are not recorded (page 8). Adjust the brightness of the image to the subject, and ...
...; The subject was taken under a strong light source, and excessive light has entered the lens. The use of the screen is too bright. In such a case, turn off and try shooting again. Attach a lens hood. The corners of the picture are too dark. • If any filter or ...optical properties of the subject was taken in a dark location without the flash, resulting in the viewfinder. • The subject is flashing in camera-shake. Excessive light appears in macro shooting. These dots are not recorded (page 8). Adjust the brightness of the image to the subject, and ...

User Guide
Page 136
...is reset without the resetting operation. • The battery pack was removed when the POWER switch was set to flash, consult your Sony dealer or local authorized Sony service facility. You can use with this corrective procedure. Charge the battery pack (t step 1 in "Read This First"). Change the... the battery pack and insert it for sometime with a low battery or no battery pack. If the camera is not illuminated (t step 1 in The lens gets fogged. • Moisture condensation has occurred. Others Your camera does not work. • Use the type of battery pack you turn on the...
...is reset without the resetting operation. • The battery pack was removed when the POWER switch was set to flash, consult your Sony dealer or local authorized Sony service facility. You can use with this corrective procedure. Charge the battery pack (t step 1 in "Read This First"). Change the... the battery pack and insert it for sometime with a low battery or no battery pack. If the camera is not illuminated (t step 1 in The lens gets fogged. • Moisture condensation has occurred. Others Your camera does not work. • Use the type of battery pack you turn on the...


