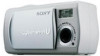
Operating Instructions (primary manual)
Page 8
... 52 Formatting a "Memory Stick 54 Copying images Copying images to your computer 56 1 Installing the USB driver and application .......... 58 2 Preparing your camera 67 3 Connecting your camera to your computer ........ 68 4 Copying images 70 5 Viewing the images on the LCD screen 42 Viewing...images to print - Picture Effect 40 8 Viewing still images Viewing still images on your camera 19 Setting the date and time 20 Shooting still images Inserting and removing a "Memory Stick 22 Setting the still image size 23 Basic still image shooting (using auto adjustment mode 26 Using...
Operating Instructions (primary manual)
Page 56
Copying images to your computer Copying images Follow the steps below to copy the images you have shot to your OS. • After the USB driver or applications are installed, step 1 is not assured in an environment upgraded to 5 (pages 58, 61, 67, 68, 72, and 75) Mac OS 8.5.1/8.6/9.0/9.1/9.2, Page 76 ...
Operating Instructions (primary manual)
Page 58
... that are stored in that order. 58 If it does not appear, doubleclick (My Computer) t [ImageMixer] in a computer. The title screen appears. 1 Installing the USB driver and application Contents of the CD-ROM x USB driver This driver is needed in order to connect the camera to your computer at this time.
Operating Instructions (primary manual)
Page 59
..., 65,000 colors) or more. • This section describes how to step 5. Click here 2 , Click [USB Driver] on the computer before installing the driver. • When using Windows XP, you need not install the USB driver. The required operations may differ depending on your OS. • Close down all applications running on the...
Operating Instructions (primary manual)
Page 60
The USB driver installation starts. When the installation is completed. The installation is completed, the screen informs you of completion. 4 Click here , Click [Yes, I want to restart my computer now], then click [Finish]. Your computer restarts. 60 When the "Information" screen appears, click [Next]. 3 Click here , Click [Next].
Operating Instructions (primary manual)
Page 61
..." screen appears. • You can use "Image Transfer". Follow the instructions that asks if you connect the camera to your computer, a screen that appear on the title screen. If the necessary driver is needed in order to proceed with the supplied USB cable. • The USB... driver is not already installed on your computer with installation. 61 Select [English] then click [OK]. When "License Agreement" screen ...
Operating Instructions (primary manual)
Page 63
If you of "ImageMixer," follow the procedure that begins on the "Image Transfer Settings" screen, then click [Next]. The "InstallShield Wizard" screen closes. Copying images 9 Click here , Confirm if the checkbox is completed, the screen informs you wish to continue with the installation of completion. 10 Click here , Click [Finish]. When the installation is checked on page 64. 63 The "Image Transfer" driver installation starts.
Operating Instructions (primary manual)
Page 71
... want to overwrite the existing image with the new one is deleted. In this time, the original one , click [Yes]. Try the USB driver installation again using the supplied CD-ROM (page 58). The device is deleted. When you do not want to overwrite it, click [No], ...devices above, follow the steps below to a folder in which an image with a mark. 3 If you try to copy an image to delete them. 1 Click [ Sony DSC] or [ Sony Handycam]. 2 Click [Remove]. The "Confirm Device Removal" screen appears. 3 Click [OK]. c Drag and drop the image files into the "My Documents" folder. ...
Operating Instructions (primary manual)
Page 76
...users only 1 Turn on your computer, and set the supplied CDROM into the System Folder icon in the screen opened in step 4. • Sony USB Driver • Sony USB Shim 76 6 When the message for confirmation is shown, click "OK." 7 Select the desired language. 8 Follow the instructions on each succeeding... screen. 9 Restart your computer and remove the CD-ROM from the CD-ROM drive. 2 Preparing your camera For details, see ...
Operating Instructions (primary manual)
Page 82
...). p If you are using the "PIXELA ImageMixer for Sony" application software, click on your computer are connected to other equipment besides the keyboard, the mouse, and your camera. • The USB driver is not installed. • The camera was connected to a computer with the USB cable before ...installing the USB driver, so the device was not recognized by the computer. • No...
Operating Instructions (primary manual)
Page 99
Index A Access lamp 23 AE/AF lock 26 Auto Focus 28 Auto power-off function 19 B Battery charging time 15 preparing batteries 12 remaining indicator 15 Battery life 17 BEEP 89 Burst 38 C Charging charging the batteries 12 charging time 15 Cleaning 90 Clock set 20 Computer copying images 56, 70 Image Transfer 61 ImageMixer 64 USB cable 68 USB driver 58 Control button 11 Copying images 56, 70 D Deleting images 52 DPOF 46 E EXEC 24 Exif 94 99
Operating Instructions (primary manual)
Page 100
... 56, 70 file names 74 image file storage destinations 74 image size 23, 25, 87 Index screen 44 Installation Image Transfer 61 ImageMixer 64 USB driver 58 J JPEG 26 100 L LCD screen DISPLAY 29, 96 LCD LIGHT 28 M "Memory Stick" formatting a "Memory Stick 54 inserting/removing a "Memory Stick 22 number of...