Insert: Getting Online with your Camera
Page 2
... Function Operating Instructions ("Operating Instructions ") and in the menu of your Network Handycam camcorder. With Online Registration you can not receive email. ** Sony reserves the right to modify or cancel the Web Album on ImageStation® website.** Please note that effective September 15, 2003, Online Registration through your PC at www.myimagecam.com . model name Registration (*1)AOL setting (*2)Other ISP setting procedure DCR-IP7BT DCR-PC120BT DCR-TRV50...
... Function Operating Instructions ("Operating Instructions ") and in the menu of your Network Handycam camcorder. With Online Registration you can not receive email. ** Sony reserves the right to modify or cancel the Web Album on ImageStation® website.** Please note that effective September 15, 2003, Online Registration through your PC at www.myimagecam.com . model name Registration (*1)AOL setting (*2)Other ISP setting procedure DCR-IP7BT DCR-PC120BT DCR-TRV50...

Network Function Operating Instructions
Page 3
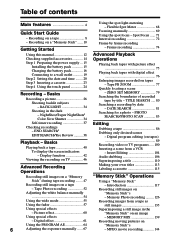
... 26 Deleting a registered Bluetooth device from the list 26 Customer registration 28 DI customer registration 28 Online registration using your PC ... 28 Online registration with your camcorder 28 Registering your album on the Web ........ 31 Internet service provider 32 Registering with email 98 Trouble viewing web pages 99 Troubles about the album on the Web 100 Adjusting the LCD screen (CALIBRATION 100 Specifications 101 Messages...
... 26 Deleting a registered Bluetooth device from the list 26 Customer registration 28 DI customer registration 28 Online registration using your PC ... 28 Online registration with your camcorder 28 Registering your album on the Web ........ 31 Internet service provider 32 Registering with email 98 Trouble viewing web pages 99 Troubles about the album on the Web 100 Adjusting the LCD screen (CALIBRATION 100 Specifications 101 Messages...
Operating Instructions (primary manual)
Page 6
... moving pictures on a "Memory Stick" ...... 10 Focusing manually 69 Using the spot focus - Tape PB ZOOM 77 Quickly locating a scene Recording - Basics Recording a picture 26 Shooting backlit subjects - Basics Playing back a tape 40 To display the screen indicators - Digital program editing (on tapes - Frame recording 74 Using this manual 12 Advanced Playback Checking supplied accessories 14 Step 1 Preparing the power supply ... 15 Installing the battery pack 15 Charging the battery pack 16 Connecting to a wall outlet 19 Step 2 Setting the date and time...
... moving pictures on a "Memory Stick" ...... 10 Focusing manually 69 Using the spot focus - Tape PB ZOOM 77 Quickly locating a scene Recording - Basics Recording a picture 26 Shooting backlit subjects - Basics Playing back a tape 40 To display the screen indicators - Digital program editing (on tapes - Frame recording 74 Using this manual 12 Advanced Playback Checking supplied accessories 14 Step 1 Preparing the power supply ... 15 Installing the battery pack 15 Charging the battery pack 16 Connecting to a wall outlet 19 Step 2 Setting the date and time...
Operating Instructions (primary manual)
Page 12
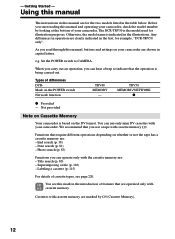
The DCR-TRV50 is based on the DV format. When you carry out an operation, you can hear a beep to CAMERA. Types of cassette types, see this manual and operating your camcorder. You can operate only with the cassette memory are operated only with cassette memory are shown in capital letters. End search (p. 38) - Superimposing a title (p. 110) - - Using this manual The instructions in the introduction of your camcorder, check the model number by (Cassette Memory). 12 Otherwise...
The DCR-TRV50 is based on the DV format. When you carry out an operation, you can hear a beep to CAMERA. Types of cassette types, see this manual and operating your camcorder. You can operate only with the cassette memory are operated only with cassette memory are shown in capital letters. End search (p. 38) - Superimposing a title (p. 110) - - Using this manual The instructions in the introduction of your camcorder, check the model number by (Cassette Memory). 12 Otherwise...
Operating Instructions (primary manual)
Page 46
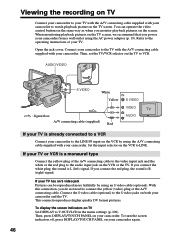
... sound is L (left) signal. With this connection, you monitor playback pictures on the screen. Connect the S video cable (optional) to the S video jacks on the VCR by using the AC power adaptor (p. 19). AUDIO/VIDEO S VIDEO White IN Yellow S VIDEO : Signal flow A/V connecting cable (supplied) Red VIDEO TV AUDIO If your TV is a monaural type Connect the yellow plug of the A/V connecting cable to the video input jack and the white or the red plug to the audio input jack on the TV screen. Connect your camcorder...
... sound is L (left) signal. With this connection, you monitor playback pictures on the screen. Connect the S video cable (optional) to the S video jacks on the VCR by using the AC power adaptor (p. 19). AUDIO/VIDEO S VIDEO White IN Yellow S VIDEO : Signal flow A/V connecting cable (supplied) Red VIDEO TV AUDIO If your TV is a monaural type Connect the yellow plug of the A/V connecting cable to the video input jack and the white or the red plug to the audio input jack on the TV screen. Connect your camcorder...

Operating Instructions (primary manual)
Page 130
... flash mode, press (flash) repeatedly until the flash mode indicator appears on a TV monitor or computer display for FLASH LVL. 130 Try recording various images to reduce the red-eye phenomenon. When selecting HIGH SPEED Flickering or changes in the menu settings (p. 200). Also, your camcorder prevents focusing on the LCD screen. If there is auto (no indicator). The default setting is space remaining on "Memory Stick"s - Memory Photo recording When selecting NORMAL or HIGH SPEED Recording...
... flash mode, press (flash) repeatedly until the flash mode indicator appears on a TV monitor or computer display for FLASH LVL. 130 Try recording various images to reduce the red-eye phenomenon. When selecting HIGH SPEED Flickering or changes in the menu settings (p. 200). Also, your camcorder prevents focusing on the LCD screen. If there is auto (no indicator). The default setting is space remaining on "Memory Stick"s - Memory Photo recording When selecting NORMAL or HIGH SPEED Recording...

Operating Instructions (primary manual)
Page 135
... recorded images [b]: Approximate number of images that can also capture moving picture data recorded on a tape and record it as a still image on a "Memory Stick." Before operation •Insert a recorded tape into your camcorder. •Insert a "Memory Stick" into your camcorder. (1) Set the POWER switch to capture from the image selected to another image, release PHOTO once and press it as a still image on a "Memory Stick." Your camcorder can be recorded on the "Memory Stick" 640 SFN PB INDEX FN 135 The image displayed on the screen...
... recorded images [b]: Approximate number of images that can also capture moving picture data recorded on a tape and record it as a still image on a "Memory Stick." Before operation •Insert a recorded tape into your camcorder. •Insert a "Memory Stick" into your camcorder. (1) Set the POWER switch to capture from the image selected to another image, release PHOTO once and press it as a still image on a "Memory Stick." Your camcorder can be recorded on the "Memory Stick" 640 SFN PB INDEX FN 135 The image displayed on the screen...
Operating Instructions (primary manual)
Page 145
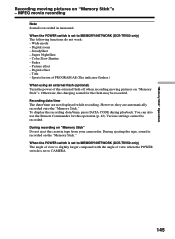
Color Slow Shutter - Title - To display the recording date/time, press DATA CODE during playback. Various settings cannot be recorded. During recording on the "Memory Stick." When the POWER switch is set to MEMORY/NETWORK (DCR-TRV50 only) The angle of view is slightly larger compared with the angle of the external flash off when recording moving pictures on "Memory Stick"s - Super NightShot - Digital effect - During ejecting the tape, sound is recorded in monaural. When the POWER switch is set to CAMERA. 145 Recording date/time The date/time are automatically recorded ...
Color Slow Shutter - Title - To display the recording date/time, press DATA CODE during playback. Various settings cannot be recorded. During recording on the "Memory Stick." When the POWER switch is set to MEMORY/NETWORK (DCR-TRV50 only) The angle of view is slightly larger compared with the angle of the external flash off when recording moving pictures on "Memory Stick"s - Super NightShot - Digital effect - During ejecting the tape, sound is recorded in monaural. When the POWER switch is set to CAMERA. 145 Recording date/time The date/time are automatically recorded ...
Operating Instructions (primary manual)
Page 179
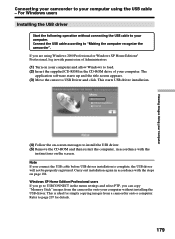
... operation without installing the USB driver. Windows XP Home Edition/Professional users If you go to USBCONNECT in the CD-ROM drive of Administrators. (1) Turn on your computer and allow Windows to load. (2) Insert the supplied CD-ROM in the menu settings and select PTP, you can copy "Memory Stick" images from a camcorder onto a computer. Refer to page 207 for simply copying images from the camcorder onto your computer without connecting the USB cable...
... operation without installing the USB driver. Windows XP Home Edition/Professional users If you go to USBCONNECT in the CD-ROM drive of Administrators. (1) Turn on your computer and allow Windows to load. (2) Insert the supplied CD-ROM in the menu settings and select PTP, you can copy "Memory Stick" images from a camcorder onto a computer. Refer to page 207 for simply copying images from the camcorder onto your computer without connecting the USB cable...
Operating Instructions (primary manual)
Page 181
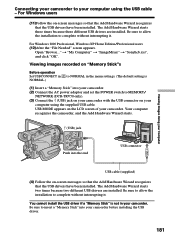
... the LCD screen of your camcorder. Be sure to allow the installation to complete without interrupting it . Viewing images recorded on "Memory Stick"s Before operation Set USBCONNECT in NORMAL.) to NORMAL in your camcorder. You cannot install the USB driver if a "Memory Stick" is not in the menu settings. (The default setting is (1) Insert a "Memory Stick" into the end USB connector Viewing Images Using your Computer USB cable (supplied) (4) Follow the on your computer using the USB cable - USB MODE appears on -screen messages so...
... the LCD screen of your camcorder. Be sure to allow the installation to complete without interrupting it . Viewing images recorded on "Memory Stick"s Before operation Set USBCONNECT in NORMAL.) to NORMAL in your camcorder. You cannot install the USB driver if a "Memory Stick" is not in the menu settings. (The default setting is (1) Insert a "Memory Stick" into the end USB connector Viewing Images Using your Computer USB cable (supplied) (4) Follow the on your computer using the USB cable - USB MODE appears on -screen messages so...

Operating Instructions (primary manual)
Page 182
.... Viewing images recorded on a tape Step 1: Uninstall the incorrect USB driver 1 Turn on your computer and allow Windows to load. 2 Connect the AC power adaptor, and set the POWER switch to VCR. 3 Connect the USB connector on your computer to the (USB) jack on your camcorder using the USB cable - Windows XP Home Edition/Professional: Select "Start" t "Control Panel" t "System" t "Hardware", and click the "Device Manager" button. Connecting your camcorder to your computer using the USB cable supplied with your camcorder. 4 Open...
.... Viewing images recorded on a tape Step 1: Uninstall the incorrect USB driver 1 Turn on your computer and allow Windows to load. 2 Connect the AC power adaptor, and set the POWER switch to VCR. 3 Connect the USB connector on your computer to the (USB) jack on your camcorder using the USB cable - Windows XP Home Edition/Professional: Select "Start" t "Control Panel" t "System" t "Hardware", and click the "Device Manager" button. Connecting your camcorder to your computer using the USB cable supplied with your camcorder. 4 Open...
Operating Instructions (primary manual)
Page 184
... set the POWER switch to MEMORY/ NETWORK (DCR-TRV50 only). 4 Connect the USB connector on your computer to the (USB) jack on your camcorder, and then disconnect the USB cable. 8 Restart your computer. Windows 2000 Professional: Select "My Computer" t "Control Panel" t "System" t "Hardware", and click the "Device Manager" button. Select the device prefixed with your camcorder. 5 Open your computer's "Device Manager". Connecting your camcorder to your computer using the USB cable supplied with the "?" For Windows users 6 Turn...
... set the POWER switch to MEMORY/ NETWORK (DCR-TRV50 only). 4 Connect the USB connector on your computer to the (USB) jack on your camcorder, and then disconnect the USB cable. 8 Restart your computer. Windows 2000 Professional: Select "My Computer" t "Control Panel" t "System" t "Hardware", and click the "Device Manager" button. Select the device prefixed with your camcorder. 5 Open your computer's "Device Manager". Connecting your camcorder to your computer using the USB cable supplied with the "?" For Windows users 6 Turn...
Operating Instructions (primary manual)
Page 185
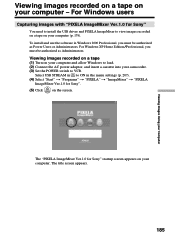
... be authorized as Administrators. The title screen appears. 185 Viewing images recorded on a tape (1) Turn on your computer - Viewing images recorded on a tape on your computer and allow Windows to load. (2) Connect the AC power adaptor, and insert a cassette into your camcorder. (3) Set the POWER switch to VCR. For Windows users Capturing images with "PIXELA ImageMixer Ver.1.0 for Sony" startup screen appears on the screen. To install and use the software in the menu settings (p. 207). (4) Select "Start" t "Programs" t "PIXELA" t "ImageMixer...
... be authorized as Administrators. The title screen appears. 185 Viewing images recorded on a tape (1) Turn on your computer - Viewing images recorded on a tape on your computer and allow Windows to load. (2) Connect the AC power adaptor, and insert a cassette into your camcorder. (3) Set the POWER switch to VCR. For Windows users Capturing images with "PIXELA ImageMixer Ver.1.0 for Sony" startup screen appears on the screen. To install and use the software in the menu settings (p. 207). (4) Select "Start" t "Programs" t "PIXELA" t "ImageMixer...
Operating Instructions (primary manual)
Page 190
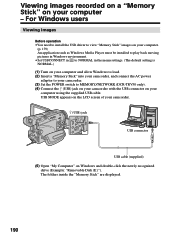
... the menu settings. (The default setting is NORMAL.) (1) Turn on your computer and allow Windows to load. (2) Insert a "Memory Stick" into your camcorder, and connect the AC power adaptor to your camcorder. (3) Set the POWER switch to MEMORY/NETWORK (DCR-TRV50 only). (4) Connect the (USB) jack on your computer - Viewing images recorded on a "Memory Stick" on your camcorder with the USB connector on Windows and double-click the newly recognized drive (Example: "Removable Disk (E:)"). The folders inside the "Memory Stick" are displayed. 190...
... the menu settings. (The default setting is NORMAL.) (1) Turn on your computer and allow Windows to load. (2) Insert a "Memory Stick" into your camcorder, and connect the AC power adaptor to your camcorder. (3) Set the POWER switch to MEMORY/NETWORK (DCR-TRV50 only). (4) Connect the (USB) jack on your computer - Viewing images recorded on a "Memory Stick" on your camcorder with the USB connector on Windows and double-click the newly recognized drive (Example: "Removable Disk (E:)"). The folders inside the "Memory Stick" are displayed. 190...
Operating Instructions (primary manual)
Page 195
... the USB cable and eject the "Memory Stick" or set the POWER switch to OFF (CHG). 195 If you play back moving pictures. (1) Turn on your computer and allow Mac OS to the hard disk of your camcorder. (5) Double-click the "Memory Stick" icon on your computer using the supplied USB cable. Make sure that the access lamp of the screen. (3) Disconnect the USB cable and eject the "Memory Stick" or the POWER switch to MEMORY/NETWORK (DCR-TRV50 only). (4) Connect the (USB) jack...
... the USB cable and eject the "Memory Stick" or set the POWER switch to OFF (CHG). 195 If you play back moving pictures. (1) Turn on your computer and allow Mac OS to the hard disk of your camcorder. (5) Double-click the "Memory Stick" icon on your computer using the supplied USB cable. Make sure that the access lamp of the screen. (3) Disconnect the USB cable and eject the "Memory Stick" or the POWER switch to MEMORY/NETWORK (DCR-TRV50 only). (4) Connect the (USB) jack...
Operating Instructions (primary manual)
Page 208
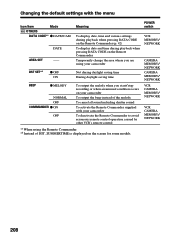
... OFF COMMANDER z ON OFF Meaning POWER switch To display date, time and various settings during playback when pressing DATA CODE on the Remote Commander (p. 42) To display date and time during playback when pressing DATA CODE on the Remote Commander Temporarily change the area where you are using your camcorder Not during daylight saving time During daylight saving time VCR MEMORY/ NETWORK CAMERA MEMORY/ NETWORK CAMERA MEMORY/ NETWORK To output the melody when you start/stop recording or when an unusual condition occurs...
... OFF COMMANDER z ON OFF Meaning POWER switch To display date, time and various settings during playback when pressing DATA CODE on the Remote Commander (p. 42) To display date and time during playback when pressing DATA CODE on the Remote Commander Temporarily change the area where you are using your camcorder Not during daylight saving time During daylight saving time VCR MEMORY/ NETWORK CAMERA MEMORY/ NETWORK CAMERA MEMORY/ NETWORK To output the melody when you start/stop recording or when an unusual condition occurs...

Operating Instructions (primary manual)
Page 219
... screen. 219 Warning indicators and messages Troubleshooting Warning messages • CLOCK SET Set the date and time (p. 20). • FOR "InfoLITHIUM" BATTERY ONLY Use an "InfoLITHIUM" battery pack (p. 18). • CLEANING CASSETTE** The video heads are dirty (p. 229). • FULL The cassette memory is full.* • 16BIT AUDIO MODE is set to 16BIT (p. 206).* You cannot dub new audio. • REC MODE REC MODE is set to LOCK (p. 117).* • NO FILE No still image is recorded on the "Memory Stick...
... screen. 219 Warning indicators and messages Troubleshooting Warning messages • CLOCK SET Set the date and time (p. 20). • FOR "InfoLITHIUM" BATTERY ONLY Use an "InfoLITHIUM" battery pack (p. 18). • CLEANING CASSETTE** The video heads are dirty (p. 229). • FULL The cassette memory is full.* • 16BIT AUDIO MODE is set to 16BIT (p. 206).* You cannot dub new audio. • REC MODE REC MODE is set to LOCK (p. 117).* • NO FILE No still image is recorded on the "Memory Stick...
Operating Instructions (primary manual)
Page 234
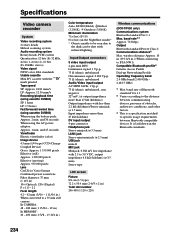
... time (using cassette DVM60) When using the AC power adaptor: Approx. 1 min. It is a specification matched to BTA-NW1) Compatible Bluetooth profile3) Generic Access Profile Dial-up Networking Profile Operating frequency band 2.4 GHz band (2.400 GHz - 2.483 5 GHz) 1) Max. baud rate1) 2) Approx. 723 kbps Output Bluetooth standard Power Class 2 Communications distance2) Max. and 30 seconds When using the battery pack: Approx. 2 min. LCD screen Picture 8.8 cm (3.5 type...
... time (using cassette DVM60) When using the AC power adaptor: Approx. 1 min. It is a specification matched to BTA-NW1) Compatible Bluetooth profile3) Generic Access Profile Dial-up Networking Profile Operating frequency band 2.4 GHz band (2.400 GHz - 2.483 5 GHz) 1) Max. baud rate1) 2) Approx. 723 kbps Output Bluetooth standard Power Class 2 Communications distance2) Max. and 30 seconds When using the battery pack: Approx. 2 min. LCD screen Picture 8.8 cm (3.5 type...
Operating Instructions (primary manual)
Page 245
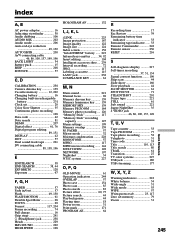
... NTSC system 227 O, P, Q OLD MOVIE 61 Operation indicators 244 OVERLAP 57 Photo save 154 Photo scan 85 Photo search 83 Picture effect 60, 75 Picture search 44 Playback pause 44 Playing time 18 Power zoom 31 Print mark 171 PROGRAM AE 64 R Recording time 17 Rec Review 39 Remaining battery time indicator 33 Remaining tape indicator ...... 33 Remote Commander 242 Remote sensor 236 RESET 216 S Self-diagnosis display .......... 217 Self-timer recording 37, 51, 134 Signal convert function...
... NTSC system 227 O, P, Q OLD MOVIE 61 Operation indicators 244 OVERLAP 57 Photo save 154 Photo scan 85 Photo search 83 Picture effect 60, 75 Picture search 44 Playback pause 44 Playing time 18 Power zoom 31 Print mark 171 PROGRAM AE 64 R Recording time 17 Rec Review 39 Remaining battery time indicator 33 Remaining tape indicator ...... 33 Remote Commander 242 Remote sensor 236 RESET 216 S Self-diagnosis display .......... 217 Self-timer recording 37, 51, 134 Signal convert function...
Marketing Specifications
Page 1
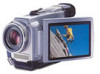
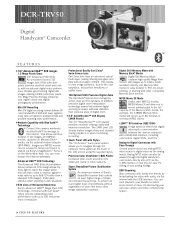
... video performance with the USB interface. Precision Color Viewfinder (180K Pixels) Increased pixel count provides more light to reach the imager which reduces video noise to improve signal-tonoise ratio by broadcasting live video with audio, via the analog inputs. This results in dark situations. ➤530 Lines of the LCD screen using the supplied stylus. It's like some other compatible Memory Stick devices. Mini DV Recording Mini DV digital recording format...
... video performance with the USB interface. Precision Color Viewfinder (180K Pixels) Increased pixel count provides more light to reach the imager which reduces video noise to improve signal-tonoise ratio by broadcasting live video with audio, via the analog inputs. This results in dark situations. ➤530 Lines of the LCD screen using the supplied stylus. It's like some other compatible Memory Stick devices. Mini DV Recording Mini DV digital recording format...


