
Operating Instructions
Page 3
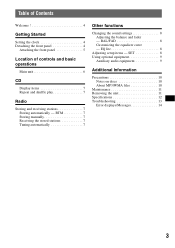
... displays/Messages 14 3 Table of Contents Welcome 4 Getting Started Setting the clock 4 Detaching the front panel 4 Attaching the front panel 5 Location of controls and basic operations Main unit 6 CD Display items 7 Repeat and shuffle play 7 Radio Storing and receiving stations 7 Storing automatically - BTM 7 Storing manually 7 Receiving the stored stations 7 Tuning automatically 7 Other functions Changing the...
... displays/Messages 14 3 Table of Contents Welcome 4 Getting Started Setting the clock 4 Detaching the front panel 4 Attaching the front panel 5 Location of controls and basic operations Main unit 6 CD Display items 7 Repeat and shuffle play 7 Radio Storing and receiving stations 7 Storing automatically - BTM 7 Storing manually 7 Receiving the stored stations 7 Tuning automatically 7 Other functions Changing the...
Operating Instructions
Page 4
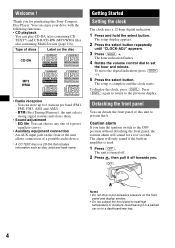
... choose any one of 6 preset equalizer curves. • Auxiliary equipment connection An AUX input jack on the disc CD-DA MP3 WMA • Radio reception - Type of this Sony Compact Disc Player. The setup is used. 1 Press (OFF). Caution alarm If you . The setup display appears...) -/+. 5 Press the select button. Thank you for a few seconds. EQ lite: You can play CD-DA (also containing CD TEXT*) and CD-R/CD-RW (MP3/WMA files also containing Multi Session (page 10)). Getting Started Setting the clock The clock uses a 12-hour digital indication. 1 Press and hold the select button.
... choose any one of 6 preset equalizer curves. • Auxiliary equipment connection An AUX input jack on the disc CD-DA MP3 WMA • Radio reception - Type of this Sony Compact Disc Player. The setup is used. 1 Press (OFF). Caution alarm If you . The setup display appears...) -/+. 5 Press the select button. Thank you for a few seconds. EQ lite: You can play CD-DA (also containing CD TEXT*) and CD-R/CD-RW (MP3/WMA files also containing Multi Session (page 10)). Getting Started Setting the clock The clock uses a 12-hour digital indication. 1 Press and hold the select button.
Operating Instructions
Page 7
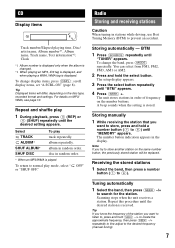
...the approximate frequency, then press (SEEK) -/+ repeatedly to fine adjust to (6)) until "MEMORY" appears. Scanning stops when the unit receives a station. Repeat this procedure until the desired setting appears. To change the band, press (MODE) repeatedly. You can select from FM1, FM2, FM3, AM1 or AM2. 2 ...will be replaced. To return to store, press and hold the select button. CD Display items Track number/Elapsed playing time, Disc/ artist name, Album number*1, Album name, Track name, Text information*2, Clock *1 Album number is displayed only when the album is changed. *2 When ...
...the approximate frequency, then press (SEEK) -/+ repeatedly to fine adjust to (6)) until "MEMORY" appears. Scanning stops when the unit receives a station. Repeat this procedure until the desired setting appears. To change the band, press (MODE) repeatedly. You can select from FM1, FM2, FM3, AM1 or AM2. 2 ...will be replaced. To return to store, press and hold the select button. CD Display items Track number/Elapsed playing time, Disc/ artist name, Album number*1, Album name, Track name, Text information*2, Clock *1 Album number is displayed only when the album is changed. *2 When ...
Operating Instructions
Page 8
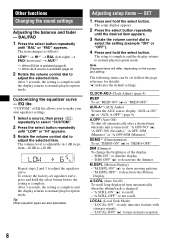
... dial to adjust the equalizer curve. The setup is changed. - "M.DSPL-ON" (z): to not scroll. Adjusting setup items - CLOCK-ADJ (Clock Adjust) (page 4) BEEP To set equalizer curve, press and hold the select button before the setting is turned off: "A.OFF-NO" (z), "A.OFF-30S (Seconds)," "A.OFF-30M (Minutes)" or "A.OFF-60M (Minutes)." Other functions...
... dial to adjust the equalizer curve. The setup is changed. - "M.DSPL-ON" (z): to not scroll. Adjusting setup items - CLOCK-ADJ (Clock Adjust) (page 4) BEEP To set equalizer curve, press and hold the select button before the setting is turned off: "A.OFF-NO" (z), "A.OFF-30S (Seconds)," "A.OFF-30M (Minutes)" or "A.OFF-60M (Minutes)." Other functions...


